
Price tags may serve a purpose at the point of sale, but once you bring a new item home, they often become an eyesore or functional nuisance. Whether it’s a stubborn sticker on glassware, plastic electronics packaging, or delicate leather goods, removing these labels without damaging the surface or leaving behind sticky residue can be frustrating. Fortunately, common household oils combined with careful scraping techniques offer a reliable, chemical-free solution. This guide walks through proven methods, tools, and precautions to help you cleanly and safely eliminate price tags from virtually any material.
The Science Behind Sticky Residue
Most price tags use pressure-sensitive adhesives designed to bond quickly and hold firmly under normal conditions. These adhesives are typically made from acrylics or rubber-based compounds that remain tacky after removal, especially when exposed to heat or left for extended periods. The longer a tag sits, the more the adhesive cures, making it harder to clean. However, many of these glues are organic in nature, which means they respond well to natural solvents like oils.
Oils such as olive, coconut, or baby oil work by penetrating the adhesive layer, softening the polymers, and breaking down the molecular bonds between the glue and the surface. Unlike harsh chemicals such as acetone or alcohol, oils are generally safe for most materials and won’t cause discoloration or brittleness when used correctly.
Best Oils for Residue Removal
Not all oils are created equal when it comes to dissolving adhesive. Some are more effective due to their viscosity, composition, and ability to spread evenly over the residue.
| Oil Type | Effectiveness | Best For | Cautions |
|---|---|---|---|
| Olive Oil | High | Glass, metal, ceramics | May leave slight sheen; wipe thoroughly |
| Coconut Oil (fractionated) | Very High | Plastics, wood, painted surfaces | Use sparingly; can attract dust if not cleaned |
| Baby Oil (mineral oil + fragrance) | Moderate to High | Skin-safe items, children's products | Fragrance may stain sensitive materials |
| Canola or Vegetable Oil | Moderate | Non-porous surfaces | Can go rancid over time; avoid on long-term storage items |
| Essential Oil (e.g., lemon or tea tree) diluted in carrier oil | High (with added degreasing power) | Tough residues, greasy films | Potent; always dilute and patch test |
For optimal results, combine a base oil like olive or coconut with a few drops of lemon essential oil. Citrus oils contain d-limonene, a natural solvent known for cutting through grime and enhancing the breakdown of adhesives.
Step-by-Step Guide to Removing Price Tags Safely
Follow this methodical process to remove price tags without damaging the underlying surface or leaving behind gummy leftovers.
- Peel off the visible label: Gently lift one corner of the price tag using your fingernail or a soft-edged tool. Pull slowly at a low angle to minimize adhesive transfer.
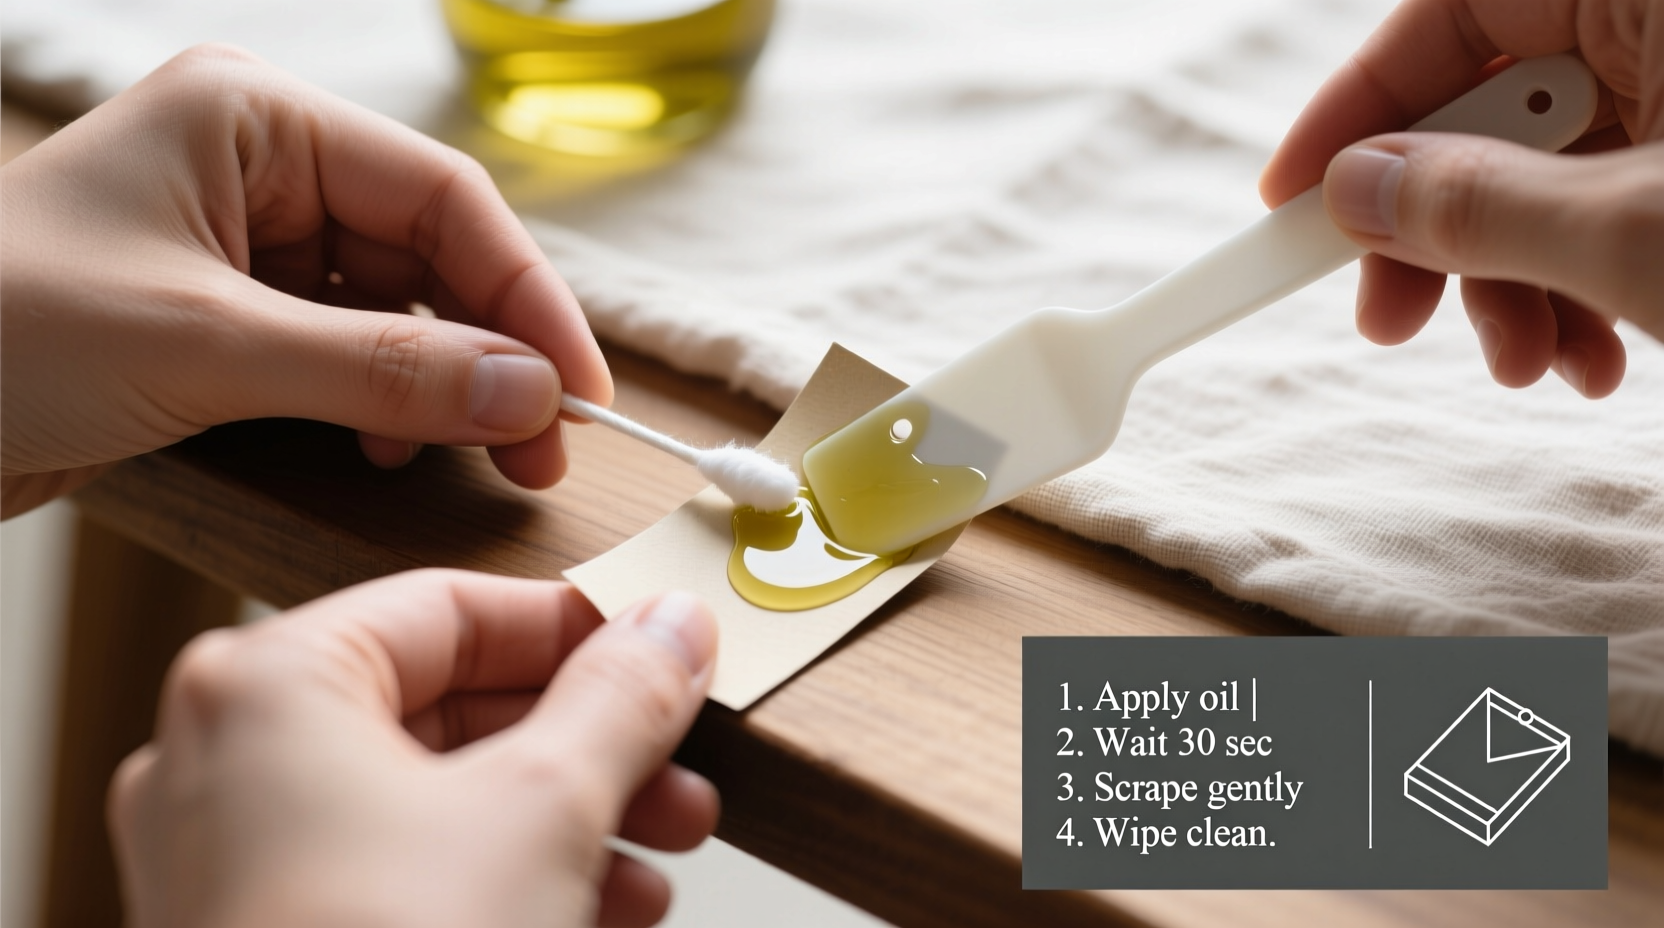
- Apply oil to the residue: Dab a small amount of oil directly onto the sticky area using a cotton ball or soft cloth. Avoid oversaturating.
- Let it sit for 5–15 minutes: Allow time for the oil to penetrate the adhesive. Thicker residues may require up to 30 minutes.
- Wipe with a microfiber cloth: Use gentle circular motions to lift softened glue. Reapply oil if needed.
- Use a gentle scraper if necessary: For persistent spots, carefully use a plastic card, wooden stick, or silicone spatula to nudge away residue without scratching.
- Clean the surface: Once the adhesive is gone, wash the area with mild soap and water or isopropyl alcohol (70%) to remove oily film.
- Dry and inspect: Buff dry with a clean cloth and check for any remaining marks.
Gentle Scraping Tools: What Works and What Doesn’t
The right scraping tool can make all the difference between a flawless finish and accidental damage. Choose implements that provide control and minimal abrasion.
- Plastic gift cards or old credit cards: Ideal for flat surfaces like phones, tablets, or appliances. Their flexibility prevents gouging.
- Wooden cuticle sticks or craft sticks: Useful for textured or curved surfaces where precision is key.
- Silicone spatulas: Soft yet firm enough to dislodge dried glue without harming non-stick coatings or painted finishes.
- Rubber erasers (vinyl or art gum): Surprisingly effective on flat paper stickers; the friction lifts residue without liquids.
Avoid metal box cutters, razor blades, or steel wool unless dealing with industrial-grade adhesives on rugged surfaces like concrete or raw metal. Even then, extreme caution is required.
“Using the wrong tool—even something as simple as a butter knife—can compromise the integrity of a high-gloss finish or scratch anti-reflective coatings.” — Daniel Reeves, Product Restoration Technician
Material-Specific Considerations
Different surfaces react differently to oils and mechanical removal. Tailor your approach based on the item’s construction.
Glass and Ceramics
These non-porous materials handle oils well. Apply coconut or olive oil, wait 10 minutes, then scrape gently with a plastic edge. Clean with vinegar-water mix afterward to restore shine.
Plastics and Electronics
Many plastics, especially polycarbonate used in phone screens, are sensitive to solvents. Stick to minimal oil application and use only soft cloths or silicone tools. Avoid essential oils near speaker grilles or ports.
Leather and Faux Leather
Oils can condition real leather, but excess may darken the dye. Use baby oil sparingly and wipe immediately after residue removal. Test on inner seams first.
Painted or Powder-Coated Surfaces
Aggressive scraping can chip paint. Use oil-soaked cloths with longer dwell times and avoid pressure. If residue persists, try a dab of rubbing alcohol on a cotton swab.
Textiles and Labels on Clothing
Not applicable in most cases—price tags on garments should be removed by hand or with scissors. If adhesive transfers, treat with a drop of dish soap and warm water before laundering.
Mini Case Study: Removing a Decade-Old Sticker from a Heirloom Lamp
Sarah inherited a brass floor lamp from her grandmother, complete with a yellowed price tag still clinging to the base. After years of exposure, the adhesive had oxidized and resisted initial wiping. She applied warmed coconut oil with a cotton pad and covered it with plastic wrap to prevent evaporation. After 20 minutes, she used a plastic hotel keycard to gently lift the edges. The residue peeled away cleanly. A final wipe with soapy water removed the oil film, revealing the original manufacturer engraving beneath. No damage was done to the lacquered brass finish.
This case illustrates the importance of patience and proper technique—especially when dealing with aged adhesives on valuable objects.
Checklist: Safe Price Tag Removal in 6 Steps
✅ Your Quick Reference Checklist:
- ☐ Identify the surface material and its sensitivity
- ☐ Select an appropriate oil (olive, coconut, or baby oil recommended)
- ☐ Perform a patch test in an inconspicuous area
- ☐ Peel off the main label gently before treating residue
- ☐ Apply oil, wait 5–15 minutes, then wipe or scrape softly
- ☐ Clean and dry the surface to remove any oily residue
Common Mistakes to Avoid
- Rushing the process: Impatience leads to excessive force and potential damage.
- Using too much oil: Excess can seep into seams, attract dust, or stain porous materials.
- Choosing aggressive tools: Metal scrapers scratch even seemingly durable surfaces over time.
- Skipping the cleanup step: Leftover oil attracts dirt and creates a new mess.
- Applying heat unnecessarily: While warm air can soften adhesive, excessive heat may warp plastics or activate deeper bonding.
FAQ
Can I use cooking spray to remove price tag residue?
No. Cooking sprays often contain lecithin, propellants, and other additives that can leave a greasy, difficult-to-clean film. Stick to pure oils like olive or coconut for better control and safety.
Will oil damage electronic screens?
Pure oils applied minimally and wiped thoroughly are unlikely to harm glass screens. However, avoid getting oil into device crevices or camera lenses. Use a lint-free cloth and apply oil to the cloth—not directly on the screen.
What if the residue turns black or gummy during removal?
This usually indicates degraded adhesive or contamination. Stop scraping. Reapply fresh oil and let it soak longer. If the gunk darkens further, switch to a 1:1 mixture of water and isopropyl alcohol on a cotton swab for spot treatment.
Conclusion
Removing price tags without residue doesn’t require specialized chemicals or expensive tools. With everyday oils and mindful scraping, you can preserve the appearance and function of your purchases—from kitchen gadgets to luxury accessories. The key lies in understanding material compatibility, allowing adequate dwell time for oils to work, and choosing non-abrasive methods that protect surfaces. By following these steps, you maintain the integrity of your items while achieving a clean, professional finish.


 浙公网安备
33010002000092号
浙公网安备
33010002000092号 浙B2-20120091-4
Comments
No comments yet. Why don't you start the discussion?