
Stickers may seem harmless, but when removed improperly, they can leave behind a stubborn layer of adhesive that dulls the appearance of your devices and even compromises their functionality. Whether it's a price tag on a new smartphone, a promotional label on a laptop, or a protective film on a tablet screen, residual glue is more than just unsightly—it can attract dust, interfere with touch sensitivity, or damage delicate surfaces if cleaned with harsh methods. The key is knowing how to remove sticker residue from electronics safely, using techniques that protect both the device’s finish and internal components.
Unlike general household surfaces, electronics demand extra caution. Screens are often coated with anti-glare or oleophobic layers that can be stripped by abrasive materials or strong solvents. Plastic and metal casings may discolor or etch under improper cleaning agents. This guide provides a comprehensive, tested approach to eliminating sticky residue while preserving your device’s integrity and performance.
Understanding the Risks of Improper Residue Removal
Before attempting any cleaning method, it's essential to understand what makes electronics vulnerable. Most modern devices feature:
- Anti-fingerprint coatings – Common on smartphones and tablets, these degrade when exposed to alcohol-based cleaners in high concentrations.
- Glass or polymer screens – Easily scratched by rough cloths or tools like razor blades.
- Vents and seams – Entry points for liquids, which can cause internal corrosion or short circuits.
- Matte or textured finishes – Often found on laptops and game controllers, these trap residue more easily and require gentle agitation.
Using inappropriate tools—such as acetone, ammonia-based glass cleaners, or steel wool—can result in permanent clouding, discoloration, or even electrical damage. The goal isn’t just cleanliness; it’s preservation.
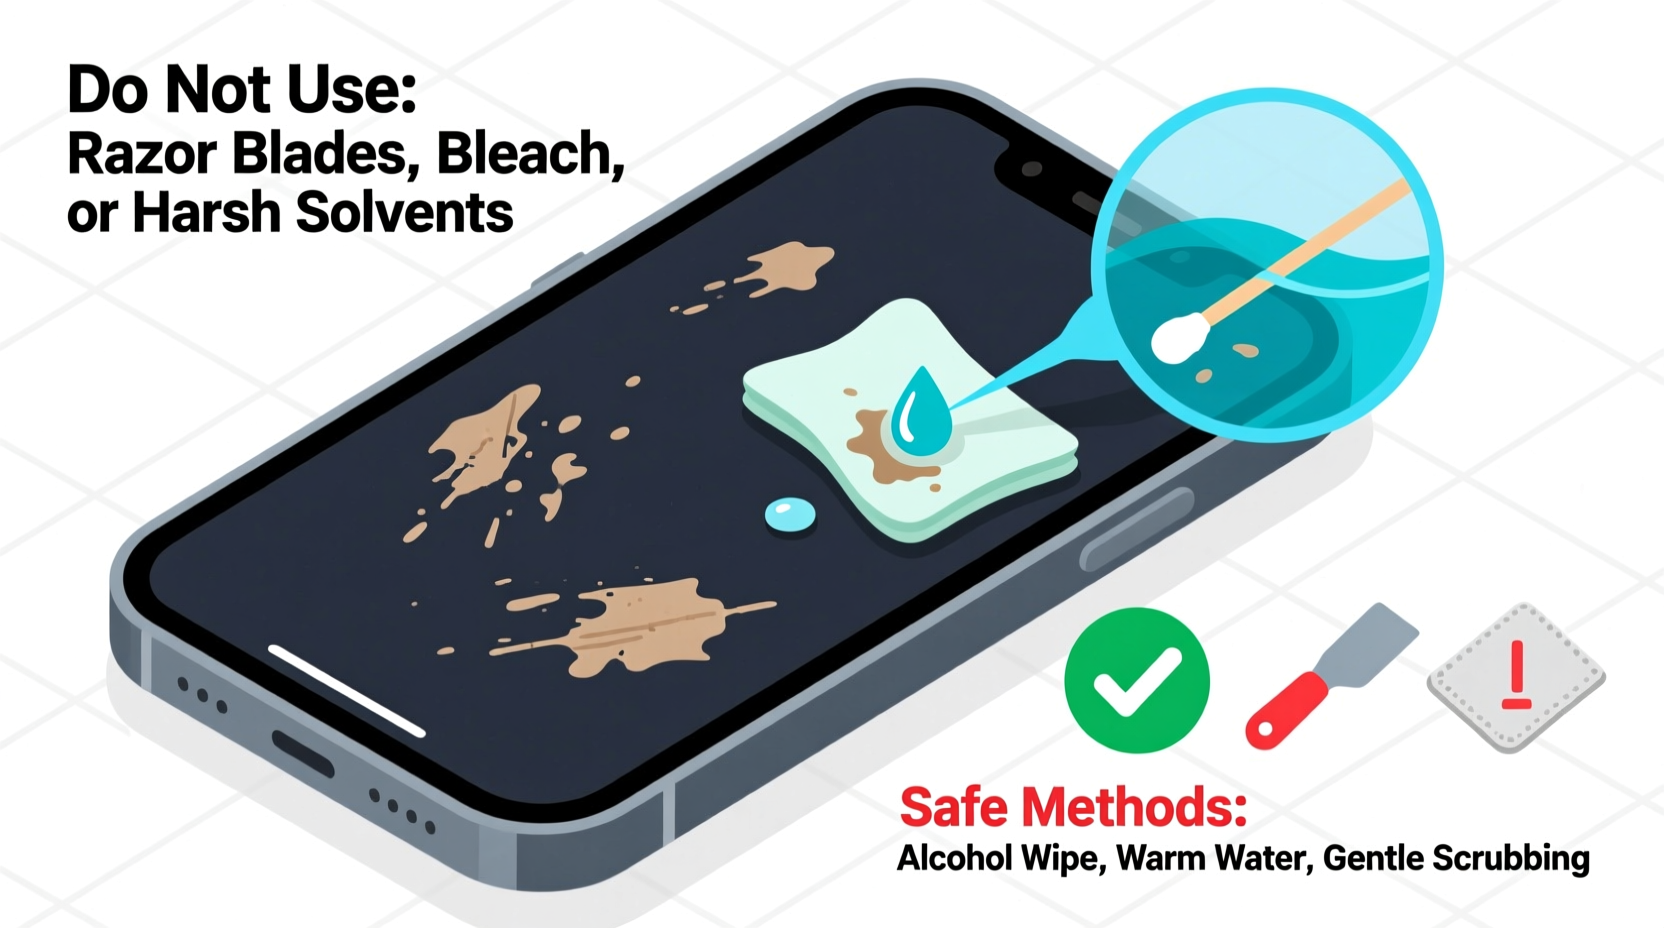
Safe and Effective Methods for Removing Sticker Residue
The safest approaches use mild solvents combined with soft materials. Below are five proven techniques, ranked by safety and effectiveness for different electronic surfaces.
- Warm, Soapy Water (for non-screen areas) – Mix a drop of dish soap into warm water. Dampen a microfiber cloth (never soak it), and gently rub the residue in circular motions. Ideal for plastic backs, charging ports (avoid direct contact), and rubberized grips.
- Isopropyl Alcohol (70% or lower) – Slightly dampen a corner of a lint-free cloth with alcohol and test on an inconspicuous area first. Use light pressure and minimal moisture. Best for metal casings and sealed glass surfaces, but avoid prolonged exposure.
- Adhesive Remover Wipes (electronics-safe) – Commercial products like 3M Adhesive Remover Wipes are formulated to dissolve glue without harming plastics or coatings. Follow instructions carefully and never spray directly onto the device.
- Baking Soda Paste (for textured surfaces) – Mix baking soda with a few drops of water to form a thick paste. Apply with a soft toothbrush using gentle strokes, then wipe clean with a damp microfiber cloth. Effective for joysticks, keyboard keys, and matte finishes.
- Heat Method (using a hairdryer) – Warm the sticker area with low-heat airflow for 30–60 seconds. The heat softens the adhesive, making it easier to lift with a plastic card edge. Do not overheat—this can warp plastic or damage batteries.
Avoid using vinegar on screens or coated surfaces—it may leave streaks and weaken protective layers over time. Similarly, WD-40 is too oily and aggressive for consumer electronics despite its popularity in general cleaning circles.
Step-by-Step Guide: Removing Residue from a Smartphone Screen
Smartphones are among the most sensitive devices due to their thin, multi-layered screens. Follow this timeline to clean safely:
- Power down the phone completely and disconnect any cables.
- Peel off the sticker slowly at a 45-degree angle. If it resists, apply gentle heat with a hairdryer held 6 inches away for 30 seconds.
- Dampen a microfiber cloth with distilled water or a 50/50 mix of water and 70% isopropyl alcohol. Wring thoroughly—only slight dampness is needed.
- Gently rub the sticky area in small circles. Do not press hard. Let the solvent do the work.
- Switch to a dry section of the cloth and buff the area until no moisture remains.
- Inspect under natural light. Repeat if necessary, but limit passes to two or three to avoid coating wear.
- Allow 5 minutes of air drying before powering back on.
Do’s and Don’ts: A Quick Reference Table
| Action | Do | Don't |
|---|---|---|
| Cleaning Solution | Use 70% isopropyl alcohol, soapy water, or commercial electronics wipes | Use acetone, nail polish remover, or window cleaner with ammonia |
| Cloth Type | Lint-free microfiber or optical lens cloth | Paper towels, tissues, or rough fabrics |
| Application Method | Dampen cloth slightly; wipe gently in one direction | Flood the surface or scrub aggressively |
| Screen Contact | Wipe around edges and avoid openings | Let liquid seep into speakers, ports, or buttons |
| Tools | Plastic card, soft toothbrush, cotton swab (lightly dampened) | Razor blades, metal scrapers, sandpaper |
Real Example: Removing a Warranty Void Sticker from a Gaming Controller
Mark, a console gamer, recently purchased a limited-edition controller with a large promotional decal covering part of the grip. After removal, he noticed a greasy film attracting dirt. He tried wiping it with a paper towel, which only smeared the residue. Remembering advice from a tech forum, he used a cotton swab lightly dipped in 70% isopropyl alcohol. With gentle circular motion, the adhesive lifted within two minutes. He finished by buffing with a dry microfiber cloth. The controller looked factory-fresh, and the textured grip remained fully functional—no slipping, no damage.
This case illustrates the importance of patience and precision. Rushing or using the wrong tool could have permanently marred the ergonomic design. Instead, a careful, informed method preserved both aesthetics and usability.
“Many users don’t realize that the adhesives on stickers are engineered to bond strongly—even temporary ones. The trick is breaking that bond safely, not forcefully.” — Dr. Lena Torres, Materials Scientist at Consumer Electronics Safety Institute
Checklist: Safe Residue Removal Process
Follow this checklist every time you clean an electronic device:
- ✅ Power off and disconnect all cables
- ✅ Remove the sticker slowly, using heat if needed
- ✅ Identify the surface type (glass, plastic, metal, coated)
- ✅ Choose an appropriate cleaning solution from the safe list
- ✅ Test on a hidden area first (e.g., back edge or side frame)
- ✅ Use a microfiber cloth dampened—not soaked—with solution
- ✅ Gently rub residue in circular or linear motions
- ✅ Dry immediately with a clean, dry section of cloth
- ✅ Inspect under good lighting; repeat only if necessary
- ✅ Allow full drying before reactivation
Frequently Asked Questions
Can I use baby wipes to clean sticker residue?
No. While convenient, most baby wipes contain mild surfactants, fragrances, and preservatives that can leave behind a filmy residue or degrade anti-smudge coatings over time. They also tend to be too moist, increasing the risk of liquid intrusion. Stick to microfiber cloths with approved solutions.
Will rubbing alcohol damage my phone screen?
Not if used correctly. Studies by display manufacturers indicate that 70% isopropyl alcohol, applied sparingly with a soft cloth, does not harm modern Gorilla Glass or similar coatings when used occasionally. However, repeated daily use or higher concentrations (like 90%+) may accelerate coating degradation. Always follow your device maker’s guidelines—Apple, for instance, officially permits 70% alcohol for external cleaning.
What should I do if residue gets inside a port?
If adhesive has migrated into a charging port or headphone jack, do not insert metal objects. Instead, use a wooden toothpick or plastic dental pick to gently dislodge debris. For stubborn cases, lightly wrap a cotton swab around the tip (avoid fraying) and twist gently. Never blow compressed air directly into the port at close range—this can push debris deeper. If in doubt, consult a certified repair technician.
Final Thoughts and Call to Action
Removing sticker residue from electronics doesn’t require expensive tools or chemicals—just knowledge, care, and the right technique. By respecting the materials your devices are made of and avoiding shortcuts that risk long-term damage, you preserve both their appearance and lifespan. Whether you're prepping a gadget for resale, refreshing an old favorite, or simply removing an eyesore, the methods outlined here ensure a safe, effective clean every time.


 浙公网安备
33010002000092号
浙公网安备
33010002000092号 浙B2-20120091-4
Comments
No comments yet. Why don't you start the discussion?