
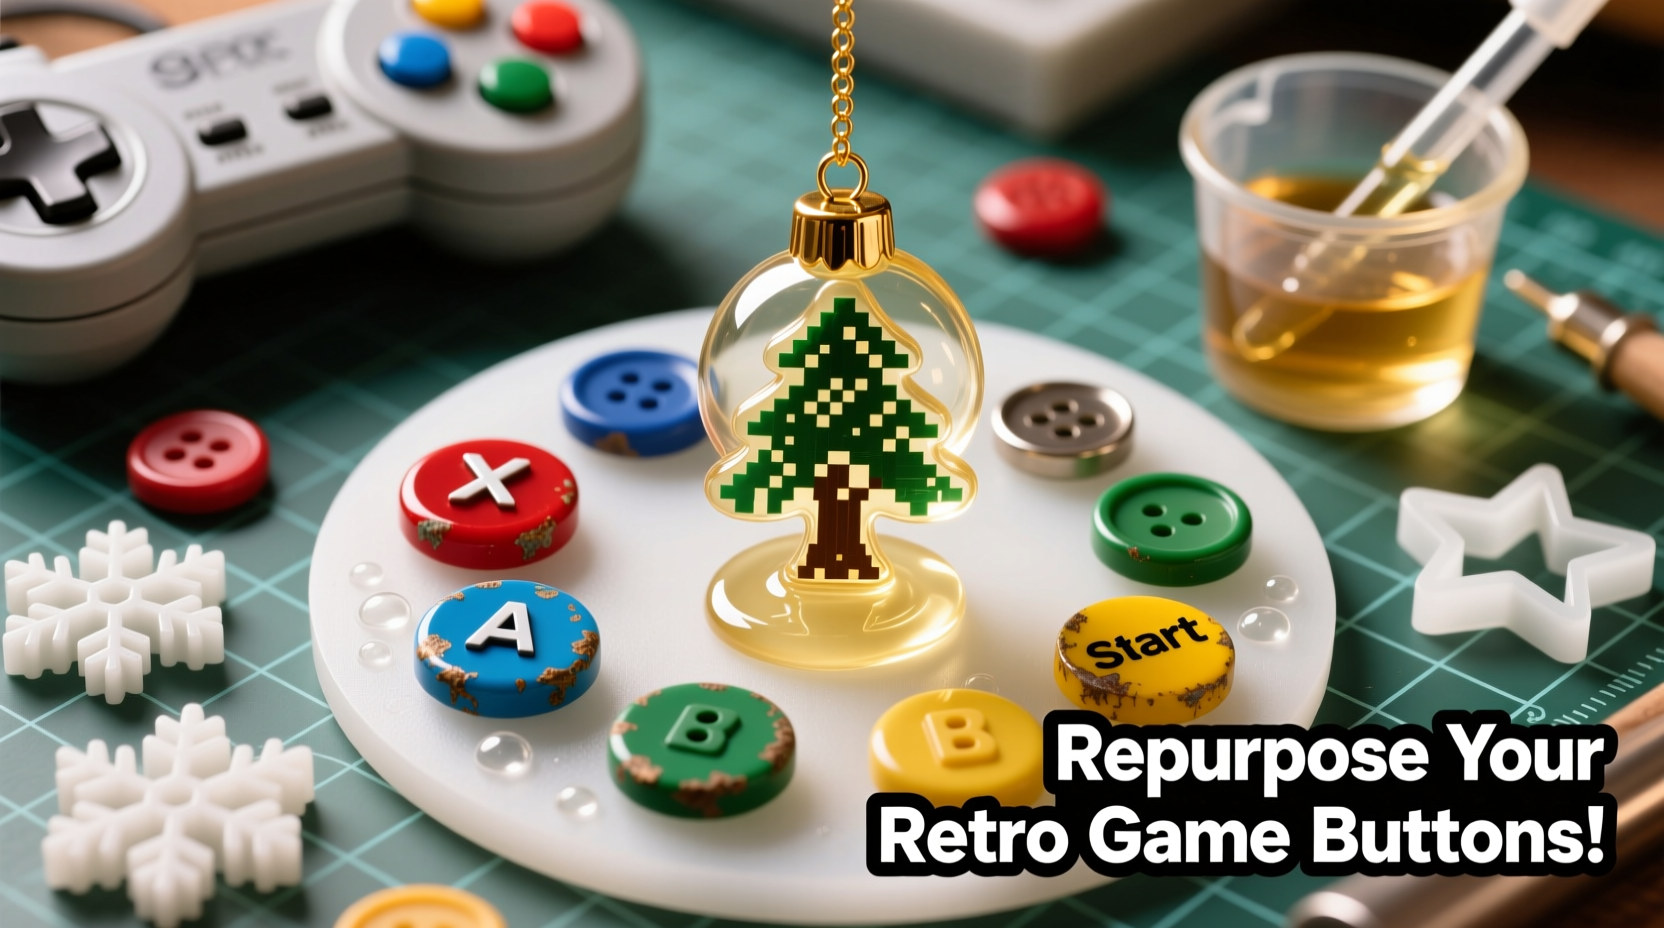
Every holiday season brings a renewed desire to personalize traditions. For those with a nostalgic connection to video games or a drawer full of obsolete electronics, there’s a creative opportunity hiding in plain sight: transforming old gaming controller buttons into charming, durable Christmas tree ornaments. By combining upcycling with the glossy elegance of epoxy resin, you can craft miniature keepsakes that honor both tech history and seasonal cheer.
This process isn’t just about decoration—it’s a tactile celebration of nostalgia, sustainability, and hands-on creativity. Whether you’re reusing parts from a childhood PlayStation, an original Xbox, or a broken Nintendo Switch Joy-Con, each button carries a story. With careful preparation and attention to detail, these small plastic domes become shimmering ornaments that catch the light and spark conversation.
Gather Your Materials and Prepare the Workspace
Before mixing any resin, ensure your environment supports precision and safety. Epoxy resin requires a clean, dust-free area with stable temperature (ideally between 70–75°F) and low humidity. Work on a flat surface covered with wax paper or silicone matting to prevent sticking.
The following materials are essential for success:
- Used gaming controller buttons (A, B, X, Y, D-pad segments, triggers)
- Epoxy resin kit (preferably jewelry-grade with UV resistance)
- Silicone molds (small dome-shaped or geometric forms to cradle the button)
- Fine-grit sandpaper (220–400 grit)
- Isopropyl alcohol (90% or higher) and lint-free cloths
- Disposable gloves, mask, and safety goggles
- Mixing cups and wooden stir sticks
- Pipettes or syringes for precise pouring
- Heat gun or butane torch for removing bubbles
- Jewelry findings (mini hooks, jump rings, ribbon loops)
- Optional: mica powders, glitter, or metallic leaf for visual enhancement
Clean and Modify the Buttons for Resin Integration
Controller buttons often retain oils from skin contact and may have residue from internal mechanisms. Begin by washing each button in warm, soapy water. Use a soft toothbrush to scrub crevices, then rinse thoroughly. Dry completely before proceeding.
Next, lightly sand the top surface of each button. This creates micro-abrasions that improve resin adhesion, preventing delamination over time. Focus only on the outward-facing side—the underside should remain intact to fit securely into molds.
If desired, enhance visual appeal by adding decorative elements. A single flake of holographic pigment placed atop the button before pouring will create a galaxy-like effect when encapsulated. Alternatively, use a fine-tip brush to apply gold leaf around the rim for a vintage arcade aesthetic.
“Resin bonds best when surfaces are clean, slightly textured, and free of contaminants. Skipping prep leads to cloudy finishes or peeling.” — Lila Nguyen, Resin Art Instructor at CraftLab Studio
Step-by-Step Guide: Casting the Ornaments
Follow this detailed sequence to produce professional-quality results without frustration.
- Prepare the mold: Place silicone mold on a level tray. Ensure cavities are free of lint or moisture. If using multi-cavity molds, organize button types beforehand.
- Position the buttons: Press each cleaned button into a mold cavity, logo-side down. The flat edge should sit flush against the mold base, leaving space above for resin fill.
- Mix the epoxy: Follow manufacturer instructions precisely. Most kits require a 1:1 or 2:1 ratio of resin to hardener. Stir slowly for at least three minutes, scraping the sides and bottom of the cup to ensure complete blending. Overmixing introduces air bubbles; undermixing causes improper curing.
- Add color (optional): Incorporate a few drops of mica powder or alcohol-based dye into the mixed resin. Swirl gently—do not shake.
- Pour carefully: Using a pipette, dispense resin directly over each button until the cavity is filled to the top. Avoid pouring from height to reduce bubble formation.
- Remove bubbles: Pass a heat gun set to low or a butane torch briefly over the surface. One quick pass per ornament is sufficient. Excessive heat can distort the mold or yellow the resin.
- Cure undisturbed: Cover the mold with a cardboard box to block dust. Allow 24 hours for initial set, then wait a full 72 hours before demolding for maximum hardness.
- Demold and finish: Gently flex the silicone mold to release each piece. Inspect for uncured spots or surface flaws. Sand minor imperfections with 600-grit paper if needed.
- Attach hanging hardware: Open a jump ring with pliers, thread it through the molded loop (if present) or drill a tiny hole near the top edge. Attach a mini hook or loop of satin ribbon.
Design Variations and Thematic Customization
These ornaments needn’t look industrial. With thoughtful tweaks, they can match any holiday theme—from rustic farmhouse to futuristic cyberpunk.
| Theme | Resin Color | Button Type | Extras |
|---|---|---|---|
| Classic Red & Green | Clear with red/green glitter | Xbox-style ABXY | Gold foil accents |
| Vintage Arcade | Amber tinted | Sega Saturn face buttons | Mini joystick charm attached |
| Winter Galaxy | Deep blue with silver mica | D-pad segments | Glitter swirls resembling constellations |
| Minimalist Modern | Tinted black or white | PS5 touch buttons | No extra embellishments |
For families with shared gaming memories, consider assigning button colors to represent different members—blue for dad, pink for daughter, green for the family pet who always sat on the controller. These subtle personalizations turn simple crafts into meaningful heirlooms.
Real Example: A Gamer’s First Holiday After Loss
When Mark Thompson inherited his late brother’s PS2 collection, he struggled with how to honor their weekend gaming rituals. Instead of storing the controllers away, he disassembled them and created a set of eight resin ornaments shaped like dual analog sticks and face buttons.
He added flecks of copper pigment to mimic the console’s signature color and hung each on a handmade tag reading “Level Up: Love Unlocked.” That Christmas, the tree became a living memorial. Relatives recognized the symbols instantly—“That’s the ‘start’ button we paused on during pizza breaks,” one cousin remarked. What began as grief processing evolved into an annual tradition: every December, Mark makes new ornaments from donated old gear, giving them to friends as tokens of shared joy.
His experience underscores a deeper truth: objects carry emotional resonance far beyond function. Repurposing them isn’t recycling—it’s remembrance.
Common Challenges and How to Solve Them
Even experienced crafters encounter issues with resin. Knowing how to troubleshoot saves time and materials.
- Cloudy or hazy finish: Caused by moisture contamination or low temperatures during cure. Always dry components thoroughly and maintain room warmth.
- Bubbles trapped under the button: Ensure the button is fully seated in the mold before pouring. Tap the mold lightly after filling to release air pockets.
- Sticky spots after 72 hours: Indicates incorrect mixing ratio. Double-check measurements and stir longer next time.
- Resin leaks out of mold: Silicone molds degrade over time. Replace older molds or reinforce edges with modeling clay.
- Buttons float upward: If the button isn’t heavy enough, it may rise in liquid resin. Pre-weight slightly with a drop of thick glue on the back, or use a two-pour method.
Frequently Asked Questions
Can I use non-gaming buttons, like keyboard keys or phone buttons?
Absolutely. Any small, rigid plastic component can be encapsulated. Keyboard WASD keys make excellent directional ornaments, while smartphone home buttons offer sleek, modern shapes. Just ensure they’re cleaned and sanded properly.
Are these ornaments safe for children’s trees?
Once fully cured, epoxy resin is non-toxic and durable. However, due to small size and potential choking hazard, supervise young children. Consider larger designs or wall displays for nurseries.
How long do these ornaments last?
With UV-resistant resin and indoor display, they can last decades without yellowing or cracking. Store in padded boxes between seasons to prevent scratches.
Final Checklist Before You Begin
- ✓ Collect at least 6–8 usable controller buttons
- ✓ Choose compatible silicone molds (dome or geometric)
- ✓ Purchase jewelry-grade epoxy resin with UV protection
- ✓ Set up a clean, level workspace with ventilation
- ✓ Wear gloves, eye protection, and a respirator-rated mask
- ✓ Test resin mix on a spare button first
- ✓ Plan design theme (color, embellishments, hanging style)
- ✓ Allow 3 full days for casting and curing
Conclusion: Turn Nostalgia Into Lasting Tradition
Transforming obsolete gaming controller buttons into epoxy resin ornaments bridges generations, technologies, and emotions. It turns clutter into meaning, waste into wonder. Each glossy dome becomes a capsule of memory—a pixelated snow globe holding moments of laughter, competition, and connection.
This project proves that sustainability doesn’t require sacrifice. With patience and care, even the smallest remnants of digital pasts can shine brightly in analog holidays. So open that drawer of forgotten tech, gather your supplies, and begin casting more than decorations. You're preserving stories, one button at a time.


 浙公网安备
33010002000092号
浙公网安备
33010002000092号 浙B2-20120091-4
Comments
No comments yet. Why don't you start the discussion?