
When only one side of your AirPods is functioning—whether it's the left or right earbud failing to produce sound—it can be incredibly frustrating. This imbalance disrupts stereo audio, makes calls difficult, and diminishes the overall listening experience. While hardware failure is possible, more often than not, the issue stems from a software glitch, Bluetooth pairing error, or firmware miscommunication between the earbuds. The good news: in most cases, resetting your AirPods resolves the problem without requiring repairs or replacements.
This guide walks you through diagnosing the root cause, properly resetting your AirPods, and restoring balanced audio performance. Whether you're using first-, second-, or third-generation AirPods, AirPods Pro, or AirPods Max, these methods apply across models with minor variations.
Why One Side of Your AirPods Might Stop Working
Before jumping into resets, it’s important to understand what might be causing the issue. A single non-responsive earbud doesn’t automatically mean the device is broken. Common culprits include:
- Bluetooth connection glitches: Interference or corrupted pairing data can cause one earbud to disconnect silently.
- Firmware sync errors: AirPods rely on internal firmware to stay synchronized. If one earbud fails to update or communicate, it may go offline.
- Dirt or debris buildup: Earwax or pocket lint blocking the speaker mesh can mute sound output.
- Battery degradation: One earbud may have significantly lower battery health, preventing it from powering on consistently.
- Software bugs after iOS updates: Occasionally, an OS update introduces compatibility issues that affect audio routing.
- Accidental mono audio settings: Accessibility settings like “Mono Audio” or imbalanced volume sliders can make it seem like one side isn't working.
Identifying the underlying reason helps determine whether a simple reset will fix the issue—or if deeper intervention is needed.
Step-by-Step Guide to Reset Your AirPods
A factory reset clears all paired devices and forces your AirPods to restart with default settings. This process often reestablishes communication between the earbuds and corrects audio imbalance. Follow these steps carefully:
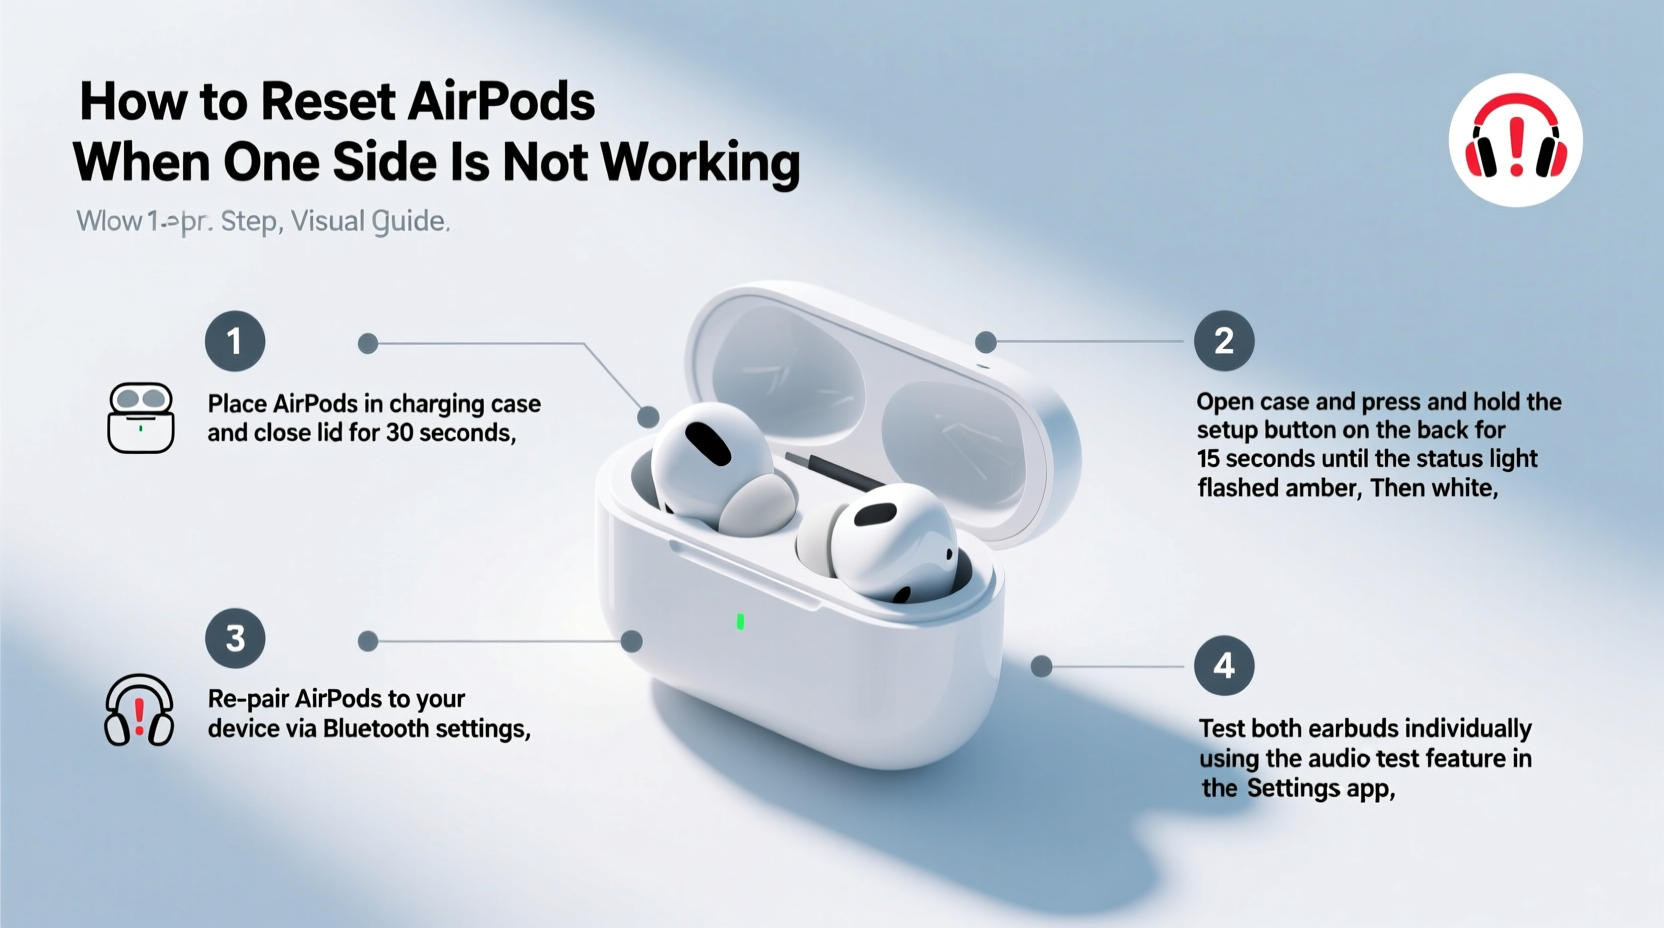
- Place both AirPods in the charging case and close the lid for at least 30 seconds. This ensures they are powered and ready for reset.
- Open the lid but keep the AirPods inside.
- Locate the setup button on the back of the case (circular button near the hinge). Press and hold this button for 15–20 seconds.
- Watch the status light: Initially, it may flash amber, then white. Continue holding until it flashes white rapidly, indicating the reset is complete.
- Release the button. Your AirPods are now erased and ready to pair again.
- Reconnect to your iPhone or iPad: Open the case near your device. The setup animation should appear. Tap “Connect,” then follow on-screen prompts.
After pairing, play stereo audio and verify that both sides work equally. If the issue persists, continue troubleshooting below.
“Resetting AirPods is often the fastest way to resolve asymmetric audio problems caused by pairing conflicts.” — Jordan Lee, Apple Support Specialist
Troubleshooting Checklist After Reset
Even after a successful reset, some issues may linger. Use this checklist to ensure no stone is left unturned:
- ✅ Clean both earbuds with a dry, soft-bristled brush to remove debris.
- ✅ Check Bluetooth settings: Ensure only one AirPods entry appears (avoid duplicate listings).
- ✅ Test audio balance in Settings > Accessibility > Audio/Visual > Balance slider (centered).
- ✅ Disable Mono Audio if enabled under the same menu.
- ✅ Update your iOS device to the latest version (Settings > General > Software Update).
- ✅ Forget other Bluetooth devices temporarily to reduce interference.
- ✅ Charge both earbuds fully before testing again.
- ✅ Try connecting to a second Apple device (e.g., iPad) to isolate the problem.
If all steps are completed and one side still doesn’t work, consider hardware diagnostics.
Do’s and Don’ts When Fixing Unresponsive AirPods
Missteps during troubleshooting can worsen the situation. Refer to this table to avoid common pitfalls:
| Do’s | Don’ts |
|---|---|
| Use a soft, dry cloth or microfiber to clean speakers | Insert sharp objects like pins or needles into speaker grilles |
| Reset via the setup button—not just unpairing in Bluetooth | Assume the earbud is dead without testing on another device |
| Keep AirPods charged regularly to prevent deep discharge | Expose AirPods to water unless they are AirPods Pro (IPX4 rated) |
| Update firmware by leaving AirPods connected overnight | Leave AirPods in hot environments (e.g., car dashboard) |
| Back up serial number and purchase date for warranty claims | Disassemble or attempt DIY repairs on sealed units |
Real Example: Recovering a \"Dead\" Right AirPod
Samantha, a freelance designer from Portland, noticed her right AirPod stopped playing audio mid-podcast. She assumed it was broken after dropping it once. Before ordering a replacement, she tried a reset.
She followed the factory reset steps precisely—holding the setup button until the light flashed white. Upon reconnecting, the right earbud still didn’t respond. Then she checked her iPhone’s Accessibility settings and discovered “Mono Audio” had been turned on accidentally during a previous accessibility test. Disabling it immediately restored stereo sound.
In another case, Mark found his left AirPod silent despite full charge indicators. Cleaning the speaker mesh with a soft brush removed compacted earwax, resolving the issue instantly. Neither required hardware repair—just methodical troubleshooting.
These examples show that perceived hardware failure is often a false diagnosis. Systematic checks save time and money.
When to Seek Hardware Repair
If resetting, cleaning, and setting adjustments fail, the problem may be physical. Signs of genuine hardware failure include:
- No charging indication on one earbud even after extended charging.
- Physical damage visible on the stem, speaker grille, or internal circuitry.
- One earbud not appearing in the battery widget or Find My app.
- Consistent failure across multiple Apple devices.
If under warranty or covered by AppleCare+, visit an Apple Store or authorized service provider. Apple offers individual earbud replacements—for a fee—if the unit isn’t covered.
Note: Third-party repairs void Apple’s warranty and may compromise water resistance and functionality. Proceed with caution.
Frequently Asked Questions
Can I use a single AirPod while the other is being repaired?
Yes. You can use one AirPod independently. Simply place the working earbud in your ear—it will connect automatically. However, stereo separation and spatial audio features will be limited.
Will resetting my AirPods delete my listening history or playlists?
No. Resetting only affects Bluetooth pairing data and device settings. Your music, podcasts, and iCloud-synced content remain intact on your iPhone or iPad.
How do I know if my AirPods need a firmware update?
Firmware updates happen automatically when your AirPods are connected to an iOS device and charging. To check the version: Go to Settings > Bluetooth > Tap the info (i) next to your AirPods > View firmware version. Compare it with Apple’s official release notes online.
Final Steps: Prevent Future Issues
Once your AirPods are working again, take proactive steps to maintain performance:
- Store them properly: Keep the case closed and in a cool, dry place.
- Clean weekly: Gently wipe down earbuds and case with a dry microfiber cloth.
- Monitor battery health: Avoid letting either earbud drain completely for long periods.
- Limit exposure: Avoid extreme temperatures, moisture, and dusty environments.
- Check settings monthly: Verify audio balance and disable any unintended accessibility features.
Regular maintenance reduces the likelihood of future failures and extends the lifespan of your AirPods beyond two years—the average user cycle.
Conclusion: Take Control of Your Audio Experience
Dealing with one-sided AirPod failure doesn’t have to mean replacing your entire set. In most cases, a proper reset combined with careful troubleshooting brings both earbuds back to life. From checking accessibility settings to performing a full factory reset, the solutions are within reach—and free.
The key is patience and precision. Rushing to conclusions or skipping diagnostic steps can lead to unnecessary expenses. By following this guide, you empower yourself to solve common tech issues confidently and independently.


 浙公网安备
33010002000092号
浙公网安备
33010002000092号 浙B2-20120091-4
Comments
No comments yet. Why don't you start the discussion?