
Vintage light strings carry charm and nostalgia, often found in older homes, holiday decorations, or retro fixtures. But their original incandescent bulbs are inefficient, fragile, and prone to overheating. Modern LED bulbs offer a cooler, longer-lasting, and energy-efficient alternative. However, retrofitting these antique strands isn’t as simple as swapping bulbs—especially when socket polarity and circuit design haven't changed since the 1950s.
The key challenge lies in compatibility: many vintage light strings were wired with non-polarized sockets, meaning current flows indiscriminately through either contact. LEDs, being diodes, only allow current in one direction. If inserted incorrectly or used in incompatible circuits, they may flicker, fail prematurely, or not illuminate at all. Worse, mismatched voltage or improper current limiting can lead to immediate burnout—even if polarity appears correct.
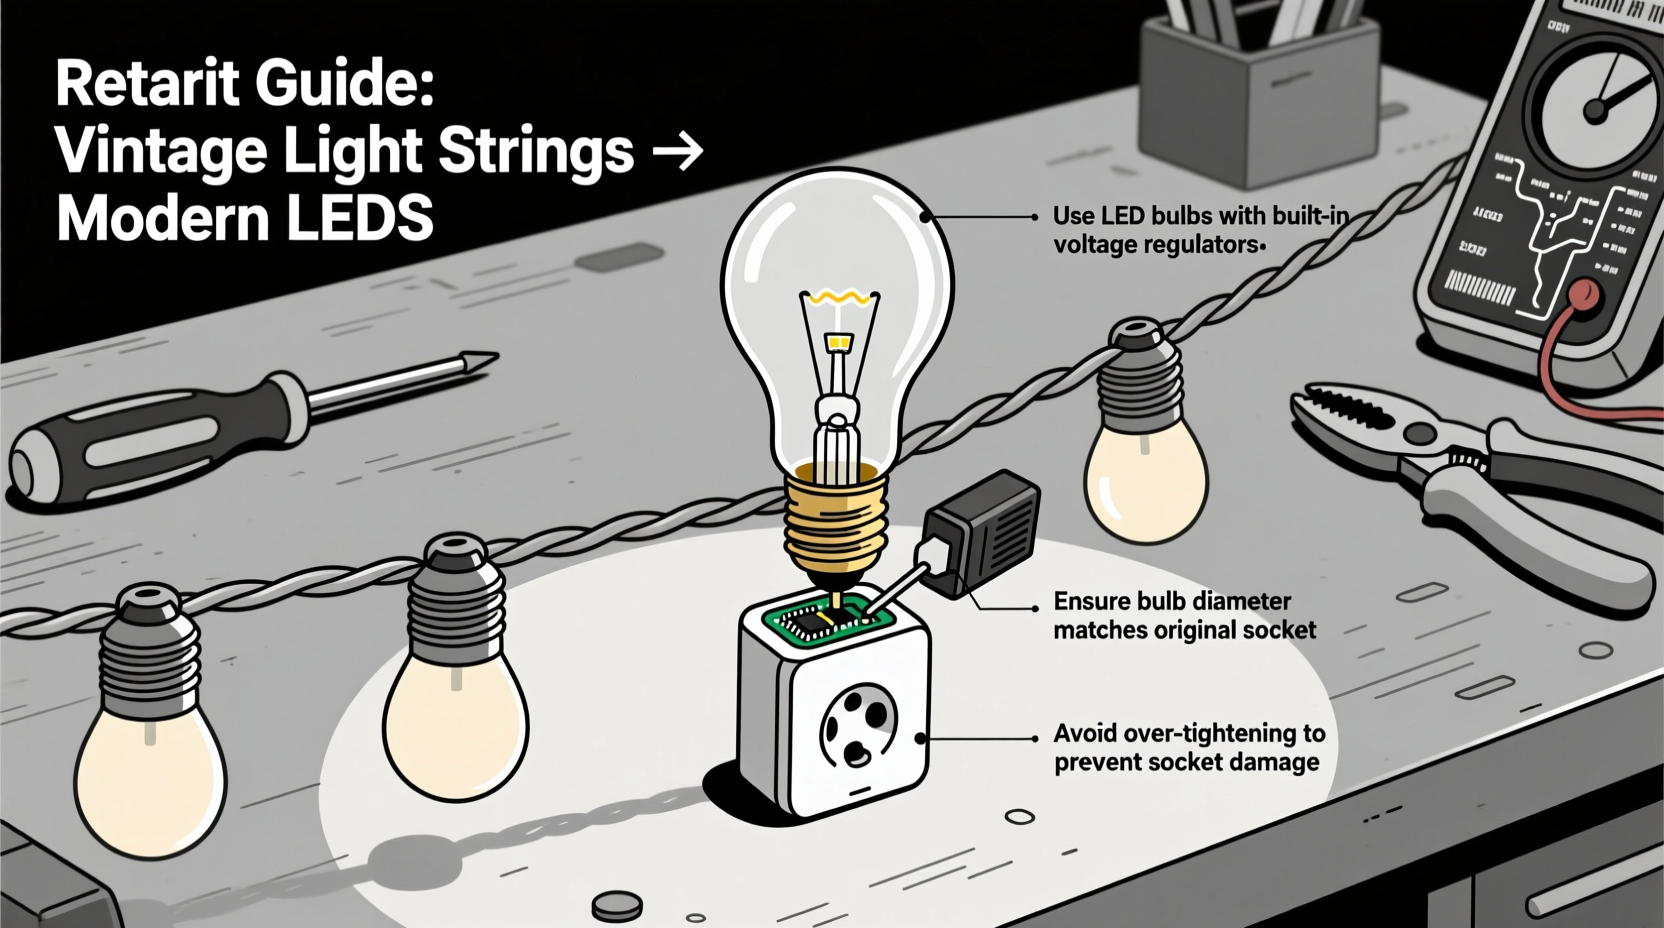
This guide walks you through the safe, reliable process of upgrading your vintage lights using modern LED replacements while preserving original wiring, avoiding polarity conflicts, and preventing damage. Whether restoring a mid-century chandelier or reviving Christmas lights from your childhood, this method ensures performance without sacrificing authenticity.
Understanding Vintage vs. Modern Lighting Systems
Vintage light strings—common from the 1930s through the 1980s—were typically designed for incandescent bulbs operating on line voltage (120V in North America) or low-voltage AC (often 12–24V). These systems relied on resistive filaments that heated up to produce light. Because they weren’t polarized, orientation didn’t matter; electricity flowed freely regardless of which side was “hot” or “neutral.”
Modern LEDs, by contrast, are semiconductor devices requiring direct current (DC) and specific polarity to function. While some replacement LED bulbs include internal rectifiers to handle alternating current (AC), not all do—and even those that do may still be sensitive to reverse voltage spikes or inconsistent waveforms common in older circuits.
Additionally, vintage strings often use series-wired configurations where multiple bulbs share the same current path. In such setups, removing one bulb breaks the entire circuit. Replacing just one or two bulbs with LEDs in a series string of incandescents creates an imbalance in resistance and voltage distribution, leading to uneven lighting or failure.
Step-by-Step Guide to Safe Retrofitting
To retrofit vintage light strings successfully, follow this sequence of actions. The goal is to maintain functionality, avoid electrical hazards, and extend the life of both the fixture and new components.
- Assess the existing system: Determine whether the string is wired in series or parallel. Series strings usually have lower voltage per bulb (e.g., 12 x 10V bulbs = 120V total). Parallel strings run each bulb at full line voltage. Use a multimeter to test continuity and voltage drop across individual sockets if possible.
- Check socket type and condition: Common vintage bases include E10, C6, or BA9s. Ensure sockets are clean, corrosion-free, and mechanically sound. Bent contacts or worn insulation increase resistance and risk arcing.
- Select compatible LED bulbs: Choose LEDs specifically rated for AC operation and non-polarized sockets. Look for terms like “bi-directional,” “AC/DC,” or “reverse polarity protected.” Brands like Feit Electric, Philips, and Bulbrite offer vintage-style LEDs with built-in bridge rectifiers.
- Verify voltage match: If your string operates on standard 120V, use 120V AC LED bulbs. For low-voltage systems (e.g., 12V landscape lighting), select LEDs matching the supply voltage. Using a 120V LED on a 12V circuit will result in no illumination; a 12V LED on 120V will instantly burn out.
- Replace all bulbs uniformly: Remove every incandescent bulb and install the new LED equivalents. This prevents current imbalances and thermal stress on remaining old bulbs.
- Test under controlled conditions: Plug the string into a GFCI-protected outlet or use an isolation transformer during initial testing. Monitor for flickering, buzzing, or excessive heat.
- Monitor long-term performance: Run the lights for several hours before permanent installation. Inspect connections and look for dimming or intermittent behavior.
Choosing the Right LED Bulbs: A Comparison Table
| Bulb Type | Voltage Compatibility | Polarity-Sensitive? | Best For | Risk Level |
|---|---|---|---|---|
| Standard LED (no rectifier) | DC only | Yes | New DC fixtures | High – likely failure |
| AC/DC LED with bridge rectifier | 12–120V AC/DC | No | Vintage series strings | Low – ideal choice |
| Line-voltage LED (120V AC) | 120V AC only | Semi | Parallel vintage strings | Moderate – check specs |
| Dual-filament hybrid | AC only | No | Dimmable retrofits | Low – rare but effective |
Note: Bridge rectifier-equipped LEDs convert AC to DC internally, eliminating dependence on external polarity. These are essential for non-polarized vintage sockets.
Common Pitfalls and How to Avoid Them
Retrofitting seems straightforward until unexpected issues arise. Here are frequent problems and solutions:
- Flickering LEDs: Caused by residual capacitance or ghost voltage in old wiring. Solution: Install a bleeder resistor (100kΩ, 0.5W) across the power input to drain stray current.
- Partial illumination: One or more bulbs don’t light. Likely due to incorrect seating or faulty rectifier in the LED. Re-seat or replace individually.
- Overheating sockets: Even LEDs generate some heat. If sockets feel hot, check for high resistance connections or undersized wire gauge. Upgrade wiring if necessary.
- Transformer hum in low-voltage systems: Some electronic transformers misinterpret LED loads as faults. Use magnetic transformers or LED-compatible drivers.
Real Example: Restoring a 1950s Porch Light String
A homeowner in Portland, OR, inherited a set of eight porcelain C7 sockets wired in series along a front porch railing. Originally using 15W incandescents, the string drew significant power and frequently blew bulbs. After consulting an electrician, she decided to retrofit with LEDs.
She tested the system and confirmed it was 120V AC, series-wired, with non-polarized sockets. She sourced C7 base LEDs labeled “120V AC, bi-directional” with integrated rectifiers. All eight bulbs were replaced simultaneously.
On first test, two bulbs glowed faintly and flickered. Further inspection revealed loose solder joints in the third socket. After re-soldering, the string operated smoothly. Over the next year, there were no failures, and energy consumption dropped by 92% compared to the original setup.
The success hinged on uniform replacement, proper bulb selection, and attention to hidden wiring flaws—proving that even decades-old systems can benefit from modern efficiency when upgraded thoughtfully.
Expert Insight: Electrical Safety and Longevity
“Many people assume LED retrofits are plug-and-play, but vintage wiring introduces variables like insulation degradation and unbalanced loads. Always verify the entire circuit—not just the bulbs—before assuming compatibility.” — Rafael Nguyen, Licensed Master Electrician & Lighting Retrofit Specialist
“The biggest mistake I see is partial upgrades. Putting one LED in a string of incandescents creates a voltage spike across the LED when the others heat up. It might work for a week, then fail catastrophically.” — Lena Patel, Home Energy Auditor, Efficiency Northwest
Essential Checklist for a Successful Retrofit
- Confirm voltage requirements of the original system
- Determine if the string is wired in series or parallel
- Inspect all sockets for wear, corrosion, or damage
- Select LED bulbs with AC compatibility and reverse polarity protection
- Ensure all bulbs are replaced—not just a few
- Test the string using a GFCI outlet or isolation transformer
- Add a bleeder resistor if flickering occurs
- Label the string clearly post-retrofit
- Monitor performance over 24–48 hours before final installation
- Consider adding surge protection for outdoor applications
Frequently Asked Questions
Can I use any LED bulb in a vintage socket?
No. Only LEDs designed for AC operation and non-polarized circuits should be used. Standard DC-only LEDs will fail quickly or not light at all due to alternating polarity in vintage wiring.
Why did my LED bulbs burn out after a few days?
This usually indicates a voltage mismatch or mixed bulb types. Running 12V LEDs on a 120V circuit causes instant burnout. Similarly, combining LEDs with incandescents in a series string leads to uneven voltage sharing and premature failure.
Do I need to rewire the entire string to make it safe?
Not necessarily. If the insulation is intact, connections are secure, and the load matches the wire gauge, rewiring isn’t required. However, if you find cracked wires, brittle insulation, or aluminum conductors, full rewiring is strongly advised for safety.
Conclusion: Preserve the Past, Power the Future
Retrofitting vintage light strings with modern LED bulbs bridges the gap between heritage and efficiency. With careful planning, the right components, and respect for electrical fundamentals, you can enjoy the warmth of classic design without the drawbacks of outdated technology. The process demands attention to detail—but the payoff is lasting beauty, reduced energy costs, and safer operation.
These lights tell stories. They’ve illuminated holidays, welcomed generations, and defined architectural character. By upgrading them responsibly, you’re not discarding history—you’re ensuring it continues to shine.


 浙公网安备
33010002000092号
浙公网安备
33010002000092号 浙B2-20120091-4
Comments
No comments yet. Why don't you start the discussion?