
Lip balm is a staple in purses, pockets, and medicine cabinets worldwide. But over time, exposure to air, temperature shifts, or infrequent use can cause the product to dry out, harden, or become stuck inside the tube. Rather than tossing it and buying a replacement—especially if it’s a favorite brand or limited edition—there are practical, effective ways to bring it back to life. Using only common household items and straightforward techniques, you can restore your dried-out lip balm to a smooth, usable state. This guide walks through proven methods, safety considerations, and real-world applications so you can save money, reduce waste, and keep your lips hydrated without compromise.
Why Lip Balm Dries Out and Gets Stuck
Lip balms typically contain waxes (like beeswax or carnauba), oils (such as coconut or jojoba), and butters (like shea or cocoa). When exposed to fluctuating temperatures—especially heat followed by cooling—the ingredients can separate or crystallize unevenly. Additionally, repeated exposure to air causes oxidation and evaporation of volatile oils, leaving behind a harder, less pliable residue. If the balm sits unused for weeks or months, this process accelerates, especially in non-airtight containers.
The mechanical design of twist-up tubes also contributes to the problem. As the balm shrinks slightly due to drying, it may lose contact with the inner walls of the tube, causing slippage when twisting. In other cases, the waxy base hardens enough that the push mechanism can’t advance it further, making it appear “stuck” even if some product remains.
“Lip balm degradation isn’t always about expiration—it’s often environmental. Heat, light, and air exposure do more damage than people realize.” — Dr. Lena Torres, Cosmetic Formulation Scientist
Step-by-Step Guide: Reviving Dry Lip Balm at Home
Restoring dry or stuck lip balm doesn’t require special tools. Most solutions leverage gentle heat, natural oils, or minor structural adjustments—all achievable with items already in your kitchen or bathroom.
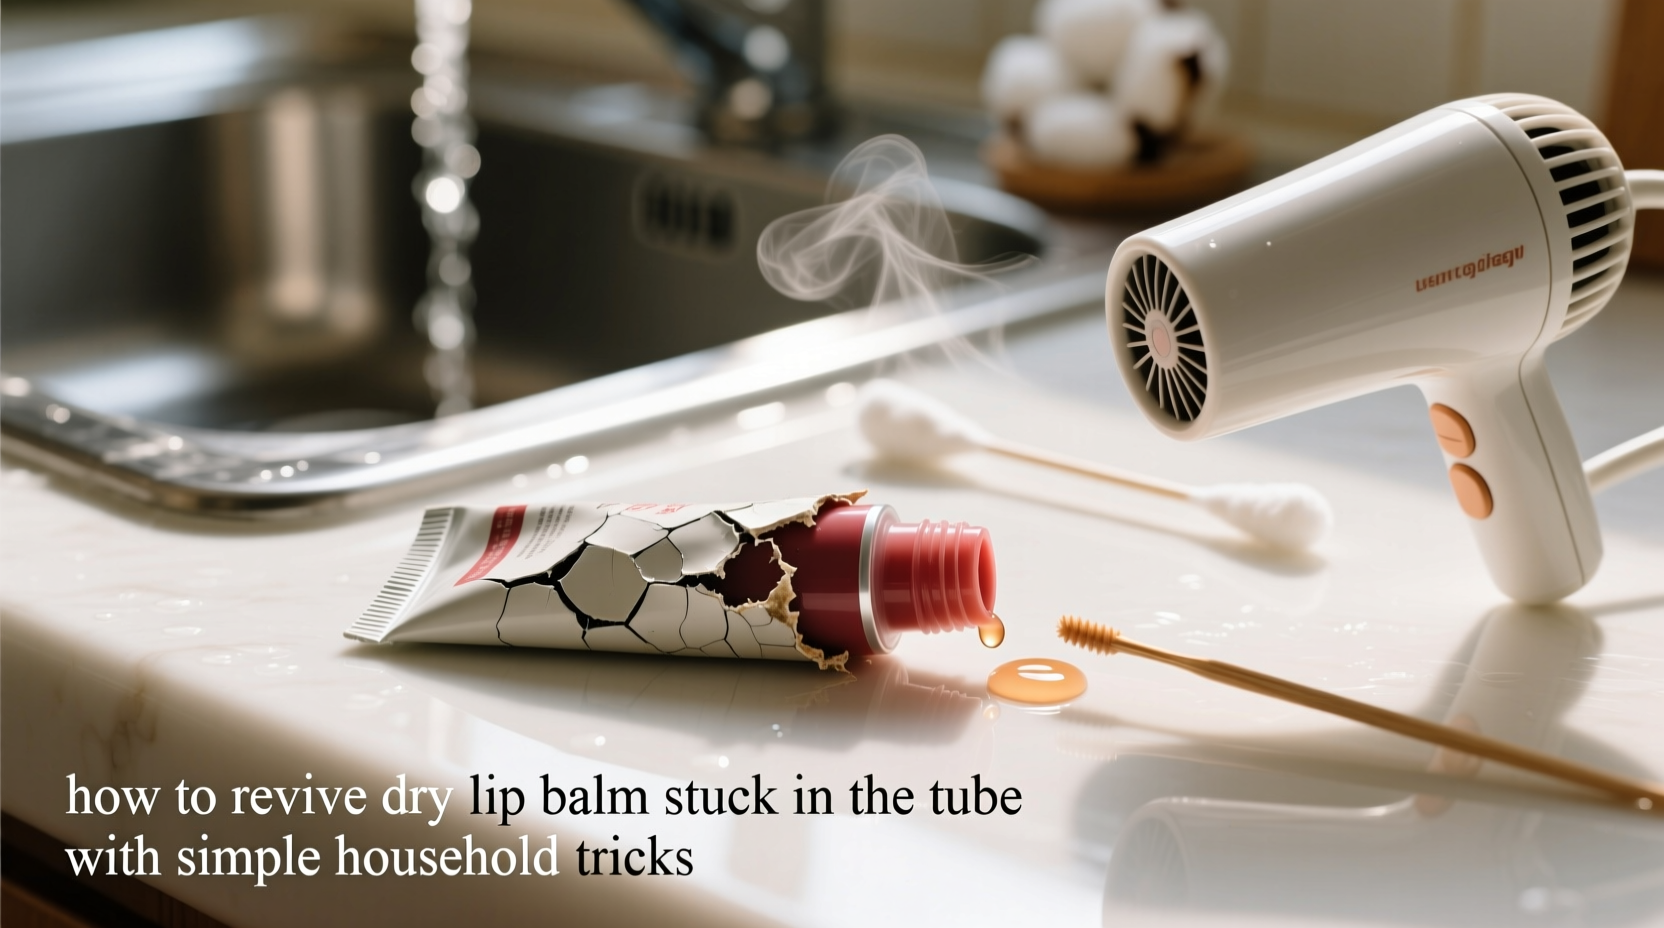
- Remove the Cartridge (if possible): Unscrew the bottom cap or gently pull the entire balm cylinder from the tube. Some brands allow full removal; others have sealed bases. If removable, proceed to step two. If not, skip to heat-based methods.
- Clean Excess Residue: Wipe away any lint, dust, or old skin cells from the exterior of the balm column using a cotton swab dampened with warm water. Avoid soaking.
- Apply Gentle Heat: Use one of the heating methods described below to soften the wax structure without degrading active ingredients.
- Incorporate Moisturizing Oils (Optional): For severely dried balms, adding a few drops of carrier oil helps restore glide and hydration capacity.
- Reset the Balm in the Tube: Once softened, press the balm back down gently or allow it to cool evenly in an upright position.
- Test and Store Properly: After cooling completely, test application. Store in a cool, dark place moving forward to prevent recurrence.
Effective Heating Methods
Heat is the most reliable way to re-melt and re-integrate the components of dried lip balm. The key is applying low, consistent warmth—not boiling or direct flame, which can burn ingredients or warp plastic.
- Hot Water Bath: Fill a mug or small bowl with hot (not boiling) water. Place the closed lip balm tube upside-down into the water for 2–5 minutes. The trapped heat softens the balm internally. Remove, wipe dry, and try advancing the stick.
- Hairdryer Method: Hold a hairdryer on low heat 6–8 inches from the tube, rotating it evenly for 30–60 seconds. Stop before the plastic feels too hot. Test twist function immediately after.
- Warm Towel Wrap: Soak a washcloth in hot water, wring it out, and wrap it around the lower half of the tube for 2–3 minutes. Reapply warmth if needed.
Adding Natural Oils to Restore Smoothness
If your lip balm has lost its glide or feels gritty, reintroducing moisture can improve texture. This method works best when the balm can be partially removed or accessed directly.
Using a sterilized pin or needle, gently lift the top layer of the dried balm. Add 1–2 drops of a lightweight, skin-safe oil such as:
- Jojoba oil (closest to human sebum)
- Sweet almond oil
- Coconut oil (use sparingly—it solidifies below 76°F)
- Castor oil (thicker, ideal for very dry formulas)
Allow the oil to absorb for 10–15 minutes, then use the heating methods above to help distribute it evenly through the balm. Once melted and mixed, let it cool upright to maintain shape.
This technique is particularly useful for medicated or SPF lip balms where replacing the entire product would mean losing sun protection or healing agents like menthol or lanolin.
When Not to Add Oil
Avoid introducing external oils into products containing sunscreen filters or preservatives unless you plan to use them quickly. Adding oil may dilute UV protection or disrupt pH balance, reducing efficacy. In these cases, rely solely on heat restoration.
Do’s and Don’ts of Lip Balm Revival
| Do’s | Don’ts |
|---|---|
| Use indirect, gentle heat (hot water, warm cloth) | Expose to open flame or boiling water |
| Add oils only if balm is very dry and will be used soon | Overfill with oil—this can make balm too greasy |
| Store revived balm in a cool, dark place | Leave it in a hot car or sunny windowsill |
| Clean applicator surface before and after revival | Use dirty tools that could introduce bacteria |
| Label revived balms if storing long-term | Assume all old balms are safe—check for rancid smell first |
Mini Case Study: Reviving a Winter-Only Lip Balm
Sarah, a nurse from Minnesota, kept a beloved lavender-scented beeswax lip balm in her winter coat pocket each season. After storing it in a drawer during spring and summer, she found it completely immobile the following December—despite knowing there was still product inside. She tried twisting forcefully, which only caused the mechanism to slip.
Following the hot water bath method, she placed the tube upside-down in a cup of hot tap water for four minutes. Upon removal, she noticed slight movement when twisting. She repeated the process once more, then applied a single drop of jojoba oil to the surface using a clean toothpick. After another brief warm soak, the balm advanced smoothly and glided evenly across her lips.
Sarah now stores the balm in a small fabric pouch inside her medicine cabinet during off-seasons and performs a quick heat refresh before first use each winter. Her balm lasted three full seasons without replacement.
Alternative Solutions When the Tube Is Sealed
Some lip balm designs don’t allow removal of the cartridge. In these cases, focus on external manipulation and controlled melting:
- Roll Between Palms: Rub the tube vigorously between your hands for 1–2 minutes. Body heat often softens the core enough to restart movement.
- Gravity-Assisted Melting: Leave the tube upside-down in a warm area (e.g., near a radiator or in a closed car on a sunny day) for several hours. Combine with occasional gentle twists.
- Freeze-and-Thaw Trick (for separation): If oils have pooled at the top, freeze the balm for 30 minutes, then apply heat. This can help re-emulsify separated layers.
Frequently Asked Questions
Can I reuse an empty-looking tube by refilling it?
Yes—with caution. If you're craft-inclined, you can clean out old residue with warm water and rubbing alcohol, then pour in homemade lip balm using melted beeswax, oil, and vitamin E. Ensure the new mixture cools fully before use. Note: Not all tubes are designed for refilling, and leakage may occur.
How long does revived lip balm last?
If properly stored, revived balm can remain usable for 3–6 months. Discard if it develops an off smell, changes color significantly, or irritates your skin. Always check expiration dates; revival doesn’t extend shelf life beyond 12–18 months post-manufacture for most formulas.
Is it safe to revive medicated or SPF lip balm?
Generally yes, as long as you avoid overheating. Active ingredients like phenol, menthol, or titanium dioxide can degrade above 120°F (49°C). Stick to low-heat methods and avoid adding foreign substances. If in doubt, replace SPF balms every 6–12 months regardless.
Checklist: How to Successfully Revive Dry Lip Balm
- ☐ Assess whether the balm is truly empty or just stuck
- ☐ Try warming the tube with hot water or a warm cloth
- ☐ Gently twist while warm to test mobility
- ☐ If accessible, add 1–2 drops of natural oil to dry surface
- ☐ Reheat to blend added oil (if used)
- ☐ Cool upright to reset shape
- ☐ Label and store in a cool, dark place
- ☐ Monitor for signs of spoilage before continued use
Final Thoughts: Waste Less, Care More
Reviving dry lip balm is more than a clever hack—it’s a small act of mindful consumption. With minimal effort and everyday tools, you can extend the life of a personal care item that might otherwise end up in the trash. These techniques reflect a broader shift toward sustainable habits: repairing instead of replacing, understanding product behavior, and treating cosmetics as valuable resources rather than disposable conveniences.
Next time you encounter a stubborn lip balm, pause before discarding it. Apply heat, patience, and a bit of know-how. You might just rediscover a trusted companion for chapped lips and cold days ahead.


 浙公网安备
33010002000092号
浙公网安备
33010002000092号 浙B2-20120091-4
Comments
No comments yet. Why don't you start the discussion?