
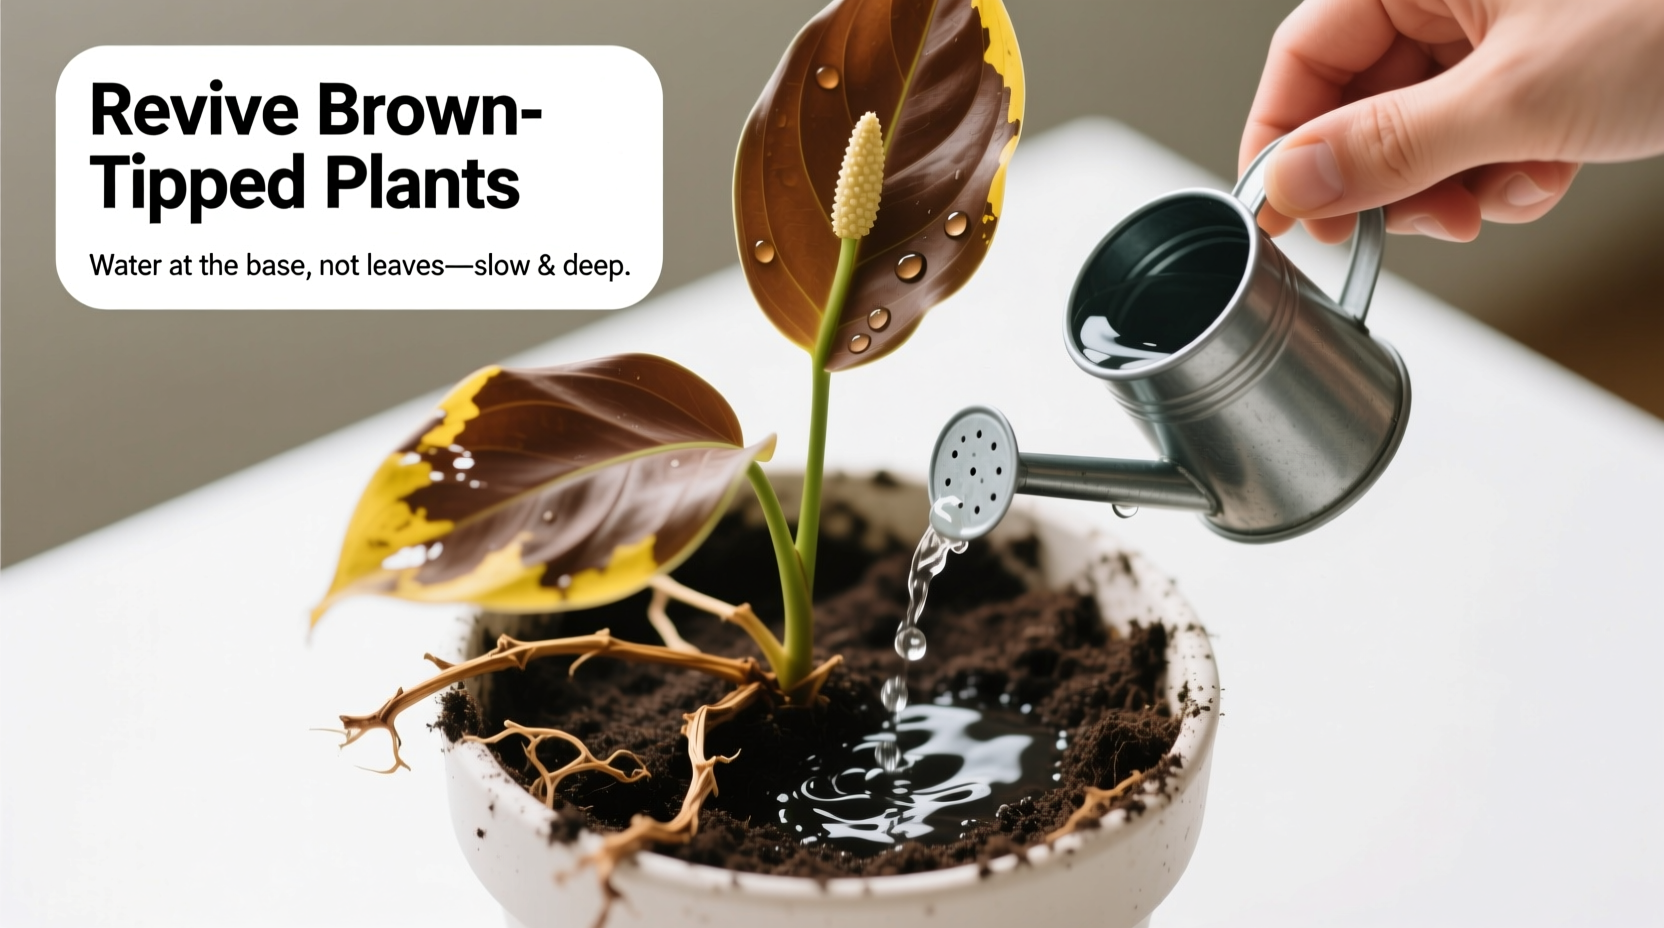
Brown leaf tips are one of the most common signs of distress in indoor plants. While they may look alarming, they don’t necessarily mean your plant is beyond saving. In fact, in many cases, a few adjustments—especially to your watering habits—can bring your green companion back to life. The key lies not just in how much you water, but in how consistently and thoughtfully you do it. Understanding the root causes behind browning tips allows you to apply targeted solutions that go beyond surface-level fixes.
This guide walks you through proven, science-backed watering methods that address the underlying issues behind dry, crispy leaf edges. From identifying overwatering versus underwatering to mastering moisture balance, you’ll learn practical steps to revive struggling plants and keep them thriving long-term.
Understanding Why Houseplant Tips Turn Brown
Brown tips on houseplants are rarely caused by a single factor. More often, they result from a combination of environmental stressors, with improper watering at the center of most cases. When a plant’s roots can't absorb water efficiently—or when the plant loses more moisture than it can replace—the leaf margins begin to dry out. These areas are furthest from the vascular system and thus the first to show signs of dehydration.
Common contributors include:
- Inconsistent watering: Alternating between drought and flood stresses root function.
- Low humidity: Especially problematic in heated or air-conditioned homes during winter.
- Salt or mineral buildup: Tap water containing fluoride, chlorine, or excess minerals accumulates in soil over time.
- Poor drainage: Soggy soil leads to root rot, impairing the plant’s ability to take up water.
- Root binding: Overcrowded roots in small pots struggle to retain moisture.
Before making any changes, assess the current state of your plant. Gently remove it from its pot to inspect the roots. Healthy roots are firm and white or light tan. If they’re mushy, dark, or smell foul, root rot is likely present and must be addressed before recovery can occur.
The Right Way to Water: A Step-by-Step Revival Plan
Reviving a plant with brown tips starts with re-establishing a balanced watering routine. Follow this timeline-based approach to gradually restore hydration without shocking the plant.
- Day 1: Assess and prepare
Remove the plant from its pot. Shake off old soil and prune away any rotten or dead roots with sterilized shears. If more than half the roots are damaged, trim affected foliage proportionally to reduce stress on the remaining root system. - Day 2: Repot if necessary
Choose a pot only 1–2 inches larger in diameter than the previous one, with adequate drainage holes. Use a well-draining potting mix suited to your plant type (e.g., cactus mix for succulents, peat-based for tropicals). - Day 3: Bottom-water to rehydrate gently
Place the plant in a shallow tray of room-temperature, filtered, or distilled water (about 1–2 inches deep). Let it sit for 20–45 minutes, allowing soil to absorb moisture upward. This method prevents surface saturation while encouraging deeper root growth. - Day 4–7: Monitor and drain
After bottom watering, let excess water drain completely. Do not let the pot sit in standing water. Wait until the top 1–2 inches of soil feel dry before considering another watering. - Week 2 onward: Establish rhythm
Begin a consistent schedule based on actual soil moisture—not the calendar. Check soil depth weekly with your finger or a wooden skewer. Water only when needed, using the same bottom-up technique.
This gradual process helps damaged roots recover without drowning them. It also trains the plant to develop deeper, healthier root systems over time.
Water Quality Matters: What You Pour In Affects Plant Health
Not all water is created equal. Tap water often contains additives like fluoride and chlorine, which can accumulate in soil and cause tip burn—especially in sensitive species like spider plants, dracaenas, and peace lilies.
To minimize chemical exposure:
- Let tap water sit uncovered for 24 hours before use to allow chlorine to evaporate.
- Use filtered or distilled water for highly sensitive plants.
- Occasionally flush the soil by slowly running water through the pot until it drains freely from the bottom. This removes salt buildup and prevents toxicity.
“Chronic browning of leaf tips in otherwise healthy plants is often a sign of water quality issues, not disease.” — Dr. Linda Harper, Urban Horticulturist, University of Vermont Extension
Flushing should be done every 3–4 months, especially if you notice white crust forming on the soil surface—a telltale sign of mineral accumulation.
Do’s and Don’ts of Watering Plants with Brown Tips
| Do | Don’t |
|---|---|
| Check soil moisture before watering | Stick to a rigid weekly schedule regardless of conditions |
| Use room-temperature water to avoid shock | Use cold or hot tap water directly from the faucet |
| Water deeply but infrequently | Give small sips of water daily (leads to shallow roots) |
| Allow full drainage after watering | Leave plants sitting in saucers of water |
| Mist foliage occasionally for humidity-loving plants | Over-mist, which can encourage fungal growth |
A Real Example: Reviving a Spider Plant with Crispy Tips
Jamie, a teacher in Chicago, had a large spider plant that had developed severe brown tips over several months. Despite regular watering, the leaves continued to deteriorate. She assumed she wasn’t giving it enough water and began increasing frequency—sometimes watering twice a week. The problem worsened.
After consulting a local nursery, she learned her tap water was high in fluoride and her pot lacked proper drainage. She took action:
- Repotted the plant into a container with drainage holes using fresh, well-aerated soil.
- Started using filtered water left to sit overnight.
- Switched to bottom watering every 7–10 days, depending on soil dryness.
- Placed the plant near a humidifier during winter months.
Within six weeks, new growth emerged with no browning. Although older leaves retained their damaged tips, the overall health of the plant improved dramatically. Today, it produces vigorous offshoots and has become a centerpiece in her living room.
Jamie’s experience highlights a crucial lesson: more water isn’t always the answer. Often, it’s about better water—and smarter delivery.
Creating a Sustainable Watering Routine
Once your plant shows signs of recovery—such as new green growth or improved leaf turgor—it’s time to focus on maintenance. Prevention is far easier than revival.
Adopt these long-term strategies:
- Label your plants: Note each plant’s preferred moisture level and watering frequency.
- Use self-watering containers cautiously: They work well for consistent hydration but require monitoring to prevent stagnation.
- Group plants with similar needs: Cluster humidity-loving types together to create microclimates.
- Track watering dates: Keep a simple log or use a plant care app to avoid guesswork.
Essential Checklist for Reviving Brown-Tipped Plants
Follow this actionable checklist to ensure you cover all critical steps:
- Inspect roots for rot or overcrowding.
- Prune dead or mushy roots with sterilized tools.
- Choose a pot with drainage; avoid decorative outer pots without holes.
- Use appropriate, well-draining soil for your plant type.
- Start with a bottom-watering session to rehydrate safely.
- Flush soil every 3–4 months to remove mineral buildup.
- Switch to filtered, distilled, or dechlorinated water.
- Monitor soil moisture—not the calendar—for future watering.
- Increase ambient humidity via pebble trays or humidifiers.
- Trim brown tips neatly once plant is stable.
Frequently Asked Questions
Can brown tips go back to green?
No. Once plant tissue dies and turns brown, it cannot regenerate or revert to green. However, correcting the underlying issue will prevent further damage and promote healthy new growth. Trimming the brown portions improves aesthetics but isn’t required for recovery.
How often should I water a plant with brown tips?
There’s no universal frequency. Water only when the top 1–2 inches of soil are dry. This could mean once a week for some plants, every 10–14 days for others. Always test the soil rather than follow a fixed schedule. Overwatering is just as harmful as underwatering.
Is misting enough to fix dry leaf tips?
Misting alone won’t solve chronic browning. While it temporarily raises humidity, the effect is short-lived. For lasting results, combine misting with proper watering, good soil, and reduced chemical exposure. Long-term solutions include using a humidifier or grouping plants together.
Conclusion: Small Changes, Big Results
Reviving a houseplant with brown tips doesn’t require expensive products or advanced gardening skills. It requires observation, patience, and a shift from reactive to proactive care. By refining your watering technique—choosing the right water, applying it correctly, and respecting your plant’s natural rhythms—you restore not just its appearance, but its vitality.
Every plant tells a story through its leaves. Crispy tips are a plea for help, not a death sentence. With the methods outlined here, you have everything you need to turn decline into renewal. Start today: check one plant’s soil, adjust your watering method, and commit to consistency. In a few weeks, you’ll see greener, stronger growth—and a renewed connection to your indoor garden.


 浙公网安备
33010002000092号
浙公网安备
33010002000092号 浙B2-20120091-4
Comments
No comments yet. Why don't you start the discussion?