
Bread is one of the most commonly wasted foods in households worldwide. A loaf that’s perfectly soft and fragrant one day can turn dry, tough, and unappetizing by the next. But before you toss that stale baguette or leftover sandwich roll, consider this: staling isn’t the same as mold or spoilage. In fact, stale bread is often entirely safe to eat—it just needs a little revival.
The good news? You don’t need special equipment or gourmet skills to bring back its texture and warmth. With a few simple techniques grounded in food science and everyday kitchen wisdom, you can transform stale bread into something deliciously usable again. Whether it’s for toast, sandwiches, or side dishes, reviving stale bread saves money, reduces food waste, and stretches your groceries further.
The Science Behind Stale Bread
Understanding why bread goes stale is the first step toward reversing it. Contrary to popular belief, staling isn’t primarily about moisture loss. While dry air can contribute, the main culprit is a process called retrogradation.
When bread bakes, starch molecules absorb water and gelatinize, giving the loaf its soft structure. As it cools and ages, those starches begin to recrystallize, pushing out moisture and making the crumb firm and chewy. This happens fastest at refrigerator temperatures—ironically, storing bread in the fridge accelerates staling.
However, heat can reverse retrogradation temporarily. By reintroducing moisture and applying controlled heat, you can re-gelatinize the starches and restore much of the original texture. The key is doing it gently and precisely.
“Staling is reversible through proper reheating because heat disrupts the crystallized starch network and allows water to be reabsorbed.” — Dr. Susan Brewer, Food Scientist and Professor of Nutrition
Step-by-Step Guide to Reviving Different Types of Bread
Not all breads respond the same way to revival. Crusty loaves like baguettes behave differently than soft sandwich bread or enriched buns. Below is a detailed guide tailored to common types.
1. Crusty Breads (Baguettes, Ciabatta, Sourdough)
These benefit most from steam and high heat, which restores their crisp exterior while softening the interior.
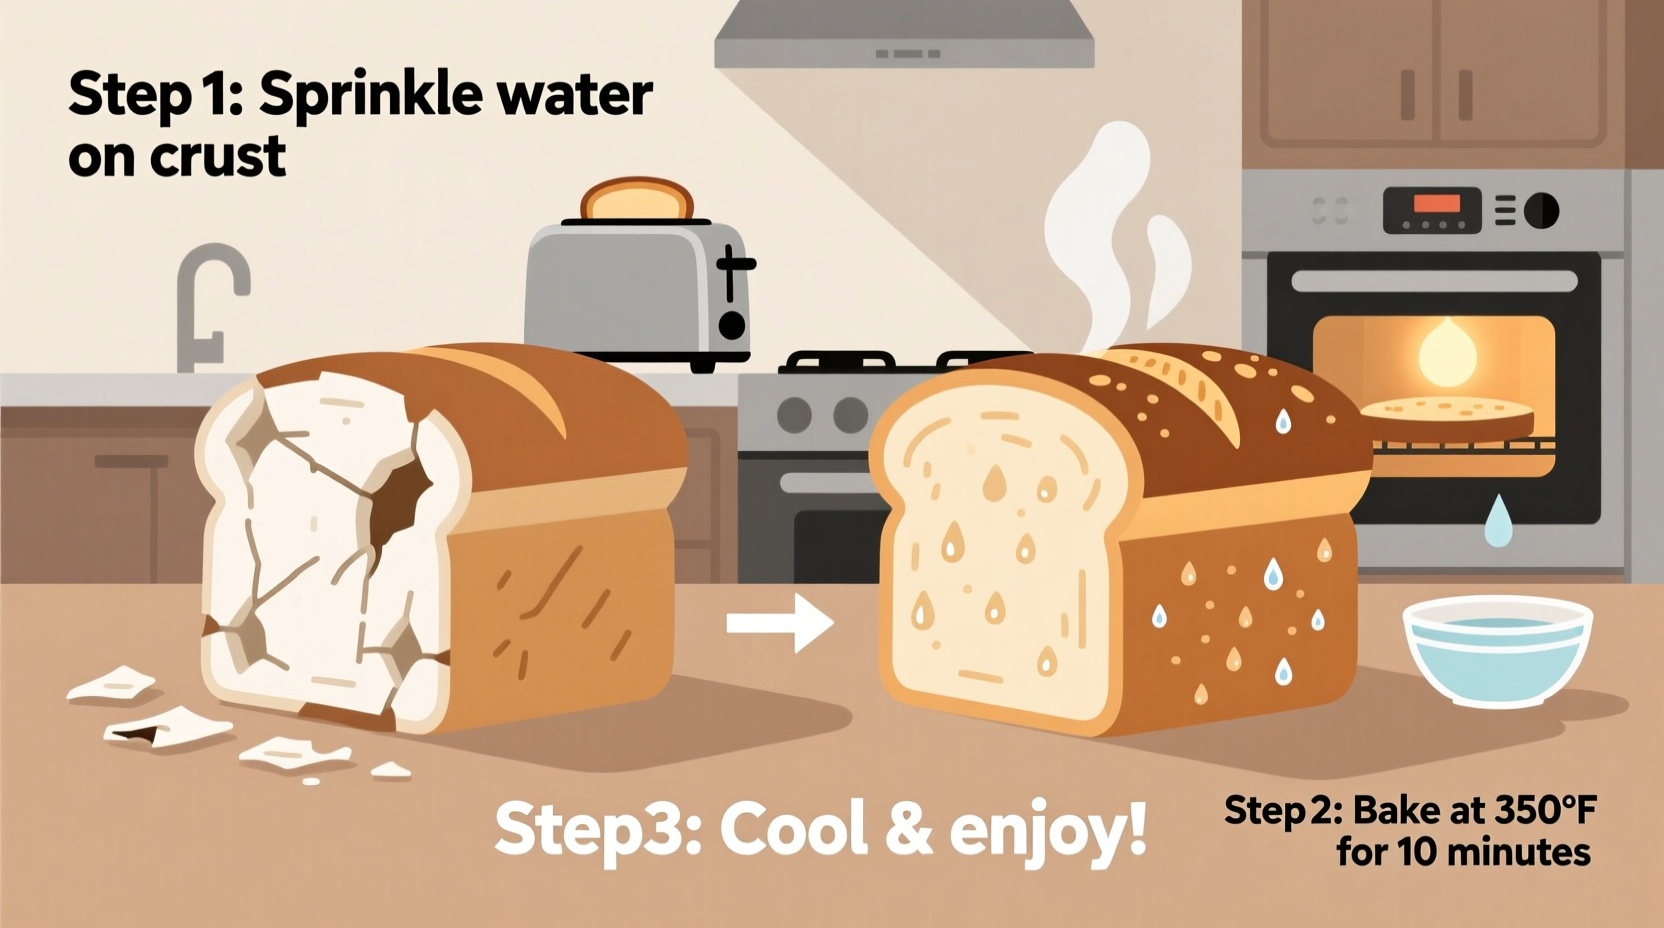
- Preheat your oven to 350°F (175°C).
- Lightly run the loaf under tap water—just enough to dampen the crust. Alternatively, spritz with a spray bottle.
- Wrap the bread loosely in aluminum foil.
- Place in the oven for 10–15 minutes.
- For extra crispness, unwrap and return to the oven for 3–5 minutes.
2. Soft Sandwich Bread
Revival here focuses on restoring softness without drying out edges.
- Dampen a clean kitchen towel with warm water and wring it out thoroughly.
- Wrap individual slices or the entire loaf in the towel.
- Microwave in 15-second bursts until warm and flexible (usually 20–30 seconds total).
- Use immediately for toast or sandwiches.
3. Rolls and Buns
Ideal for burgers or breakfast, these small items heat quickly.
- Place rolls on a microwave-safe plate.
- Cover with a slightly damp paper towel.
- Heat for 10–20 seconds. Check frequently to avoid overheating.
- For oven method: Bake at 300°F (150°C) for 5 minutes wrapped in foil.
4. Bagels
A dense texture means they need more moisture and time.
- Slice the bagel if not already cut.
- Run under water briefly or mist with a spray bottle.
- Place in toaster oven or regular oven at 375°F (190°C) for 4–6 minutes.
- Finish in a toaster for crunch, if desired.
Alternative Uses When Full Revival Isn't Possible
Sometimes bread is too far gone for direct consumption—even after attempted revival. That doesn’t mean it’s useless. Repurposing extends its life meaningfully.
Make Homemade Croutons
Dry, hard bread is perfect for croutons. Cut into cubes, toss with olive oil, garlic, and herbs, then bake at 375°F (190°C) for 12–15 minutes until golden and crisp. Use in salads or soups.
Create Breadcrumbs
Process stale bread in a food processor until fine. Spread on a baking sheet and dry in a low oven (250°F / 120°C) for 20–30 minutes. Store in an airtight container for up to 3 months. Great for coating chicken, thickening sauces, or topping casseroles.
Prepare Bread Pudding or French Toast
Stale bread absorbs custard mixtures better than fresh. For bread pudding, combine cubed bread with eggs, milk, sugar, and spices. Bake until set. For French toast, soak slices in egg-milk mixture before pan-frying.
| Bread Type | Best Secondary Use | Key Benefit |
|---|---|---|
| White Sandwich Loaf | Bread Pudding | Soaks up custard evenly |
| Baguette | Croutons | Naturally crisp when baked |
| Sourdough | Strata or Savory Pudding | Holds shape during baking |
| Brioche | French Toast | Rich flavor enhances dish |
| Rolls/Buns | Breadcrumbs | Uniform size, easy processing |
Storage Tips to Prevent Staling in the First Place
Prevention beats correction. How you store bread dramatically affects its shelf life.
- Room Temperature (Short Term): Keep bread in a cotton bread bag or paper bag inside a cool, dark cupboard. Avoid plastic bags unless used within 24 hours—they trap moisture and promote mold.
- Freezing (Long Term): Slice before freezing for easy portioning. Wrap tightly in foil or freezer-safe wrap, then place in a sealed bag. Thaw at room temperature or toast directly from frozen.
- Avoid the Fridge: Cold temperatures speed up starch recrystallization. Only refrigerate if mold is a serious concern due to humidity—and even then, expect faster textural decline.
“Freezing is the single best method to preserve bread quality over time. It halts staling and prevents microbial growth.” — National Bakery Association, Storage Guidelines Report (2022)
Mini Case Study: Reducing Waste in a Busy Household
The Thompson family of five in Portland, Oregon, used to go through two loaves of bread weekly—mostly for school lunches. Within months, they realized they were throwing away nearly one-third of each loaf due to staleness.
After reading about bread revival techniques, they implemented a few changes: slicing and freezing half of each new loaf immediately, using stale ends for weekend croutons, and microwaving older slices with a damp towel before packing lunches.
Within six weeks, their bread waste dropped to zero. They also saved approximately $120 annually on replacement loaves and reported improved satisfaction with lunch textures. “I didn’t think a stale slice could taste fresh again,” said Sarah Thompson. “Now my kids actually eat their sandwiches instead of trading them at school.”
Checklist: How to Handle Stale Bread Like a Pro
Keep this checklist handy for quick reference whenever you face a stale loaf:
- ✅ Assess freshness: No mold? It’s likely salvageable.
- ✅ Choose the right method: Oven for crusty bread, microwave for soft types.
- ✅ Add moisture: Dampen crust or cover with a wet towel.
- ✅ Heat gently: Avoid high power or long durations to prevent drying.
- ✅ Use revived bread immediately: Texture degrades upon cooling.
- ✅ Repurpose if needed: Make croutons, breadcrumbs, or baked dishes.
- ✅ Freeze surplus: Prevent future staling by freezing unused portions.
Frequently Asked Questions
Can you revive bread that’s been frozen?
Yes. Frozen bread thaws well and can be revived using the same methods. For best results, thaw at room temperature first, then refresh in the oven or microwave. You can also toast or bake directly from frozen—add 1–2 minutes to heating time.
Why does my revived bread still feel dry?
Likely causes include insufficient moisture during heating or overexposure to heat. Always introduce water—either via spraying, wrapping in a damp cloth, or placing a bowl of water in the oven. Also, monitor time closely; 30 extra seconds in the microwave can turn soft bread leathery.
Is it safe to eat bread that smells stale but has no mold?
Yes. Staleness affects texture and aroma but not safety. If there’s no visible mold, off-putting odor (like sourness or mustiness), or slimy texture, the bread is safe to revive and consume. However, always inspect carefully—some molds are microscopic.
Conclusion: Turn Waste Into Worth
Reviving stale bread isn’t just a kitchen hack—it’s a mindset shift toward mindful consumption. Every loaf represents resources, labor, and time. Discarding it prematurely undermines sustainability and personal economy.
With the techniques outlined here, you gain control over your food lifecycle. From precise oven methods to creative repurposing, you can consistently rescue bread from the trash bin and return it to the table. These practices require minimal effort but deliver tangible benefits: fresher meals, lower grocery bills, and reduced environmental impact.


 浙公网安备
33010002000092号
浙公网安备
33010002000092号 浙B2-20120091-4
Comments
No comments yet. Why don't you start the discussion?