
Bananas are a staple in many baked goods—banana bread, muffins, pancakes, and cakes all rely on their natural sweetness and creamy texture. But what happens when your recipe calls for ripe, spotty bananas and all you have are firm, green-tipped ones? Waiting days for nature to take its course isn’t always an option. The challenge lies in speeding up ripening while preserving the banana’s integrity so it doesn’t turn into a watery, overcooked mess in your batter.
The key is understanding the science behind ripening: ethylene gas. This naturally occurring plant hormone triggers fruit to soften and sweeten. By harnessing this process strategically—and avoiding common mistakes—you can transform underripe bananas into perfectly ripe baking ingredients in hours, not days, without sacrificing texture.
The Science of Banana Ripening
Bananas, like many climacteric fruits, continue to ripen after harvest due to increased respiration and ethylene production. Ethylene acts as a signaling molecule, prompting enzymes to break down starches into sugars, degrade pectin (which softens cell walls), and change pigments from green to yellow and eventually brown.
When you're baking, you want peak ripeness: high sugar content, deep flavor, and enough softness to mash smoothly—but not so soft that the fruit breaks down during mixing or contributes excess moisture. Overripened bananas can make baked goods dense or soggy, especially if they've been exposed to heat too rapidly.
Controlling the environment—temperature, airflow, and ethylene concentration—is essential to accelerate ripening without pushing bananas past their ideal state.
“Ripening is a biochemical process that can be sped up safely with warmth and confinement, but overheating causes cellular collapse.” — Dr. Lila Torres, Postharvest Physiologist, University of California Cooperative Extension
Best Methods to Speed Up Ripening (Without Mushiness)
Not all quick-ripening techniques are equal. Some cause uneven softening or scald the peel, leading to internal breakdown. Below are four reliable methods tested by home bakers and food scientists alike, ranked by effectiveness and consistency.
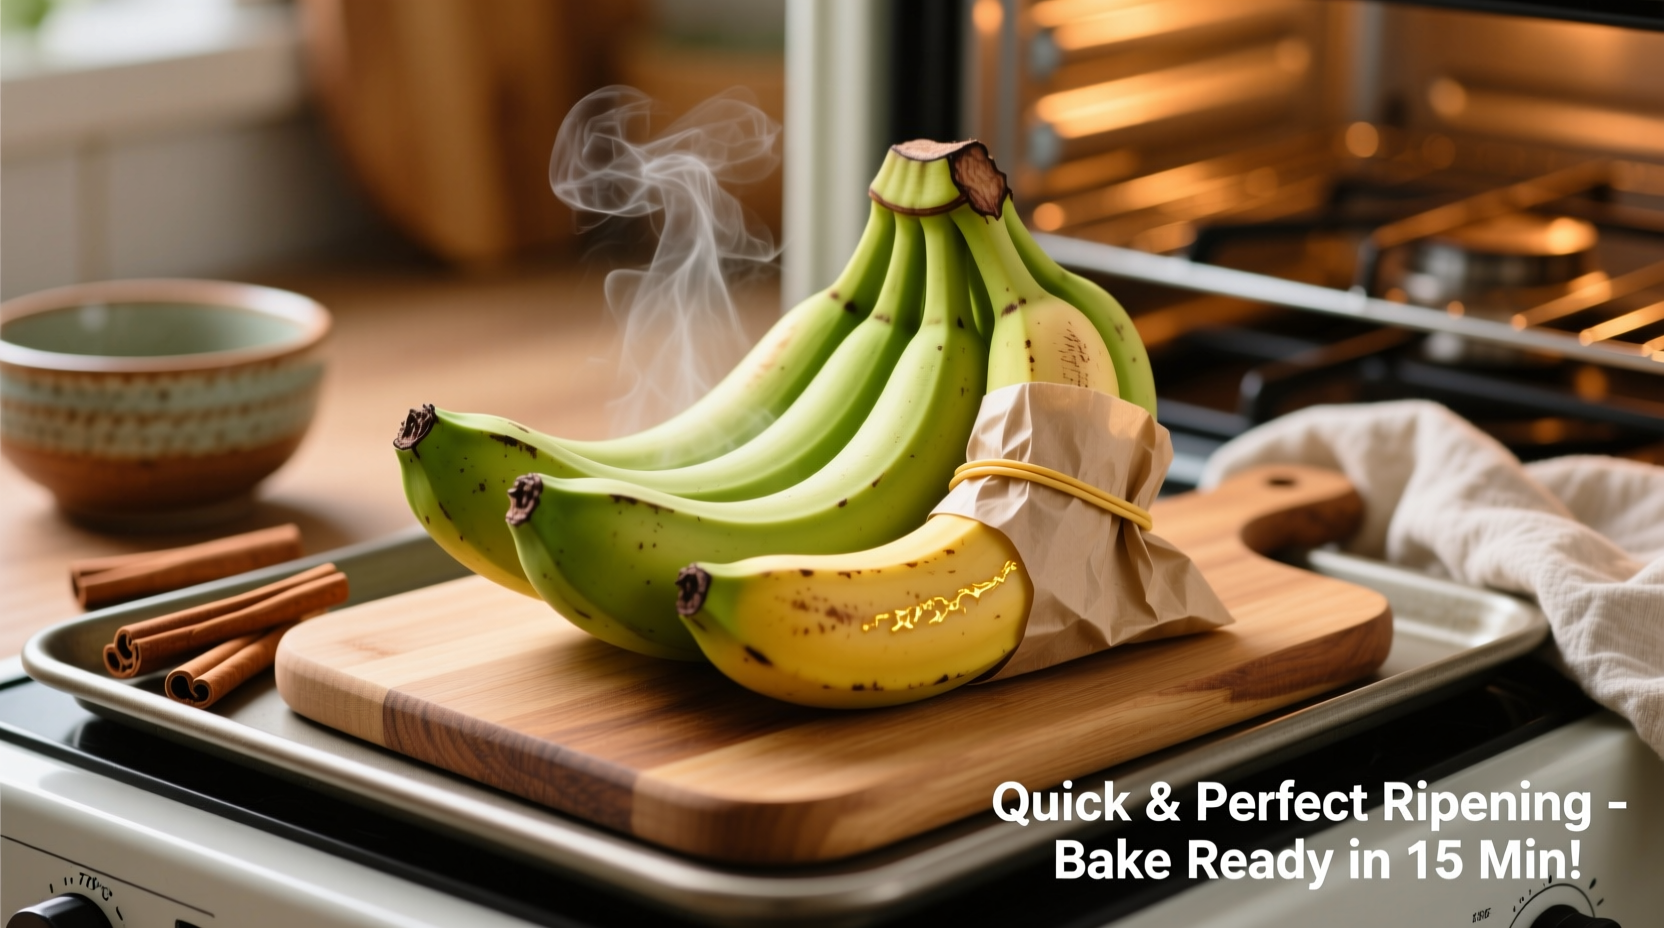
1. Oven-Ripening at Low Heat
This method mimics the effect of prolonged sun exposure without boiling the fruit inside its skin. It gently encourages starch-to-sugar conversion and softening while keeping structure intact.
- Preheat oven to 175°F (80°C).
- Place unpeeled bananas on a baking sheet lined with parchment paper.
- Bake for 20–30 minutes, checking every 10 minutes. They should darken to deep yellow or light brown with slight softness when gently pressed.
- Remove and let cool completely before peeling and mashing.
This technique typically yields bananas ready for immediate use in recipes requiring mashed fruit. The interior becomes creamy but not wet, with enhanced sweetness comparable to naturally ripened counterparts.
2. Paper Bag + Apple Method
A classic trick used by grocers and chefs: trapping ethylene gas around the bananas. Adding a high-ethylene producer like an apple or tomato intensifies the effect.
- Place bananas and one apple (or a few tomato slices) inside a brown paper bag.
- Fold the top loosely to allow minimal airflow while retaining gas.
- Leave at room temperature (ideally 68–77°F).
Ripening occurs within 12–24 hours. Check periodically; remove bananas once they reach desired yellow-brown stage. Avoid plastic bags—they trap moisture and encourage mold.
3. Microwave (Limited Use Only)
The microwave is often suggested online, but it's risky. High heat bursts cells, releasing water and creating mush. However, a modified approach can work in emergencies.
| Method | Time | Result | Best For |
|---|---|---|---|
| Oven at 175°F | 20–30 min | Evenly softened, sweet, no mush | All baking applications |
| Paper Bag + Apple | 12–24 hr | Natural texture, full flavor development | Overnight prep |
| Boiling Water Bath | 10–15 min | Skin blackens; flesh warm and soft | Immediate use only |
| Full-Power Microwave | 1–2 min | Mushy, cooked edges, watery | Avoid unless desperate |
To minimize damage if using microwave:
- Prick skins with a fork in several places.
- Heat on 30% power for 1-minute intervals, checking after each.
- Stop when slightly soft but still firm.
- Cool before use.
Even then, expect less ideal texture than other methods.
4. Boiling Water Immersion
An underrated but fast method: submerging unpeeled bananas in hot (not boiling) water accelerates enzymatic activity.
- Heat water to 160–180°F (70–82°C)—just below simmering.
- Immerse bananas for 10–15 minutes.
- Drain and cool before peeling.
The peel turns dark, but the flesh remains cohesive and sweetens noticeably. Ideal when you need results within an hour and lack oven space.
How to Tell When Bananas Are Perfectly Ripe for Baking
Visual cues matter, but touch and smell provide more accurate signals. Here’s how to assess readiness:
- Color: Bright yellow with scattered brown speckles (“sugar spots”) indicates optimal ripeness. Fully brown is fine if not slimy.
- Feel: Gently press near the stem. Should yield slightly but resist indentation. Too soft = overripe.
- Smell: Sweet, floral aroma at the stem end. Sour or fermented notes mean spoilage.
- Peelability: Skin should come off cleanly without clinging or stringy resistance.
Common Mistakes That Lead to Mushy Bananas
Speed shouldn’t compromise quality. These errors sabotage texture even if ripening seems successful:
- Using high oven temperatures: Above 180°F starts actual cooking, rupturing cell walls.
- Leaving bananas in sealed plastic bags: Traps moisture and promotes fermentation.
- Skipping the cooling phase: Warm bananas release more liquid into batter, affecting consistency.
- Relying solely on color: A black peel doesn’t guarantee ripeness—sometimes it’s just heat-damaged.
- Mashing immediately after heating: Let them rest 15–20 minutes post-heating to stabilize moisture distribution.
Mini Case Study: Last-Minute Banana Bread for a School Bake Sale
Sarah had promised homemade banana bread for her daughter’s school fundraiser the next morning. On Friday night, she realized her bananas were barely yellow. With no time to wait, she tried the low-heat oven method.
She preheated her oven to 175°F, placed three unpeeled bananas on a tray, and baked them for 25 minutes. After cooling, she found the insides golden-yellow, aromatic, and easy to mash—without excess juice. Her bread rose evenly, tasted deeply caramelized, and received rave reviews.
“I was worried it would taste ‘fake’ or be too wet,” Sarah said. “But no one could tell they weren’t naturally ripe. The texture was perfect.”
This real-world example shows that controlled heat, applied carefully, delivers results indistinguishable from slow ripening.
Step-by-Step Guide: Quick-Ripen Bananas in Under 30 Minutes
Follow this timeline when you’re short on time but serious about quality:
- Minute 0: Preheat oven to 175°F (80°C). Line a baking sheet with parchment.
- Minute 5: Place firm, yellow-green bananas on tray. Do not peel.
- Minute 6–25: Bake for 20–30 minutes. Check at 20 minutes by gently squeezing one. Target: slight give, skin turning brown.
- Minute 26: Remove from oven. Let cool for 15 minutes on counter—this allows internal moisture to redistribute.
- Minute 41: Peel and mash with a fork or potato masher. Use directly in your recipe.
Total time: ~45 minutes, including cooling. Result: bakery-quality texture and sweetness.
Do’s and Don’ts of Fast Banana Ripening
| Do’s | Don’ts |
|---|---|
| Use low heat (under 180°F) | Use full-power microwave settings |
| Combine with apples in paper bags | Store in airtight plastic containers |
| Cool bananas before peeling | Peel or mash while still hot |
| Check frequently during heating | Walk away and overbake |
| Freeze overripe bananas for later use | Discard brown bananas unnecessarily |
FAQ
Can I use green bananas for baking?
No. Green bananas are high in starch and low in sugar, resulting in bland, gummy textures. They also resist mashing and won’t caramelize properly during baking. Wait until they’re at least yellow before attempting any ripening method.
Why did my quick-ripened bananas taste bitter?
Bitterness usually results from overheating. Temperatures above 180°F can degrade compounds in the fruit, producing off-flavors. It may also occur if the banana was already starting to spoil before treatment. Always start with fresh, undamaged fruit.
Can I speed up ripening in the fridge?
No. Cold temperatures halt ethylene production and slow ripening. Refrigeration is only suitable for slowing decay *after* bananas are ripe. Never store unripe bananas in the fridge.
Final Tips for Baking Success
Once your bananas are ripe, handle them properly to maintain quality:
- Mash just before incorporating into batter to prevent oxidation.
- If using frozen bananas, thaw completely and drain excess liquid to avoid soggy results.
- For richer flavor, lightly toast nuts or spices before adding to banana-based batters.
- Always taste your banana mash before mixing—it should be sweet and fragrant, not sour or flat.
Conclusion
Ripening bananas quickly for baking doesn’t require magic—just an understanding of fruit physiology and careful control of environment. Whether you choose low-heat oven treatment, ethylene trapping with apples, or a hot water bath, the goal remains the same: accelerate natural processes without crossing into cooking territory. With these proven techniques, you’ll never miss a baking opportunity due to unripe fruit again.


 浙公网安备
33010002000092号
浙公网安备
33010002000092号 浙B2-20120091-4
Comments
No comments yet. Why don't you start the discussion?