
Maintaining your vehicle’s tires isn’t just about safety—it directly impacts fuel efficiency, handling, and long-term cost. Tire rotation is a simple yet often overlooked maintenance task that can significantly extend tire life. When done correctly and on schedule, it ensures even wear across all four tires. Beyond rotation, knowing when tires have reached the end of their usable life is equally important. This guide walks you through rotating your tires at home safely and recognizing the key signs that replacement is due.
Why Tire Rotation Matters
Tires don’t wear evenly. Front tires typically bear more load during steering and braking, leading to faster tread wear compared to rear tires. In front-wheel-drive vehicles, the front tires also handle propulsion, accelerating wear. Without rotation, this imbalance shortens overall tire lifespan and can compromise vehicle stability, especially in wet or icy conditions.
Regular rotation—typically every 5,000 to 7,500 miles—helps distribute wear more uniformly. This not only prolongs tire life but also maintains consistent traction and improves ride comfort. The National Highway Traffic Safety Administration (NHTSA) estimates that proper tire maintenance, including rotation, can reduce the risk of tire-related crashes by up to 40%.
Step-by-Step Guide to Rotating Tires at Home
Rotating your tires at home is feasible with basic tools and a safe workspace. Follow this detailed sequence to do it correctly and safely.
- Gather Your Tools: You’ll need a jack, lug wrench, torque wrench, wheel chocks, and jack stands. A floor jack is preferable over a scissor jack for better control.
- Park on Level Ground: Choose a flat, hard surface like a concrete driveway. Engage the parking brake and place wheel chocks behind the tires that will remain on the ground.
- Loosen Lug Nuts Slightly: Before lifting the car, use the lug wrench to break the tension on the lug nuts of all four wheels. Turn them counterclockwise just enough to loosen—don’t remove them yet.
- Lift the Vehicle: Position the jack under the manufacturer’s recommended lift point (usually marked near the frame rails). Raise one corner at a time, never lifting the entire vehicle at once.
- Secure with Jack Stands: Once lifted, place jack stands under reinforced points for added safety. Never rely solely on the jack.
- Remove Wheels: Now fully unscrew and remove the lug nuts, then take off the wheels.
- Follow the Correct Rotation Pattern: The pattern depends on your vehicle type:
- Rear-Wheel Drive (RWD): Move rear tires to the front on the same side; move front tires to the rear, crossing to the opposite side.
- Front-Wheel Drive (FWD): Move front tires to the rear on the same side; rear tires go to the front, crossing sides.
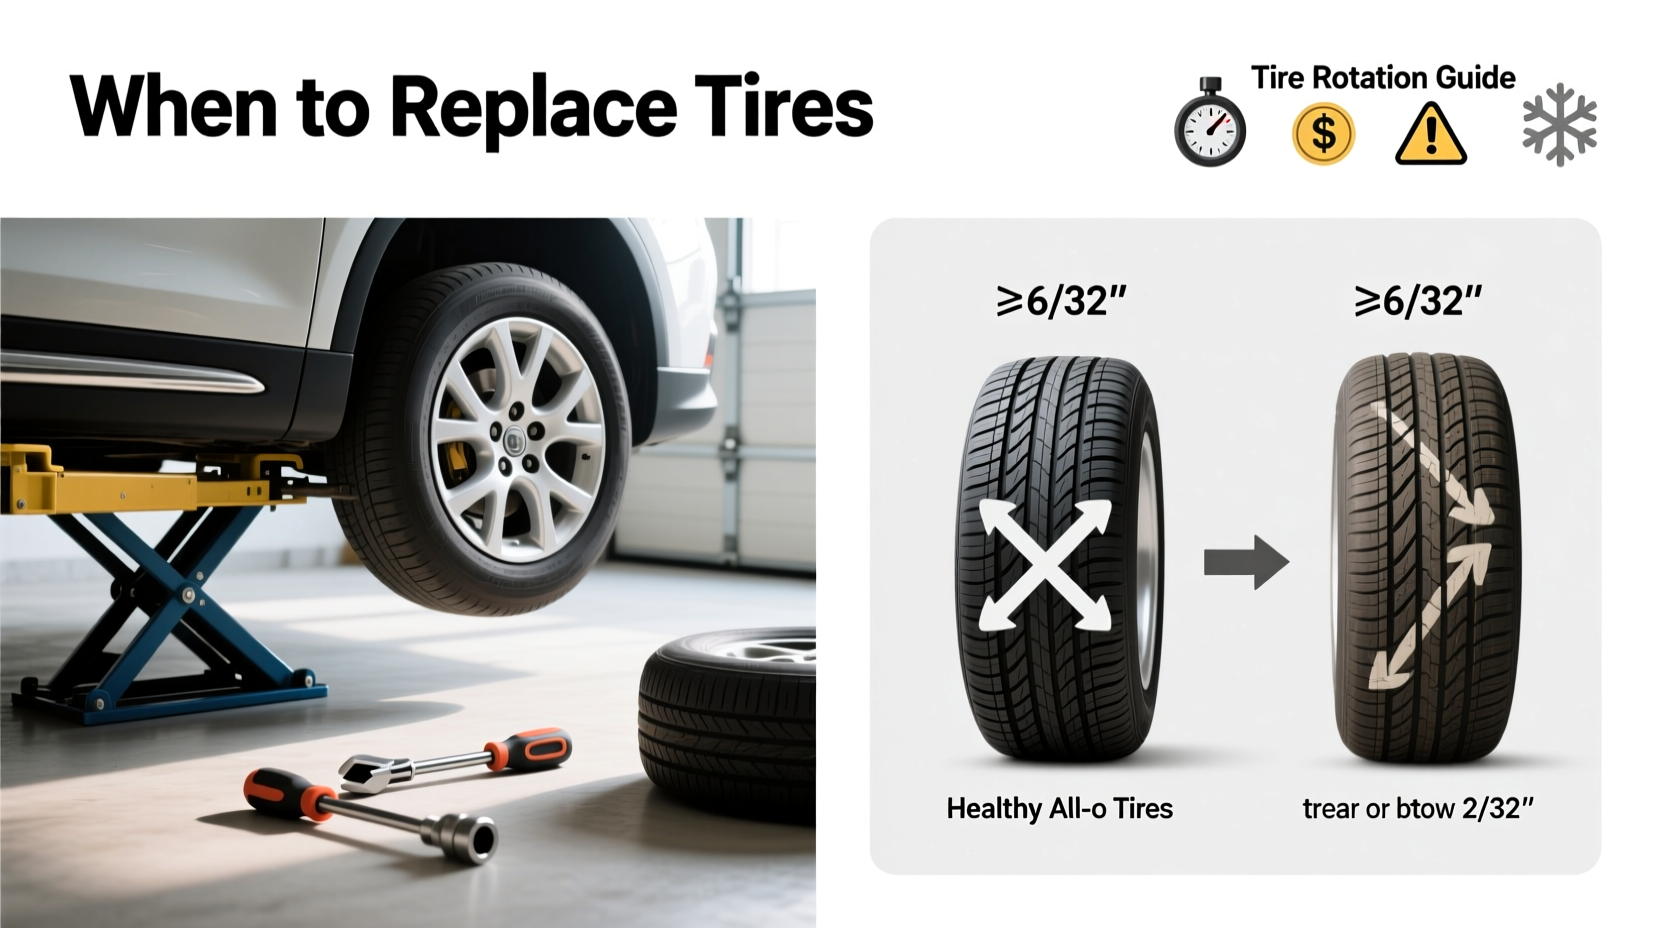
- All-Wheel Drive (AWD): Use an “X-pattern” rotation—swap diagonally.
- Different Sized Tires (front vs. rear): Cannot be rotated side-to-side. Only switch front-to-rear on the same side if permitted by the manufacturer.
- Reinstall Wheels: Place each tire back on its hub, hand-tighten the lug nuts, then lower the vehicle slightly so the tire touches the ground but doesn’t bear full weight.
- Tighten Lug Nuts in a Star Pattern: Use the torque wrench to tighten lug nuts gradually in a crisscross pattern to the manufacturer’s specification (usually 80–100 ft-lbs).
- Lower the Vehicle Completely: Remove jack stands and fully lower the car. Double-check lug nut tightness once the vehicle is on the ground.
When to Replace Tires: Key Indicators
Even with regular rotation, tires eventually wear out. Knowing when to replace them prevents dangerous blowouts and loss of control. Here are the most reliable indicators:
- Tread Depth Below 2/32 Inches: This is the legal minimum in most states. Use the penny test: insert a penny into the tread with Lincoln’s head down. If you can see the top of his head, it’s time to replace the tire.
- Uneven Wear Patterns: Cupping, feathering, or bald spots suggest alignment issues, improper inflation, or worn suspension parts—even if overall tread seems adequate.
- Cracks or Bulges in Sidewalls: Dry rot from UV exposure or impact damage can create weak spots. Any bulge indicates internal structural failure and requires immediate replacement.
- Vibration at Highway Speeds: While sometimes due to balance issues, persistent vibration after balancing may signal internal belt separation.
- Age Over Six Years: Rubber degrades over time regardless of tread. Check the DOT code on the sidewall—the last four digits indicate week and year of manufacture (e.g., “2320” = 23rd week of 2020). Most manufacturers recommend replacement after six years, even if tread looks good.
“Tire age is a silent killer. Many drivers assume tread depth is the only factor, but chemical breakdown starts from day one.” — Carlos Mendez, ASE-Certified Master Technician
Checklist: Pre-Rotation & Replacement Readiness
Use this checklist before every tire rotation or inspection to ensure nothing is missed:
- ✅ Confirm vehicle is on level, stable ground
- ✅ Apply parking brake and use wheel chocks
- ✅ Inspect tires for cuts, punctures, or embedded debris
- ✅ Measure tread depth at multiple points per tire
- ✅ Check sidewalls for cracking, bubbling, or dry rot
- ✅ Verify correct tire pressure using a calibrated gauge
- ✅ Review DOT date code for tire age
- ✅ Identify correct rotation pattern based on drivetrain
- ✅ Torque lug nuts to manufacturer specs after reinstallation
- ✅ Record mileage and date of rotation for future reference
Common Mistakes to Avoid
Even experienced DIYers make errors that compromise safety or effectiveness. Watch out for these pitfalls:
| Mistake | Why It’s Risky | Better Approach |
|---|---|---|
| Skipping torque specifications | Over-tightening strips threads; under-tightening risks wheel detachment | Always use a torque wrench calibrated to your vehicle’s specs |
| Rotating without checking alignment | Alignment issues cause rapid uneven wear despite rotation | Inspect for pulling or steering wheel vibration; get alignment checked annually |
| Ignoring spare tire condition | Spare may be cracked, underinflated, or expired when needed | Inspect spare during each rotation, especially if full-size |
| Using wrong rotation pattern | Can worsen wear or damage AWD systems | Consult owner’s manual—don’t assume standard patterns apply |
| Not cleaning hub and wheel surfaces | Debris causes improper seating and vibration | Wipe contact surfaces clean before reinstalling wheels |
Real Example: Sarah’s Near-Miss on I-75
Sarah, a delivery driver from Ohio, had been rotating her SUV’s tires every 6,000 miles for three years. She prided herself on maintenance—until she noticed a slight wobble at 65 mph. She pulled over and inspected the tires. One rear tire showed deep tread, but upon closer look, she found hairline cracks along the inner sidewall. She hadn’t checked for dry rot before. A local mechanic confirmed the tire was compromised due to winter salt exposure and age (it was seven years old).
Had she continued driving, the tire could have failed catastrophically. Instead, she replaced both rear tires and began inspecting for sidewall damage during every rotation. Her experience highlights that tread depth alone isn’t enough—comprehensive inspection saves lives.
Frequently Asked Questions
Can I rotate my tires too often?
While frequent rotation won’t harm tires, doing it more than every 5,000 miles offers diminishing returns unless you drive aggressively or on rough terrain. Stick to the 5,000–7,500 mile range unless your manual suggests otherwise.
Do new tires need to be broken in before rotation?
Yes. Most manufacturers recommend waiting until 500–1,000 miles before first rotation. This allows the tread to settle and any manufacturing oils to wear off, ensuring optimal grip during initial use.
Should I balance tires when rotating?
It’s not required every time, but if you notice vibration or haven’t balanced in over 10,000 miles, combining rotation with balancing is cost-effective and improves ride quality.
Final Tips for Long-Term Tire Health
Rotation and replacement timing are critical, but supporting habits make a difference. Keep tires properly inflated—check monthly, as underinflation increases rolling resistance and wear. Rotate seasonally if you live in areas with extreme temperature swings. Store off-season tires in cool, dark places away from ozone sources like motors or heaters.
For performance or high-mileage drivers, consider professional alignment checks twice a year. And always keep a tire repair kit and portable air compressor in your trunk—not as a substitute for replacement, but as a temporary solution to avoid roadside delays.
“The best tire care routine combines proactive rotation, vigilant inspection, and timely replacement. It’s not about doing everything perfectly—it’s about consistency.” — Lena Patel, Automotive Safety Consultant
Take Control of Your Vehicle’s Safety
Rotating your tires at home is a skill that pays dividends in safety, savings, and performance. With the right tools and knowledge, you can perform this essential task confidently and accurately. More importantly, learning to spot the subtle signs of tire aging and wear empowers you to act before problems escalate.
Don’t wait for a warning light or a blowout to take action. Start today: inspect your tires, mark your next rotation date, and commit to a maintenance rhythm that protects you and your passengers. Share your experiences or questions below—your insight might help another driver avoid a costly or dangerous mistake.


 浙公网安备
33010002000092号
浙公网安备
33010002000092号 浙B2-20120091-4
Comments
No comments yet. Why don't you start the discussion?