
Silicone makeup sponges have gained popularity for their hygienic design, durability, and seamless blending capabilities. Unlike traditional porous sponges, silicone ones don’t absorb product, which reduces bacterial buildup and makes cleaning easier—on the surface. However, many users unknowingly damage their sponges by using harsh techniques or inappropriate cleaning agents. The result? A once-smooth, bouncy tool becomes dull, cracked, or permanently deformed. Proper care isn’t just about cleanliness; it’s about preserving the integrity of the material so your sponge continues to perform like new. This guide outlines a safe, science-backed approach to cleaning your silicone makeup sponge while maintaining its unique texture and elasticity.
Why Cleaning Technique Matters for Silicone Sponges
Silicone is a synthetic polymer known for its flexibility, heat resistance, and non-porous surface. These qualities make it ideal for cosmetic tools, but they also mean that improper cleaning can lead to long-term degradation. Harsh scrubbing, abrasive cleaners, or exposure to high heat can compromise the molecular structure of the silicone, leading to micro-tears, cloudiness, or warping. Over time, this affects both appearance and functionality—your sponge may not bounce back as well or could leave streaks on your skin.
Cleaning isn’t just about removing foundation residue or concealer buildup. It’s also about preventing oil accumulation from skincare products and minimizing contact with environmental pollutants. Even though silicone doesn’t harbor bacteria the way foam sponges do, repeated exposure to unclean conditions can still create a breeding ground on the surface if not properly maintained.
“Silicone is resilient, but it’s not indestructible. Gentle handling during cleaning preserves elasticity and ensures consistent application over time.” — Dr. Lena Torres, Cosmetic Dermatologist and Product Safety Analyst
A Step-by-Step Guide to Safe Cleaning
Cleaning your silicone makeup sponge doesn’t require complicated tools or expensive solutions. What it does require is consistency and attention to detail. Follow this five-step process to keep your sponge in optimal condition:
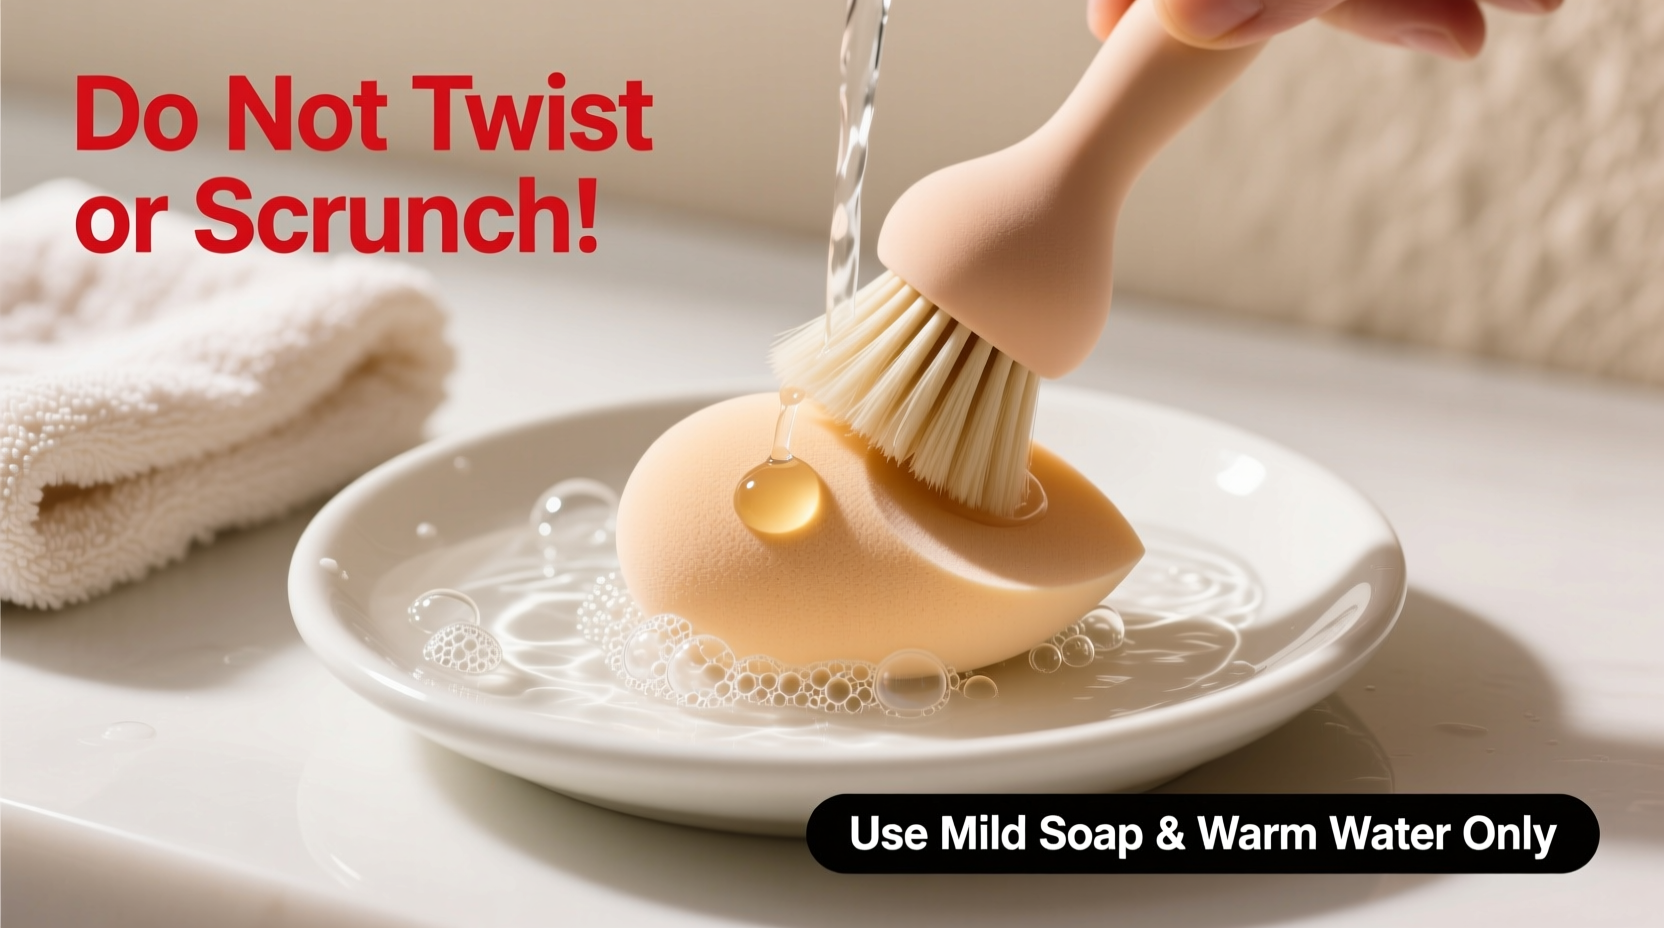
- Rinse Under Lukewarm Water
Begin by holding the sponge under lukewarm running water. Avoid hot water, as temperatures above 60°C (140°F) can begin to soften or warp the silicone. Gently massage the surface with your fingers to loosen any visible product residue. - Apply a Mild Cleanser
Use a small amount of gentle, pH-balanced cleanser—such as baby shampoo, facial cleanser, or a dedicated silicone tool wash. Apply directly to the sponge or onto a soft cloth. Never use household detergents or bleach-based cleaners, as these contain strong surfactants that degrade silicone polymers over time. - Massage in Circular Motions
Using your fingertips, gently rub the surface of the sponge in circular motions. Focus on areas where product tends to accumulate, such as edges and textured zones. Do not twist, stretch excessively, or scrub with rough materials like brushes or sponges. - Rinse Thoroughly
Hold the sponge under running water until all traces of cleanser are gone. Check by squeezing it lightly—no soapy film should remain. Residual soap can dry out the surface and attract dust or lint when stored. - Pat Dry and Air-Dry Completely
After rinsing, gently press the sponge between two clean towels to remove excess moisture. Then place it on a drying rack or flat surface in a well-ventilated area away from direct sunlight. Allow it to air-dry completely before storing—this usually takes 4–6 hours.
Do’s and Don’ts: Best Practices at a Glance
To help you remember key guidelines, here's a clear comparison of recommended versus harmful practices when cleaning silicone makeup sponges.
| Do’s | Don’ts |
|---|---|
| Use lukewarm water (below 60°C) | Expose to boiling water or steam |
| Clean weekly or after heavy use | Leave residue for days without washing |
| Use mild, non-abrasive cleansers | Use alcohol, acetone, or bleach |
| Dry naturally in open air | Place near heaters or in direct sun |
| Store in a breathable container | Keep in sealed plastic bags while damp |
Real Example: How One User Extended Her Sponge’s Life by 8 Months
Jamila, a freelance makeup artist based in Portland, noticed her silicone sponge started losing its bounce after only three months of daily use. She was using dish soap and scrubbing it vigorously with a nail brush, believing this ensured deep cleaning. After developing slight redness around her cheekbones post-application, she consulted a dermatologist who suggested her cleaning method might be compromising the sponge’s surface.
She switched to a routine using baby shampoo and hand-washing with light finger pressure. She also began allowing the sponge to dry upright on a ceramic dish with ventilation holes. Within weeks, the texture improved, and irritation disappeared. Eight months later, the sponge still performs like new—proof that technique matters more than frequency.
Alternative Cleaning Methods: Pros and Cons
While hand-washing is the gold standard, some users explore alternative methods for convenience. Here’s an evaluation of common approaches:
- Microwave Sanitizing: Some brands suggest placing a wet sponge in the microwave for 30 seconds to kill germs. While effective for certain tools, this method risks melting or warping silicone due to uneven heating. Not recommended unless explicitly stated by the manufacturer.
- Dishwasher Use: Though tempting for multitasking, dishwashers expose silicone to high heat and aggressive detergents. Even top-rack placement can degrade the material over time. Hand-washing remains safer.
- UV Sanitizer Boxes: These devices use ultraviolet light to disinfect surfaces without chemicals. They’re excellent for supplementing cleaning routines but don’t replace physical removal of makeup residue. Use them only after washing and drying the sponge.
Frequently Asked Questions
Can I use makeup wipes to clean my silicone sponge?
No. Most makeup wipes contain alcohol, fragrances, and preservatives that can dry out or chemically react with silicone. While they may remove surface product temporarily, they leave behind residues that attract dirt and degrade the material over time. Always follow up with a proper wash even if you wipe it down mid-use.
How often should I replace my silicone makeup sponge?
With proper care, a high-quality silicone sponge can last 9–12 months. Signs it’s time to replace include loss of elasticity, visible cracks, persistent stickiness, or discoloration that doesn’t come off after cleaning. Regular inspection helps prevent skin irritation caused by degraded materials.
Is it safe to share a silicone sponge with someone else?
Even though silicone is non-porous, sharing any cosmetic applicator increases the risk of transferring bacteria, oils, or viruses (like cold sores). Each person should have their own sponge, especially if used on bare skin. Clean thoroughly between uses regardless.
Checklist: Your Weekly Silicone Sponge Care Routine
Follow this simple checklist to ensure consistent maintenance:
- ✅ Rinse sponge under lukewarm water after each use
- ✅ Perform full wash with mild cleanser at least once per week
- ✅ Inspect for signs of wear: cracks, cloudiness, stiffness
- ✅ Store in a dry, ventilated space—never sealed while damp
- ✅ Replace every 9–12 months or sooner if damaged
Preserving Performance Through Mindful Maintenance
The appeal of a silicone makeup sponge lies in its precision, ease of cleaning, and long lifespan. But these benefits only endure when matched with thoughtful care. Treating it like a disposable tool defeats its purpose. By understanding how silicone reacts to heat, friction, and chemicals, you empower yourself to extend its life significantly.
Think of your sponge as a precision instrument—not unlike a paintbrush or surgical tool—where performance depends on upkeep. A few minutes of mindful cleaning each week saves money, reduces waste, and supports healthier skin. The texture you love—the smooth glide, the responsive bounce—is entirely dependent on how gently you treat it.
“Longevity starts with cleaning habits. A well-maintained silicone sponge delivers better results month after month.” — Rachel Kim, Beauty Tool Engineer at LumiForm Labs
Take Action Today for Lasting Results Tomorrow
Your silicone makeup sponge deserves more than a quick rinse. It deserves a cleaning routine that honors its design and function. Start tonight: gather a gentle cleanser, set aside five minutes, and give your sponge the attention it needs. Notice how smoothly it applies foundation tomorrow morning. Share your experience, refine your method, and encourage others to treat their tools with the same care. Because true beauty isn’t just in the finish—it’s in the details behind the glow.


 浙公网安备
33010002000092号
浙公网安备
33010002000092号 浙B2-20120091-4
Comments
No comments yet. Why don't you start the discussion?