
Every holiday season, millions of homeowners across the country reach for ladders to decorate their rooftops with festive Christmas lights. But climbing several feet into the air on an aluminum extension ladder is one of the leading causes of preventable injuries during the holidays. According to the U.S. Consumer Product Safety Commission, thousands of people visit emergency rooms each year due to falls from ladders while hanging decorations. Fortunately, you don’t need to risk your safety to create a dazzling display. With the right tools, planning, and techniques, it’s entirely possible—and far safer—to install rooftop Christmas lights without ever stepping onto a ladder.
This guide walks through proven methods that eliminate or minimize ladder use, reduce physical strain, protect your roof and gutters, and still deliver professional-looking results. Whether you live in a two-story colonial or a single-level ranch, these strategies are adaptable, cost-effective, and grounded in real-world experience from professional decorators and safety experts.
Why Avoid Ladders When Hanging Christmas Lights?
The most obvious reason to avoid ladders is safety. Even experienced climbers can lose balance on icy ground, uneven terrain, or slippery shingles. A fall from just 10 feet can result in serious injury. Beyond personal risk, ladders can damage roofing materials, gutters, and siding—especially when dragged along edges or leaned too hard against fragile surfaces.
Additionally, many people underestimate the time and effort involved in repeated ladder climbs. Hanging lights row by row becomes exhausting, inefficient, and increases exposure to cold weather. Eliminating the ladder streamlines the process, reduces fatigue, and often leads to more consistent, evenly spaced lighting.
“Every year, we respond to dozens of preventable falls during the holiday decorating season. The majority could have been avoided with alternative installation methods.” — Dr. Alan Reeves, Emergency Medicine Physician and Safety Advocate
Tools That Make Ladder-Free Installation Possible
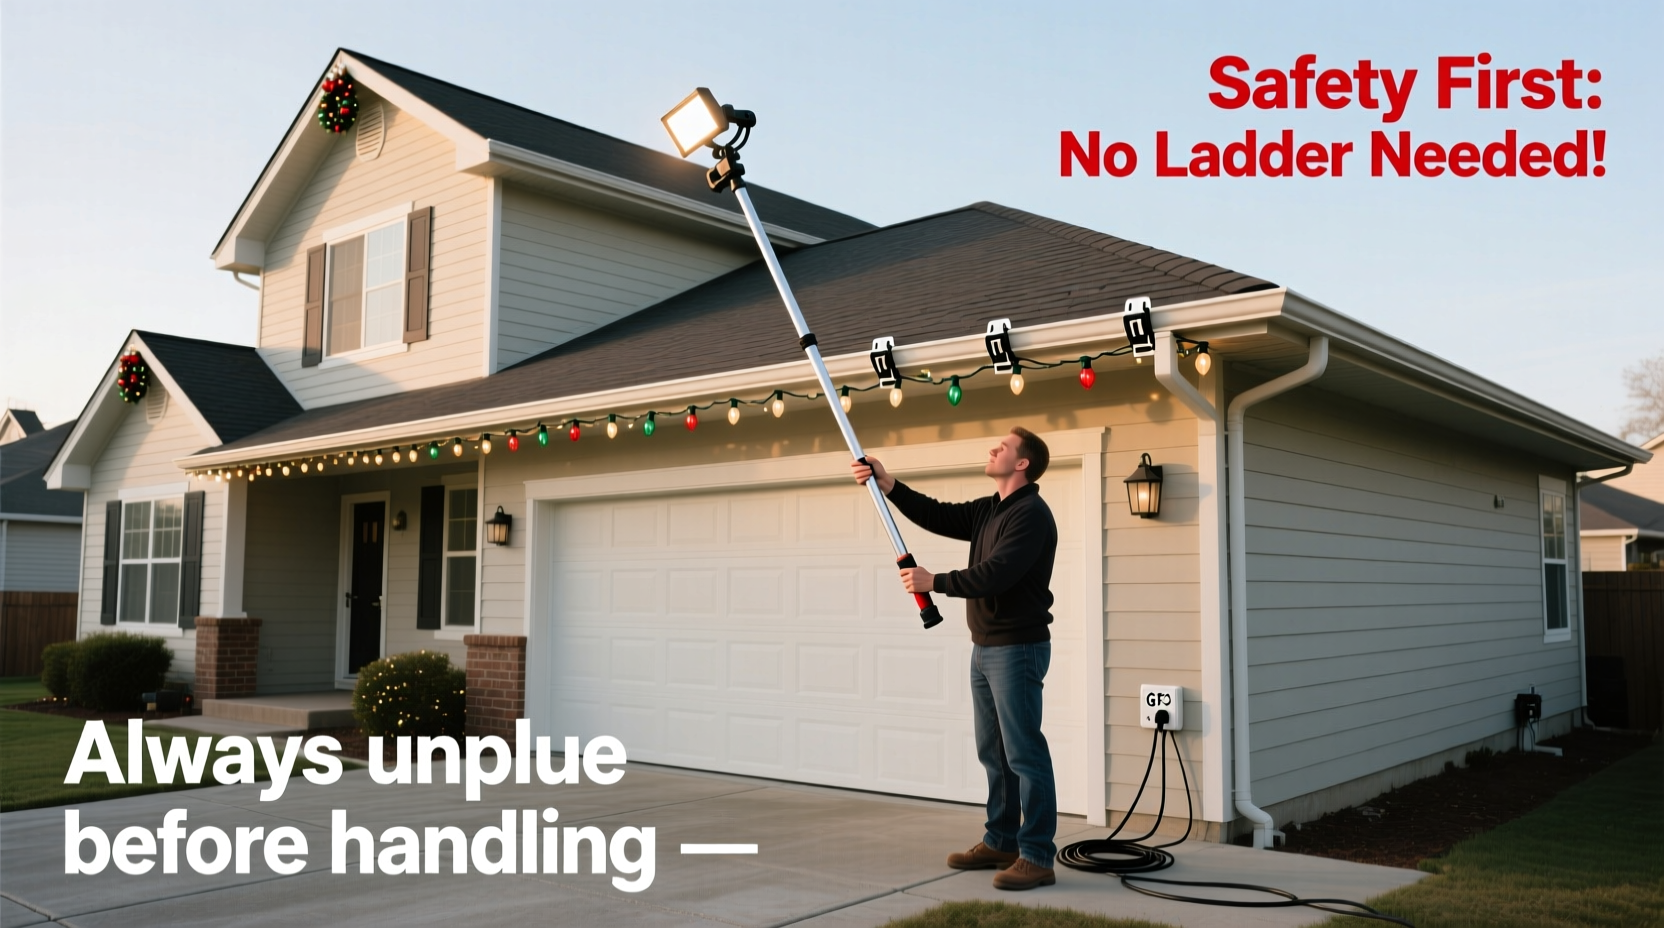
The key to installing rooftop lights without a ladder lies in specialized tools designed to extend your reach and improve precision from the ground. These aren’t gimmicks—they’re used by professional holiday decorators and endorsed by fire departments and roofing contractors.
1. Pole-Based Light Hangers
These extendable poles come with attachment heads that allow you to clip, hook, or magnetize lights onto gutters, eaves, and fascia boards. Most models extend from 6 to 20 feet and are made from lightweight fiberglass or reinforced aluminum.
2. Magnetic Rope Light Attachments
If your home has metal gutters or flashing, magnetic clips let you attach rope-style lights securely from the ground using a pole. They snap into place with strong neodymium magnets and can support up to 5 pounds per clip.
3. Gutter Grips and No-Nail Clips
Plastic or rubber-coated clips slide under gutter edges and hold string lights without nails or staples. You can install them using a long-handled tool or even a modified coat hanger on a pole.
4. Laser-Guided Alignment Tools
To ensure straight lines and even spacing, some professionals use small laser guides attached to extension poles. This helps align clips or light strands before final placement.
5. Drone-Assisted Setup (Advanced)
While not common among average homeowners, some enthusiasts use small drones equipped with lightweight tethers to guide string lights over peaks and ridges. This method requires practice and favorable weather but can cover large areas quickly.
| Tool | Best For | Ladder Required? | Avg. Cost |
|---|---|---|---|
| Extension Pole Hanger | Gutters, eaves, soffits | No | $25–$50 |
| Magnetic Clips | Metal gutters, steel roofs | No | $15–$30 (pack of 10) |
| No-Nail Gutter Clips | All gutter types | No | $10–$20 |
| Drone + Tether Kit | Large or multi-peaked roofs | Rarely | $150+ |
| Traditional Ladder | Direct access needed | Yes | $80–$200 |
Step-by-Step: Installing Rooftop Lights Without a Ladder
Follow this logical sequence to hang lights safely and efficiently from ground level.
- Plan Your Design on Paper
Sketch your home’s front elevation. Mark where lights will go—along rooflines, around windows, across eaves. Decide on color, bulb type, and plug locations. This prevents mid-installation changes and wasted materials. - Measure Total Length Needed
Use a measuring tape along the ground to estimate linear feet of roofline. Add 10% extra for overlap and connections. Buy commercial-grade, outdoor-rated LED strings with end-to-end connectors for daisy-chaining. - Install Ground-Level Power Source
Use a weatherproof outdoor outlet or install a covered extension cord system. Never run cords through windows or doors that won’t close properly. Use a GFCI-protected circuit to prevent electrical hazards. - Attach First Anchor Point Safely
If your design starts at a high corner, use a pole tool to secure the first clip or magnet. Alternatively, ask a helper on stable ground to assist with positioning. Never throw wires or attempt blind tosses. - Use Extension Pole to Place Clips
Attach no-nail gutter clips every 12–18 inches along the edge. Slide the pole tip under the gutter lip and press until the clip snaps into place. Test stability by gently tugging with the pole. - Thread Lights Through Clips
Start at the power source and feed the light string into the first clip. Use the pole’s hook attachment to guide the cord into subsequent clips. Work left to right or top to bottom depending on roof slope. - Secure Peak and Ridge Lines
For homes with gabled roofs, use a flexible wire or fish tape fed through a PVC conduit mounted on a pole. Thread the light strand through the guide and pull into position at the peak. Magnetic clips work well here if metal supports exist. - Test Before Finalizing
Plug in the lights temporarily to check for dark sections, loose connections, or sagging. Adjust clip positions as needed using the pole. - Weatherproof Connections
Wrap all plug joints with self-amalgamating electrical tape or use UL-listed outdoor connector covers. Elevate junctions off the ground using zip ties or mounting brackets. - Set Timer or Smart Control
Connect to a programmable timer or Wi-Fi-enabled smart plug. This ensures lights turn on at dusk and off at bedtime, saving energy and extending bulb life.
Real Example: A Two-Story Home Decorated Without a Single Climb
Mark Teller, a homeowner in Portland, Oregon, owns a steep-roofed Craftsman-style house with deep eaves and vinyl gutters. In past years, he used a 24-foot ladder with mixed results—once slipping on wet leaves, another time denting the gutter. Last holiday season, he decided to try a ladder-free approach.
He purchased a 16-foot telescoping pole kit with interchangeable heads (hook, magnet, clip installer) for $42. He measured his roofline and bought 200 feet of warm-white LED mini lights with built-in fuses. Using the pole, he installed plastic gutter clips every 15 inches along the front-facing eaves and dormers. He then threaded the lights through the clips from the porch step—never rising more than three feet off the ground.
For the gable peak, he used a bendable fiberglass rod with a looped end to guide the light string upward. After securing both ends, he tightened the line with a tensioner clip. The entire job took four hours over two evenings, compared to eight hours (and one near-fall) the previous year.
“It looked better, was safer, and I didn’t have to ask my neighbor for help,” Mark said. “Now I recommend this method to everyone in my neighborhood group chat.”
Checklist: Ladder-Free Light Installation
- ☐ Sketch lighting plan with measurements
- ☐ Purchase LED strings rated for outdoor use
- ☐ Acquire extension pole with multiple attachments
- ☐ Buy no-nail gutter clips or magnetic holders
- ☐ Confirm GFCI-protected outdoor outlet availability
- ☐ Use self-amalgamating tape for waterproof connections
- ☐ Install smart plug or timer for automation
- ☐ Test all strands before full deployment
- ☐ Secure excess cord with zip ties—avoid tripping hazards
- ☐ Schedule monthly checks for wind damage or wear
Common Mistakes to Avoid
Even with the best tools, errors can compromise safety and aesthetics. Steer clear of these frequent missteps:
- Using duct tape or nails: These damage gutters and void roofing warranties. Opt for non-invasive clips instead.
- Overloading circuits: Daisychaining more than three standard strands can trip breakers. Use heavy-duty cords or split loads across outlets.
- Ignoring weather forecasts: Windy or rainy conditions make pole handling difficult and increase electrical risks. Wait for calm, dry days.
- Skipping tension control: Sagging lights look messy and collect debris. Use tensioner clips or secondary support lines every 4–6 feet.
- Forgetting storage prep: At season’s end, coil lights carefully and store in labeled bins. Keep poles clean and dry to prevent jamming next year.
“The safest decoration is one installed without unnecessary risk. Technology now allows us to achieve stunning effects without endangering lives.” — National Fire Protection Association (NFPA) Holiday Safety Bulletin, 2023
Frequently Asked Questions
Can I use these methods on a tile or slate roof?
Yes, but avoid any tools that require direct roof contact. Focus on gutter-based systems or fascia-mounted clips. Tile and slate are fragile; walking on them risks cracks and leaks. Pole tools allow full access without touching the roof surface.
What if I don’t have gutters?
No-gutter homes can use fascia boards or soffit-mounted clips. Some manufacturers offer adhesive-backed hooks rated for outdoor use (ensure they’re UV-resistant). Apply in warm weather for best adhesion, and remove gently in spring to avoid paint damage.
Are drone installations safe and legal?
Small consumer drones used for guiding lights are generally safe in open yards but must comply with FAA regulations. Fly below 400 feet, away from airports, and never over crowds. Most homeowners find pole tools sufficient—drones are best for complex architectural features.
Final Thoughts: Celebrate Safely, Decorate Smarter
Hanging Christmas lights should be a joyful tradition—not a dangerous chore. By embracing modern tools and thoughtful techniques, you can create a festive, eye-catching display without risking injury or property damage. The shift away from ladders isn’t just about convenience; it’s a commitment to long-term safety, smarter home maintenance, and sustainable holiday practices.
Thousands of homeowners are already making the switch, discovering that ground-level decorating saves time, reduces stress, and produces cleaner, more professional results. With a modest investment in the right equipment, you can enjoy a sparkling roofline year after year—without ever climbing a rung.


 浙公网安备
33010002000092号
浙公网安备
33010002000092号 浙B2-20120091-4
Comments
No comments yet. Why don't you start the discussion?