
Removing eyelash extensions might seem like a quick fix when you're tired of their look or feel, but doing it incorrectly can lead to irreversible damage to your natural lashes. Many people attempt to pull or peel off extensions, only to find thinning lashes, irritation, or even temporary lash loss afterward. The truth is, with the right tools, timing, and technique, you can remove eyelash extensions at home safely—without harming your natural lash line. This guide walks you through the safest method, backed by professional insight and real-world experience.
Why Safe Removal Matters
Your natural lashes follow a growth cycle that lasts between 60 and 90 days. When extensions are improperly removed—especially by tugging or using harsh products—the stress on the hair follicle can prematurely dislodge healthy lashes still in their growth phase. Over time, this leads to sparser lashes, weakened follicles, and longer regrowth periods.
Professional salons use medical-grade adhesive removers and precision tools designed to dissolve the bond without disturbing the natural lash. At home, you can replicate this process carefully using safe ingredients and patience. Rushing or skipping steps increases the risk of trauma.
“Never underestimate the fragility of the lash line. Even minor trauma from improper removal can cause traction alopecia—a condition caused by repeated pulling.” — Dr. Lena Torres, Ophthalmic Dermatologist
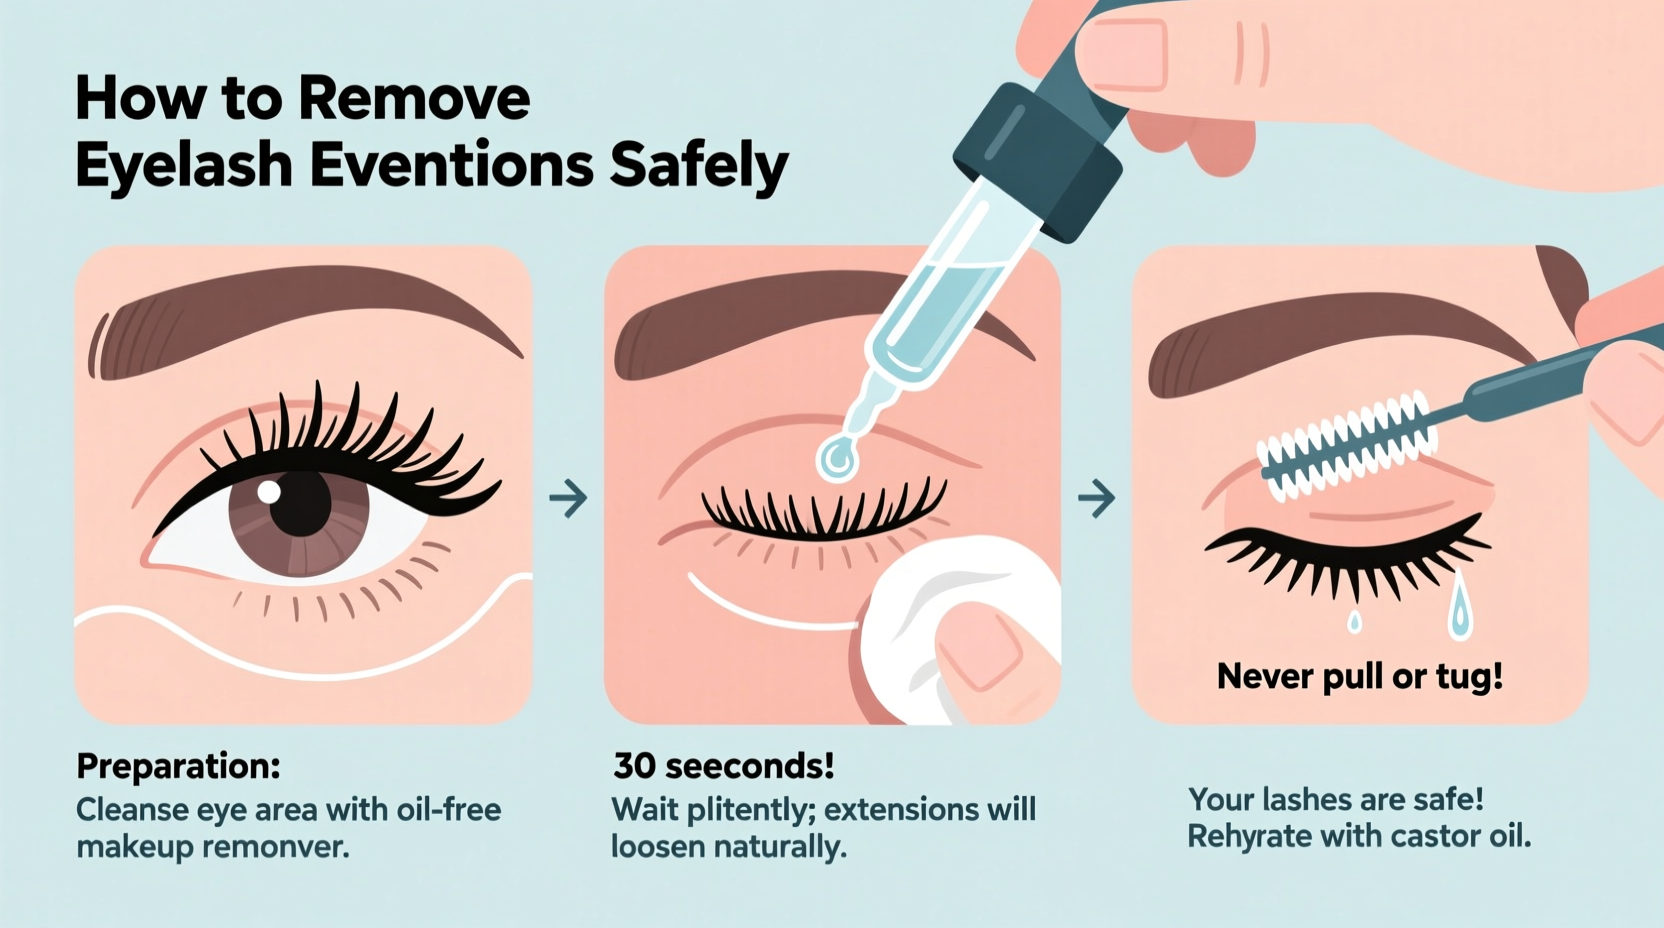
Step-by-Step Guide to Safe At-Home Removal
Follow this detailed timeline to dissolve the adhesive gently and preserve your natural lashes. This process takes about 30–45 minutes, depending on extension density.
- Prepare Your Space: Choose a well-lit area with a mirror. Wash your hands thoroughly to prevent introducing bacteria near your eyes.
- Cleanse Eyelids: Use an oil-free eye makeup remover to wipe away any mascara or residue. Avoid getting cotton fibers in your eyes.
- Apply Heat (Optional): Hold a warm (not hot) washcloth over closed eyes for 1–2 minutes. This softens the adhesive slightly, making breakdown easier.
- Soak a Cotton Pad with Oil-Based Remover: Use pure coconut oil, olive oil, or a dedicated lash-safe oil (like castor oil). Avoid mineral oil or petroleum jelly, which can clog follicles.
- Hold Against Lashes for 5 Minutes: Place the soaked pad over your closed eye. Let the oil penetrate the adhesive bond. Do not rub.
- Gently Wipe Downward: After soaking, lightly swipe from base to tip of the lashes using a downward motion. Extensions should slide off gradually.
- Repeat as Needed: If some extensions remain, reapply oil and wait another 5 minutes before trying again.
- Cleanse Again: Once all extensions are gone, wash your eyelids with a gentle facial cleanser to remove oil residue.
- Condition Lashes: Apply a few drops of vitamin E oil or a lash serum to nourish follicles and support regrowth.
Do’s and Don’ts of Home Lash Extension Removal
| Do’s | Don’ts |
|---|---|
| Use natural oils like coconut or castor oil | Use acetone or alcohol-based removers |
| Be patient—allow oil to break down adhesive slowly | Rub or tug at the lashes aggressively |
| Perform removal in good lighting | Try removing extensions immediately after swimming or sweating |
| Cleanse eyelids post-removal | Reuse cotton pads or swabs (risk of infection) |
| Wait at least 4 weeks before reapplying extensions | Sleep with partially removed extensions still clinging |
A Real Example: What Happens Without Caution
Sophia, a 29-year-old marketing executive, had been wearing lash extensions for nearly a year with regular salon fills. When she decided to take a break, she tried removing them at home using baby oil and a cotton swab. Impatient after 10 minutes, she began rubbing vigorously. Within two days, she noticed clumps of lashes falling out each morning. Three weeks later, her lash line was visibly thinner, especially near the outer corners.
She consulted a dermatologist who confirmed trauma-induced shedding. “You didn’t just remove the extensions,” the doctor said. “You pulled out dozens of growing lashes.” It took Sophia five months of consistent serum use and no extensions to regain her original lash density.
Her mistake? Skipping the waiting phase and applying friction. With just 15 more minutes of patience, she could have avoided the damage entirely.
Essential Tools and Ingredients Checklist
Before starting, gather these items to ensure a smooth, safe process:
- Organic coconut oil or castor oil (preferably cold-pressed)
- Cotton pads or lint-free applicators
- Gentle facial cleanser (fragrance-free)
- Warm water and clean washcloth
- Lash serum or vitamin E oil
- Magnifying mirror (optional but helpful)
- Timer or clock (to track soak times)
When to See a Professional Instead
While at-home removal is possible, certain situations call for expert help:
- Dense or layered extensions: Thick clusters or volume fans increase adhesive load, requiring stronger solvents best handled in-clinic.
- Signs of irritation: Redness, swelling, or burning sensations may indicate an allergic reaction or infection needing medical attention.
- Previous lash trauma: If you’ve already experienced lash thinning, professional removal minimizes further risk.
- Uncertainty about adhesive type: Some salons use cyanoacrylate-based glues that react poorly to oils. A technician can identify the correct remover.
Professionals use pH-balanced removers that target the glue while protecting keratin in natural lashes. They also isolate each extension during removal, preventing accidental pulling of nearby hairs.
“The safest removal isn’t always the fastest. In our studio, we spend 45–60 minutes per client to ensure zero lash loss.” — Naomi Reed, Certified Lash Technician & Educator
Post-Removal Care: Supporting Lash Recovery
After removal, your lashes need time to recover. The follicles may be sensitive, and the growth cycle could be temporarily disrupted. Support healing with these practices:
- Use a lash serum daily: Look for formulas with peptides, biotin, or panthenol to strengthen new growth.
- Avoid waterproof mascara for 2–3 weeks: These formulas require harsh removers that stress delicate lashes.
- Sleep on a silk pillowcase: Reduces friction and prevents lashes from snagging overnight.
- Stay hydrated and eat protein-rich foods: Keratin production depends on adequate nutrition.
- No extensions for 4–6 weeks: Give follicles time to rest and regenerate before reapplication.
During this recovery window, consider embracing your natural lashes. Many people rediscover their true lash potential after taking a break from enhancements.
Frequently Asked Questions
Can I use olive oil to remove eyelash extensions?
Yes, extra-virgin olive oil is effective at breaking down lash adhesive due to its high fatty acid content. However, ensure it’s pure and free of additives. Warm it slightly before use for better penetration, and strain if cloudy. Avoid if you have oily eyelids or acne-prone skin, as it may clog follicles.
How long does it take for natural lashes to grow back after damage?
If follicles remain intact, most people see noticeable regrowth within 6–8 weeks. Full recovery to pre-damage density typically takes 3–4 months. Consistent use of lash serums and avoiding mechanical stress speeds up the process.
Is it normal for some extensions to fall off naturally?
Yes. Extensions are glued to individual natural lashes, which shed naturally every 2–3 weeks. Losing 1–5 extensions per day is normal. However, if entire clusters come off with bare patches underneath, it may indicate poor application or premature shedding from irritation.
Final Thoughts: Patience Protects Your Lashes
Removing eyelash extensions at home doesn’t have to mean sacrificing your natural lash health. The key lies in patience, proper tools, and respecting the delicate biology of your lash line. Rushing the process or using aggressive methods may save minutes today but cost months of regrowth tomorrow.
By following a slow, oil-based dissolution method, caring for your lids post-removal, and giving your lashes time to breathe, you maintain both beauty and long-term lash integrity. Whether you’re stepping away from extensions temporarily or reassessing your lash routine, doing it safely ensures you’ll have strong, healthy lashes ready for whatever comes next.


 浙公网安备
33010002000092号
浙公网安备
33010002000092号 浙B2-20120091-4
Comments
No comments yet. Why don't you start the discussion?