
Accidents happen. Whether it's a curious child experimenting with a Sharpie or an adult mistaking a wall for a whiteboard, permanent marker on painted walls is a common household issue. While the ink may appear stubborn and irreversible, there are multiple non-destructive methods to lift it cleanly—without damaging the underlying paint or resorting to a full repaint. The key lies in understanding the chemistry of permanent markers and selecting the right cleaning agent based on your wall’s finish.
Most permanent markers use alcohol-based solvents and pigments designed to bond strongly with surfaces. However, these same properties make them vulnerable to specific types of cleaners—especially those that can break down oils and resins without harming latex or acrylic paint. With careful testing and the correct technique, even years-old stains can be removed effectively.
Understanding Wall Surfaces and Marker Behavior
Before attempting any removal method, it's essential to identify your wall type. The majority of interior walls are painted with either flat (matte), satin, semi-gloss, or gloss finishes. Each has different levels of porosity and durability:
- Flat/Matte Finish: Most porous and delicate. Highly absorbent, making stain removal riskier.
- Satin Finish: Slightly more durable than flat; offers mild resistance to moisture.
- Semi-Gloss/Gloss: Least porous and most washable. These finishes resist stains better and tolerate stronger cleaners.
Permanent marker tends to sit on top of glossier paints but can penetrate deeper into flat finishes. This means aggressive scrubbing on matte walls may lead to scuffing or discoloration—even if the marker comes off.
“Always test your cleaning solution in an inconspicuous area first. A small patch can save you from widespread damage.” — Linda Torres, Residential Cleaning Specialist with 18 years of experience
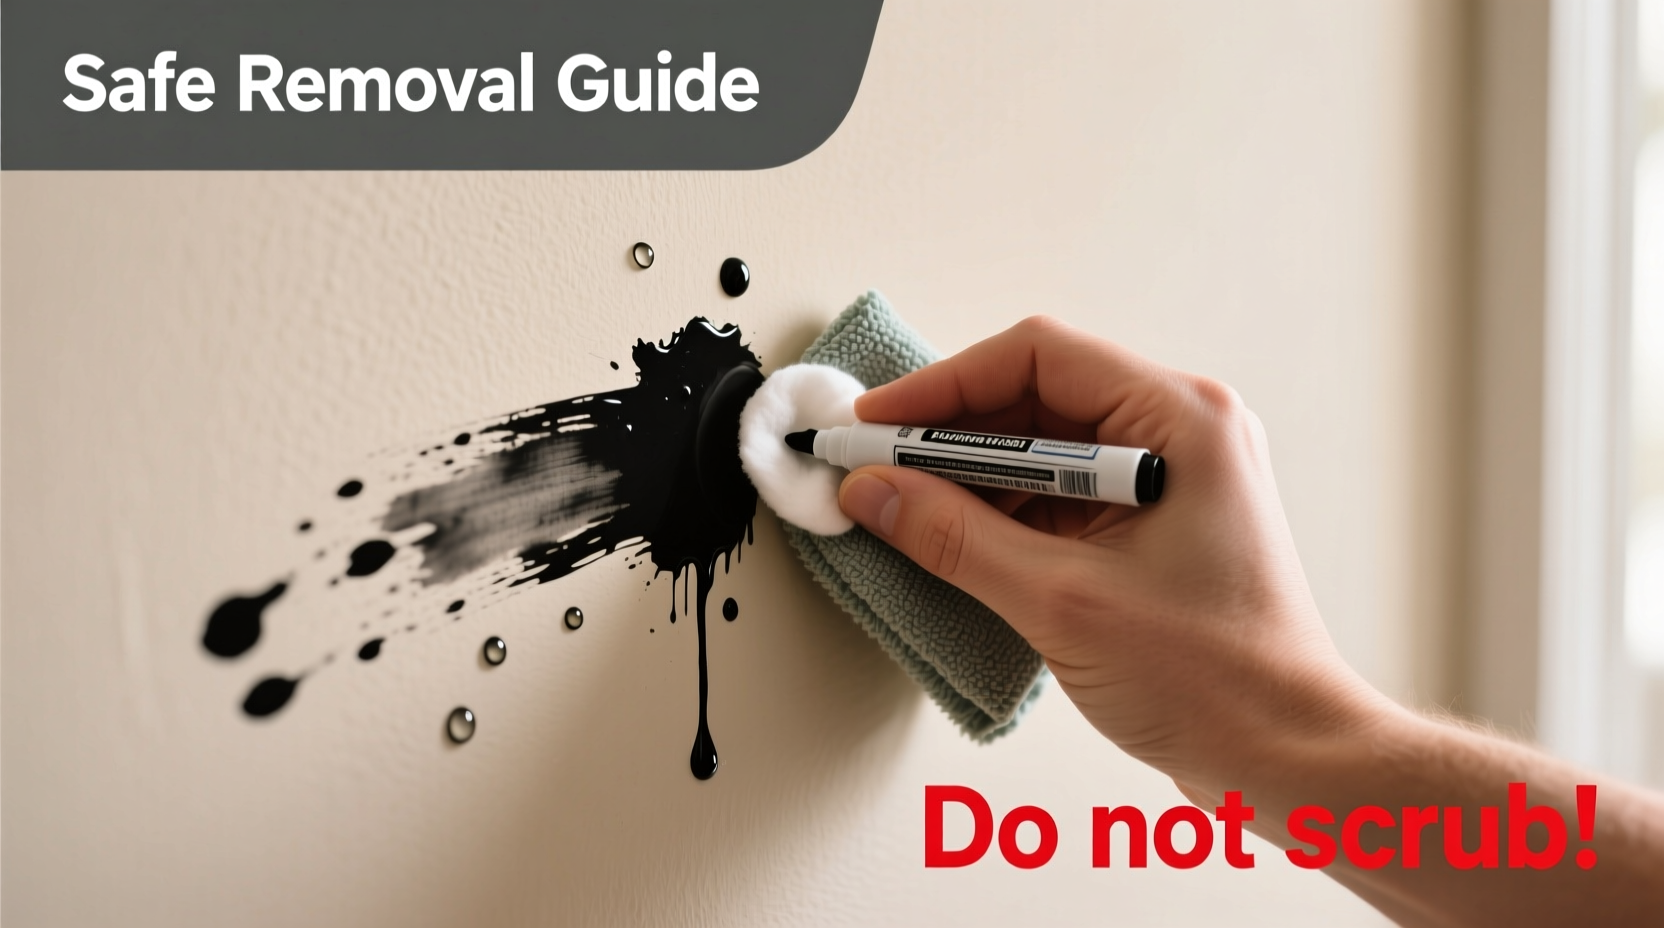
Step-by-Step Guide to Removing Permanent Marker
Follow this systematic approach to maximize effectiveness while minimizing risk to your walls:
- Assess the Stain: Determine how fresh the mark is. Fresh ink is easier to remove than dried, set-in stains.
- Choose Your Cleaner: Based on wall finish and available supplies, select one of the safe options listed below.
- Test First: Apply a small amount of cleaner to an inconspicuous spot. Wait 30 seconds, then wipe gently with a soft cloth.
- Apply Gently: Dampen a cotton ball, swab, or microfiber cloth with your chosen solution. Avoid soaking the wall.
- Blot, Don’t Rub: Use light pressure and circular motions to lift the ink. Aggressive rubbing can spread the stain or damage paint.
- Rinse and Dry: Wipe the area with a damp cloth to remove residue, then dry immediately with a clean towel.
- Evaluate Results: If the stain remains, repeat once after waiting 5–10 minutes. Multiple harsh treatments increase damage risk.
Safe and Effective Cleaning Solutions
Many household products can dissolve permanent marker ink safely. Below are seven proven options, ranked by safety and accessibility:
| Cleaning Agent | Best For | Caution |
|---|---|---|
| Isopropyl Alcohol (70% or higher) | All wall types (with caution on flat paint) | May dull flat finishes; always dilute if needed |
| Hairspray (alcohol-based) | Fresh marks on semi-gloss/satin walls | Avoid oily or conditioning sprays |
| Hand Sanitizer (alcohol-based gel) | Kids' rooms—less fumes, easy control | Check for added dyes or fragrances |
| Baking Soda + Water Paste | Gentle abrasion for older stains | Use only on durable finishes; avoid scrubbing hard |
| Non-Acetone Nail Polish Remover | Tough, set-in stains on glossy walls | Never use acetone—it can melt paint |
| Mr. Clean Magic Eraser (Melamine Foam) | Light stains on washable surfaces | Can remove paint if overused; not for flat finishes |
| Dish Soap + Warm Water | Faint or partial removal as first step | Limited effectiveness alone; best combined with others |
For example, isopropyl alcohol works by breaking down the polymer binders in permanent ink. When applied correctly, it liquefies the pigment so it can be wiped away. Because it evaporates quickly, it minimizes moisture exposure to the paint layer—a critical factor in preventing blistering or peeling.
Real Example: Removing a Child’s Artwork from a Nursery Wall
Sarah, a mother of two in Portland, returned home to find her 4-year-old had drawn a detailed “spaceship” across the nursery wall using a black Sharpie. The room had flat latex paint, which made her hesitant to try anything too abrasive.
She started by mixing a paste of baking soda and water, applying it with a soft sponge in gentle circles. After minimal progress, she switched to a cotton ball dipped in 70% isopropyl alcohol. She tested it behind the changing table first, confirming no paint lifting occurred. Then, working section by section, she blotted the lines carefully. Within ten minutes, the entire drawing was gone. She finished by wiping the area with a damp microfiber cloth and drying it thoroughly.
“I was ready to repaint,” Sarah said later. “But taking it slow and using alcohol saved me hours and kept the room looking seamless.”
This case illustrates the importance of patience and methodical treatment—especially in high-sensitivity environments like children’s rooms where volatile chemicals should be minimized.
Common Mistakes to Avoid
Even well-intentioned efforts can backfire if improper tools or techniques are used. Here are frequent errors and their consequences:
- Using Acetone or Bleach: Both can strip paint, cause yellowing, or weaken adhesion between layers.
- Scrubbing Too Hard: Especially with melamine sponges, excessive pressure removes not just ink but paint.
- Skipping the Patch Test: What works in one room may damage another due to variations in paint age or brand.
- Applying Heat: Hair dryers or steam can set the ink permanently or bubble the paint surface.
- Layering Cleaners: Mixing alcohol with ammonia or vinegar creates harmful fumes and reduces effectiveness.
One homeowner reported using nail polish remover containing acetone on a bedroom wall, only to discover a cloudy, etched patch where the paint had been chemically stripped. Repairs required sanding, priming, and repainting—an avoidable outcome.
When to Use a Magic Eraser—and When Not To
The Mr. Clean Magic Eraser is often recommended online for marker removal. It functions as a micro-abrasive sponge made from melamine foam, which physically lifts stains at a microscopic level.
On semi-gloss or gloss walls, it can be highly effective for light or partially set marks. However, on flat or eggshell finishes, it poses a significant risk. Because these paints lack protective sheen, the eraser can easily abrade the surface, leaving a shiny or thin spot that stands out under light.
“Think of a Magic Eraser like fine sandpaper. It removes a tiny layer of whatever it touches—including your paint.” — Greg Miller, Professional Painter and Restoration Technician
If you choose to use one:
- Dampen it slightly—never use dry.
- Use very light pressure in small sections.
- Stop immediately if the wall appears shinier or lighter.
- Always follow up with a damp cloth to remove residue.
Prevention Tips for Future Accidents
Once the marker is gone, consider steps to prevent recurrence—especially in homes with young children or shared workspaces:
- Store permanent markers in locked cabinets or high shelves when not in use.
- Label markers clearly—use “Whiteboard Only” stickers on dry-erase pens to avoid confusion.
- Install removable wall decals or peel-and-stick wallpaper in playrooms for easy cleanup.
- Teach children early about appropriate drawing surfaces using positive reinforcement.
FAQ
Can I use hand sanitizer to remove permanent marker from walls?
Yes, alcohol-based hand sanitizers are effective because they contain isopropyl alcohol (usually 60–70%). Squeeze a small amount onto a cloth and dab gently on the stain. It’s especially useful in homes with kids due to its low odor and non-toxic ingredients (though still keep it out of reach).
Will vinegar remove permanent marker from painted walls?
Plain vinegar alone is generally ineffective. While mildly acidic, it doesn’t break down the resinous components of permanent ink. However, a mixture of vinegar and baking soda may offer slight abrasive action, but results are inconsistent. Alcohol-based solutions remain far superior.
What should I do if the marker stain returns after drying?
If the stain reappears once dry, it likely means the ink penetrated deeply or migrated from beneath the surface. Try a second application after letting the wall rest for 10 minutes. If unsuccessful, the area may need spot-priming with a stain-blocking primer (like BIN or Kilz) followed by touch-up paint. But this is rare with proper initial treatment.
Final Checklist: Safe Removal Process
Use this checklist to ensure you’re following best practices:
- Identify wall finish (flat, satin, semi-gloss, etc.)
- Check age and size of the marker stain
- Gather supplies: isopropyl alcohol, cotton balls, microfiber cloths, baking soda, gloves
- Test cleaner on hidden wall area
- Apply solution gently with blotting motion
- Rinse with damp cloth and dry thoroughly
- Evaluate results—repeat only if necessary
- Prevent future incidents with designated drawing zones
Conclusion
Removing permanent marker from walls doesn’t require expensive tools or a complete repaint. With everyday household items and a cautious, informed approach, most stains can be eliminated safely—preserving both your paint and your peace of mind. The secret lies in matching the cleaning method to your wall’s finish, avoiding harsh chemicals, and prioritizing gentle techniques over force.
Whether dealing with a toddler’s masterpiece or an office mishap, take a breath and proceed methodically. A little knowledge goes a long way toward turning a frustrating mistake into a quick, invisible fix.


 浙公网安备
33010002000092号
浙公网安备
33010002000092号 浙B2-20120091-4
Comments
No comments yet. Why don't you start the discussion?