
Swimming is one of the most enjoyable and health-promoting activities, but it often comes with an annoying side effect: trapped water in the ear. That muffled sensation, slight discomfort, or even temporary hearing reduction can be more than a nuisance—it can lead to infections if not addressed properly. The good news is that in most cases, you can resolve the issue quickly and safely at home without medical intervention. This guide provides practical, medically sound methods to remove water from the ear after swimming, backed by expert insights and real-world experience.
Why Water Gets Trapped in the Ear
The human ear canal is naturally curved, which helps protect the eardrum from foreign particles. However, this same curvature can trap water, especially after submersion in pools, lakes, or oceans. When water enters the ear during swimming, it may cling to the walls of the canal due to surface tension or become lodged behind a small amount of earwax. Children and adults with narrower ear canals are particularly prone to this issue.
Trapped water doesn’t always cause immediate pain, but it creates a moist environment where bacteria can thrive—increasing the risk of otitis externa, commonly known as swimmer’s ear. According to the Centers for Disease Control and Prevention (CDC), swimmer’s ear leads to approximately 2.4 million healthcare visits annually in the United States alone.
Safe and Effective Home Methods to Remove Water
Most cases of trapped water resolve on their own within minutes or hours. However, when the sensation persists, several gentle, non-invasive techniques can encourage drainage without damaging delicate ear structures.
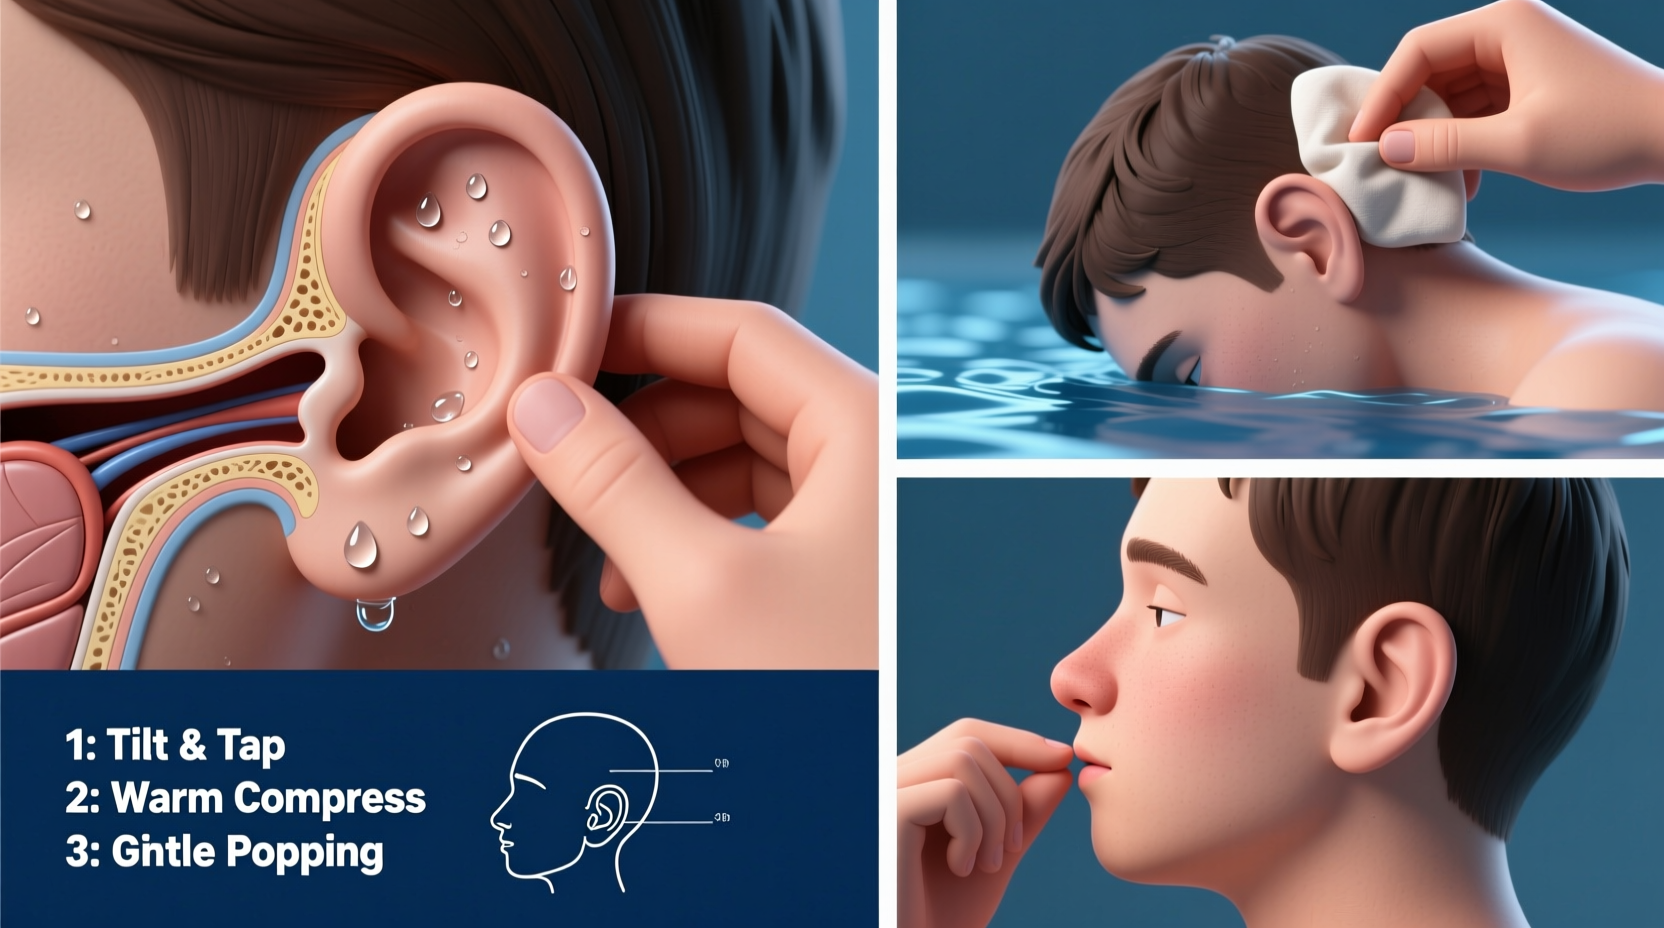
1. Gravity-Assisted Draining
This is the simplest and safest first step. Tilt your head sideways with the affected ear facing downward. Gently hop on one foot or walk around slowly to use gravity and motion to dislodge the water.
- Stand next to a sink or towel to catch drips.
- Tilt your head so the ear is parallel to the floor.
- Hold the position for 30 seconds to a minute.
- Gently tug on the outer ear to straighten the canal and improve drainage.
2. The Valsalva Maneuver (with caution)
This technique involves creating pressure in the Eustachian tubes to help open them and equalize pressure, which can assist in moving fluid out of the middle ear. It should only be used if you suspect water has reached deeper than the external canal—such as after diving or jumping into water.
- Close your mouth.
- Pinch your nostrils shut.
- Gently blow air through your nose while keeping it closed.
- You should feel a slight pop in your ears if successful.
Note: Do not blow too hard. Excessive force can damage the eardrum or push infection-causing bacteria further into the ear.
3. Warm Air Evaporation
Using a hairdryer on a low, warm setting can help evaporate trapped moisture. Keep the dryer at least 30 cm (12 inches) away from the ear and move it continuously to avoid overheating.
| Setting | Recommended | Avoid |
|---|---|---|
| Heat Level | Low warmth | Hot or high heat |
| Distance | 12–18 inches | Direct contact |
| Duration | 30–60 seconds | More than 2 minutes |
4. Alcohol and Vinegar Solution (for prevention and mild cases)
A mixture of rubbing alcohol and white vinegar in equal parts can help dry out the ear and prevent bacterial growth. The alcohol evaporates moisture, while the vinegar’s acidity discourages microbial development.
To use:
- Mix 1 tablespoon of rubbing alcohol with 1 tablespoon of white vinegar.
- Lie on your side and use a dropper to place 1–2 mL into the ear.
- Wait 3–5 minutes, then turn to let the solution drain out.
This method is best used after swimming as a preventive measure rather than a treatment for existing pain or infection.
“After frequent swimming, a few drops of an alcohol-vinegar solution can significantly reduce the risk of swimmer’s ear.” — Dr. Linda Chen, Otolaryngologist at Philadelphia Ear Institute
What Not to Do: Common Mistakes
While many people reach for quick fixes, some methods can do more harm than good. Avoid these practices to protect your hearing and prevent complications.
| Method | Risk | Better Alternative |
|---|---|---|
| Cotton swabs (Q-tips) | Pushes water and wax deeper; risks eardrum injury | Use gravity or evaporation instead |
| Fingernails or sharp objects | Scratches ear canal; introduces bacteria | Never insert anything into the ear canal |
| Ear candles | No scientific benefit; fire hazard and wax blockage risk | Stick to evidence-based methods |
| Overuse of ear drops without symptoms | Disrupts natural ear flora; may cause irritation | Use only when needed and as directed |
When to Seek Medical Attention
While home remedies are effective for minor water entrapment, certain symptoms indicate a need for professional evaluation. Ignoring these signs can lead to chronic infections or hearing damage.
Seek medical help if you experience:
- Persistent pain lasting more than 24 hours
- Drainage of pus or foul-smelling fluid
- Significant hearing loss or ringing (tinnitus)
- Redness, swelling, or warmth around the outer ear
- Fever accompanying ear discomfort
These could be signs of otitis externa or a middle ear infection, both of which may require prescription antibiotic drops or oral medication.
Mini Case Study: A Weekend Swimmer’s Experience
Mark, a 34-year-old recreational swimmer, began experiencing a fullness in his left ear after a weekend of lake swimming. He tried shaking his head and using a cotton swab, which only worsened the sensation. After two days, he developed mild pain and noticed reduced hearing.
He visited an urgent care clinic, where a physician diagnosed early-stage swimmer’s ear caused by prolonged moisture exposure and micro-abrasions from the cotton swab. Mark was prescribed antibiotic ear drops and advised to avoid swimming for a week. He recovered fully within six days.
Reflecting later, Mark said, “I didn’t realize how much damage a simple Q-tip could do. Now I use a hairdryer on low and never insert anything into my ears.”
Prevention: Keeping Your Ears Dry Before Problems Start
Preventing water from becoming trapped is easier than treating it afterward. Incorporating a few habits into your post-swim routine can make a significant difference.
Checklist: Post-Swim Ear Care Routine
- ✅ Tilt your head to each side after swimming to drain water
- ✅ Gently dry the outer ear with a soft towel—do not rub inside
- ✅ Use a few drops of alcohol-vinegar solution if you swim frequently
- ✅ Wear silicone earplugs designed for swimming
- ✅ Avoid swimming in polluted or highly chlorinated water when possible
- ✅ Let ears air-dry completely before wearing headphones or hearing aids
For children who swim regularly, consider custom-fitted ear molds from an audiologist. These provide a better seal than generic plugs and reduce the risk of recurrent ear issues.
“Parents often don’t realize that repeated ear infections in young swimmers can stem from untreated water retention. Prevention starts the moment they exit the pool.” — Dr. Alicia Torres, Pediatric ENT Specialist
Frequently Asked Questions
Can water stuck in the ear cause permanent damage?
In most cases, no. Temporary water trapping resolves without complications. However, if left untreated and leads to chronic swimmer’s ear, repeated inflammation can cause scarring or narrowing of the ear canal, potentially affecting hearing over time.
Is it safe to use hydrogen peroxide to remove water?
Hydrogen peroxide is sometimes used to soften earwax, but it’s not recommended for routine water removal. It can irritate the sensitive skin of the ear canal, especially if there are micro-tears. If you have excessive wax buildup, consult a doctor instead of self-treating.
How long can water stay in the ear before it becomes a problem?
Water typically evaporates within a few hours. If it remains for more than 24–48 hours, especially with symptoms like discomfort or muffled hearing, it increases infection risk. Take action early using safe drying techniques.
Conclusion: Protect Your Hearing with Smart Habits
Removing water from the ear after swimming doesn’t require special tools or medications—just knowledge and consistency. By understanding how water gets trapped, applying safe removal techniques, and adopting preventive habits, you can enjoy swimming without the discomfort of clogged ears or the risk of infection. Most importantly, respect the delicate nature of your ears: avoid inserting objects, recognize warning signs, and seek care when needed.


 浙公网安备
33010002000092号
浙公网安备
33010002000092号 浙B2-20120091-4
Comments
No comments yet. Why don't you start the discussion?