
Transforming your holiday display with custom animated lighting is no longer limited to professionals or theme parks. With the rise of affordable addressable RGB LEDs, homeowners can now create dynamic light shows that pulse, chase, fade, and synchronize to music—all from a single string of lights. Unlike traditional RGB strips, addressable LEDs allow individual control over each bulb, enabling intricate patterns and smooth transitions. Setting them up requires careful planning, proper hardware, and the right software, but the results are well worth the effort.
Understanding Addressable RGB Lights
Addressable RGB Christmas lights use digital protocols such as WS2811, WS2812B (NeoPixel), or SK6812 to control each LED individually. These bulbs contain built-in drivers that interpret data signals sent from a microcontroller, allowing precise color and brightness control per pixel. This level of granularity opens the door to complex animations like waves, rainbows, chases, and even audio-reactive effects.
The most common form factors include flexible LED strips, rigid bars, and pre-mounted strings designed specifically for outdoor holiday use. Strings often come in 50- or 100-light configurations with 5V or 12V power requirements. Choosing the right type depends on your project scale, power availability, and whether you plan to mount them indoors or outdoors.
Essential Components and Setup Checklist
Before diving into programming animations, ensure you have all necessary components. A missing piece—like an underpowered supply or incompatible controller—can derail the entire project.
Hardware You’ll Need
- Addressable RGB lights – WS2811-based strings are ideal for long runs; NeoPixels work well for shorter, detailed designs.
- Microcontroller – Options include ESP32, Arduino Uno, or Raspberry Pi. The ESP32 is preferred due to its Wi-Fi capability, which enables remote control and integration with smart home systems.
- Power supply – Match voltage (5V or 12V) and provide sufficient amperage. As a rule of thumb, assume 60mA per LED at full white brightness. For 100 LEDs at 5V, you’d need at least 6A (100 × 0.06 = 6).
- MOSFETs or level shifters – Required when using 5V logic controllers (like Arduino) with 12V strips to prevent signal degradation.
- Jumper wires, breadboard (optional), and connectors – For assembling circuits safely and cleanly.
- SD card module (optional) – Useful for storing animation sequences without relying on constant computer connection.
Software Tools
- Arduino IDE or PlatformIO – For writing and uploading code.
- FastLED or Adafruit_NeoPixel library – Simplifies LED control with pre-built functions for color mixing and animation.
- XLights (for advanced users) – A free, powerful sequencing tool that supports complex choreography and music synchronization.
“With addressable LEDs, the real magic isn’t just in the lights—it’s in how they communicate. Signal integrity and stable power make or break performance.” — Daniel Reyes, Embedded Systems Engineer and Holiday Lighting Designer
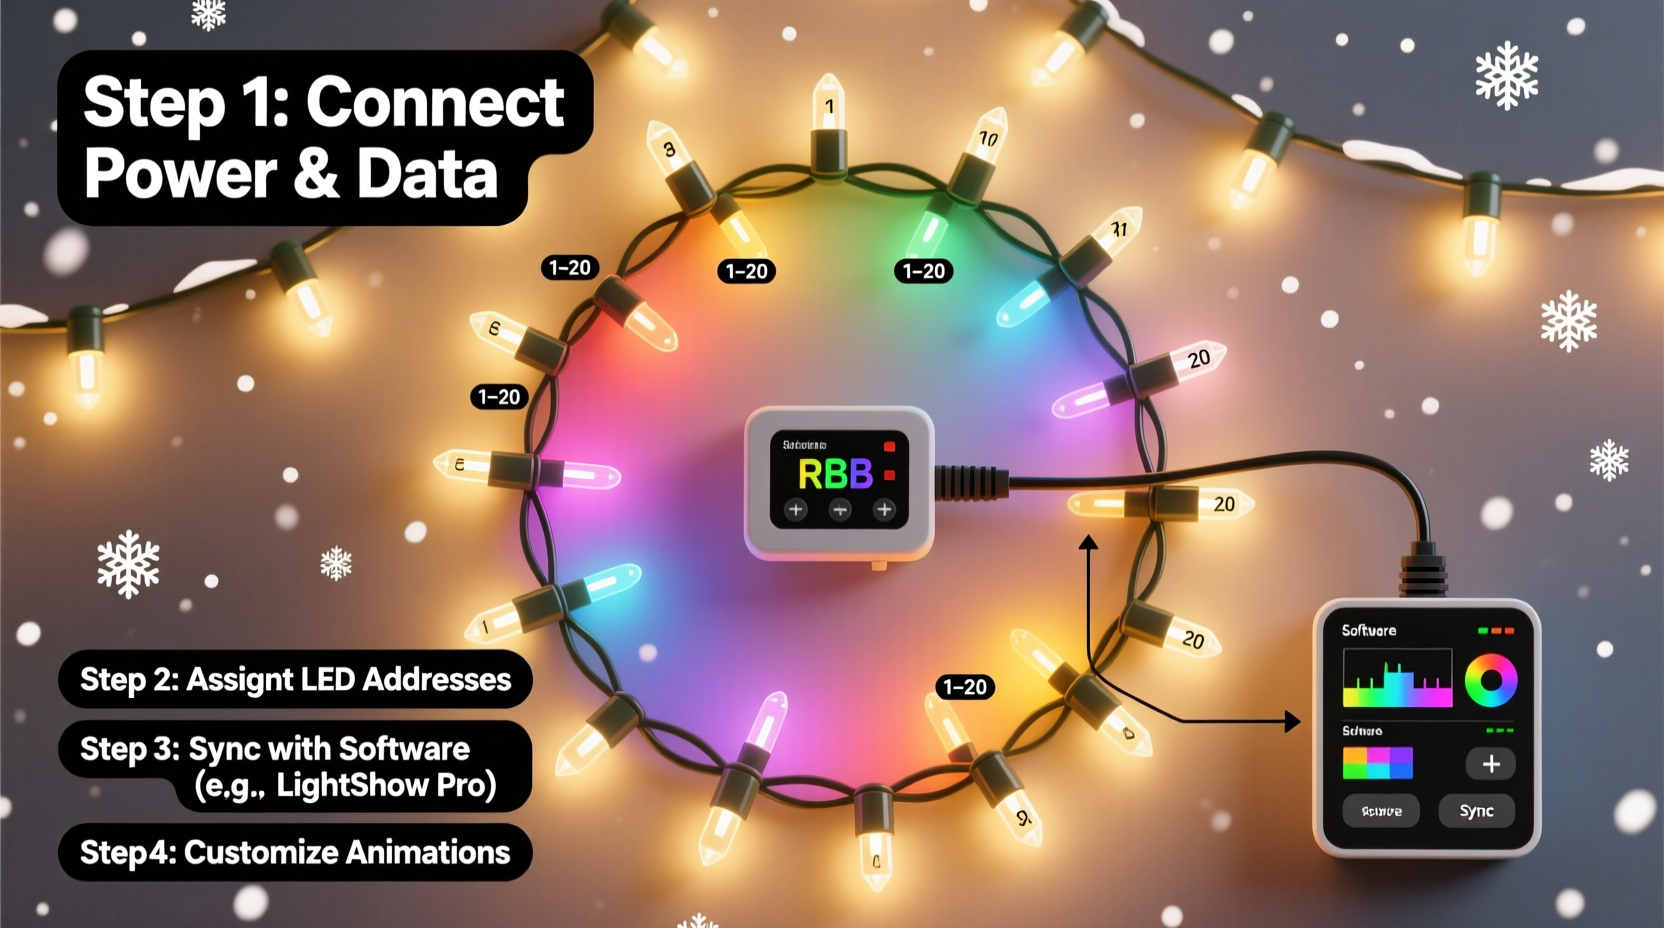
Step-by-Step Wiring and Configuration
Proper wiring ensures reliable operation and prevents damage to your components. Follow this sequence carefully.
- Plan your layout: Sketch where lights will go, measure total length, and decide how many segments you'll control independently. Each microcontroller has limits—typically 500–1000 pixels per data line depending on refresh rate.
- Connect power and ground: Attach the positive (V+) and ground (GND) wires from the power supply to both the LED strip and the microcontroller’s ground. Use thick gauge wire (18AWG or lower) for runs over 1 meter to minimize voltage drop.
- Link data lines: Connect the data input (DIN) of the first LED to a digital pin on the microcontroller (e.g., Pin 3 on Arduino). If using a 12V strip with a 5V logic board, insert a bidirectional logic level shifter between the controller and DIN.
- Daisy-chain additional strips (if needed): Connect the data output (DOUT) of one strip to the DIN of the next. Avoid chaining more than 5 meters of 5V strips without re-amplifying the signal.
- Add power injection for long runs: Every 2–3 meters (or after 50 LEDs), connect additional power leads directly from the supply to the V+ and GND rails. This prevents dimming at the end of the chain.
- Test before finalizing: Upload a simple rainbow cycle sketch to verify all LEDs respond correctly and there are no dead zones.
Programming Custom Animations
Once hardware is connected, it's time to bring your lights to life. The FastLED library is widely used for its simplicity and rich feature set.
Basic Animation Example Using FastLED
Here’s a minimal Arduino sketch that creates a smooth color wave:
#include#define NUM_LEDS 100 #define DATA_PIN 3 CRGB leds[NUM_LEDS]; void setup() { FastLED.addLeds<WS2811, DATA_PIN, GRB>(leds, NUM_LEDS); } void loop() { static uint8_t hue = 0; fill_rainbow(leds, NUM_LEDS, hue++, 7); FastLED.show(); delay(20); }
This script cycles through the rainbow by incrementing the base hue every 20 milliseconds. Functions like fill_solid(), fadeToBlackBy(), and nblend() allow blending, pulsing, and fading effects.
Advanced Control with XLights
For synchronized holiday shows—especially those timed to music—XLights offers a graphical interface to design animations frame by frame. It supports:
- Timeline-based sequencing with BPM sync
- Model building (mapping physical layouts digitally)
- Remote deployment via E1.31 (sACN) protocol over Wi-Fi
- Integration with DMX controllers for large-scale setups
To use XLights with an ESP32:
- Flash the ESP32 with firmware supporting sACN/E1.31 (e.g., Jinx! Lite or ESPixelStick).
- Assign a static IP to the device on your network.
- In XLights, define a “Universe” matching the number of channels (3 per LED: R, G, B) and assign the ESP32’s IP.
- Map your physical model (e.g., a tree spiral or house outline) in the layout editor.
- Create sequences using drag-and-drop effects and export them live to the lights.
| Feature | FastLED (Arduino) | XLights (PC-Based) |
|---|---|---|
| Learning Curve | Beginner to Intermediate | Intermediate to Advanced |
| Animation Complexity | Moderate (code-driven) | High (timeline editing) |
| Music Sync | Limited (requires FFT coding) | Full support with beat detection |
| Remote Control | Possible via Wi-Fi APIs | Built-in via Ethernet/Wi-Fi |
| Best For | Static displays, small projects | Large, choreographed shows |
Troubleshooting Common Issues
Even experienced builders encounter glitches. Here are frequent problems and solutions:
- First few LEDs flicker or show wrong colors: Likely a signal issue. Add a 330Ω resistor between the controller’s data pin and the strip’s DIN. Also, ensure ground continuity across all devices.
- LEDs turn white or random colors at startup: This is usually due to stray signals during boot. Keep data lines short and shielded if possible. Some recommend powering the LEDs only after the microcontroller initializes.
- Voltage drop causing dim ends: Inject power at multiple points along long runs. Never rely solely on end-to-end wiring for chains over 2 meters at 5V.
- Overheating power supply: Check load calculations. If drawing near the supply’s maximum, upgrade to a higher-rated unit or split loads across two supplies (with shared ground).
Real-World Example: The Neighborhood Light Show Upgrade
Mark T., a hobbyist in Portland, OR, upgraded his static red-and-green roof lights to a 350-LED addressable system using two 150-LED WS2811 strings and a 100-LED strip around his front window. He used an ESP32 running WLED firmware connected to a 12V 10A power supply with power injection every 1.5 meters.
Initially, he struggled with inconsistent colors on the third segment. After checking connections, he discovered the data line was too long without amplification. He added a 74HCT245 level shifter, which restored clean signal transmission. Using XLights, he programmed a holiday medley synced to classic carols. The result? A neighborhood attraction that drew families nightly during December.
“It took three weekends to get everything stable,” Mark said, “but seeing kids point at the dancing snowflakes made it all worthwhile.”
Frequently Asked Questions
Can I mix different types of addressable LEDs on the same controller?
No. While physically possible, mixing chipsets (e.g., WS2812B and SK6812) on one data line often causes erratic behavior because they use slightly different timing protocols. Always group identical models together and use separate pins or controllers for different types.
How do I protect my setup from weather and surges?
Use waterproof enclosures for all electronics, especially power supplies and microcontrollers. Install surge protectors on outlets feeding outdoor lights. For added safety, use a GFCI-protected circuit. Seal connector joints with silicone tape or heat-shrink tubing rated for outdoor use.
Is it safe to run these lights 24/7 during the holidays?
Yes, provided you’ve used appropriate wiring, adequate power, and proper ventilation. Monitor temperatures during the first 24 hours. Most quality addressable LEDs have thermal protection and consume less than 0.2W per bulb, making continuous operation feasible. Turn off when not needed to extend lifespan.
Final Steps and Best Practices
After successful testing, secure all components permanently. Use UV-resistant zip ties for mounting strips, route cables away from foot traffic, and label every wire at both ends. Document your setup with notes on pin assignments, IP addresses, and power specs—this helps immensely during troubleshooting or next year’s reinstall.
Consider automating your display. With an ESP32, you can schedule daily on/off times via NTP synchronization or trigger animations based on motion sensors or voice commands through platforms like Home Assistant.
Conclusion: Bring Your Vision to Light
Setting up addressable RGB Christmas lights for custom animations blends artistry with technology. From selecting the right components to crafting mesmerizing sequences, each step brings you closer to a personalized holiday experience. Whether you’re illuminating a single tree or orchestrating a block-wide symphony of light, the tools are accessible, the community is supportive, and the joy is contagious.


 浙公网安备
33010002000092号
浙公网安备
33010002000092号 浙B2-20120091-4
Comments
No comments yet. Why don't you start the discussion?