
Keyboards are one of the most frequently used tools in both work and personal computing, yet they often go unnoticed when it comes to maintenance. Over time, crumbs, dust, skin cells, and debris accumulate between the keys, creating an unhygienic environment and potentially impairing functionality. Sticky keys, unresponsive buttons, and even overheating can result from neglect. The good news is that preventing this buildup doesn’t require expensive tools or hours of effort. With a consistent, straightforward routine, you can keep your keyboard clean, functional, and germ-free.
Why Keyboard Cleanliness Matters
A dirty keyboard isn’t just unsightly—it poses real risks. Studies have shown that computer keyboards can harbor more bacteria than a toilet seat. This microbial load increases if you eat near your device, touch your face frequently, or fail to wash your hands before typing. Beyond health concerns, accumulated debris can interfere with key mechanisms. Mechanical keyboards may suffer from inconsistent actuation, while membrane keyboards might develop dead spots. Dust also traps moisture and heat, accelerating internal wear.
Maintaining a clean keyboard enhances not only hygiene but also longevity and user experience. A responsive, quiet, and visually clean keyboard improves focus and comfort during long typing sessions. Preventative care reduces the need for costly replacements or professional servicing.
“Regular keyboard maintenance should be as routine as backing up files. It’s a small habit with significant returns in performance and health.” — Dr. Lena Patel, Ergonomics and Workplace Hygiene Researcher
Daily Habits to Minimize Debris Accumulation
Prevention starts with behavior. Adjusting daily habits takes little effort but dramatically reduces what enters your keyboard in the first place.
- Avoid eating at your desk: This is the single most effective change. Even small snacks like chips or crackers generate fine crumbs that fall between keys.
- Wash hands before use: Reduces oil, sweat, and bacterial transfer onto keycaps.
- Position the keyboard correctly: Tilt it slightly away from you when not in use to discourage particles from settling into gaps.
- Use a desk mat: A large mat catches falling debris before it reaches the keyboard area.
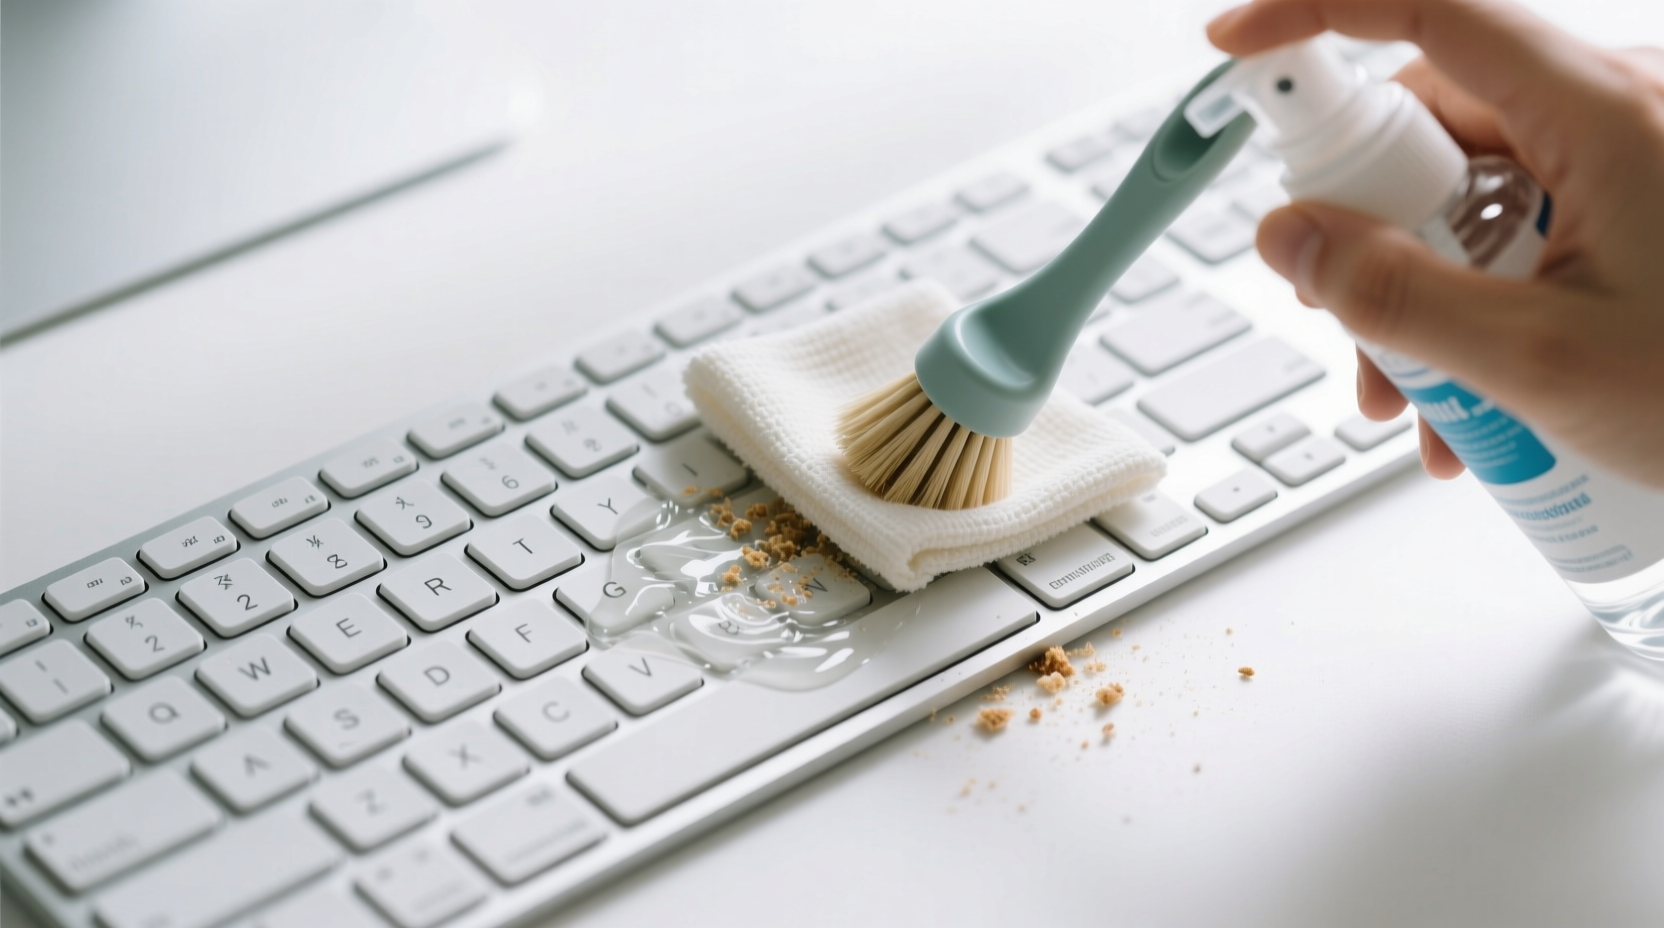
Weekly Cleaning Routine: Step-by-Step Guide
A weekly cleaning ritual prevents minor buildup from becoming a deep-seated problem. Follow this five-step process to maintain optimal condition.
- Power down and disconnect: Unplug wired keyboards or turn off wireless ones. For laptops, shut down completely to avoid accidental input damage.
- Invert and shake gently: Hold the keyboard upside down at a 75-degree angle and tap the back several times. This dislodges loose particles without forcing them deeper.
- Use compressed air: Spray short bursts between keys at varying angles. Keep the can upright to prevent liquid propellant from ejecting. Focus on high-traffic areas like spacebar and Enter key.
- Clean surfaces with a microfiber cloth: Dampen lightly with isopropyl alcohol (70%) or screen-safe cleaner. Wipe each keycap and the surrounding frame. Never spray liquid directly onto the keyboard.
- Target stubborn debris: Use a dry cotton swab or a narrow adhesive roller to extract lint and sticky residue from tight spaces.
Monthly Deep-Cleaning Checklist
Once a month, go beyond surface cleaning to address hidden grime. This deeper maintenance ensures long-term reliability.
🔧 Monthly Keyboard Care Checklist
- Remove keycaps (if detachable) using a keycap puller
- Soak keycaps in warm, soapy water for 15 minutes
- Scrub gently with a soft toothbrush to remove residue
- Rinse and air-dry completely (minimum 2 hours)
- Vacuum between switches with a mini vacuum attachment
- Inspect for frayed cables or wobbly USB ports
- Reassemble and test all keys for responsiveness
Note: Not all keyboards support removable keys. Membrane or laptop models should never be disassembled beyond surface cleaning. Stick to external methods for these devices.
Do’s and Don’ts of Keyboard Maintenance
| Do’s | Don’ts |
|---|---|
| Use isopropyl alcohol (70%) for disinfecting | Never submerge non-waterproof keyboards |
| Store in a closed drawer when not in use for extended periods | Avoid using household cleaners like bleach or window spray |
| Invest in a silicone keyboard cover for shared or dusty environments | Don’t blow air with your mouth—saliva introduces moisture and microbes |
| Clean hands regularly, especially after meals | Don’t use metal tools to scrape under keys |
| Rotate between two keyboards if used heavily | Don’t ignore persistent stickiness—it may indicate internal buildup |
Real-Life Example: How Sarah Fixed Her Sticky Laptop Keys
Sarah, a freelance writer based in Portland, noticed her laptop’s “E” and “R” keys were increasingly unresponsive. She often worked from her couch with a bowl of popcorn nearby. After three months of gradual decline, she consulted a technician who found a dense layer of cheese dust and salt crystals beneath the keys.
Instead of paying $120 for internal cleaning, Sarah followed a DIY monthly routine inspired by online forums. She began using a foldable Bluetooth keyboard on her coffee table, kept snacks farther away, and wiped her laptop keyboard every Friday night. Within a month, responsiveness improved. Six months later, no further issues emerged. Her total investment: $15 for a cleaning kit and behavioral discipline.
This case illustrates how small changes prevent major problems. Proximity to food was the root cause, and awareness transformed her habits.
Choosing the Right Tools and Accessories
Effective cleaning depends on having the right supplies. Here’s what to keep in your digital hygiene toolkit:
- Compressed air can: Essential for dislodging deep debris. Opt for models with a straw nozzle for precision.
- Microfiber cloths: Lint-free and gentle on plastic and coatings.
- Isopropyl alcohol wipes: Pre-moistened, safe for electronics, and effective against germs.
- Silicone keyboard cover: Fits snugly over most models, blocking dust and liquids. Remove and wash weekly.
- Mini vacuum with narrow attachment: Useful for desks and keyboards, especially in pet-friendly homes.
For mechanical keyboard users, a keycap puller and magnetic dust blaster (a specialized tool using static) are worth considering. These minimize finger contact and reduce cross-contamination.
FAQ: Common Questions About Keyboard Cleaning
How often should I clean my keyboard?
At minimum, perform a quick wipe and air blast once a week. A thorough cleaning—including keycap removal if possible—should happen monthly. In high-use or dusty environments, consider bi-weekly maintenance.
Can I use hand sanitizer to clean my keyboard?
No. While hand sanitizer contains alcohol, it often includes fragrances, thickeners, and glycerin that leave sticky residues. These attract more dust and may degrade plastic over time. Stick to pure isopropyl alcohol diluted to 70% or use manufacturer-approved wipes.
Are keyboard covers a good idea?
Yes—for certain situations. Silicone covers are excellent for protecting against dust, spills, and pet hair in shared spaces. However, some users find them affect typing feel and may trap heat. Use them during idle periods or in dirty environments, but remove them during active typing for better ventilation and tactile response.
Final Thoughts: Make Cleanliness a Seamless Habit
Keeping your keyboard free of crumbs and dust doesn’t require heroic effort—just consistency. By integrating a few smart behaviors into your weekly workflow, you protect both your hardware and your health. Think of keyboard care as part of your digital wellness routine, just like updating software or organizing files.
The best routines are sustainable. Start small: commit to one weekly cleaning session and gradually adopt monthly deep cleans. Choose tools that fit your setup and lifestyle. Most importantly, stay mindful of what you bring near your workspace. Prevention is always easier than repair.


 浙公网安备
33010002000092号
浙公网安备
33010002000092号 浙B2-20120091-4
Comments
No comments yet. Why don't you start the discussion?