
Fresh herbs elevate the flavor of any dish, but their short shelf life often leads to waste. Too often, a vibrant bunch of cilantro or parsley wilts within days of purchase, turning slimy and unusable before you’ve had a chance to use it. The good news? With the right storage techniques, you can extend the life of your fresh herbs by up to two weeks—sometimes even longer. These practical, kitchen-tested methods are grounded in food science and used by chefs and home cooks alike. No special equipment required. Just smart habits that make a real difference.
The Science Behind Herb Spoilage
Fresh herbs are delicate. They lose moisture quickly and are highly susceptible to microbial growth when exposed to excess humidity or warmth. Most herbs are composed of 80–90% water, which means dehydration is their primary enemy. At the same time, trapping too much moisture creates an environment where mold and bacteria thrive. The key to long-lasting herbs lies in balancing hydration and airflow.
Temperature also plays a crucial role. Tender herbs like basil and cilantro are sensitive to cold and can suffer from chilling injury if stored improperly. Hardy herbs such as rosemary and thyme fare better in cooler conditions but still require protection from drying out. Understanding these differences allows for tailored storage strategies that maximize freshness.
“Proper herb storage isn’t about one-size-fits-all solutions. It’s about matching the method to the herb’s biology.” — Dr. Lena Torres, Postharvest Food Scientist, University of California Agriculture Department
Step-by-Step Guide: How to Store Herbs by Type
Not all herbs should be treated the same way. Categorizing them based on texture and origin helps determine the best storage method. Below is a proven, step-by-step approach grouped by herb type.
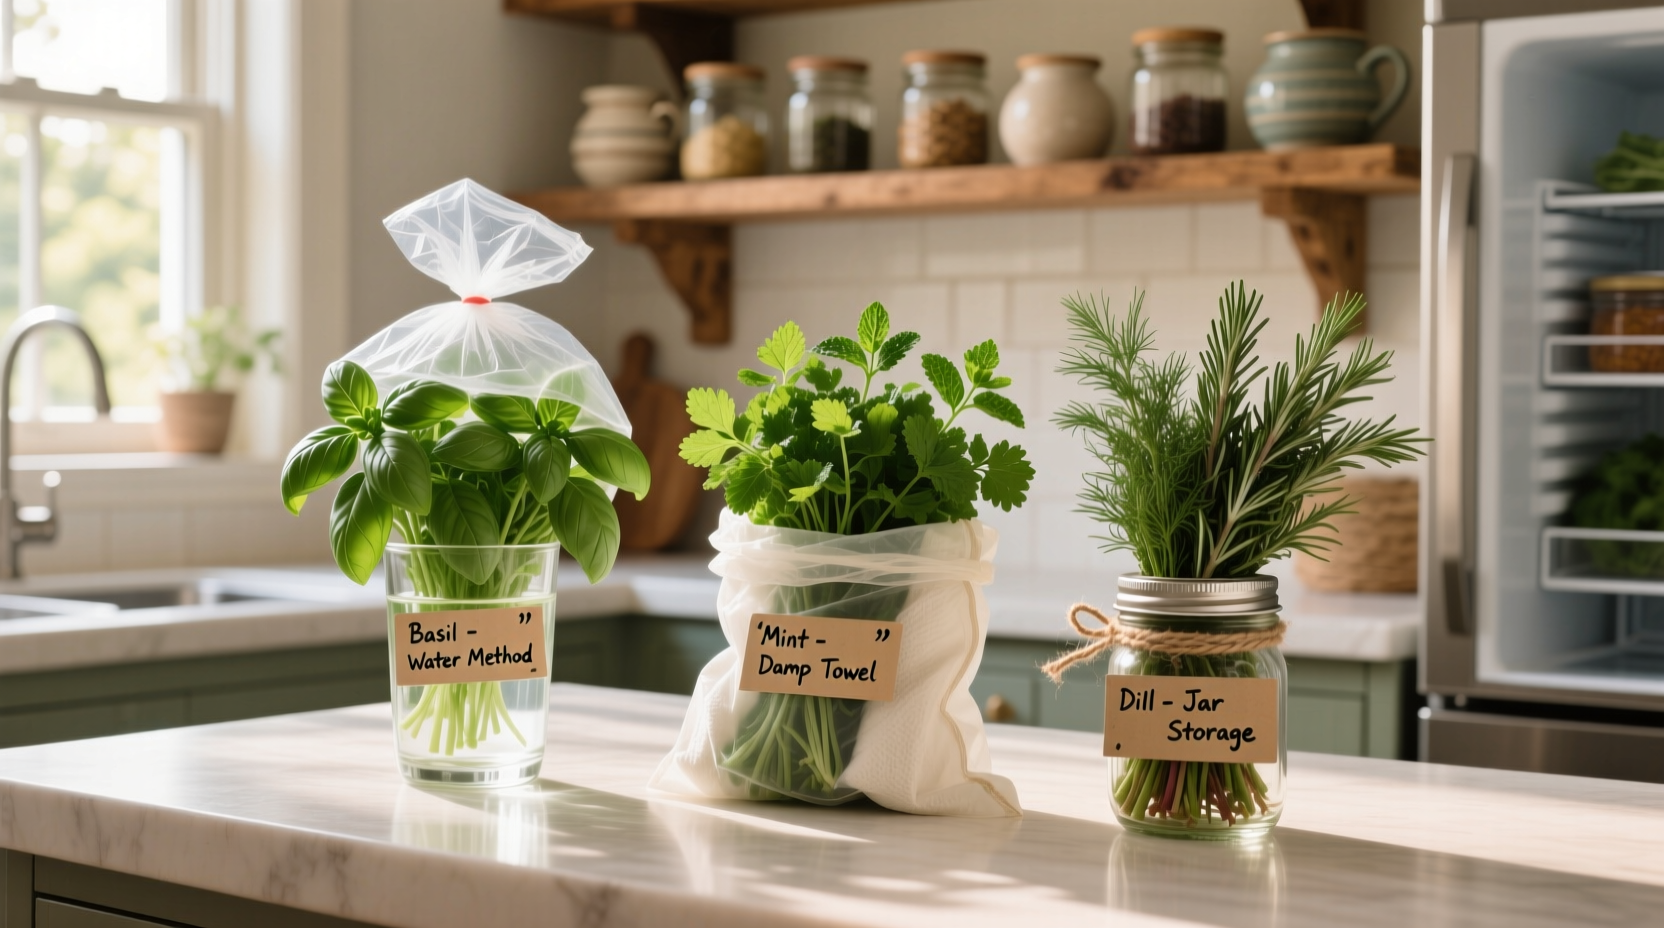
1. Tender Herbs (Cilantro, Parsley, Dill, Basil*)
These leafy, soft-stemmed herbs wilt quickly but respond well to hydration-based storage. Think of them like cut flowers—they need water to stay crisp.
- Trim about ½ inch off the bottom of the stems.
- Place the herbs stem-down in a glass or jar with 1–2 inches of water.
- Cover loosely with a plastic bag or reusable produce bag.
- Store in the refrigerator (except basil—see note below).
- Change the water every 2–3 days.
Note on basil: Basil is tropical and sensitive to cold. Refrigeration causes blackening and mushiness. Instead, keep basil at room temperature in a water-filled jar, away from direct sunlight—like a bouquet on the counter. Use within 7–10 days.
2. Hardy Herbs (Rosemary, Thyme, Oregano, Sage)
These woody-stemmed herbs have lower moisture content and don’t require standing water. They benefit more from controlled humidity than constant hydration.
- Gently wipe off any dirt or moisture with a dry paper towel.
- Wrap the herbs loosely in a slightly damp paper towel.
- Place the bundle inside a resealable container or airtight bag.
- Store in the crisper drawer of your refrigerator.
This method maintains just enough moisture without encouraging rot. Check weekly and replace the paper towel if it becomes too wet.
3. Flat-Leaf vs. Curly Herbs
While not a biological category, this distinction affects how air circulates around the leaves. Curly parsley, for example, traps more moisture between its ruffles, increasing the risk of mold.
- For curly herbs: Avoid sealing tightly. Allow airflow by using perforated bags or leaving the top open.
- For flat-leaf herbs: They handle moisture better and can be stored using the jar method like tender herbs.
Alternative Storage Methods That Work
If you’re short on space or preparing herbs in advance, these alternative techniques offer excellent results.
Freezing Herbs in Oil or Water
Freezing preserves flavor exceptionally well, especially for cooking applications. This method works best with herbs you’ll use in soups, stews, or sautés.
- Chop herbs finely.
- Fill ice cube trays halfway with chopped herbs.
- Pour olive oil or water over them to fill each compartment.
- Freeze until solid, then transfer cubes to a labeled freezer bag.
Basil frozen in oil retains its color and aroma remarkably well. Use directly from frozen—no thawing needed.
Drying Herbs Quickly at Home
Drying concentrates flavor and drastically extends shelf life. While traditional air-drying takes days, a quick oven or microwave method can preserve herbs in under an hour.
- Oven method: Spread herbs on a baking sheet, bake at 170°F (75°C) for 2–3 hours until brittle.
- Microwave method: Place herbs between two paper towels, microwave in 30-second bursts until dry.
Store dried herbs in airtight jars away from light. Properly dried herbs last up to a year.
Do’s and Don’ts of Herb Storage
| Do | Don't |
|---|---|
| Trim stems before placing in water | Leave herbs in original plastic clamshells |
| Use a damp (not wet) paper towel for wrapping | Seal herbs in airtight containers without airflow |
| Change water every 2–3 days for jar-stored herbs | Wash herbs before storing (adds excess moisture) |
| Store basil at room temperature | Refrigerate basil—it turns black |
| Freeze surplus herbs in oil | Throw away wilted herbs—revive them in ice water |
One common mistake is washing herbs immediately after purchase. While cleanliness matters, moisture accelerates decay. Wait to wash herbs until just before use. If cleaning is necessary, dry thoroughly with a salad spinner or clean towel before storing.
Real Example: How a Home Cook Reduced Herb Waste by 70%
Sophia, a meal-prepper from Portland, used to buy fresh herbs weekly, only to toss half due to spoilage. After learning the jar-and-bag method for parsley and cilantro, she adjusted her routine. She now stores tender herbs upright in water, covered with a produce bag, in her fridge’s middle shelf (away from the coldest zones). For thyme and rosemary, she uses the damp-paper-towel wrap.
She also started freezing leftover basil into oil cubes during peak summer season. “I used to throw out a whole bunch every week,” she says. “Now I stretch one purchase over two weeks, and I always have flavored oil ready for pasta.” Her herb spending dropped, and her cooking improved thanks to consistent access to fresh flavors.
Checklist: Maximize Freshness in 5 Steps
Follow this simple checklist every time you bring fresh herbs home:
- ☐ Sort herbs by type: tender, hardy, or basil.
- ☐ Trim stems and remove damaged leaves.
- ☐ Choose the correct storage method (jar, wrap, or counter).
- ☐ Label and date containers for frozen or dried batches.
- ☐ Refresh water or paper towels every 2–3 days.
Sticking to this routine ensures you never guess what to do. It transforms herb care from a chore into a seamless part of kitchen organization.
Frequently Asked Questions
Can I revive wilted herbs?
Yes, in most cases. Submerge limp herbs (especially parsley, cilantro, and dill) in a bowl of ice-cold water for 15–30 minutes. The cold water rehydrates the cells, restoring crispness. Pat dry before use.
Should I store herbs in glass or plastic containers?
Glass is ideal for maintaining consistent humidity and preventing odor absorption. However, clean, airtight plastic containers work well too. Avoid flimsy produce bags unless perforated for airflow.
How long do herbs really last with these methods?
Tender herbs stored in water typically last 10–14 days, compared to 3–5 days when left in original packaging. Hardy herbs last 2–3 weeks when wrapped properly. Frozen herbs retain flavor for 6 months; dried herbs up to 1 year.
Expert Insight: What Restaurants Do Differently
Professional kitchens treat herbs as perishable assets, not garnishes. Many high-end restaurants use modified atmosphere packaging (MAP), which adjusts oxygen and carbon dioxide levels to slow decay. While consumers can’t replicate MAP at home, they can mimic its principles.
“The core idea is minimizing respiration and moisture loss. At our restaurant, we store parsley in hydrating sleeves and rotate stock daily. At home, the water-jar method is the closest equivalent—and it’s brilliant in its simplicity.” — Chef Marcus Lin, Executive Chef at Verde Bistro
Another pro tip: Keep herbs away from ethylene-producing fruits like apples, bananas, and tomatoes. Ethylene gas accelerates ripening and decay, causing herbs to yellow and wilt prematurely.
Final Tips for Long-Term Success
Extending the life of fresh herbs isn’t about perfection—it’s about consistency. Even small improvements compound over time. Here are three final tips to lock in your success:
- Buy only what you need. Purchase smaller bunches more frequently if you don’t cook daily. Less waste, fresher flavor.
- Prep ahead, but wisely. Chop herbs only when ready to use. Premature cutting increases surface area for moisture loss and oxidation.
- Grow your own. A small windowsill pot of basil, thyme, or mint gives you continuous harvests and eliminates storage issues altogether.
Conclusion: Make Every Sprig Count
Fresh herbs are worth preserving. They add depth, aroma, and vibrancy to meals that dried versions simply can’t match. By applying these kitchen-tested storage tricks—sorting by type, using water jars, wrapping in damp towels, freezing in oil, and avoiding common mistakes—you can double the lifespan of your herbs with minimal effort.
Start tonight. The next time you bring home a bunch of cilantro or a sprig of rosemary, don’t just toss it in the fridge. Give it the care it deserves. You’ll save money, reduce waste, and cook with brighter, bolder flavors all week long.


 浙公网安备
33010002000092号
浙公网安备
33010002000092号 浙B2-20120091-4
Comments
No comments yet. Why don't you start the discussion?