
Pothos (Epipremnum aureum) is one of the most popular houseplants for good reason: it’s nearly indestructible, grows quickly, and thrives in low light. But beyond its resilience, one of the most satisfying aspects of owning a pothos is learning how to propagate it—especially in water. This method allows you to multiply your collection, gift plants to friends, or rejuvenate a leggy vine with ease. For beginners, water propagation offers a clear, visual way to monitor root development and understand plant health. With the right steps and a little patience, you can turn a single cutting into multiple thriving plants.
Why Propagate Pothos in Water?
Water propagation has become a favorite among indoor gardeners because it’s simple, transparent, and highly effective for many vining plants like pothos. Unlike soil propagation, where root growth remains hidden, water allows you to see exactly when roots form and how they develop. This visibility helps prevent overwatering or rot, two common issues in soil-based methods.
Pothos cuttings adapt exceptionally well to aquatic environments. Their nodes—the small bumps along the stem where leaves emerge—are pre-programmed to produce roots when exposed to moisture. In water, these nodes activate within days, often producing healthy, white roots in under two weeks. The process also gives you full control over water quality and hygiene, reducing the risk of fungal infections.
“Water propagation is one of the most reliable ways to clone pothos. It’s forgiving, educational, and perfect for beginners who want to learn plant biology through hands-on experience.” — Dr. Lena Torres, Horticulturist & Urban Gardening Educator
Step-by-Step Guide to Propagating Pothos in Water
Propagating pothos in water doesn’t require special tools or expertise. Follow these steps carefully to ensure success from the first snip to the final transplant.
- Select a Healthy Parent Plant: Choose a mature pothos with vibrant green leaves and no signs of yellowing, pests, or disease. A healthy parent ensures strong genetics and faster rooting.
- Gather Your Tools: Use clean, sharp scissors or pruning shears. Sterilize them with rubbing alcohol to prevent transferring pathogens.
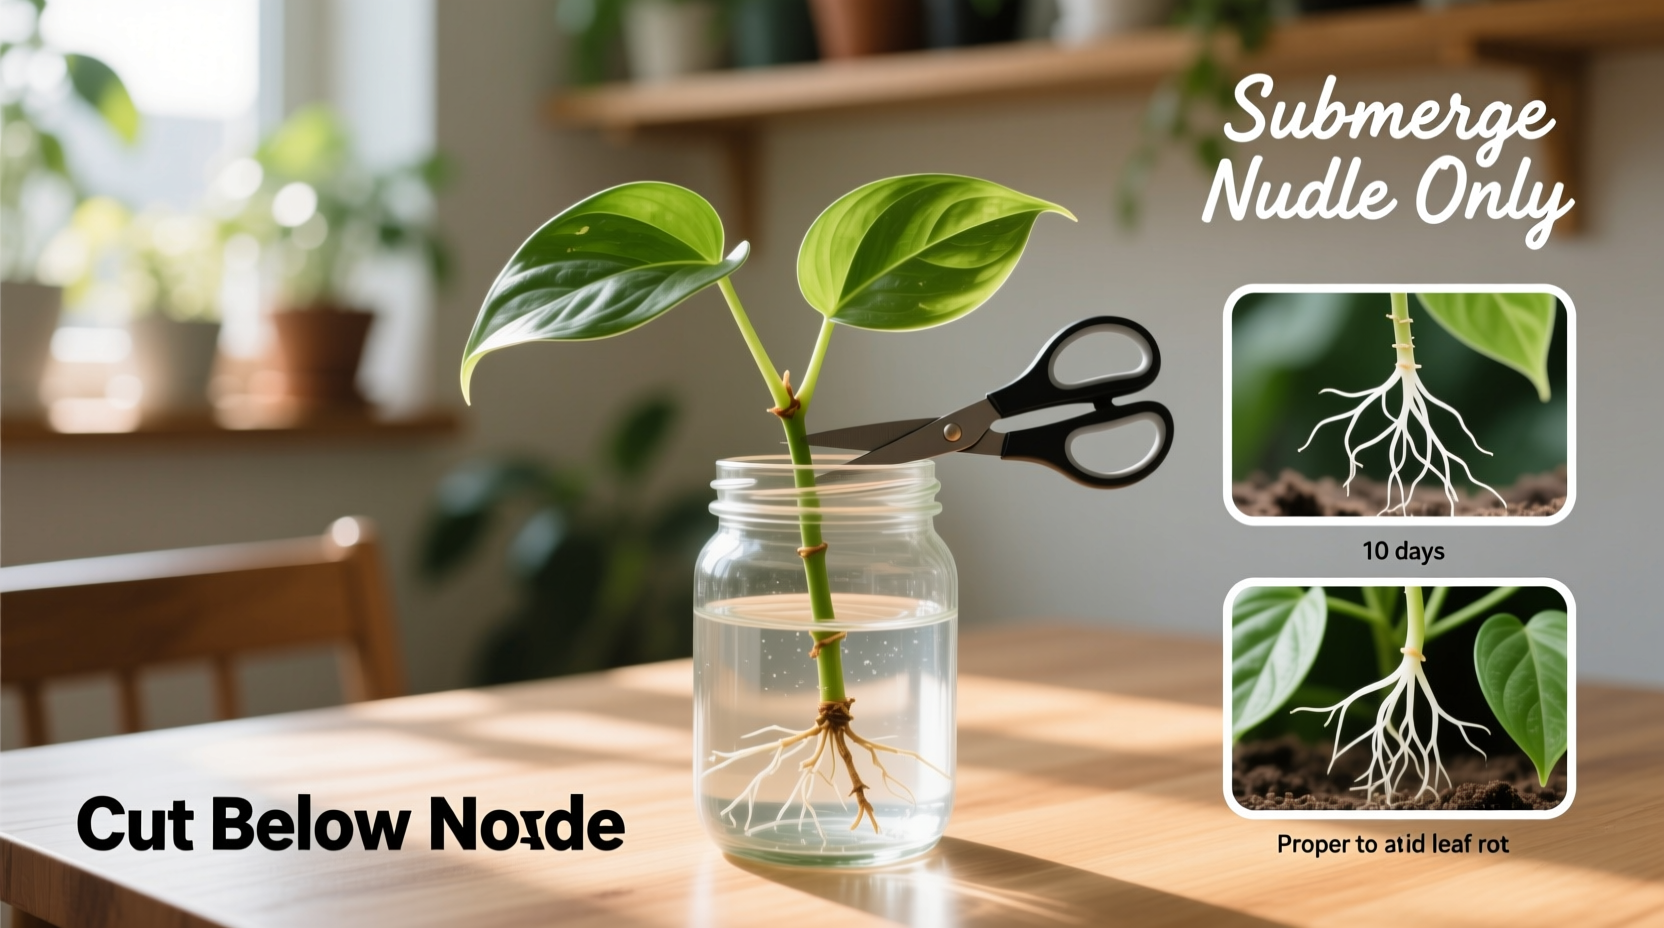
- Take the Cutting: Cut just below a node—the raised area on the stem where leaves attach. Each cutting should have at least one node and 2–3 leaves. Nodes are essential; without them, roots won’t form.
- Remove Lower Leaves: Strip off any leaves that would sit below the waterline. Submerged foliage can rot and contaminate the water.
- Place in Water: Use a clean glass, jar, or vase filled with room-temperature water. Ensure the node is fully submerged while leaves remain above the surface.
- Choose the Right Location: Place the container in bright, indirect light. Avoid direct sunlight, which can overheat the water and encourage algae growth.
- Wait and Monitor: Change the water every 5–7 days to keep it oxygenated and free of bacteria. Within 7–10 days, small white roots should begin to emerge from the node.
- Transplant or Continue Growing in Water: Once roots reach 1–2 inches in length, you can either transfer the cutting to soil or continue growing it hydroponically in water.
Common Mistakes to Avoid During Water Propagation
Even though pothos is forgiving, certain missteps can delay or derail propagation. Being aware of these pitfalls increases your chances of success.
- Cutting Above the Node: Always cut below the node, not above. The node contains meristematic tissue responsible for root initiation.
- Leaving Leaves in Water: Submerged leaves decay quickly, promoting bacterial growth that can infect the stem.
- Using Tap Water with High Chlorine: Some municipal tap water contains chlorine or fluoride, which may slow root development. Let water sit out overnight to allow chemicals to evaporate, or use filtered or distilled water.
- Placing in Direct Sunlight: While pothos needs light, direct sun heats the water and encourages algae, making it harder for roots to thrive.
- Infrequent Water Changes: Stagnant water depletes oxygen and accumulates microbes. Weekly changes are crucial for healthy root formation.
| Do’s | Don’ts |
|---|---|
| Use clean containers and tools | Reuse dirty jars without washing |
| Submerge only the node, not leaves | Let leaves soak in water |
| Change water weekly | Leave water unchanged for weeks |
| Provide bright, indirect light | Place in scorching afternoon sun |
| Wait until roots are 1–2 inches long before transplanting | Plant too early with tiny root nubs |
Real Example: Sarah’s First Pothos Propagation Journey
Sarah, a first-time plant owner in Seattle, inherited a large golden pothos from her grandmother. Over time, the plant became leggy and sparse at the base. Instead of discarding it, she decided to try propagation after reading about it online. Using a kitchen knife (which she wiped with alcohol), she took four cuttings, each with a visible node and two leaves. She placed them in recycled glass bottles filled with filtered water and positioned them near a north-facing window.
She changed the water every Sunday and noticed tiny white specks forming at the nodes by day six. By day 14, all cuttings had developed roots over an inch long. Sarah transplanted three into pots with well-draining soil, keeping one in water as a decorative piece on her desk. Six months later, all four plants were thriving—her original pothos looked fuller than ever, and she gifted two new plants to coworkers. “It felt like magic,” she said. “I didn’t think I could grow anything, but now I’m hooked.”
When and How to Transplant to Soil
While some people choose to grow pothos permanently in water, transitioning to soil often leads to more vigorous growth and larger leaves. The best time to transplant is when roots are between 1 and 2 inches long. Longer roots can become fragile and break during transfer.
To move your cutting to soil:
- Prepare a small pot (4–6 inches) with drainage holes.
- Fill it with a well-aerated potting mix—combine regular potting soil with perlite or orchid bark for better drainage.
- Gently remove the cutting from water, being careful not to damage young roots.
- Dig a small hole, place the cutting in, and cover the roots with soil. Press lightly to secure it.
- Water thoroughly until excess drains out.
- Keep the plant in bright, indirect light and maintain slightly moist soil for the first few weeks.
Expect some leaf drop or slowed growth during the transition period—this is normal. The plant is adjusting from an aquatic environment to soil-based nutrient uptake. Avoid fertilizing for at least four weeks.
Frequently Asked Questions
Can I propagate pothos in cold water?
No. Cold water shocks the plant tissue and slows metabolic activity. Always use room-temperature or slightly warm water to encourage root initiation.
How long does it take for pothos to root in water?
Most cuttings develop visible roots within 7–10 days. Full root systems suitable for transplanting usually take 3–4 weeks, depending on light, temperature, and water quality.
My water smells bad and looks cloudy. What should I do?
This indicates bacterial growth, likely caused by decaying leaves or infrequent water changes. Immediately replace the water, rinse the container and cutting, and remove any soft or discolored stems. Going forward, change the water weekly and ensure no leaves are submerged.
Checklist for Successful Pothos Propagation in Water
Use this checklist to stay organized and maximize your success rate:
- ☑ Select a healthy parent plant with vibrant foliage
- ☑ Sterilize scissors or pruning shears before cutting
- ☑ Take cuttings just below a node, ensuring at least one node per stem
- ☑ Remove lower leaves to prevent submersion
- ☑ Use clean glassware filled with room-temperature water
- ☑ Submerge only the node(s), not the leaves
- ☑ Place in bright, indirect light (no direct sun)
- ☑ Change water every 5–7 days
- ☑ Wait until roots are 1–2 inches long before transplanting
- ☑ Transition to well-draining soil if desired, using gentle handling
Final Thoughts and Next Steps
Propagating pothos in water is one of the most accessible entry points into plant care and horticulture. It teaches observation, patience, and the fundamentals of plant biology—all while producing tangible results in just a few weeks. Whether you’re looking to expand your indoor jungle, revive an aging plant, or share greenery with others, this technique empowers you to do so sustainably and affordably.
Once you’ve mastered water propagation with pothos, consider applying the same principles to other houseplants like philodendrons, spider plants, or tradescantia. Each species offers slight variations, but the core concepts remain consistent. Start small, learn from each attempt, and celebrate every new root.


 浙公网安备
33010002000092号
浙公网安备
33010002000092号 浙B2-20120091-4
Comments
No comments yet. Why don't you start the discussion?