
Capturing what’s on your screen is one of the most practical digital skills you can master. Whether you're saving an important message, documenting a software bug, or sharing a funny meme, screenshots are indispensable. Yet, many users still struggle with inconsistent results—blurry captures, missing steps, or not knowing where the image was saved. The reality is that each device and operating system handles screenshots differently. Knowing the right method saves time, avoids frustration, and ensures clarity in communication.
This guide breaks down the exact steps to take a screenshot across major platforms—Windows, macOS, iOS, Android, Linux, and even gaming consoles. You’ll also learn advanced tricks, troubleshooting tips, and best practices to make every capture count.
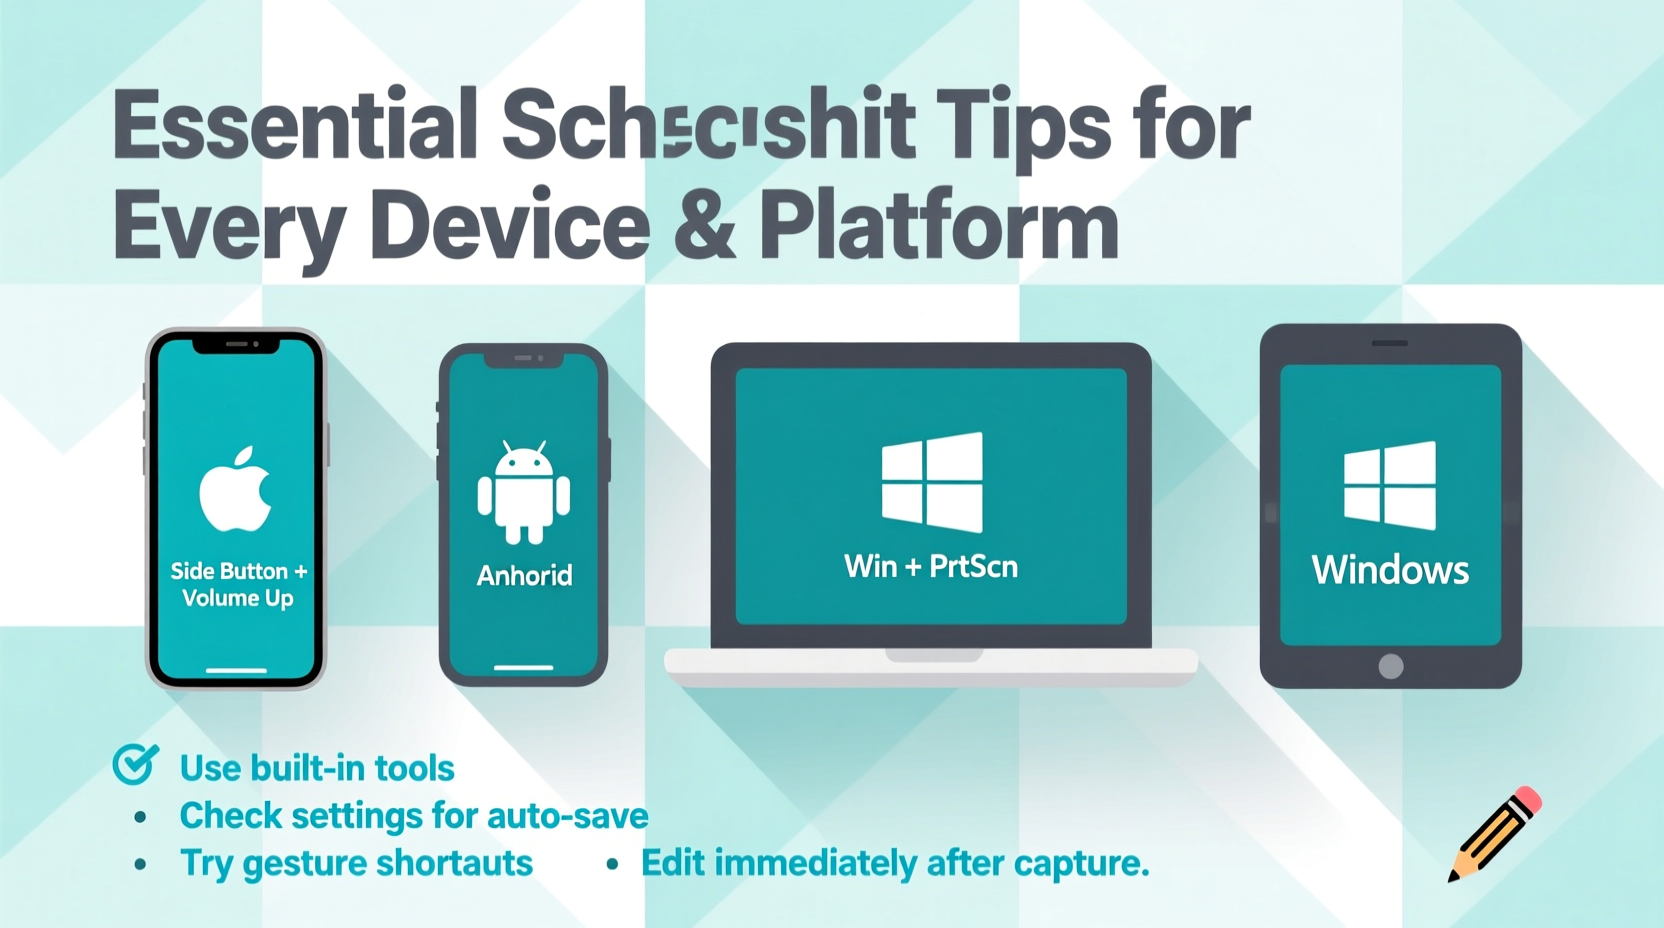
How to Take a Screenshot on Windows
Windows offers multiple ways to capture your screen depending on your version and needs. The most common methods work across Windows 10 and 11.
To capture the entire screen, press Print Screen (PrtScn). This copies the full display to your clipboard. You’ll need to paste it into an application like Paint, Word, or an email using Ctrl+V.
For a quicker save, use Windows + PrtScn. This automatically saves the full-screen screenshot as a PNG file in your “Screenshots” folder inside Pictures.
If you only want to capture the active window, press Alt + PrtScn. This copies just the highlighted window to the clipboard for easy pasting.
For selective captures, use the built-in **Snipping Tool** or **Snip & Sketch**:
- Press Windows + Shift + S.
- Your screen dims, and a toolbar appears at the top.
- Select between rectangular, freeform, window, or full-screen snip.
- Drag to select the area.
- The screenshot copies to your clipboard and opens in Snip & Sketch for annotation.
How to Take a Screenshot on macOS
Apple has refined its screenshot tools over the years, especially since macOS Mojave. Modern Macs offer powerful keyboard shortcuts and a dedicated screenshot utility.
To capture the entire screen, press Command + Shift + 3. A thumbnail briefly appears in the corner—click it to edit instantly, or let it save to your desktop.
To capture a portion of the screen, press Command + Shift + 4. Your cursor turns into a crosshair. Drag to select the area. Release to capture.
You can also capture a specific window by pressing Command + Shift + 4, then pressing Spacebar. The cursor becomes a camera. Hover over any window and click to capture it with a drop shadow effect.
For even more control, press Command + Shift + 5 to open the full Screenshot app. From here, you can:
- Choose between screen recording and screenshot modes.
- Set timers (5 or 10 seconds).
- Select where screenshots are saved (desktop, documents, etc.).
- Record specific windows or portions of the screen.
“macOS’s screenshot toolset rivals professional software—once you know the shortcuts, capturing and editing becomes seamless.” — Jordan Lee, Apple Product Trainer
Screenshots on Mobile Devices: iPhone and Android
Smartphones make taking screenshots effortless, but the method varies between brands and models.
iOS (iPhone and iPad)
On iPhones with Face ID (iPhone X and later), press the Side Button and Volume Up button simultaneously. On older models with a Home button, press Side Button and Home together.
A flash and shutter sound confirm the capture. A thumbnail appears in the lower-left corner. Tap it to edit, mark up, crop, or share immediately. If ignored, the screenshot saves to Photos.
Android
Most Android devices use Power + Volume Down buttons pressed at the same time. Some Samsung models support palm-swipe gestures (enable in Settings > Advanced Features > Motions).
After capture, a notification appears allowing quick access to edit or share. Screenshots are stored in the Gallery or Files app under “Screenshots” folder.
| Device | Button Combination | Save Location |
|---|---|---|
| iPhone (Face ID) | Side + Volume Up | Photos App |
| iPhone (Home Button) | Side + Home | Photos App |
| Android (Standard) | Power + Volume Down | Gallery/Screenshots |
| Samsung (Gesture) | Palm Swipe Right | Same as above |
Special Cases: Chromebooks, Linux, and Gaming Consoles
Not all devices follow mainstream patterns. Here’s how to handle less common platforms.
Chromebook
Press Ctrl + Show Windows (F5) to capture the entire screen. For a partial screenshot, use Ctrl + Shift + Show Windows and drag to select.
Screenshots appear in the “Downloads” folder and trigger a brief notification.
Linux (Ubuntu/GNOME)
Press PrtScn for full screen, Shift + PrtScn for a selected area, or Alt + PrtScn for the active window.
Use Ctrl + PrtScn to copy instead of saving. Screenshots go to the Pictures folder by default.
Gaming Consoles
- PlayStation 5: Press the Create button. Choose “Take Screenshot” or use voice command if supported.
- Xbox Series X|S: Press the Xbox button, then Share button twice to capture a screenshot.
- Nintendo Switch: Press the Screenshot button (camera icon) on the left Joy-Con.
All console screenshots save to internal storage and can be shared via their respective apps (e.g., PlayStation App, Xbox App).
Best Practices and Troubleshooting Tips
Taking a screenshot seems simple—until it doesn’t work. These actionable strategies ensure consistent success.
Checklist: Optimize Your Screenshot Workflow
- ✅ Ensure sufficient storage space—full drives prevent saving.
- ✅ Update your OS regularly—bugs in screenshot functions are often patched.
- ✅ Use built-in editors to annotate before sharing.
- ✅ Organize screenshots with folders or naming conventions.
- ✅ Disable sensitive content previews in messaging apps before capturing.
Blurry or low-resolution screenshots often result from zoomed displays or scaling settings. On Windows, check Display Settings > Scale and Resolution. On Mac, ensure you’re not using scaled viewing modes that compress output.
If your keyboard shortcuts fail, test individual keys. Sticky or unresponsive keys (especially PrtScn) are common on older laptops. Alternatively, use the on-screen keyboard or built-in tools like Snip & Sketch or Grab (on Mac).
“Over 60% of support tickets involving user errors could be resolved with a clear screenshot. Teaching clients how to capture effectively reduces resolution time by half.” — Maria Chen, IT Support Lead at TechFlow Solutions
Frequently Asked Questions
Where do screenshots get saved by default?
On Windows, they go to Pictures > Screenshots. On macOS, they save to the Desktop unless changed. iPhones store them in the Photos app, while Android uses the Gallery or Files app under “Screenshots.”
Can I take a screenshot of a scrolling page?
Yes, but not natively on most devices. Use browser extensions like GoFullPage (Chrome/Firefox) or Edge’s built-in Web Capture. Some Samsung phones offer “Scroll Capture” in their native screenshot editor.
Why won’t my Print Screen key work?
Some laptops require you to press Fn + PrtScn. Others reassign the key to brightness or volume. Check your manufacturer’s function lock settings (often toggled with Fn + Esc).
Master the Moment: Start Capturing With Confidence
Knowing how to take a screenshot isn’t just about pressing buttons—it’s about understanding your device’s rhythm and leveraging tools to communicate clearly. Whether you’re troubleshooting, teaching, or simply preserving a moment online, the right capture makes all the difference.
Now that you’ve learned the precise methods across platforms, tested the shortcuts, and absorbed expert insights, put them into practice. Try capturing something useful today—a recipe, a confirmation page, or a step in a tutorial. Share it with someone who needs it. And when you perfect your technique, help others do the same.


 浙公网安备
33010002000092号
浙公网安备
33010002000092号 浙B2-20120091-4
Comments
No comments yet. Why don't you start the discussion?