
In an age where smartphones are our primary cameras, the ability to capture stunning images on the go has never been more accessible. Yet many people believe great photography requires advanced editing tools or expensive gear. The truth is, the most powerful tool in photography isn’t software—it’s your eye. By mastering a few foundational techniques, you can dramatically improve your smartphone photos without ever touching an edit button. This guide focuses on in-the-moment decisions that elevate your shots: composition, lighting, timing, and intention.
Master Natural Light for Instant Quality
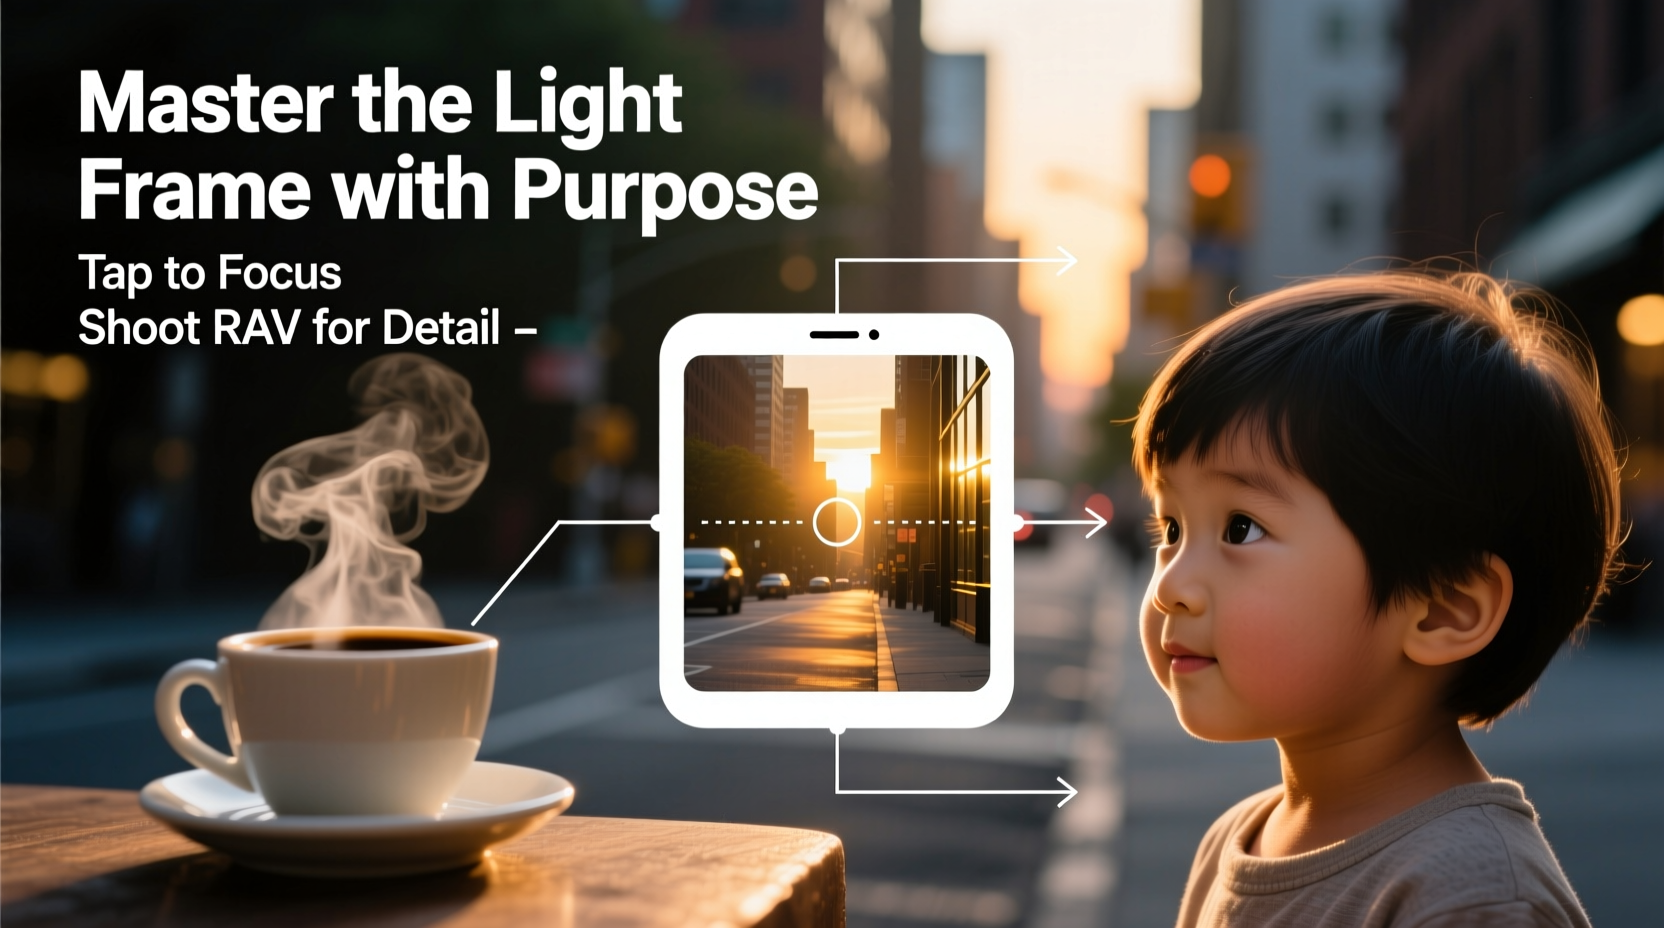
Lighting is the single most important factor in any photograph. No amount of cropping or color adjustment can fix a poorly lit image. Fortunately, natural light is free, abundant, and forgiving when used correctly.
The golden hours—shortly after sunrise and before sunset—deliver soft, warm illumination that flatters subjects and reduces harsh shadows. During midday, when the sun is high and direct, look for shaded areas under trees, awnings, or buildings. These spots provide even lighting with minimal contrast.
Indoors, rely on windows as your primary light source. Open curtains fully and place your subject within 3–6 feet of the glass. Turn off overhead lights to prevent mixed color temperatures, which create unnatural skin tones. If shooting at night, use ambient sources like streetlights, candles, or string lights to add mood without glare.
“Photography is the art of capturing light. Learn to see it, and you’ll never need filters.” — Lena Torres, Mobile Photography Educator
Use Composition Rules to Create Visual Impact
A well-composed photo draws the viewer in and tells a story at a glance. While modern smartphones offer high-resolution sensors, they can't compensate for a cluttered or unbalanced frame. Applying basic compositional principles transforms ordinary snapshots into compelling visuals.
The Rule of Thirds is one of the most effective techniques. Imagine dividing your screen into a 3x3 grid. Instead of placing your subject in the center, align them along one of the vertical lines, with the eyes near a top intersection point. Most smartphones have a built-in grid overlay (found in Camera Settings) to help you visualize this.
Leading lines guide the eye through the image. Use pathways, railings, fences, or even shadows to create depth and direction. When photographing architecture or landscapes, look for converging lines that draw attention toward a focal point.
Framing adds context and depth. Use doorways, windows, tree branches, or arches to enclose your subject. This technique isolates the main point of interest while adding layers to the scene.
Negative space—the empty area around a subject—can be just as powerful as the subject itself. It creates breathing room and emphasizes isolation, emotion, or movement. A person standing alone on a beach with vast sky above becomes more dramatic when surrounded by open space.
Do’s and Don’ts of Composition
| Action | Do | Don't |
|---|---|---|
| Subject Placement | Align with grid lines | Center everything |
| Background | Keep it simple and uncluttered | Allow distracting signs or objects |
| Horizon Line | Keep it level and aligned with grid | Tilted or cut through center |
| Framing | Use natural elements to enclose subject | Crop limbs awkwardly |
Stabilize Your Shot for Sharper Results
Blurry photos are often mistaken for poor camera quality, but the real culprit is usually hand movement. Even slight shakes during exposure can soften details, especially in low light when the shutter stays open longer.
To minimize shake, hold your phone with both hands. Tuck your elbows into your sides for support. Exhale slowly as you press the shutter—just like a marksman taking aim. For extra stability, lean against a wall, post, or table.
If available, use a small tripod or grip-style stabilizer. Many foldable options fit in a pocket and connect via Bluetooth remote or headphone jack. They’re ideal for self-portraits, long exposures, or group shots.
Tap the screen to focus before taking the shot. This locks focus and exposure, reducing the chance of blur from misjudged distance. On most phones, a yellow box appears when you tap—wait for it to settle before capturing.
Curate Your Environment Before You Shoot
Great photography isn’t just about what you include—it’s also about what you exclude. Take a moment to scan the entire frame before pressing the shutter. Remove clutter, reposition objects, or change your angle to eliminate distractions.
In portraits, check for poles or trees that appear to grow out of someone’s head—a common issue known as “invasion framing.” In still life or food photography, wipe smudges off plates, straighten utensils, and remove stray crumbs. These small adjustments make a significant difference in perceived quality.
Change your perspective. Get lower to shoot from a child’s height, climb stairs for a bird’s-eye view, or lie on the ground for a dramatic upward angle. Unusual vantage points transform familiar scenes into fresh visuals.
Wait for the right moment. Street photographers don’t just snap randomly—they anticipate action. A person stepping into a puddle, a dog leaping for a ball, or steam rising from a coffee cup all add narrative weight. Patience rewards you with authenticity.
Mini Case Study: From Blurry Snapshot to Gallery-Worthy Shot
Sarah, a travel blogger, visited Kyoto during cherry blossom season. Her first attempts at photographing the sakura trees were disappointing—overexposed skies, blurry petals, and crowds cutting across the frame. She paused and applied several in-camera techniques: she waited until late afternoon for softer light, crouched down to use a bench as a foreground element, asked a friend to stand slightly off-center using the Rule of Thirds, and held her phone steady against a railing. The resulting photo captured delicate pink blooms against a softly lit path, with her friend gazing upward—no editing needed. It became her most shared image of the trip.
Step-by-Step Guide to Taking a Better Photo in 5 Minutes
You don’t need hours to improve your smartphone photography. Follow this quick sequence anytime you want to capture a strong image:
- Assess the light – Is it harsh or soft? Move to shade if needed, or wait for clouds to diffuse sunlight.
- Enable the grid – Turn on your phone’s Rule of Thirds overlay in camera settings.
- Choose your angle – Kneel, squat, or find elevation. Avoid shooting from typical eye level every time.
- Compose deliberately – Tap to focus on your subject. Ensure background is clean and horizon is level.
- Hold steady and shoot – Use two hands, press gently, or use a volume button. Take 2–3 shots to increase success odds.
This routine takes less than five minutes but incorporates the core principles of professional mobile photography. Practice it daily, and soon these steps will become second nature.
Checklist: Pre-Shot Essentials
- ✅ Clean the lens with a microfiber cloth
- ✅ Enable gridlines in camera app
- ✅ Check lighting direction and adjust position
- ✅ Lock focus by tapping the screen
- ✅ Scan the frame for distractions
- ✅ Hold phone steadily with both hands
- ✅ Take multiple shots from slightly different angles
FAQ
Can I take good photos in low light without editing?
Yes, but technique matters. Use stable surfaces to prevent blur, enable Night Mode if available, and avoid digital zoom. Increase ambient light with lamps or candles rather than relying on flash, which flattens textures and creates harsh highlights.
Do I need to upgrade my phone for better photos?
Not necessarily. While newer models offer improved sensors and lenses, the photographer’s skill has a far greater impact than hardware. A well-composed, properly lit photo on an older device will always outperform a careless shot on a flagship model.
Should I use HDR mode?
HDR (High Dynamic Range) can be helpful in high-contrast scenes, like a bright window behind a person. It balances shadows and highlights automatically. However, it may cause ghosting if subjects move. Use it selectively—especially in static scenes—and review the result before assuming it’s better.
Final Thoughts
Smartphone photography at its best is spontaneous, authentic, and immediate. Editing tools can enhance images, but they can’t replace the fundamentals of light, composition, and timing. By training your eye to recognize great moments and positioning yourself to capture them effectively, you create powerful images straight out of the camera.
The next time you raise your phone to take a photo, pause. Look at the light. Adjust your stance. Wait one extra second. These small acts compound into a portfolio of images that feel intentional, vivid, and alive—without a single filter applied.


 浙公网安备
33010002000092号
浙公网安备
33010002000092号 浙B2-20120091-4
Comments
No comments yet. Why don't you start the discussion?