
Moving from an Android device to an iPhone is a significant shift in ecosystem, and one of the most critical steps during this transition is ensuring your contacts make the journey safely. While Google Account sync is the default method for transferring data, not everyone relies on Gmail or wants their personal information tied to a Google profile. Whether you've been using local contact storage, a custom email provider, or simply prefer to avoid cloud syncing, there are reliable ways to move your contacts directly—without touching Gmail.
This guide walks through practical, tested methods to transfer your Android contacts to your new iPhone without involving Google. From Apple’s official Move to iOS app to SIM card transfers, file exports, and third-party solutions, you’ll find a method that suits your comfort level with technology and privacy preferences.
Why Avoid Gmail for Contact Transfer?
While Google Contacts integration is seamless and widely used, some users choose not to rely on it for several valid reasons:
- Privacy concerns: You may not want your personal contact data stored on Google servers.
- Work or secondary accounts: Your contacts might be linked to a corporate or non-Gmail email account.
- Offline-only contacts: Some users store contacts locally on their Android device without syncing to any account.
- Data ownership: You prefer full control over where and how your data is transferred.
In these cases, bypassing Gmail becomes not just preferable but necessary. The good news is that Apple and third-party developers offer alternatives that keep your data private and secure during migration.
Method 1: Use Apple’s “Move to iOS” App (Recommended)
The most straightforward and officially supported way to transfer contacts from Android to iPhone without Gmail is by using Apple’s free Move to iOS app. This tool was specifically designed for Android-to-iPhone transitions and supports transferring contacts, messages, photos, calendar events, and more—without requiring a Google account.
“Apple’s Move to iOS app remains the gold standard for cross-platform migration. It creates a private Wi-Fi connection between devices, ensuring no data passes through external servers.” — David Lin, Mobile Migration Specialist
Step-by-Step Guide Using Move to iOS
- Ensure both your Android phone and new iPhone have at least 50% battery and are connected to the same Wi-Fi network.
- Start setting up your iPhone. When prompted, tap “Move Data from Android” during the initial setup process.
- On your Android device, download and open the Move to iOS app from the Google Play Store.
- Tap Continue, then agree to the terms.
- On the “Find Your Code” screen, wait for the iPhone to display a six- or ten-digit code.
- Enter that code on your Android device.
- Select the data types to transfer. Make sure Contacts is checked.
- Wait for the transfer to complete. This may take several minutes depending on the number of contacts.
- Finish setting up your iPhone. Your contacts will automatically appear in the Contacts app.
This method encrypts the data in transit and does not upload anything to the cloud, making it ideal for users who prioritize security and simplicity.
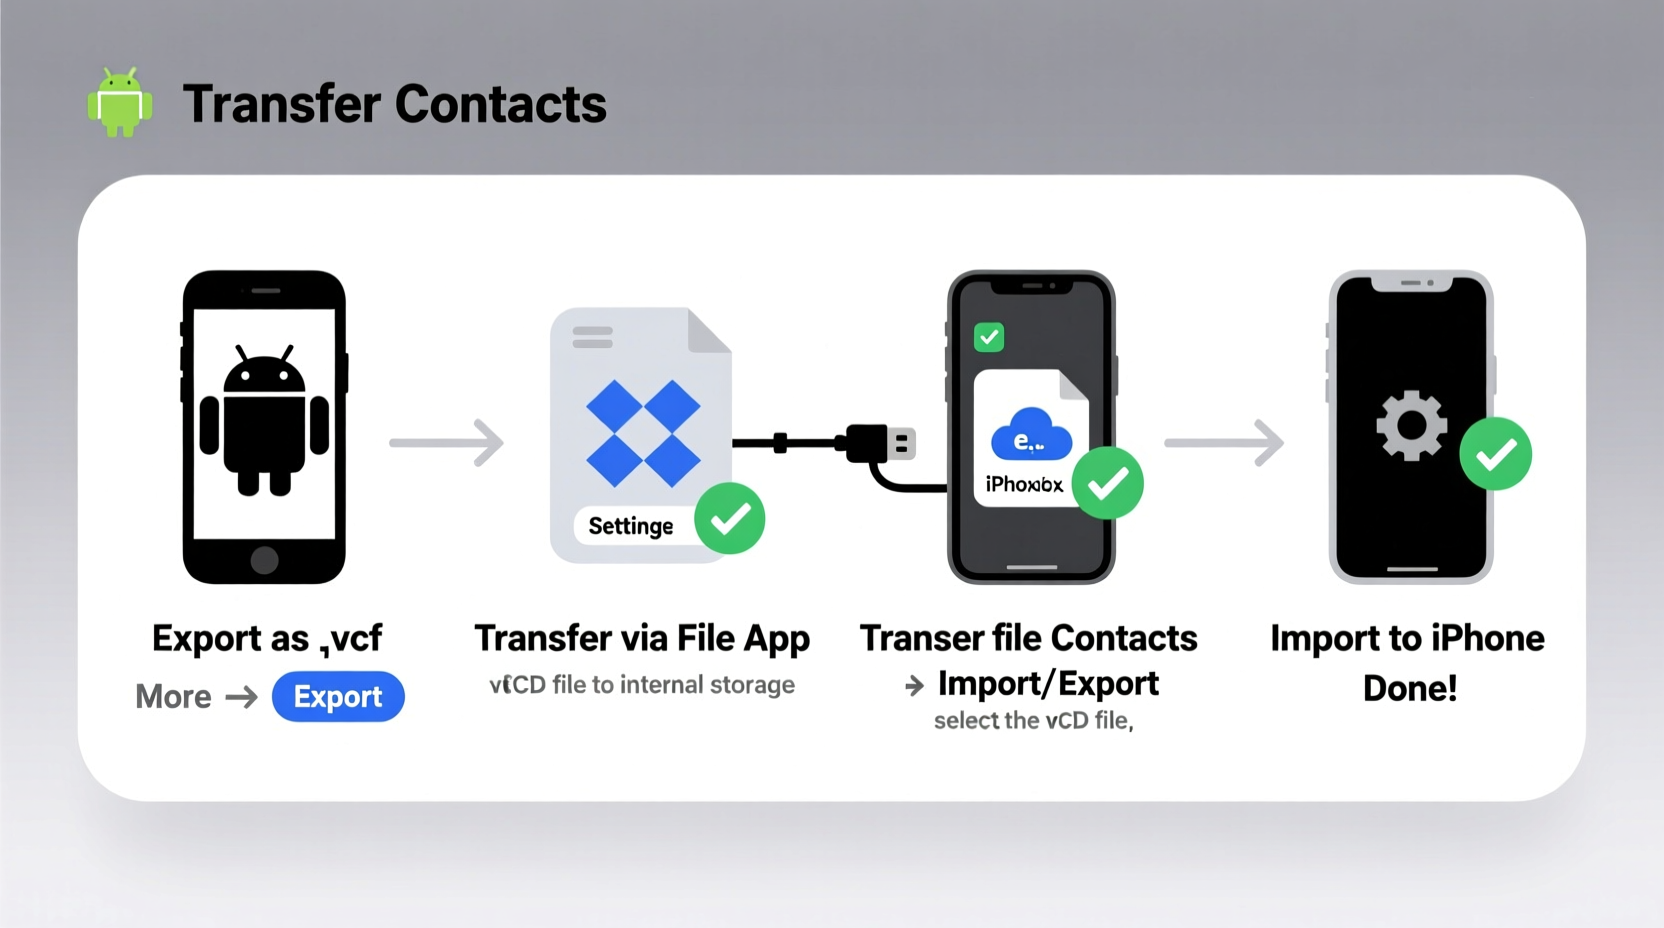
Method 2: Export Contacts to vCard File (.vcf)
If you prefer a manual approach or need to transfer only a subset of contacts, exporting them as a vCard (.vcf) file is a flexible option. This format is universally supported by iPhones and doesn’t require any third-party service.
Exporting from Android
- Open the Phone or Contacts app on your Android device.
- Tap the menu (three dots) and select Settings or Manage Contacts.
- Choose Export or Share Contacts.
- Select Export to .vcf file.
- Choose whether to export all contacts or specific ones.
- Save the file to your device’s internal storage or SD card.
The file will typically be named something like contacts.vcf and can be found in the Downloads folder.
Transferring and Importing to iPhone
You now have several options to get the .vcf file onto your iPhone:
- Email: Attach the file to an email and open it on your iPhone. Tap the attachment and choose “Add to Existing Contacts” or “Create New Contacts.”
- iCloud Drive: Upload the file via a browser or Android app, then access it on iPhone through the Files app.
- Computer (Mac or PC): Transfer the file via USB, then import it into iCloud.com or use iTunes (on older macOS versions).
Once opened on the iPhone, the system will automatically parse the vCard and add each contact to your iPhone’s address book.
Method 3: Use SIM Card Transfer (Limited but Quick)
Older Android phones often allow saving contacts directly to the SIM card—a feature rarely used today but still functional for basic transfers. While limited in capacity and functionality, this method requires no internet or apps.
Steps to Transfer via SIM
- On your Android, go to Contacts > Settings > Import/Export.
- Select Copy to SIM card.
- Confirm the transfer. Note: Only names and phone numbers will be saved; no emails, photos, or notes.
- Power off your Android, remove the SIM card, and insert it into your iPhone.
- Turn on the iPhone. When prompted, tap “Import Contacts”.
- Wait for the import to finish, then eject the SIM and replace it if needed.
This method works best when you have fewer than 250 contacts and only need essential details. It's also useful in emergency situations where Wi-Fi or computers aren't available.
| Transfer Method | Supports Photos & Notes | Duplicate Handling | Internet Required | Best For |
|---|---|---|---|---|
| Move to iOS | Yes | Smart merge | Yes (Wi-Fi) | Full migration, first-time switchers |
| vCard (.vcf) | Yes | No (manual cleanup) | No (after file transfer) | Partial transfers, selective import |
| SIM Card | No | No | No | Quick backup, minimal data |
Method 4: Third-Party Apps (For Advanced Users)
If you're comfortable using third-party software and want greater control over the transfer process, several trusted apps can bridge the gap between Android and iPhone without relying on Google.
Popular options include:
- SHAREit: Transfers files peer-to-peer using local Wi-Fi Direct. No cloud upload. Export contacts as .vcf, send via SHAREit, then import on iPhone.
- Send Anywhere: Secure file transfer with encryption. Send the .vcf file using a 6-digit key.
- Copy My Data: Specifically designed for contact migration. Uses Bluetooth or Wi-Fi Direct to transmit contact lists.
These apps do not require account creation and keep data within your control. However, always download such apps from official stores and verify developer credibility before use.
Checklist: Preparing for Contact Transfer
- ✅ Back up your Android contacts locally before starting.
- ✅ Ensure both devices are charged above 50%.
- ✅ Disable battery optimization for transfer apps on Android.
- ✅ On iPhone, disable iMessage & FaceTime temporarily if experiencing sync issues.
- ✅ After transfer, verify all contacts appear correctly and delete duplicates manually if needed.
Mini Case Study: Maria’s Seamless Switch Without Gmail
Maria, a freelance photographer, used her Samsung Galaxy S20 exclusively with a private email account and stored all client contacts locally. When she upgraded to an iPhone 15, she didn’t want to link her professional network to any Google service.
She opted for the Move to iOS app during setup. Within 12 minutes, all 437 of her contacts—including custom fields like “Client Type” and “Last Shoot Date”—transferred flawlessly. She later verified each entry and began using iCloud Backup to protect her new contact list.
“I was nervous about losing my client database,” Maria said. “But the transfer worked perfectly, and I never had to log into Gmail once.”
Frequently Asked Questions
Can I transfer contacts without Wi-Fi?
Yes, but only via physical methods like SIM card or USB file transfer using a computer. Apps like Move to iOS require Wi-Fi to create a private network between devices.
Will my contact photos transfer too?
Yes, if you use the Move to iOS app or a complete vCard export. SIM card transfers do not support photos.
What if my iPhone doesn’t recognize the .vcf file?
Ensure the file wasn’t corrupted during transfer. Try opening it on a computer first. Also, check that your iPhone has enough storage and restart the device before retrying.
Final Tips for a Smooth Transition
Switching platforms doesn’t have to mean losing your digital relationships. By planning ahead and choosing the right method, you can bring your entire contact list to your iPhone securely and efficiently—no Google account required.
Remember to double-check the integrity of your transferred data. Open the Contacts app, search for key entries, and confirm details like phone numbers, emails, and notes are intact. If duplicates appear, use the built-in “Merge Duplicates” feature under Settings > Contacts > Look for Duplicates.
Conclusion
Transferring contacts from Android to iPhone without Gmail is not only possible—it’s simple when you know the right tools. Whether you use Apple’s Move to iOS app, export a vCard file, leverage your SIM card, or rely on secure third-party apps, your personal data stays under your control throughout the process.
Take the time to evaluate your needs: Are you moving all contacts or just a few? Do you value speed, privacy, or completeness? Match your priorities to the method that fits best. Once your contacts are safely on your iPhone, you can fully embrace the iOS experience—knowing your connections came with you.


 浙公网安备
33010002000092号
浙公网安备
33010002000092号 浙B2-20120091-4
Comments
No comments yet. Why don't you start the discussion?