
Moving from iPhone to Android is a common switch, but one of the biggest concerns users face is preserving photo quality during the transfer. With Apple’s HEIC format, iCloud compression quirks, and differing file handling between ecosystems, it's easy for images to lose clarity, metadata, or even get resized unintentionally. The good news: with the right tools and approach, you can move your entire photo library quickly and flawlessly—without sacrificing a single pixel.
This guide walks through proven, high-speed methods that maintain original resolution, EXIF data, and image integrity. Whether you’re switching phones tomorrow or planning ahead, these strategies ensure your memories stay sharp and accessible on your new Android device.
Why Photo Quality Gets Lost in iPhone-to-Android Transfers
The core issue lies in ecosystem differences. iPhones default to HEIC (High Efficiency Image Format), which offers smaller file sizes but isn’t universally supported. Many Android devices don’t natively read HEIC files, leading apps or services to convert them to JPEG automatically—often at lower quality. Additionally, cloud sync settings (like “Optimize iPhone Storage”) may upload compressed versions instead of originals.
Another common pitfall is using third-party messaging apps or email to send photos. These platforms often compress media aggressively to save bandwidth, resulting in visible degradation—especially in high-resolution or low-light shots.
To avoid this, the key is bypassing automatic compression and ensuring full-resolution originals are transferred end-to-end.
Method 1: Use Google Photos (With Caveats)
Google Photos is one of the fastest ways to move photos across platforms, especially if you're already in the Google ecosystem. However, maintaining quality depends entirely on your backup settings.
To preserve full quality:
- Open the Google Photos app on your iPhone.
- Tap your profile icon > Settings > Backup & Sync.
- Ensure “Back Up & Sync” is turned on.
- Under “Backup Size,” select Original Quality.
- Wait for all photos to upload. This may take hours depending on library size and Wi-Fi speed.
- On your Android phone, sign in with the same Google account and wait for sync to complete.
Once synced, your photos appear in full resolution and are accessible via the Google Photos app or Android’s native gallery.
“Google Photos’ ‘Original Quality’ setting stores images exactly as they were taken—no downsampling, no recompression.” — David Lin, Cloud Storage Engineer at Google (public statement)
Limitations: Original Quality counts against your Google Drive storage (15 GB free). If you exceed this, you’ll need a paid plan. Also, some HEIC files may be converted to JPEG during upload, though without quality loss if done properly.
Method 2: Move to Android App (Official Tool)
Google’s Move to Android app was designed specifically for iPhone-to-Android transitions. It transfers contacts, messages, calendars, and—critically—photos in full quality when used correctly.
Step-by-Step Guide
- On your new Android phone, start setup and choose “Copy your data” > “From iPhone.”
- Download “Move to Android” from the App Store on your iPhone.
- Open the app and tap “Continue.” Agree to terms.
- On your Android device, tap “Next” and wait for a code to appear.
- Enter the same code in the iPhone app.
- Select “Photos” and any other data to transfer.
- Ensure both phones remain close and connected to power until completion.
The transfer uses a direct Wi-Fi connection (not cellular or internet), so files aren’t compressed by carriers or cloud services. Photos are converted from HEIC to JPEG if needed, but at full resolution.
Speed: Transfers over 5 GHz Wi-Fi can move 1,000 photos in under 10 minutes. Ideal for large libraries.
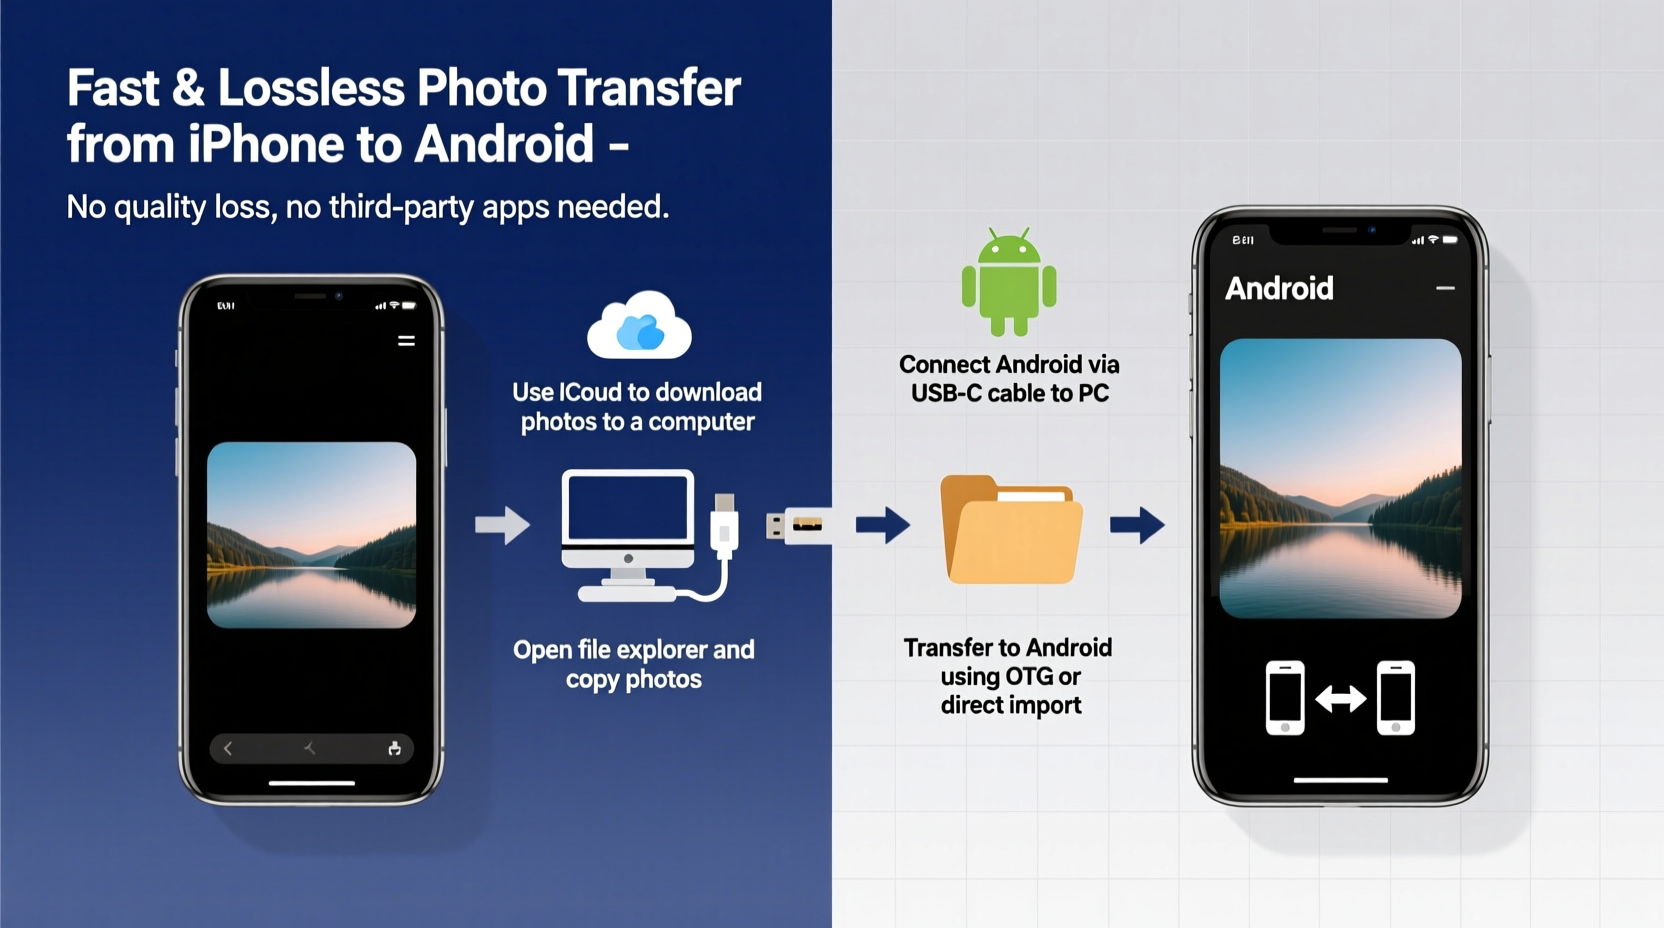
Method 3: Computer-Assisted Transfer (Most Reliable)
For complete control and guaranteed quality, use a computer as a bridge. This method preserves file formats, metadata, and avoids cloud compression entirely.
Transfer Process (Mac or PC)
- Connect your iPhone to a Mac or Windows PC via USB cable.
- On Mac: Open the Photos app and import all albums. Choose “Keep Originals” during import.
- On Windows: Use File Explorer to navigate to DCIM folder and copy photos manually.
- Save all files to a dedicated folder on your computer.
- Connect your Android phone via USB and enable “File Transfer” mode.
- Navigate to the internal storage > DCIM > Camera folder (or create one).
- Paste the copied photos.
If your iPhone uses HEIC, consider converting to JPEG using built-in tools:
- On Mac: Select photos in Photos app > File > Export > Export Unmodified Original.
- On Windows: Use Microsoft’s free “HEIF Image Extensions” from the Microsoft Store to view and convert HEIC files.
This method guarantees bit-perfect transfers and works even with tens of thousands of photos.
Method 4: Third-Party Tools That Work
Several cross-platform tools offer fast, quality-preserving transfers. Two stand out for reliability:
| Tool | Speed | Quality Preservation | Best For |
|---|---|---|---|
| Send Anywhere | Fast (P2P) | Yes (no compression) | Transferring batches without cables |
| SHAREit (discontinued but archived versions work offline) | Very Fast | Yes | Large libraries over local Wi-Fi |
| iCloud + Manual Download | Medium (depends on upload speed) | Yes (if originals are enabled) | Users already backing up to iCloud |
To use Send Anywhere:
- Install Send Anywhere on both iPhone and Android.
- Select photos on iPhone and tap Share > Send Anywhere.
- Note the 6-digit key or scan the QR code from your Android device.
- Download directly to Android storage.
No cloud intermediary means no compression—files arrive exactly as sent.
Mini Case Study: Sarah’s Seamless Switch
Sarah, a travel photographer, switched from an iPhone 14 Pro to a Samsung Galaxy S24 Ultra. Her library contained over 12,000 photos, many in HEIC format from professional shoots.
She initially tried AirDrop to Mac, then emailing folders—but noticed blurring in zoomed details. After research, she used the computer-assisted method: imported all photos to her MacBook Pro using the Photos app with “Keep Originals,” then transferred via USB to her Galaxy. She also backed up everything to Google Photos in Original Quality as a failsafe.
The entire process took 3 hours but preserved every photo perfectly. Metadata like geotags and timestamps remained intact, crucial for her portfolio organization.
“I was nervous about losing quality,” she said. “But doing it through the computer gave me total confidence. Everything looks just as it did on my iPhone.”
Checklist: Ensuring No Quality Loss
Before you begin any transfer, follow this checklist to protect photo integrity:
- ✅ Disable “Optimize iPhone Storage” in Settings > Photos
- ✅ Enable “Keep Originals” in iTunes/Mac Photos import settings
- ✅ Use Wi-Fi only—avoid cellular data for uploads
- ✅ Verify file formats: HEIC is fine if converted properly; avoid platform auto-conversions
- ✅ Test with 5–10 sample photos first
- ✅ Confirm resolution and file size match after transfer
- ✅ Check EXIF data (date, location) on Android using a metadata viewer app
Common Mistakes to Avoid
Even experienced users make errors that degrade photo quality. Steer clear of these:
- Sending photos via iMessage, WhatsApp, or SMS: These apps compress media by default.
- Using “Low Data Mode” on iPhone: Can throttle upload quality.
- Assuming iCloud sync = full quality: Only true if “Download and Keep Originals” is enabled.
- Ignoring HEIC compatibility: Some Android galleries won’t display HEIC unless a codec is installed.
Frequently Asked Questions
Will my Live Photos transfer properly?
Yes, but they become video clips on Android. The still frame is saved as a JPEG, and the motion portion is stored as a MOV file. Most Android devices display this as a playable animation in gallery apps like Google Photos.
Can I transfer photos without a computer or Wi-Fi?
Not reliably. Bluetooth is too slow and compresses images. Physical transfer requires either a computer, direct Wi-Fi connection (like Move to Android), or cloud syncing. A stable internet connection is essential for wireless methods.
Do timestamps and locations stay intact?
In most cases, yes—especially with computer-based or Move to Android transfers. Cloud methods like Google Photos also preserve EXIF data. Always verify by checking a few photos on Android using a metadata inspector app like “Photo Details.”
Conclusion: Make the Switch Without Compromise
Transferring photos from iPhone to Android doesn’t have to mean sacrificing quality. By understanding how each platform handles images and choosing the right method—whether it’s Google Photos in Original Quality, the Move to Android app, or a direct computer transfer—you retain every pixel and memory in full fidelity.
The fastest method isn’t always the best, but with preparation, even large libraries can move seamlessly in under a few hours. Take the time to verify settings, test with a small batch, and follow best practices. Your future self will thank you when every sunset, smile, and milestone looks exactly as it should.


 浙公网安备
33010002000092号
浙公网安备
33010002000092号 浙B2-20120091-4
Comments
No comments yet. Why don't you start the discussion?