
Switching from acrylic to gel nails is a common choice for those seeking a more flexible, natural-looking enhancement with less odor and reduced risk of yellowing. However, the transition can be risky if not handled properly—especially after prolonged acrylic use, which often leads to thin, weakened natural nails. Done incorrectly, this shift can result in peeling, splitting, or even permanent nail bed damage. The key lies in preparation, professional guidance, and a dedicated at-home care routine that supports nail recovery and resilience.
This guide outlines a science-backed, dermatologist-approved approach to making the switch safely. Whether you're transitioning for aesthetic reasons, sensitivity concerns, or nail health, the process should prioritize healing over speed. With the right steps, your nails can emerge stronger, healthier, and beautifully enhanced under a gel system.
Understanding the Difference: Acrylic vs. Gel Nails
Before beginning the transition, it’s essential to understand what sets acrylic and gel nails apart—not just in appearance, but in chemical composition and impact on natural nails.
| Feature | Acrylic Nails | Gel Nails |
|---|---|---|
| Composition | Made from liquid monomer and powder polymer | UV/LED-cured resin gel |
| Curing Process | Chemically cured (air-drying) | Light-cured (UV or LED lamp) |
| Odor | Strong chemical smell | Minimal to no odor |
| Flexibility | Rigid, prone to cracking | More flexible, less likely to break |
| Nail Damage Risk | High (due to filing and removal) | Lower when applied and removed correctly |
| Lifespan | 3–4 weeks | 2–3 weeks |
Acrylics are known for their durability but require aggressive filing during application and removal, which thins the nail plate over time. Gels, while gentler, still demand careful handling—especially on compromised nails. Transitioning isn’t just about changing products; it’s about rehabilitating the nail bed first.
Step-by-Step Guide to a Safe Transition
A successful transition involves three distinct phases: removal, recovery, and reapplication. Rushing any stage increases the risk of long-term damage.
- Professional Acrylic Removal
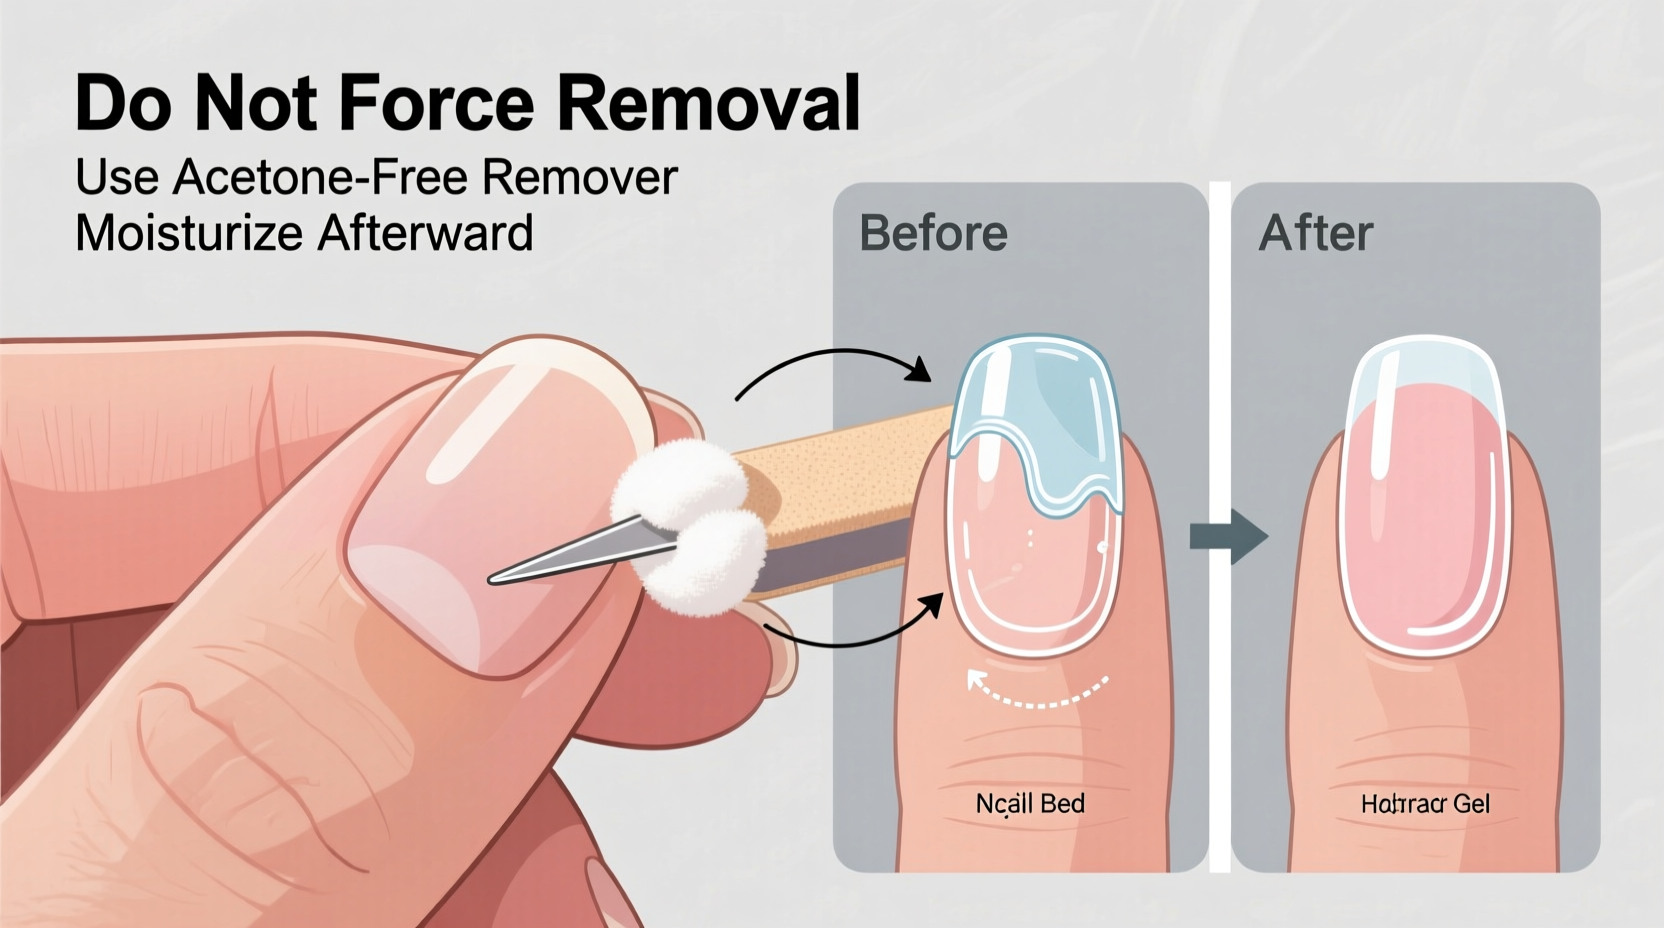
Never attempt to peel or file off acrylics at home. Improper removal is the leading cause of nail trauma. Visit a licensed technician who uses the foil method: acetone-soaked wraps left on for 10–15 minutes to gently dissolve the product. After removal, the tech should lightly buff ridges—never aggressively sand the nail surface. - Assess Nail Health
Examine your nails post-removal. Healthy nails are opaque, smooth, and free of splits or white spots. If yours are thin, wavy, or layered, they need recovery time. This phase may last 2–6 weeks depending on prior damage. - Begin Recovery Routine
Use hydrating cuticle oils (containing jojoba or vitamin E) twice daily. Avoid water soaking, harsh detergents, and gel polish during this time. Consider a nail strengthener with calcium or hydroxyethyl methacrylate—but only if recommended by a dermatologist. - First Gel Application
When ready, return to a reputable salon. Inform your technician about your history with acrylics. Opt for a soak-off gel overlay rather than an extension. This builds protection without added stress. Choose a builder gel for light reinforcement, avoiding excessive thickness. - Maintenance & Monitoring
Schedule fills every 2–3 weeks. Watch for signs of lifting, which can trap moisture and lead to fungal issues. Always have gels professionally removed with acetone wraps—never drill or pry them off.
Common Mistakes That Cause Damage
Even with good intentions, many people unknowingly sabotage their nail health during the transition. Awareness is the first step toward prevention.
- Skipping the healing phase: Jumping straight into gel after acrylic removal denies nails time to regenerate keratin layers.
- Over-filing: Technicians sometimes file too deeply to “smooth” the nail, weakening the structure.
- DIY removal: Using household acetone or scraping gels off causes micro-tears in the nail plate.
- Using glue-on extensions as a middle ground: These often require rough filing and strong adhesives, worsening thinning.
- Ignoring hydration: Dehydrated nails become brittle and prone to breaking, especially after chemical exposure.
“Nail plates damaged by acrylics need time to rebuild their lipid barrier. Pushing into another enhancement too soon is like painting over cracked drywall—it might look fixed, but the foundation is weak.” — Dr. Lena Torres, Board-Certified Dermatologist & Nail Health Specialist
Essential Care Checklist for a Smooth Transition
Follow this actionable checklist to ensure your nails remain healthy throughout the switch:
- ✅ Schedule professional acrylic removal using acetone-soak method
- ✅ Allow 2–6 weeks of bare-nail recovery (longer if severe thinning)
- ✅ Apply cuticle oil 2x daily (morning and night)
- ✅ Wear gloves during cleaning or dishwashing
- ✅ Avoid gel polish or dip powders during recovery
- ✅ Choose a reputable salon with certified technicians
- ✅ Request a lightweight gel overlay, not full extensions
- ✅ Commit to regular maintenance fills every 2–3 weeks
- ✅ Never pick, peel, or DIY-remove gel enhancements
- ✅ Monitor for pain, lifting, or discoloration—address immediately
Real Example: Sarah’s Recovery Journey
Sarah, a 32-year-old marketing executive, had worn acrylics for seven years. After noticing her natural nails were peeling and felt “like paper,” she decided to switch to gels for a softer look. Without guidance, she booked a gel set two days after acrylic removal. Within a week, her nails began lifting, and one corner split completely.
She consulted a nail specialist who advised a full reset: remove the gels immediately, stop all enhancements, and begin a 4-week recovery protocol. She used a dermatologist-recommended nail serum, wore cotton-lined gloves at work, and avoided water immersion. After a month, she returned for a light gel overlay. Now, six months later, she maintains healthy gels with bi-weekly oil application and professional fills—without a single break.
Her experience underscores a critical truth: patience pays off. Healing isn’t passive—it’s an active commitment to restoration.
Do’s and Don’ts During the Transition
| Do’s | Don’ts |
|---|---|
| Do use a nourishing cuticle oil daily | Don’t use nail hardeners containing formaldehyde |
| Do wear gloves when using cleaners or washing dishes | Don’t soak nails in acetone for extended periods |
| Do choose a reputable salon with glowing reviews | Don’t file your nails into sharp points—round edges are stronger |
| Do keep nails short during recovery to reduce leverage stress | Don’t apply gel polish at home without proper curing tools |
| Do drink plenty of water and maintain a protein-rich diet | Don’t ignore pain or lifting—these signal underlying problems |
Nutrition also plays a role. Keratin production depends on adequate intake of biotin, zinc, and protein. Supplements like biotin (10,000 mcg/day) have been shown in clinical studies to improve nail thickness and reduce splitting over 90 days.
Frequently Asked Questions
Can I go straight from acrylics to gel nails?
No, it’s not advisable. Your natural nails need time to recover after acrylic removal. Applying gel immediately adds stress to already weakened nails, increasing the risk of peeling, thinning, and infection. Wait at least 2–4 weeks, or longer if your nails show signs of damage.
How do I know if my nails are ready for gel?
Healthy transition-ready nails are uniformly colored (not transparent), smooth, and resistant to peeling. They shouldn’t bend excessively when pressure is applied. If you can see the pink nail bed through the surface, the nail is too thin. A simple test: press the tip gently—if it flexes dramatically, wait longer.
Are gel nails safer than acrylics?
Generally, yes—when applied and removed properly. Gel nails are more flexible, less porous, and don’t produce strong fumes. They also require less aggressive filing. However, improper removal (such as scraping or drilling) can still cause significant damage. The safety advantage comes from technique, not just the product.
Final Thoughts: Building a Sustainable Nail Care Routine
Transitioning from acrylic to gel nails isn’t just a change in polish—it’s a shift in mindset. It’s about moving from durability at any cost to sustainability and long-term health. The most beautiful nails aren’t the longest or sparkliest; they’re the ones that stay intact, grow naturally, and reflect consistent care.
Your nails are a barometer of overall wellness. Treating them with respect during transitions sets the foundation for decades of strong, attractive hands. Whether you continue with gels, switch to dip, or embrace natural nails, the principles remain the same: gentle handling, professional expertise, and patience.


 浙公网安备
33010002000092号
浙公网安备
33010002000092号 浙B2-20120091-4
Comments
No comments yet. Why don't you start the discussion?