
Trimming your dog’s toenails is an essential part of pet care, but it becomes significantly more challenging when the nails are black. Unlike clear or light-colored nails, where the pinkish quick—the blood vessel and nerve bundle inside—is visible, black nails obscure this crucial landmark. Cutting too close can cause pain, bleeding, and long-term anxiety in your dog. However, with the right approach, tools, and patience, you can maintain your dog’s nail health safely and confidently.
Understanding the Dog Nail Anatomy
Dog toenails consist of a hard outer shell made of keratin and a soft inner core known as the quick. The quick supplies blood and sensation to the nail. In light-colored nails, the quick appears as a pink area extending from the base toward the tip. In black nails, this structure is hidden, making it difficult to judge how far you can cut without causing injury.
The length of the quick varies between dogs and even between individual nails on the same paw. Active dogs who walk frequently on hard surfaces may naturally wear down their nails, shortening the quick over time. Sedentary dogs, especially those living indoors, often have longer nails and deeper quicks, increasing the risk during trimming.
“Many owners avoid trimming black nails out of fear, but regular maintenance actually causes the quick to recede gradually, making future trims easier.” — Dr. Linda Chen, DVM, Canine Dermatology & Wellness Specialist
Essential Tools for Safe Trimming
Using the correct tools increases precision and reduces the risk of cutting into the quick. Invest in high-quality equipment designed for pets:
- Guillotine-style clippers: Ideal for small to medium dogs; they offer clean cuts but require steady hands.
- Scissor-style clippers: Provide better leverage and visibility, especially useful for larger breeds.
- Grinder tools (e.g., Dremel): File down nails gradually, minimizing the chance of hitting the quick. Best for black nails since they allow incremental shortening.
- Styptic powder or cornstarch: Keep on hand to stop bleeding instantly if you accidentally cut too deep.
- Treats and positive reinforcement items: Reward cooperation to build trust and reduce stress.
Step-by-Step Guide to Trimming Black Toenails Safely
Follow this methodical process to minimize risks and keep your dog calm throughout the procedure:
- Choose a quiet time and place. Pick a moment when your dog is relaxed—after a walk or meal—and work in a well-lit room.
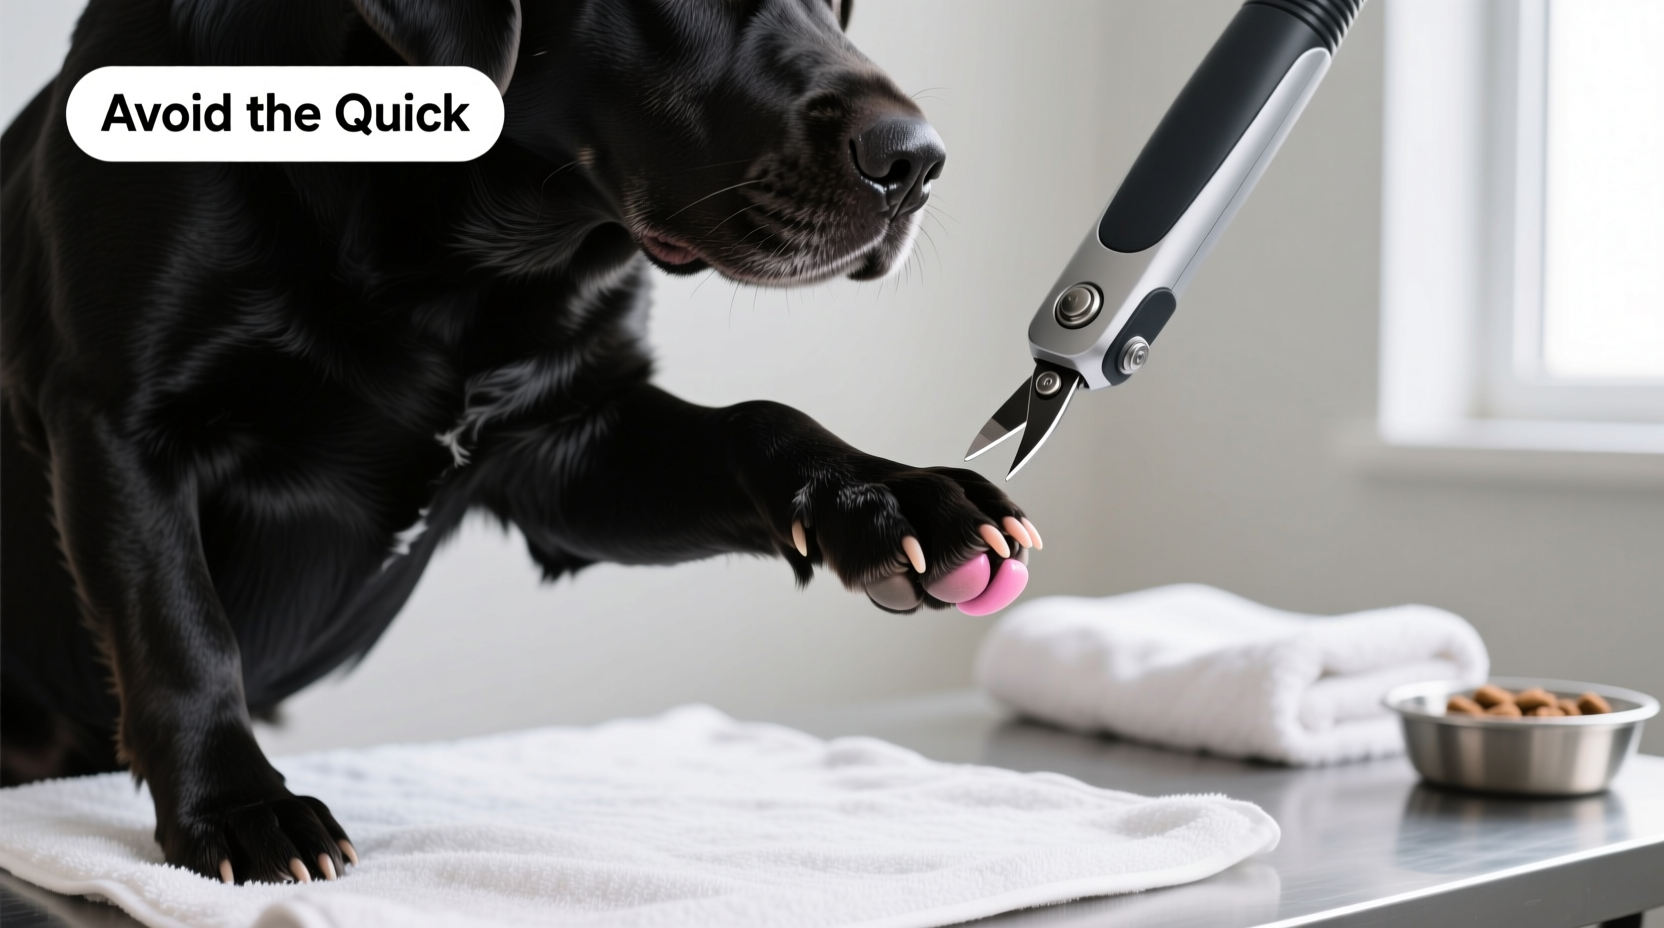
- Examine each nail closely. Look for subtle texture changes: a duller surface near the base may indicate the start of the quick. Also, note that the nail often curves upward at the point where the quick ends.
- Identify the safest starting point. For black nails, begin by trimming only the very tip—the thinnest part—where the curve starts to lift off the ground. This minimizes risk.
- Cut at a 45-degree angle. Aim to preserve the natural shape of the nail while removing just enough to prevent clicking on floors.
- Proceed incrementally. If unsure, make tiny cuts every few days. This allows the quick to recede slowly without trauma.
- Inspect the cut surface. After each snip, look at the center of the nail. A small dark dot indicates you’re approaching the quick. Stop immediately once you see it.
- Use a grinder for fine-tuning. After clipping, gently file the edges to smooth sharp points and shorten slightly without cutting live tissue.
- Reward and reassure. Offer treats and praise after each nail—even mid-session—to reinforce positive associations.
What to Do If You Hit the Quick
If bleeding occurs, stay calm. Your reaction influences your dog’s stress level. Apply styptic powder directly to the nail tip and hold pressure for 30–60 seconds. If unavailable, use cornstarch or flour as a temporary alternative. Most bleeds stop within two minutes. Avoid wrapping the paw tightly, which may cause more distress. Once stopped, comfort your dog and end the session—there’s no need to finish all nails at once.
Do’s and Don’ts When Trimming Black Nails
| Do’s | Don’ts |
|---|---|
| Trim a little at a time, especially with black nails | Attempt to cut deeply in one go |
| Use proper lighting (natural or bright LED) | Work in dim or shadowed areas |
| Inspect the cross-section after each cut | Ignore signs like resistance or sensitivity |
| File nails with a grinder between clippings | Use human nail clippers—they’re not strong enough |
| Reward your dog after each nail | Force the process if your dog is stressed |
| Trim every 3–4 weeks regularly | Wait until nails click loudly on the floor |
Real Example: Helping Max Overcome Nail Anxiety
Max, a 4-year-old black Labrador, had never had his nails trimmed due to his owner’s fear of causing pain. His nails were so long they curled under, altering his gait. When Max finally visited a groomer, two nails bled during trimming, reinforcing his fear. He began growling and pulling his paws away at any sign of clippers.
His owner consulted a veterinary behaviorist, who recommended a desensitization plan. For two weeks, she touched Max’s paws daily while giving treats, then introduced the clippers without using them. After building trust, she began trimming one nail every other day, using a grinder afterward. Within six weeks, Max allowed full trims without resistance. More importantly, the gradual approach shortened his quicks significantly, making future trims safer and less invasive.
This case illustrates that patience and consistency yield better results than infrequent, stressful sessions.
Alternative Methods: Grinders vs. Clippers
While clippers are traditional, grinders offer distinct advantages—especially for black nails:
- Precision: Grinders remove small amounts at a time, reducing the risk of cutting into the quick.
- No splintering: They produce smooth edges, lowering the chance of snagging or breaking.
- Gradual recession: Regular filing encourages the quick to retreat further into the toe.
- Quieter long-term: Dogs often tolerate the vibration better than the sudden \"snip\" sound of clippers.
However, some dogs dislike the noise or sensation of the rotating bit. Introduce the tool gradually—turn it on nearby without contact, pairing it with treats. Start with short bursts of 2–3 seconds per nail.
“With black nails, I always recommend starting with a grinder. It gives owners confidence and dogs less reason to resist.” — Sarah Wong, Certified Pet Groomer & Educator
Checklist: Preparing for a Stress-Free Nail Trim
Before beginning, ensure you’re fully prepared. Use this checklist to set up for success:
- ☑ Choose a calm time of day
- ☑ Gather tools: clippers, grinder, styptic powder, treats
- ☑ Select a quiet, well-lit space
- ☑ Check that clippers are sharp and functional
- ☑ Have a helper ready if your dog is wiggly
- ☑ Plan to trim only 1–2 nails per session if needed
- ☑ Bring favorite treats or a lick mat for distraction
- ☑ Stay patient—never rush or restrain harshly
Frequently Asked Questions
How often should I trim my dog’s black toenails?
Every 3 to 4 weeks is ideal. Regular trimming prevents overgrowth, supports joint health, and helps the quick recede gradually. Waiting too long makes each session riskier and more uncomfortable for your dog.
Can I see the quick in black nails at all?
Not clearly. However, experienced groomers sometimes detect a faint gray or blackish dot in the center of a freshly cut nail, indicating proximity to the quick. If you see a small dark circle appear after a cut, stop immediately—you’re close.
What if my dog won’t let me touch their paws?
Start with paw handling exercises. Gently touch each paw for a few seconds daily, rewarding with treats. Gradually increase duration and add pressure on the toes. Pair the activity with something enjoyable, like mealtime or play. Desensitization takes days or weeks but builds lasting cooperation.
Conclusion: Building Confidence Through Consistency
Trimming black dog toenails doesn’t have to be intimidating. By understanding nail anatomy, using the right tools, and adopting a gradual, reward-based approach, you can maintain your dog’s foot health safely. Remember, consistency is more effective than perfection. Even trimming one nail per week is progress. Over time, the quick will recede, visibility will improve, and your confidence will grow.
Don’t wait for nails to become overgrown or for accidents to happen. Start today—with patience and care, you’ll create a routine that keeps your dog comfortable, mobile, and pain-free.


 浙公网安备
33010002000092号
浙公网安备
33010002000092号 浙B2-20120091-4
Comments
No comments yet. Why don't you start the discussion?