
Sharing memories through photographs has become an essential part of modern communication. Whether you're sending vacation snapshots to family, posting product images online, or archiving important documents, the ability to upload photos quickly and correctly matters. Yet many people still struggle with slow transfers, incorrect file formats, or privacy concerns. The process doesn’t have to be complicated. With the right tools and techniques, uploading photos can be fast, secure, and hassle-free—no technical expertise required.
Understanding Your Upload Options
Different situations call for different methods. Uploading a photo from your smartphone to social media uses a different workflow than transferring high-resolution files from a DSLR to a client via email. Knowing your options helps you choose the most efficient path.
- Direct device uploads: Using built-in features on smartphones or cameras to share instantly to apps like Instagram, WhatsApp, or Google Photos.
- Cloud storage services: Platforms like Dropbox, iCloud, or OneDrive allow bulk uploads and cross-device access.
- Email attachments: Best for small batches but limited by file size caps (usually 25MB).
- File transfer tools: Services like WeTransfer or SendAnywhere handle large files without compression.
- Website forms and portals: Common in professional settings such as job applications or portfolio submissions.
Step-by-Step Guide to Uploading Photos Smoothly
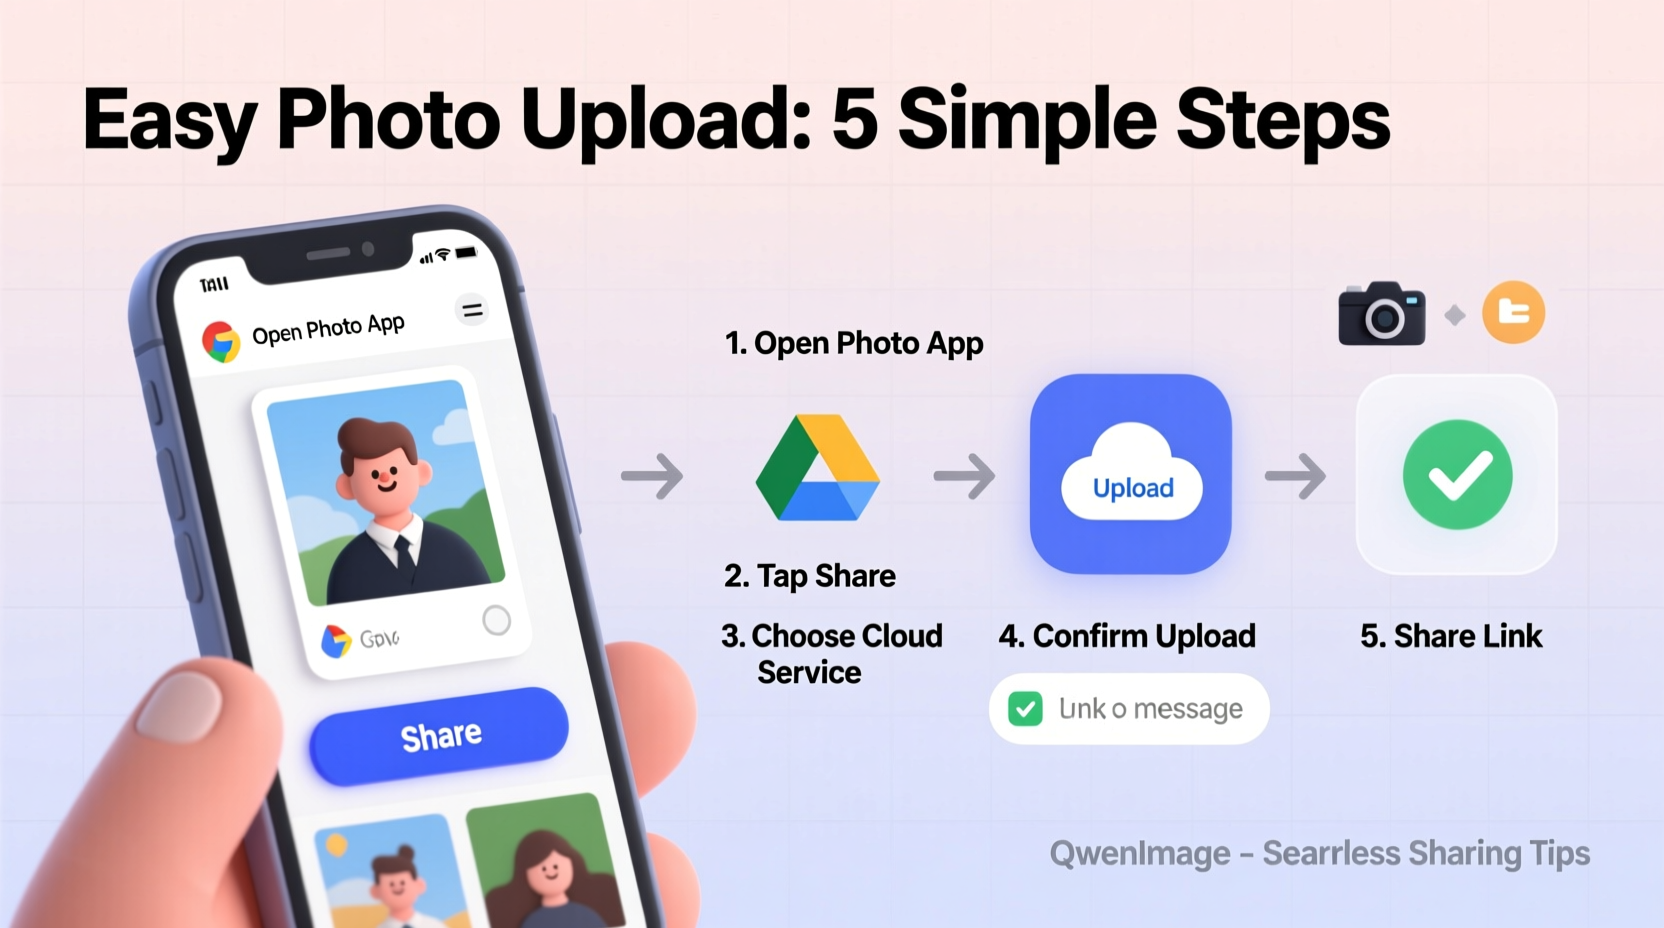
Follow this universal five-step process to ensure every upload goes smoothly, regardless of platform or device.
- Select and organize your photos. Review your images and delete blurry or duplicate shots. Rename files clearly (e.g., “BeachTrip_Sunset_01.jpg”) to make them easier to identify later.
- Check file size and format. Most platforms accept JPEG, PNG, or GIF. If needed, compress large files using free tools like TinyPNG or Preview (on Mac) to stay within limits.
- Choose the right method. For one-off shares, use direct app integration. For multiple files, opt for cloud storage with shareable links.
- Initiate the upload. Tap “Upload,” “Attach,” or “Share,” then navigate to your photo location—camera roll, desktop folder, or cloud drive.
- Confirm and verify. Wait for the upload to complete. Open the link or check the inbox to ensure the recipient can view the image correctly.
“Speed and reliability matter more than ever when sharing visuals. A well-prepared file saves time and prevents miscommunication.” — David Lin, Digital Workflow Consultant
Best Practices for Faster, Safer Transfers
Beyond the basics, smart habits improve both efficiency and security. These practices apply whether you’re a casual user or managing business-related image distribution.
Organize Before You Share
Create folders labeled by event, date, or project. This reduces confusion during selection and speeds up future retrieval. On smartphones, use album features; on computers, leverage naming conventions and subdirectories.
Maintain Privacy and Permissions
Before uploading photos containing other people, especially children or in sensitive locations, obtain consent. Avoid geotagging private addresses unless necessary. Disable location metadata in settings if sharing publicly.
Use Batch Tools for Multiple Files
If you regularly upload several images at once, consider drag-and-drop interfaces or desktop sync clients. Google Drive and Dropbox let you highlight and upload entire folders in seconds.
Do’s and Don’ts of Photo Uploading
| Do’s | Don’ts |
|---|---|
| ✅ Compress oversized files before emailing | ❌ Send unedited raw camera files unless requested |
| ✅ Use strong passwords for cloud accounts | |
| ✅ Test links before sending to clients | ❌ Assume all recipients know how to open ZIP archives |
| ✅ Backup originals after upload | ❌ Delete source photos immediately after transfer |
| ✅ Label shared albums clearly | ❌ Use vague names like “IMG_1234” for deliverables |
Real Example: Sharing Family Photos Across Generations
Sarah, a mother of two living in Portland, wanted her parents in Florida to see weekly updates of her newborn. Initially, she emailed individual photos, which often failed due to size limits. Her father struggled to open attachments on his older tablet.
She switched strategy: she created a private Google Photos album titled “Lily’s First Months,” enabled auto-backup from her phone, and shared the album link with read-only access. Now, her parents receive automatic updates and can view photos in chronological order—even adding comments. No tech support needed.
This solution reduced friction, preserved quality, and strengthened connection—all because Sarah chose the right tool for the audience and purpose.
Essential Checklist for Every Upload
Use this quick-reference checklist before initiating any photo transfer:
- ☐ Confirm internet connection is stable
- ☐ Verify file type compatibility (JPEG/PNG/GIF)
- ☐ Resize or compress if exceeding 10MB
- ☐ Remove sensitive metadata (location, timestamps)
- ☐ Double-check recipient’s preferred method
- ☐ Test the share link on another device
- ☐ Keep a local or cloud backup of original files
Frequently Asked Questions
Why won’t my photo upload even though I’m connected to Wi-Fi?
This often happens due to poor signal strength or network congestion. Try moving closer to the router, restarting your device, or switching to a less crowded network. Also, ensure the target platform isn't experiencing downtime.
Can I upload RAW image files directly?
Most consumer platforms don’t support RAW formats (like .CR2 or .NEF). Convert them to JPEG or TIFF first using software like Adobe Lightroom, Apple Photos, or free online converters. Only send RAW files when specifically requested by professionals.
How do I share 100+ photos without slowing things down?
Compress them into a ZIP folder and upload to a cloud service. Generate a shareable link with expiration protection. Alternatively, create a shared album in iCloud or Google Photos, which handles large volumes efficiently and allows viewer comments.
Mastering the Art of Seamless Image Sharing
Uploading photographs shouldn’t feel like a chore. By understanding your tools, preparing files properly, and choosing the right channel for each situation, you turn what could be a frustrating task into a smooth, almost automatic routine. Technology exists to connect us—not complicate our lives. Whether you're preserving memories, collaborating professionally, or simply staying in touch, taking a few moments to optimize your process pays dividends in time saved and relationships strengthened.


 浙公网安备
33010002000092号
浙公网安备
33010002000092号 浙B2-20120091-4
Comments
No comments yet. Why don't you start the discussion?