
Sharing your creativity online starts with one simple action: uploading a video. Whether you're launching a YouTube channel, promoting a product on Instagram, or posting a tutorial on TikTok, the process of uploading may seem different across platforms—but the core principles remain the same. For beginners, understanding this process can be overwhelming due to varying file formats, size limits, and interface quirks. This guide breaks down everything you need to know to confidently upload videos to any major platform, from preparation to publication.
Step 1: Prepare Your Video for Upload
Before clicking “upload,” ensure your video is optimized for the platform you’re using. A poorly formatted video might fail to process, look blurry, or take too long to load—discouraging viewers before they even press play.
Start by reviewing your video’s technical specifications:
- Resolution: Aim for at least 1080p (1920x1080) for high quality. Platforms like YouTube support up to 4K.
- Aspect Ratio: Match the platform’s preferred format. For example, vertical (9:16) works best on TikTok and Instagram Reels, while horizontal (16:9) suits YouTube and Facebook.
- File Format: MP4 (H.264 codec) is widely accepted. Avoid less common formats like AVI or MOV unless required.
- File Size: Keep under the platform’s limit. YouTube allows up to 256 GB or 12 hours, but smaller files upload faster and process more reliably.
Step 2: Choose the Right Platform and Understand Its Requirements
Each platform has unique guidelines that affect how your video performs. Uploading blindly without checking these can lead to rejected files or poor viewer experience.
| Platform | Max File Size | Recommended Format | Aspect Ratio |
|---|---|---|---|
| YouTube | 256 GB | MP4, MOV, AVI | 16:9 (horizontal) |
| TikTok | 287.6 MB (mobile), 2 GB (desktop) | MP4, MOV | 9:16 (vertical) |
| Instagram Reels | 4GB | MP4, MOV | 9:16 or 4:5 |
| 4GB | MP4, MOV | 16:9, 1:1, 9:16 | |
| X (formerly Twitter) | 512 MB | MP4, MOV | 16:9 |
Understanding these differences helps you tailor each upload. For instance, if you record in landscape mode but want to post on TikTok, consider cropping or adding background elements to fill the vertical frame.
“Optimizing your video for the platform isn’t just about compatibility—it’s about maximizing engagement.” — Dana Lee, Digital Content Strategist
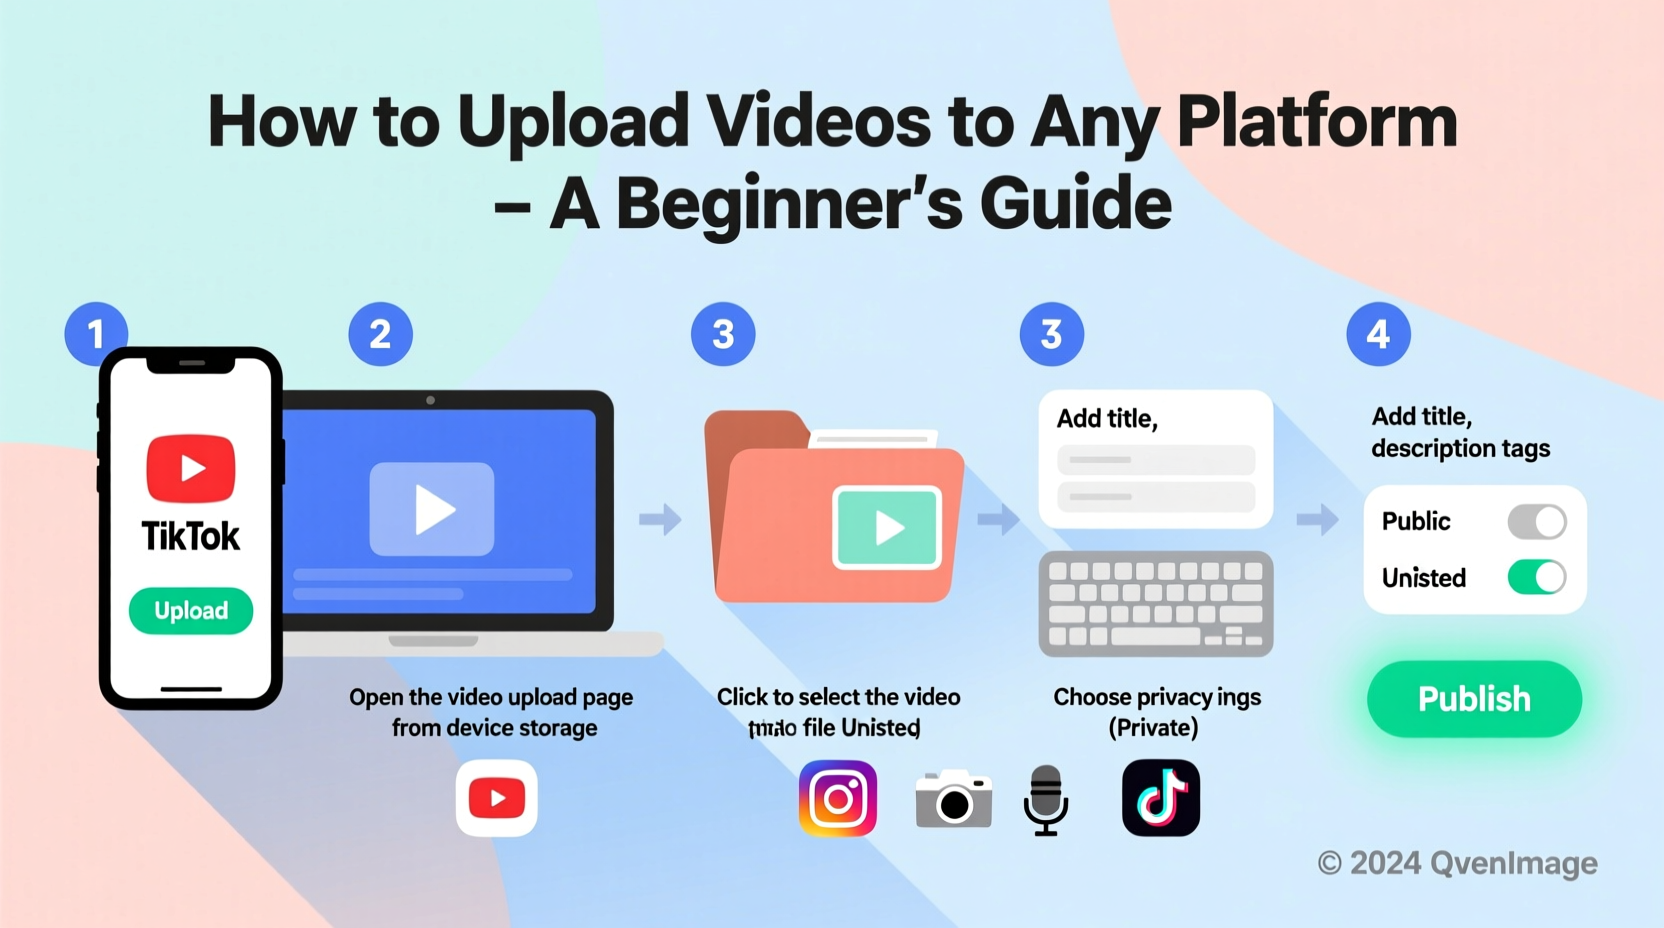
Step 3: Log In and Navigate to the Upload Section
Once your video is ready, go to the platform’s website or app and log into your account. Here’s how to find the upload button on popular platforms:
- YouTube: Click the camera icon in the top-right corner, then select “Upload video.”
- TikTok: Tap the “+” button at the bottom center of the screen to start uploading from your gallery.
- Instagram: Swipe right on the home screen or tap the “+” icon, then choose “Reel” or “Post.”
- Facebook: Click “Create Post,” then drag and drop your video or use the photo/video icon.
- X (Twitter): Click the compose button (quill icon), attach a video file, and publish.
Note: Some platforms, like TikTok, allow direct recording within the app. However, uploading pre-edited videos gives you more control over quality and branding.
Step 4: Fill in Metadata for Better Visibility
After selecting your file, most platforms will ask for details. This metadata shapes how people discover your video. Skipping it reduces reach significantly.
Key fields include:
- Title: Clear, engaging, and keyword-rich (e.g., “Beginner Guitar Lesson – Learn 3 Easy Chords”).
- Description: Explain what the video covers, include relevant links, and add keywords naturally.
- Tags: On YouTube and some platforms, tags help categorize content (e.g., #beginnertutorial, #guitarlesson).
- Thumbnail: Upload a custom image (recommended size: 1280x720 pixels). A compelling thumbnail increases click-through rates.
- Captioning: Add subtitles manually or use auto-generated ones to improve accessibility and retention.
Step 5: Review, Publish, and Share
Before hitting publish, preview your video. Check for audio issues, visual glitches, or incorrect text overlays. Most platforms allow you to pause processing and make edits.
Decide whether to publish immediately or schedule the video. Scheduling is useful for reaching audiences when they’re most active—typically evenings or weekends, depending on your demographic.
After publishing, share the link across your social networks, email newsletters, or embed it on your website. Engagement in the first hour signals popularity to algorithms, so notify your followers directly if possible.
Mini Case Study: From First Upload to 10K Views
Sophie, a baking enthusiast, recorded her first cupcake decorating tutorial on her phone. Initially, she uploaded it directly to YouTube without trimming the shaky intro or optimizing the title. The video received only 12 views in a week.
She revisited the process: trimmed the video to 5 minutes, added background music, used a clean title (“Easy Rainbow Cupcakes in 5 Minutes”), and designed a bright thumbnail. Her second upload gained over 10,000 views in two weeks, largely due to improved metadata and formatting.
This shows that technical correctness matters, but presentation determines visibility.
Checklist: How to Successfully Upload Any Video
Use this checklist every time you upload to avoid common mistakes:
- ✅ Edited and finalized the video content
- ✅ Exported in correct format (usually MP4)
- ✅ Verified resolution and aspect ratio match platform standards
- ✅ Compressed file if necessary to meet size limits
- ✅ Logged into the correct account
- ✅ Located the upload button in the app or desktop site
- ✅ Added a clear, keyword-rich title
- ✅ Wrote a helpful description with timestamps (if applicable)
- ✅ Selected relevant tags or categories
- ✅ Uploaded a custom thumbnail
- ✅ Reviewed video preview before publishing
- ✅ Shared the link after going live
Frequently Asked Questions
Why won’t my video upload?
Common causes include an unsupported file format, oversized file, unstable internet connection, or temporary server issues. Convert your video to MP4, reduce its size, and try again on a stable Wi-Fi network.
How long does it take for a video to process?
Processing time depends on video length, resolution, and platform load. A 10-minute 1080p video usually takes 5–10 minutes on YouTube. High-resolution videos (4K+) may take much longer.
Can I edit my video after uploading?
You can update the title, description, and thumbnail anytime. However, changing the actual video content requires deleting and re-uploading it, which resets views and comments. Some platforms like YouTube allow minor cuts via the editor, but full revisions need re-upload.
Final Tips for Consistent Success
Uploading videos becomes easier with practice. Focus on consistency—posting regularly builds audience trust and algorithmic favor. Always keep backups of your original files in case you need to re-upload or repurpose content.
Stay updated on platform changes. Social media sites frequently adjust upload limits, supported formats, and recommendation systems. Following official blogs or creator newsletters helps you adapt quickly.
Most importantly, don’t let technical hurdles stop you from sharing your message. Every expert creator started exactly where you are now—with their first upload.


 浙公网安备
33010002000092号
浙公网安备
33010002000092号 浙B2-20120091-4
Comments
No comments yet. Why don't you start the discussion?