
Applying foundation with a makeup sponge can deliver one of the most natural, airbrushed finishes—if done correctly. Yet many users end up using too much product, creating streaks, or dealing with uneven coverage. The problem often isn’t the foundation or the sponge itself, but the technique behind its use. With the right method, you can stretch your product further, avoid patchiness, and achieve a seamless complexion that looks like skin, not makeup.
The beauty of a makeup sponge lies in its versatility and ability to blend precisely. But improper hydration, incorrect pressure, or poor application order can turn a promising routine into a frustrating mess. This guide breaks down the science and artistry behind effective sponge use, offering practical steps, expert insights, and real-world solutions to eliminate waste and streaking once and for all.
Why Makeup Sponges Waste Product (And How to Stop It)
A dry or improperly dampened sponge acts like a sponge in every sense—it soaks up liquid foundation rather than spreading it. When you press a dry sponge into your face, it absorbs more product than necessary, forcing you to apply additional layers to compensate. This leads to overuse, clogged pores, and a heavy appearance.
The key is moisture control. A well-dampened sponge expands and becomes less absorbent, allowing it to glide smoothly and distribute product evenly. However, too much water dilutes foundation and weakens coverage. The ideal state is “damp,” not dripping wet.
Sponges also waste product when used with excessive pressure. Pressing too hard forces the sponge deeper into the skin’s surface, absorbing more foundation and disrupting even distribution. Light, bouncing motions preserve product and prevent streaks.
The Step-by-Step Technique for Flawless Blending
Using a makeup sponge effectively is less about speed and more about precision. Follow this sequence to maximize coverage while minimizing waste:
- Start with clean hands and skin. Wash your face and apply moisturizer or primer. Let it set for two minutes before applying foundation.
- Dampen your sponge. Soak it under running water or in a bowl, then squeeze gently until no more water drips out. It should feel plump and bouncy.
- Apply foundation strategically. Place small dots of product on your forehead, cheeks, nose, chin, and neck. Avoid swiping directly from the bottle onto the sponge.
- Use the pointed end for detail areas. Start with the under-eye area, sides of the nose, and around the lips. Use light tapping motions—never drag.
- Switch to the rounded base for larger zones. Bounce gently across the cheeks, forehead, and jawline. Let the sponge do the work; don’t press deeply.
- Blend outward and upward. Move from the center of the face toward the hairline and ears to avoid harsh lines.
- Flip the sponge as needed. Use cleaner sides for final blending to catch any excess product or streaks.
- Set lightly. Wait 60 seconds before setting with powder to avoid disturbing the blend.
This method ensures minimal absorption and maximum control. The bouncing motion diffuses pigment gradually, building coverage naturally without piling on product.
Do’s and Don’ts of Sponge Application
| Do’s | Don’ts |
|---|---|
| Dampen the sponge before each use | Use a dry sponge |
| Apply foundation in dots, not thick lines | Swirl foundation directly onto the sponge |
| Bounce, don’t drag or swipe | Wipe or smear the product across skin |
| Clean your sponge weekly | Use a dirty sponge daily |
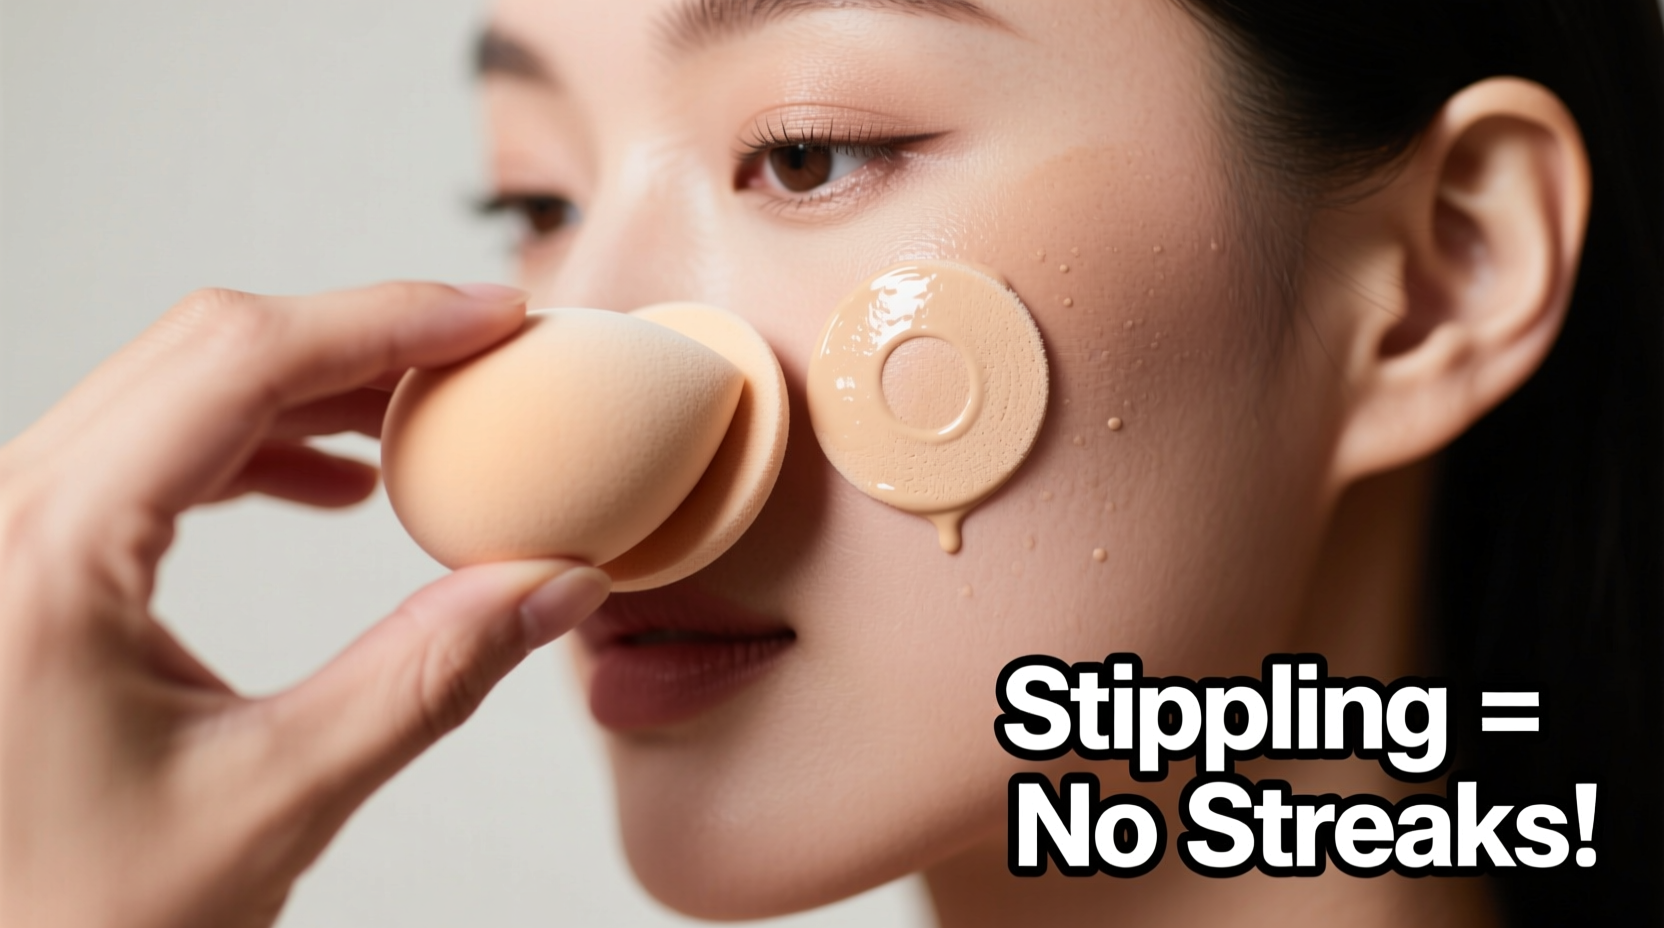
| Use the flat side for contouring or stippling | Press too hard to cover blemishes |
| Replace sponges every 3–6 months | Keep using a torn or discolored sponge |
Following these guidelines prevents common mistakes that lead to wasted product and visible streaks. For example, dragging the sponge creates sheer trails at the edges, especially along the jawline. Bouncing maintains consistency and avoids abrupt transitions.
Expert Insight: What Professionals Know About Sponges
Makeup artists rely on sponges for high-definition photography and long shoots where imperfections are magnified. Their techniques prioritize efficiency and skin-like finish.
“Most people waste half their foundation because they’re using a dry sponge. Water activates the latex cells so they expand and stop soaking up product. If your sponge weighs more after use than before, you’re losing foundation to absorption.” — Lila Chen, Celebrity Makeup Artist
Chen also emphasizes timing: “Foundation should be blended within 90 seconds of application. After that, it starts to oxidize and bond with the skin, making blending harder and streaks more likely.”
Another pro tip: warm the sponge slightly between your palms before use. Body heat softens the material, improving flexibility and adhesion to facial contours.
Real-World Example: From Patchy to Perfect in One Try
Sophie, a 29-year-old office worker, struggled with her full-coverage foundation always looking cakey by midday. She’d apply what she thought was a moderate amount, only to find streaks near her temples and wasted product pooling around her nostrils.
After switching to a damp sponge and changing her technique, she noticed immediate improvement. Instead of rubbing foundation in circular motions, she began using a stippling bounce. She applied smaller dots of product and started from the center of her face.
Her foundation now lasts longer, uses 40% less product per application, and appears undetectable in daylight. “I didn’t realize I was pressing so hard,” she said. “Once I let the sponge do the work, everything changed.”
Sophie’s experience reflects a common issue: over-application due to poor technique. By adjusting her method, not her products, she achieved better results with less effort.
Maintenance Matters: Keeping Your Sponge Effective
A dirty or degraded sponge compromises both hygiene and performance. Buildup of old makeup, oils, and bacteria makes the sponge denser and more absorbent, increasing product waste and streak risk.
Cleaning should be done at least once a week for daily users. Use a gentle brush cleanser or baby shampoo with lukewarm water. Swirl the sponge in your palm until the water runs clear. Rinse thoroughly and let it air-dry in a ventilated area—never in a closed container or bathroom cabinet where mold can grow.
Inspect your sponge monthly. If it tears, develops an odor, or no longer bounces back after squeezing, replace it. Most sponges last 3–6 months with proper care.
Frequently Asked Questions
Can I use a makeup sponge with thick or full-coverage foundation?
Yes, but adjust your technique. Apply the foundation in very thin layers and build gradually. Thick formulas require more bouncing and less pressing to avoid dragging. Dampen the sponge well to prevent it from absorbing too much product.
Why does my sponge leave lines around my jawline?
This usually happens when you stop blending too soon or switch directions abruptly. Always blend past your jawline and onto your neck using the same motion. Use the narrow edge of the sponge to feather the edges seamlessly. Also, ensure your neck and face are the same shade to avoid contrast.
Is there a difference between sponges for liquid, cream, and powder?
The same sponge can work for all, but density matters. Softer, more porous sponges (like classic egg-shaped ones) excel with liquids and creams. Firmer sponges or those with textured surfaces work better for powders. For multi-use, choose a medium-density sponge and clean it regularly to prevent cross-contamination.
Final Checklist: Master Your Sponge Routine
- ✅ Dampen sponge before every use—squeeze until no dripping
- ✅ Apply foundation in small dots on key facial zones
- ✅ Use bouncing, stippling motions—not dragging or swiping
- ✅ Start from the center of the face and blend outward
- ✅ Clean sponge weekly with mild cleanser
- ✅ Replace sponge every 3–6 months or when worn
- ✅ Use lighter pressure on delicate areas like under eyes
- ✅ Allow foundation to set briefly before powdering
Following this checklist ensures consistent, streak-free results while stretching your product’s lifespan. Over time, these habits become second nature, saving you money and frustration.
Conclusion: Transform Your Makeup Game with One Simple Tool
Mastering the makeup sponge isn’t about owning the most expensive brand—it’s about understanding how to use it properly. With the right moisture level, gentle technique, and consistent maintenance, you can achieve a finish that rivals professional airbrushing—all while using less product and avoiding unsightly streaks.
Every swipe, tap, and bounce shapes the final result. Take the time to refine your method, learn from small adjustments, and treat your sponge as a precision tool, not just an applicator. The payoff is healthier-looking skin, longer-lasting makeup, and fewer touch-ups throughout the day.


 浙公网安备
33010002000092号
浙公网安备
33010002000092号 浙B2-20120091-4
Comments
No comments yet. Why don't you start the discussion?