
Navigating outdoor spaces at night can be hazardous without proper illumination. During the holiday season, many homeowners turn to Christmas lights not just for festive decoration but also as a practical lighting solution for walkways, driveways, and garden paths. However, improper use of these lights can lead to glare, visual confusion, or even disorientation—especially for older adults or guests unfamiliar with the terrain. The key lies in balancing aesthetics with safety through thoughtful planning, appropriate light selection, and strategic installation.
When used correctly, Christmas lights can serve as subtle yet effective navigational aids, enhancing visibility without overwhelming the senses. This guide explores how to transform seasonal decor into functional pathway lighting that ensures safe movement after dark while preserving the charm of the holidays.
Understanding Light and Night Vision
The human eye adapts differently to light at night. In low-light conditions, our pupils dilate to capture more available light, making us more sensitive to sudden brightness. Harsh or overly bright lighting—especially cool white or blue-toned LEDs—can cause glare, reduce depth perception, and temporarily impair vision. This is particularly problematic on uneven surfaces where missteps could result in injury.
For safe nighttime navigation, lighting should support natural night vision rather than disrupt it. Ideal pathway lighting provides consistent, low-level illumination that defines edges and changes in elevation without creating stark contrasts between light and shadow. The goal isn’t full visibility, but enough guidance to move confidently and securely.
“Effective outdoor lighting isn’t about brightness—it’s about contrast, consistency, and color temperature. A well-lit path should feel intuitive, not intrusive.” — Dr. Lena Torres, Environmental Lighting Specialist, University of Colorado Boulder
Selecting the Right Type of Christmas Lights
Not all Christmas lights are suitable for functional pathway guidance. Some are designed purely for decorative impact, featuring flashing patterns, multicolor sequences, or intense brightness that compromise safety. Choosing the right lights involves evaluating several technical and perceptual factors.
Color Temperature Matters
Light color is measured in Kelvin (K). For safe, non-disorienting illumination:
- Warm white (2700K–3000K): Mimics candlelight or incandescent bulbs; reduces glare and supports natural night vision.
- Cool white (4000K+): Emits a bluish tint that increases contrast and can cause discomfort in darkness.
Stick to warm white LEDs—they consume less energy, last longer, and are gentler on the eyes during nighttime exposure.
Brightness and Lumen Output
Christmas lights vary widely in lumen output (total visible light emitted). For pathway guidance, avoid high-lumen strings meant for tree toppers or roof outlines. Instead, opt for micro LED string lights rated under 150 lumens per set. These provide soft, diffused glow ideal for marking ground-level features.
Avoid Flashing or Strobing Effects
While animated lighting may be festive, flashing or twinkling modes can interfere with spatial awareness. Rapid changes in light levels make it difficult for the brain to interpret depth and distance accurately. For safety-critical areas like steps or curves, use steady-on settings only.
| Feature | Recommended | Avoid |
|---|---|---|
| Color Temperature | Warm white (2700K–3000K) | Cool white, daylight blue |
| Light Pattern | Steady-on, constant glow | Twinkling, strobe, chase effects |
| Lumen Output | Low to medium (under 150 lm/set) | High-output commercial strings |
| Placement Height | Ground level to 18 inches | Overhead or wall-mounted above 3 ft |
| Power Source | Low-voltage DC or solar | Unprotected mains voltage |
Strategic Placement for Safe Navigation
Where you place Christmas lights has a direct impact on their effectiveness as navigational tools. Poorly positioned lights can create shadows, blind spots, or misleading cues. Follow these principles to ensure clarity and continuity.
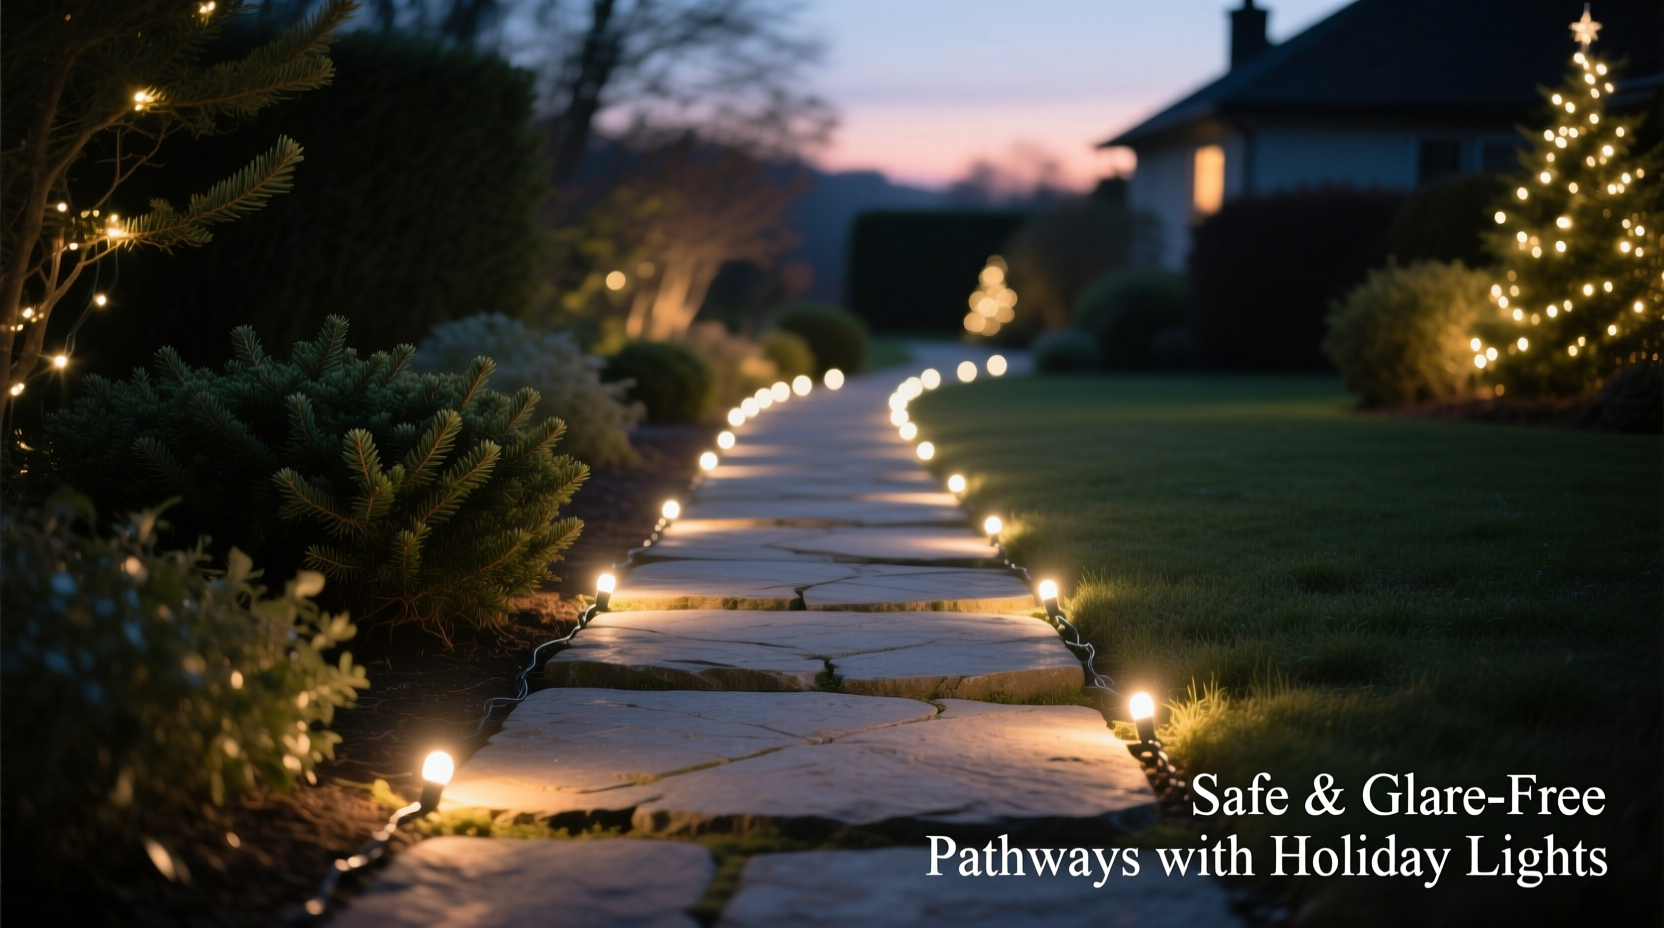
Follow the Path, Don't Overpower It
Use lights to outline the edges of walkways rather than flood the entire surface. Install lights along borders—such as garden edging, stone walls, or planter boxes—to define boundaries. If no physical border exists, stake small ground markers wrapped with light strings every 18–24 inches along both sides of the path.
This method creates a “tunnel effect” that guides the eye forward without requiring full visual acuity. It also prevents tripping hazards by clearly indicating where solid footing ends and lawn or gravel begins.
Highlight Changes in Elevation
Steps, ramps, and level transitions are high-risk zones. Reinforce these areas with slightly denser lighting. Place one or two additional light nodes on each step edge or at the top and bottom of inclines. Consider using waterproof LED step lights embedded into risers for maximum clarity.
If using string lights, loop them around handrails or posts adjacent to stairs. Never rely solely on overhead lighting, which casts downward shadows and obscures tread details.
Minimize Vertical Glare
A common mistake is mounting lights too high—on fences, eaves, or trees—where they shine directly into people’s line of sight. When walking toward a light source above eye level, even low-intensity bulbs can cause glare due to pupil dilation in darkness.
Keep all functional pathway lighting below 18 inches in height. Ground-level fixtures or low-profile stakes keep illumination directed downward, reducing skyglow and glare while improving contrast on the walking surface.
“In landscape lighting, less is often more. A single row of warm, evenly spaced lights at foot level can do more for safety than ten tangled strands across a porch ceiling.” — Marcus Bell, Certified Outdoor Lighting Designer (COLD)
Step-by-Step Guide: Installing Safe Christmas Pathway Lighting
Transform your outdoor space into a safely illuminated route with this five-phase installation process.
- Map Your Pathway
Walk the route at dusk or night with a flashlight. Note any turns, steps, narrow sections, or obstacles. Sketch a simple diagram showing key decision points. - Choose Fixtures and Layout
Select warm white, steady-on string lights with grounded stakes or clip-in mounts. Plan for dual-side lining if the path is wider than 2 feet. For curved paths, increase density slightly on inside bends. - Test Before Securing
Lay out lights loosely along the path and plug them in. Observe from multiple angles—approaching from driveway, front door, and side gates. Adjust spacing or remove excess clusters causing hotspots. - Install with Safety in Mind
Secure lights using weather-resistant clips or plastic staples. Avoid nails or tight ties that damage wires. Elevate connections off the ground using junction boxes or elevated outlets. Ensure GFCI protection for all electrical circuits. - Final Night Evaluation
After dark, walk the path slowly. Confirm there are no dark gaps longer than 3 feet. Verify that transitions (e.g., pavement to gravel) are clearly marked. Ask a family member to test it independently and report any confusing sections.
Real-World Example: A Safer Front Walk in Portland
In suburban Portland, Oregon, homeowner Diane Rhee transformed her icy front path into a winter-safe route after a neighbor slipped on black ice during a holiday gathering. Her property featured a 40-foot sloped walkway bordered by shrubs, with no permanent lighting.
Diane installed 80 feet of warm white micro-LED string lights along both edges, secured with flexible plastic stakes every 20 inches. She added three extra nodes at the base and top of a five-step porch landing. All connections ran through a GFCI outlet under an eave, protected by a weatherproof cover.
She avoided wrapping nearby trees or railings to prevent vertical glare. Instead, she focused on horizontal continuity. After one month, she reported zero close calls—even during foggy evenings—and received compliments on the “cozy, inviting” appearance.
Most importantly, elderly visitors noted they felt more confident navigating the path independently, citing clear visual cues and absence of blinding light.
Checklist: Safe Christmas Pathway Lighting Setup
- ☐ Choose warm white (2700K–3000K), steady-on lights
- ☐ Limit brightness to low- or medium-lumen strings
- ☐ Position lights at or below 18 inches in height
- ☐ Line both sides of the path for consistent edge definition
- ☐ Increase light density at steps, curves, and entry points
- ☐ Use GFCI-protected outlets and elevate electrical connections
- ☐ Avoid flashing, strobing, or multicolor modes in functional zones
- ☐ Test layout at night before permanent installation
- ☐ Automate operation with timer or motion sensor (optional)
- ☐ Inspect weekly for damage, moisture, or displacement
Frequently Asked Questions
Can I use solar-powered Christmas lights for pathway safety?
Yes, provided they receive adequate sunlight during the day. Solar strings work best in open areas unobstructed by roofs or trees. Choose models with built-in batteries rated for at least 8 hours of runtime. Keep in mind that performance may decrease during extended cloudy periods typical of winter months.
Are battery-operated lights safe for outdoor pathways?
Battery-powered lights can be used for short-term or accent lighting, but they’re less reliable for consistent safety guidance. Voltage drops over time reduce brightness, and frequent replacements increase maintenance burden. For permanent or high-traffic routes, hardwired or solar-recharged systems are preferable.
How far apart should lights be spaced along a path?
Space lights 18 to 24 inches apart along each side of the path. For wider paths (over 4 feet), consider adding a centerline string or alternating staggered placement. On curves, reduce spacing to 12–18 inches to maintain visual flow.
Conclusion: Illuminate with Purpose
Using Christmas lights to guide nighttime pathways doesn’t require elaborate displays or dazzling brilliance. True safety comes from intentionality—choosing the right color, controlling brightness, and placing lights where they enhance orientation without causing sensory overload. By treating holiday lighting as both decoration and duty, homeowners can welcome guests with warmth that’s not just emotional, but literal and protective.
The most memorable holiday moments happen when everyone arrives safely. Take time now to assess your outdoor routes, apply these strategies, and create a welcoming environment that prioritizes clarity over clutter. Whether you're hosting a large gathering or simply ensuring your own safe return at night, thoughtful lighting makes all the difference.


 浙公网安备
33010002000092号
浙公网安备
33010002000092号 浙B2-20120091-4
Comments
No comments yet. Why don't you start the discussion?