
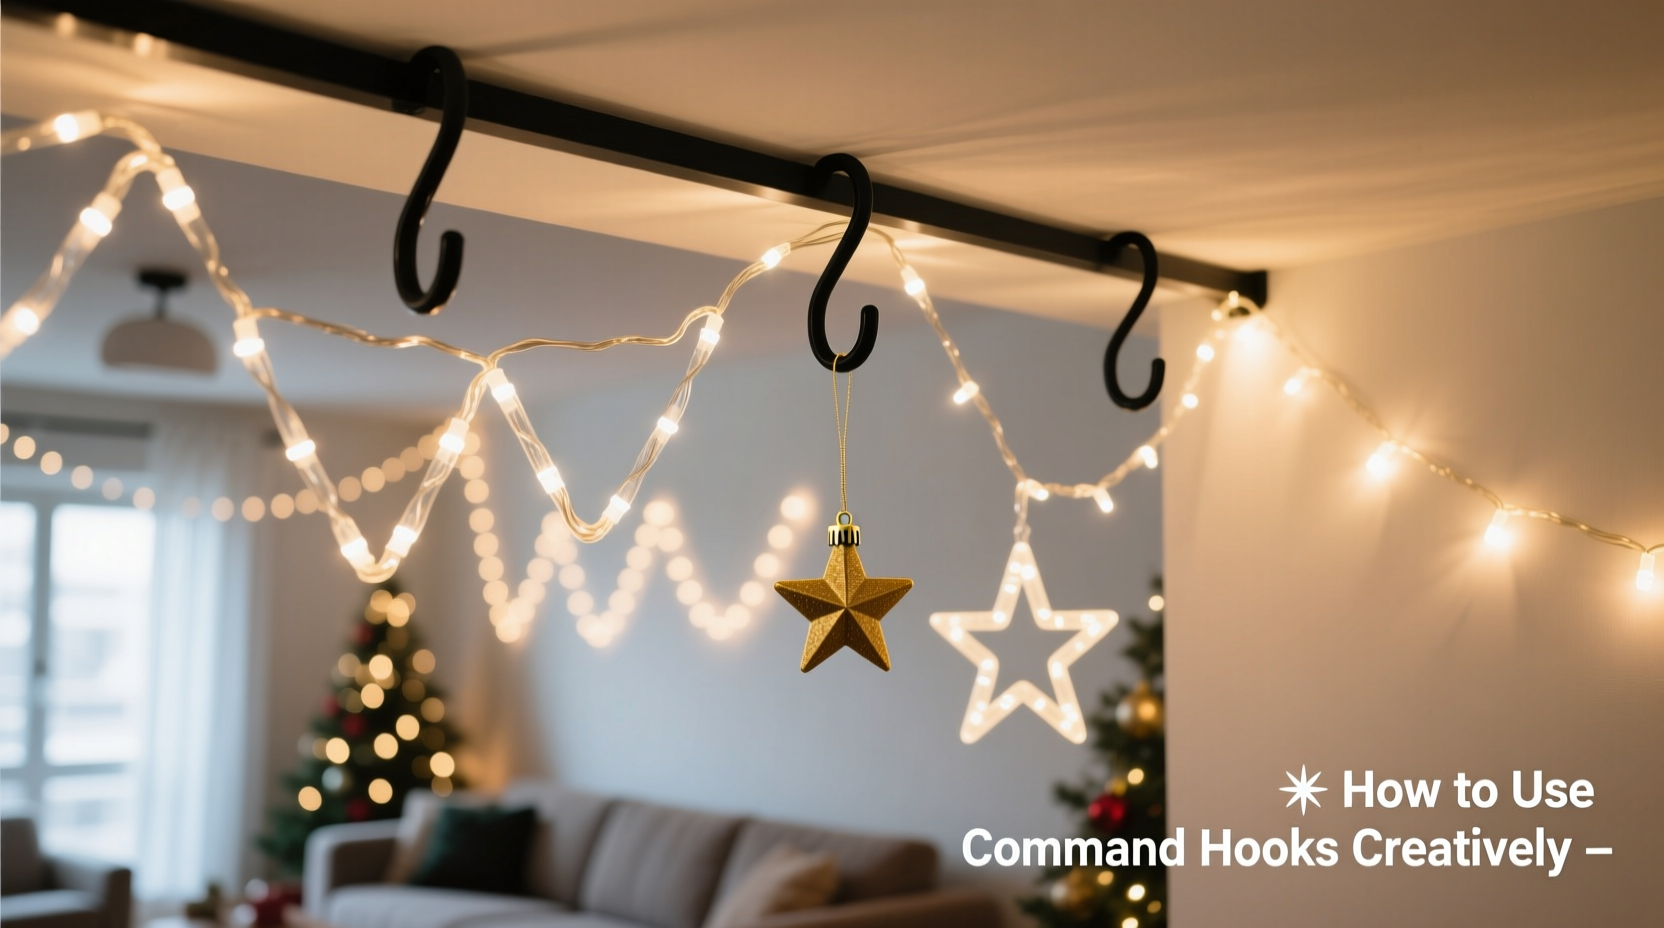
Indoor Christmas lights bring warmth, magic, and seasonal cheer to any space. But stringing them up without damaging walls or leaving behind stubborn residue has long been a decorating dilemma. Command hooks offer an elegant, damage-free solution—but their potential goes far beyond simply hanging a single strand above a window. When used creatively, these small adhesive tools can transform your entire holiday lighting display into a seamless, professional-looking spectacle.
Whether you're living in a rental, protecting freshly painted walls, or simply avoiding nails and drills, Command hooks provide the flexibility and strength needed for intricate indoor light arrangements. From ceiling constellations to stairway ribbons of glow, the right placement and configuration can turn ordinary rooms into festive wonderlands—all removable in January with no trace left behind.
Why Command Hooks Are Ideal for Holiday Lighting
Traditional methods of mounting Christmas lights often involve nails, tacks, or tape that can chip paint, leave holes, or degrade over time. Command hooks, developed by 3M, use a unique adhesive technology that holds firmly during use but detaches cleanly when pulled correctly. This makes them ideal for temporary installations like seasonal décor.
Their versatility lies not just in their removability, but in the range of sizes and weight capacities available. From mini clear hooks rated for 1 pound to large utility versions supporting up to 7.5 pounds, there's a Command product suitable for nearly every type of indoor light string—LED, incandescent, battery-powered, or plug-in.
“Command hooks have revolutionized temporary décor installation. They allow people to decorate boldly without fear of property damage.” — Lisa Tran, Interior Stylist & Seasonal Design Consultant
Additionally, because they come in multiple colors—including white, clear, and metallic finishes—they can blend discreetly into trim, molding, or ceilings, keeping the focus on the lights themselves rather than the hardware holding them.
Creative Layout Ideas Using Command Hooks
Most people think of Command hooks as simple anchor points for vertical drops or horizontal runs. But with strategic planning, they enable complex, artistic lighting designs that mimic professional installations.
1. Ceiling Constellation Effect
Create a dreamy starfield across your ceiling by spacing small fairy lights in random clusters. Use clear mini Command hooks to secure each bulb node at varying heights using short monofilament line (invisible fishing wire). This gives the illusion of floating lights.
2. Staircase Ribbon Lighting
Wrap lights along banister rails by placing Command hooks every 6–8 inches underneath the handrail. This keeps cords flush and safe from foot traffic while creating a continuous ribbon of light ascending the stairs. Use J-hook styles so the cord rests securely in the curve.
3. Wall-Mounted Light Art
Shape lights into symbols—stars, snowflakes, trees, or even words like “Joy” or “Noel.” Use small Command picture hanging strips to affix corners and bends precisely. Plan the design on paper first, then transfer it to the wall using light pencil marks before applying hooks.
4. Window Frame Glow
Instead of taping lights directly to glass or frames, place narrow Command hooks on the outer edge of window casings. Position one hook per corner and additional ones along longer sides to prevent sagging. The result is a clean, framed glow that enhances curb appeal from inside out.
5. Floating Shelf Accents
Highlight bookshelves, mantels, or floating cabinets by running micro-lights along the underside. Attach tiny Command hooks to the back lip of the shelf to hold the cord in place. This casts a soft upward wash of light, emphasizing objects on display without glare.
Step-by-Step Guide: Installing a Command Hook-Based Light Layout
Success depends on proper preparation and execution. Follow this timeline to ensure a polished, durable setup:
- Plan Your Design (Day 1)
Sketch your desired layout on graph paper or use digital tools. Measure distances between key points—windows, corners, ceiling beams—and note where power outlets are located. - Gather Supplies (Day 1)
Collect:- Appropriate number and size of Command hooks
- Christmas lights (preferably lightweight LED)
- Tape measure, level, pencil
- Isopropyl alcohol wipes
- Invisible thread or fishing line (if suspending)
- Prepare Surfaces (Day 2 – Installation Day)
Clean all mounting areas thoroughly with alcohol wipes. Let dry completely. Dust, grease, or moisture reduces adhesion strength significantly. - Mark Placement Points
Use a pencil and level to mark exact hook positions. For symmetrical designs (like geometric shapes), measure from central reference points to maintain balance. - Apply Hooks
Peel backing and press each hook firmly against the surface for at least 30 seconds. Avoid touching the adhesive side with fingers. Wait one hour before loading to allow full bond development. - String Lights Gradually
Begin at the power source and work outward. Gently guide the cord into each hook. Do not stretch or yank. Test illumination periodically to catch faulty sections early. - Final Adjustments
Once fully installed, step back and assess visibility, spacing, and brightness. Re-position any uneven segments and conceal excess cord neatly behind furniture or baseboards.
Choosing the Right Command Hook for Your Lights
Not all Command hooks are created equal. Selecting the wrong type can lead to drooping, detachment, or surface damage. Refer to the table below to match your lighting needs with the correct product.
| Type of Command Hook | Weight Capacity | Best For | Avoid With |
|---|---|---|---|
| Mini Clear Hooks | 1 lb | Fairy lights, garlands, thin cords | Heavy incandescent strings |
| Large Clear Hooks | 3.5 lbs | Medium LED strands, curtain lights | Outdoor-grade wires indoors |
| Utility Hooks (White/Black) | 7.5 lbs | Denser light sets, combined strings | Delicate wallpaper or textured paint |
| Picture Hanging Strips | Up to 8 lbs (pair) | Fixed-point art forms, shaped letters | Curved or flexible layouts |
| Moving Box Hangers | 2 lbs | Temporary ceiling drops, swags | Permanent installations |
Always check the packaging for specific wall compatibility. Most Command products work best on painted drywall, wood, tile, and glass—but perform poorly on brick, stucco, or heavily textured surfaces.
Real Example: A Renter’s Festive Living Room Makeover
Sophie Rivera, a graphic designer in Chicago, wanted to elevate her apartment’s holiday ambiance without violating her lease agreement. Her goal was a cozy, Instagram-worthy lounge area featuring a glowing wall mural spelling “BELIEVE” in cursive lights.
She began by sketching the word layout on her phone, scaling it to fit above the sofa. Using painter’s tape, she lightly mapped the shape onto the wall. Then, she applied small Command Picture Hanging Strips at every major curve and endpoint—12 total. She threaded a flexible copper wire LED string through the anchors, bending it gently to follow the taped outline.
To hide the power cord, she ran it down the side of the entertainment center using flat, clear Command Cord Clips. The entire project took under three hours, cost $47, and passed her landlord’s inspection after removal in January. Neighbors later asked if she’d hired a decorator.
Common Mistakes and How to Avoid Them
- Overloading hooks: Just because a hook can hold weight doesn’t mean it should bear tension. Distribute load across multiple anchors, especially for long runs.
- Skipping surface prep: Applying hooks to dusty or greasy walls is the leading cause of premature failure. Always wipe clean with alcohol.
- Ignoring temperature limits: Command products require room temperature (above 50°F/10°C) during application and for at least one hour after. Cold rooms weaken bonding.
- Removing incorrectly: Never pull sideways or yank. To remove, stretch the tab slowly downward until the adhesive releases. If it resists, warm it slightly with a hairdryer.
- Using outdated stock: Adhesive degrades over time. Check expiration dates on packaging, especially if buying in bulk off-season.
Checklist: Preparing Your Command Hook Light Installation
- ☐ Choose appropriate light type (LED recommended for low heat and weight)
- ☐ Measure wall/ceiling dimensions and plan layout
- ☐ Purchase correct quantity and size of Command hooks
- ☐ Buy alcohol wipes or rubbing alcohol and lint-free cloth
- ☐ Locate nearest power outlet and determine cord path
- ☐ Test lights before installation
- ☐ Clean all mounting surfaces thoroughly
- ☐ Mark hook positions with pencil and level
- ☐ Apply hooks and wait one hour before loading
- ☐ Install lights gradually, checking alignment
- ☐ Conceal cords using cord clips or baseboard routing
- ☐ Take photos for reassembly next year
FAQ: Command Hooks and Indoor Christmas Lights
Can I reuse Command hooks after taking them down?
No, Command hooks are designed for single-use. Once removed, the adhesive strip stretches and loses effectiveness. However, replacement refills are available separately, allowing you to keep the original hook base if desired.
Will Command hooks damage wallpaper?
They can, depending on the wallpaper type. Vinyl or washable wallpapers generally handle removal well. Delicate, unpasted, or older papers may tear. Always test in an inconspicuous area first and consider using specialized Command Wallpaper Products, which are formulated for fragile surfaces.
How do I hide the hooks so they’re not visible?
Choose color-matched or clear hooks based on your wall finish. Position them behind bulbs or at natural shadow points (like corners or under rails). For ceiling work, use transparent monofilament line to suspend lights so only the bulbs appear to float.
Conclusion: Illuminate with Confidence and Creativity
Using Command hooks for indoor Christmas light layouts isn’t just about convenience—it’s about reclaiming the freedom to celebrate boldly, regardless of your living situation. These small tools empower renters, homeowners, and temporary dwellers alike to create magical spaces without permanent commitments.
With thoughtful planning, the right materials, and attention to detail, your holiday lighting can rival professional displays—all while preserving your walls and simplifying cleanup. The season is short; your décor should be joyful, not stressful.


 浙公网安备
33010002000092号
浙公网安备
33010002000092号 浙B2-20120091-4
Comments
No comments yet. Why don't you start the discussion?