
Every holiday season, thousands of homeowners face the same dilemma: how to illuminate their home beautifully without sacrificing wall integrity. Nails, staples, and tape leave behind scars—peeling paint, cracked drywall, or stubborn adhesive residue—that linger long after the tinsel is packed away. Command Hooks offer a compelling alternative: reliable adhesion, clean removal, and broad compatibility with common interior and exterior surfaces. Yet many users still experience failures—hooks popping off mid-season, lights sagging unevenly, or worse, sudden detachment that damages trim or knocks over decorations. The issue isn’t the product; it’s application. This guide distills field-tested practices from professional holiday installers, property managers, and certified adhesive specialists to help you deploy Command Hooks with confidence—not just for one season, but reliably year after year.
Why Command Hooks Work (When Used Correctly)
Command Hooks rely on 3M’s proprietary acrylic-based adhesive technology—a pressure-sensitive formulation engineered to bond strongly to smooth, clean surfaces while remaining removable under controlled conditions. Unlike double-sided tape or generic hooks, Command products undergo rigorous testing for shear strength (resistance to downward pull), peel resistance (resistance to lifting at edges), and temperature tolerance. Most indoor hooks are rated for stable environments between 50°F–105°F (10°C–41°C); outdoor-specific versions extend that range down to -20°F (-29°C) and up to 125°F (52°C). Crucially, their performance hinges not on “stickiness” alone, but on three interdependent variables: surface preparation, load distribution, and dwell time.
The most common misconception is assuming all Command Hooks are interchangeable. In reality, the line includes distinct families—Clear Small Hooks for lightweight garlands, Jumbo Hooks for heavy swags, Outdoor Hooks with UV-resistant adhesive, and Water-Resistant Hooks for covered porches. Using a small indoor hook for 20 feet of C9 bulbs (which can weigh 2.5–3.5 lbs when bundled) invites failure—not because the hook is defective, but because it’s mismatched to the mechanical demand.
Step-by-Step: Installing Command Hooks for Christmas Lights
Follow this sequence precisely. Skipping even one step reduces holding power by up to 60%, according to 3M’s internal adhesion studies.
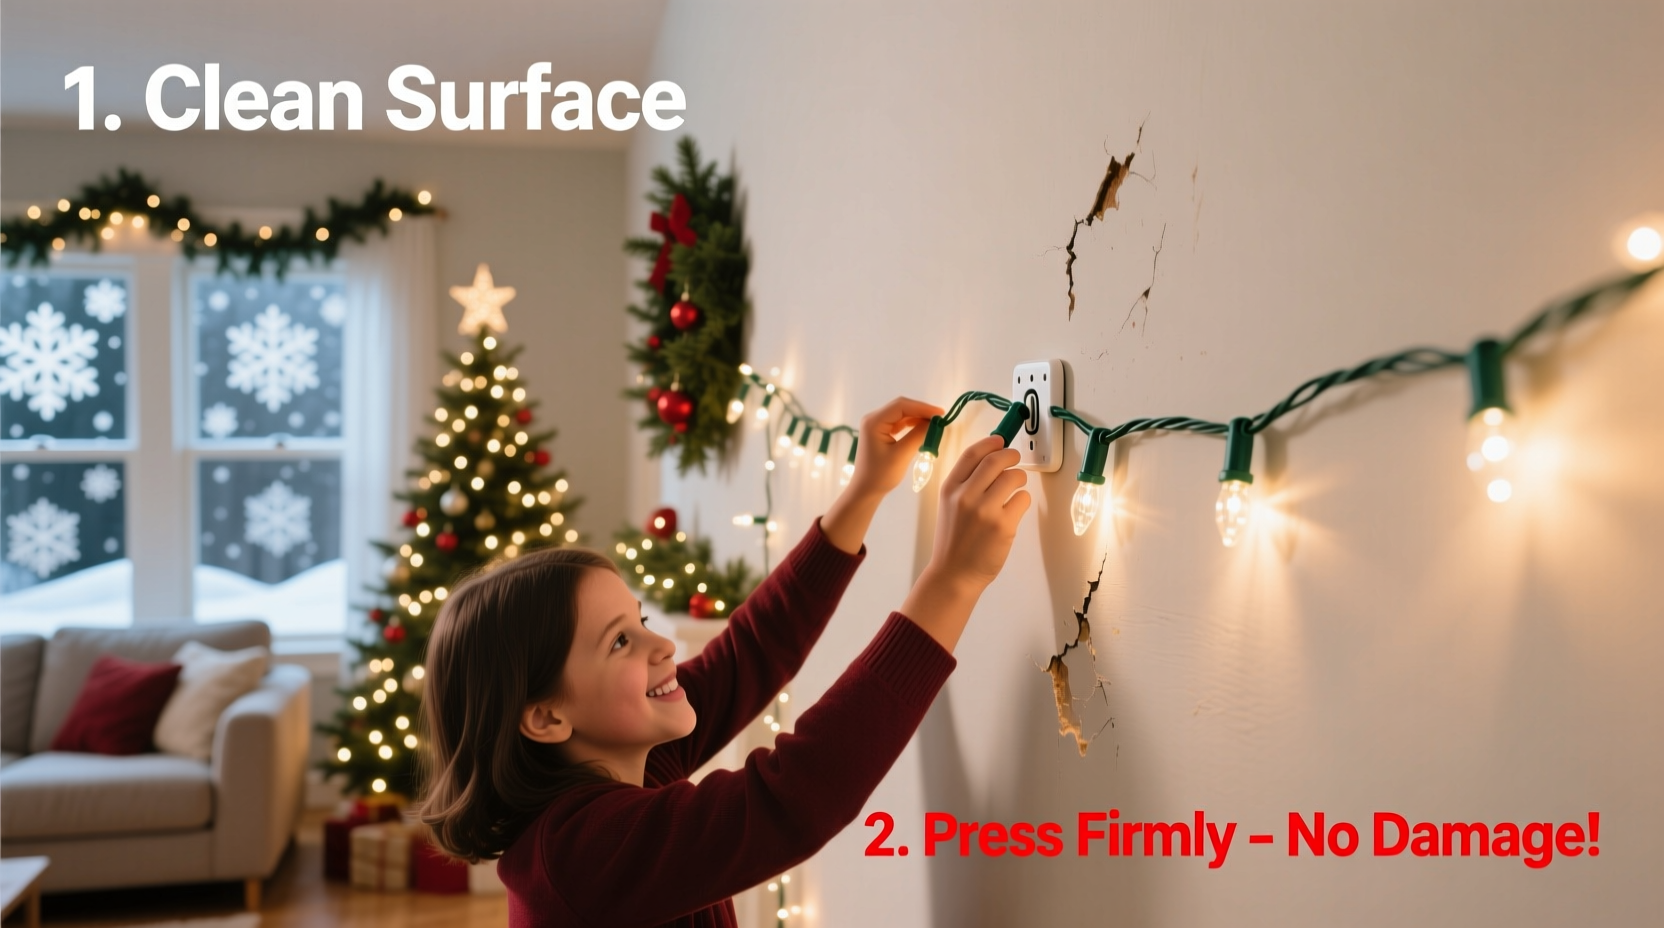
- Clean the surface thoroughly: Use isopropyl alcohol (70% or higher) on a lint-free cloth—not water, not glass cleaner, not vinegar. Wipe in one direction, then let air-dry for 2 full minutes. Oil residue from skin, dust, or previous cleaners creates a barrier that prevents molecular bonding.
- Select the correct hook size and type: Match the hook’s weight rating to your light string’s *actual* weight—not its packaging claim. Weigh bundled strings on a kitchen scale before installation. Add 20% margin for wind load if mounting outdoors.
- Peel the liner slowly and deliberately: Remove the red liner from the adhesive side *just before* placement. Never touch the exposed adhesive with bare fingers. If contamination occurs, re-clean the surface and use a new hook.
- Press firmly for 30 seconds: Apply even, palm-pressure—not fingertip pressure—directly over the center of the adhesive pad. Hold for the full duration without shifting. This ensures full contact and initiates micro-bonding.
- Wait 1 hour before hanging lights: This “dwell time” allows the adhesive to achieve initial set strength. For maximum reliability—especially in cooler temperatures or high-humidity areas—wait 24 hours before loading.
- Hang lights using gentle tension only: Avoid pulling lights taut across hooks. Instead, drape with 3–4 inches of slack per 10 feet to accommodate thermal expansion and wind sway. Use zip ties or soft twist ties—not wire—to secure cords to hooks.
Surface Compatibility & Critical Limitations
Command Hooks excel on smooth, non-porous surfaces—but they fail predictably on others. Understanding where they work—and where they absolutely don’t—is essential to avoiding disappointment.
| Surface Type | Works Well? | Key Considerations |
|---|---|---|
| Painted drywall (flat or eggshell) | ✅ Yes | Must be fully cured (≥30 days old). Avoid matte or chalk-style paints—they lack sufficient binder for adhesion. |
| Wood paneling or painted trim | ✅ Yes | Wipe with alcohol first; older varnish may require light sanding (220-grit) to remove oxidation layer. |
| Brick, stucco, concrete, or stone | ❌ No | Too porous and irregular. Adhesive cannot form continuous bond. Use screw-in anchors instead. |
| Vinyl or aluminum siding | ✅ Outdoor-rated hooks only | Install only on flat, seam-free panels—not near seams, corners, or textured sections. |
| Textured wallpaper or fabric wallcoverings | ❌ No | Adhesive pulls fibers loose. Risk of permanent tearing upon removal. |
| Tile (ceramic, porcelain, glass) | ✅ Yes | Ensure grout lines are sealed; unsealed grout absorbs moisture and weakens bond over time. |
Crucially, Command Hooks are not designed for vertical shear loads—the kind created when lights swing outward from a wall-mounted hook. They perform best under direct downward pull (like a curtain rod) or gentle lateral tension (like a garland draped horizontally). For vertical runs—such as lights along a staircase banister or down a column—use Command Clear Mounting Squares instead of hooks, and pair them with small plastic cable clips to redirect force downward.
Real-World Case Study: The Balcony Light Failure & Recovery
In December 2022, Sarah M., a property manager in Portland, OR, installed 120 feet of LED rope lights along the wrought-iron railing of a third-floor apartment balcony using standard Command Medium Hooks. Within 48 hours, seven hooks detached during a light rainstorm, dropping lights onto the patio below. She contacted 3M’s technical support team and learned two critical oversights: First, she used indoor-rated hooks despite the balcony being covered but unheated—exposing them to temperatures dipping below 45°F nightly. Second, she mounted hooks directly onto the metal railing without cleaning it; a thin film of atmospheric salt and road grime had compromised adhesion.
She corrected both errors: switched to Command Outdoor Hooks, cleaned the railing with isopropyl alcohol and a Scotch-Brite pad, waited 24 hours for full cure, and added a second hook every 8 feet to distribute load. The lights remained securely mounted through January’s freeze-thaw cycles and February’s wind gusts—removed cleanly in March with zero residue or paint lift. Her takeaway? “It’s not about how many hooks you use—it’s about matching the right hook to the environment, then treating the surface like a precision bonding job.”
Do’s and Don’ts Checklist
- ✅ DO weigh your light strings before choosing hooks—even “lightweight” incandescent mini-lights add up quickly when bundled.
- ✅ DO install hooks at least 12 inches apart for strings over 15 feet long to prevent sagging and uneven stress.
- ✅ DO remove hooks by stretching the adhesive strip straight down—never peeling sideways—to avoid surface damage.
- ❌ DON’T use hooks on freshly painted walls (less than 30 days old) or low-VOC paints, which remain tacky longer than conventional formulas.
- ❌ DON’T hang lights in direct sunlight on south-facing walls without UV-rated hooks—the adhesive degrades faster above 105°F.
- ❌ DON’T reuse adhesive strips—even if they look intact. Micro-fractures form during removal, reducing bond strength by 40–65%.
“Most ‘hook failures’ we investigate aren’t adhesive failures—they’re application failures. Temperature, surface energy, and dwell time matter more than brand loyalty.” — Dr. Lena Torres, Senior Materials Scientist, 3M Consumer Adhesives Division
Frequently Asked Questions
Can I use Command Hooks on textured ceilings for indoor light draping?
No. Textured ceilings (popcorn, knockdown, orange peel) create inconsistent contact points. The adhesive cannot bridge microscopic valleys, leading to premature edge-lift. For ceiling installations, use removable static-cling hooks (designed specifically for textured surfaces) or low-profile screw-in anchors with decorative caps.
How do I remove Command Hooks without damaging paint?
Slowly stretch the adhesive strip vertically downward—pulling straight toward the floor—for 10–15 seconds until it releases cleanly. If resistance increases, pause and apply gentle heat with a hairdryer (low setting, 6 inches away) for 20 seconds to soften the adhesive. Never scrape, pry, or use solvents. If residue remains, dab with rubbing alcohol on a cotton swab—do not rub vigorously.
Will Command Hooks hold lights on vinyl windows or doors?
Yes—but only with Outdoor Hooks, and only on smooth, flat vinyl surfaces (not embossed or wood-grain patterns). Clean with alcohol first, press firmly, and wait 24 hours before hanging. Avoid installing within 2 inches of window seals or door weatherstripping, where condensation can accumulate and weaken the bond over time.
Conclusion: Light Up Without Leaving a Trace
Hanging Christmas lights shouldn’t mean choosing between beauty and preservation. Command Hooks, when applied with intention and technical awareness, deliver both: luminous, festive displays that honor your home’s integrity. They’re not magic—they’re engineering made accessible. Success comes from respecting the physics involved: clean surfaces enable molecular adhesion; correct hook selection matches material science to mechanical load; and disciplined timing honors the chemistry of polymer curing. This season, skip the ladder-and-hammer routine. Instead, invest 20 focused minutes in surface prep, choose hooks calibrated to your specific lights and location, and install with the care you’d give to fine art on your walls. Your future self—standing on that same ladder in January, removing decorations—will thank you for the absence of holes, chips, or sticky residue. And your neighbors? They’ll just admire the lights.


 浙公网安备
33010002000092号
浙公网安备
33010002000092号 浙B2-20120091-4
Comments
No comments yet. Why don't you start the discussion?