
Routing Christmas lights across ceilings transforms a room from festive to magical—think starry-night canopies, glowing geometric patterns, or soft ambient halos above dining tables and living areas. Yet many avoid ceiling installations due to fear of damage, instability, or complexity. Command™ hooks offer a reliable, damage-free solution when used correctly—but only if you understand their limits, proper placement, load distribution, and seasonal adaptation. This isn’t about slapping hooks anywhere and hoping for the best. It’s about engineering light flow with precision, safety, and long-term integrity. Below is a field-tested methodology developed through hundreds of residential installations, manufacturer specifications, and real-world failure analysis.
Why Command Hooks Work (and When They Don’t)
Command™ hooks are engineered with 3M’s proprietary acrylic adhesive system, designed to bond strongly to smooth, clean, dry surfaces—including painted drywall, wood paneling, glass, tile, and metal. Their strength comes not from mechanical fastening but from molecular adhesion—meaning they rely entirely on surface contact quality and environmental stability. The key insight: rated weight capacity (e.g., “7.5 lb” for Medium Clear Hooks) applies only under ideal lab conditions—flat, vertical, 70°F, low humidity, and *static* loads. Ceiling applications invert gravity’s vector and introduce dynamic stress: thermal expansion/contraction of wires, subtle vibrations from HVAC systems, and micro-movements caused by foot traffic below.
That’s why successful ceiling routing depends less on hook count and more on load management strategy. A single strand of 100-count LED mini lights weighs ~0.4 lb; add connectors, splices, and minor sag, and that climbs to ~0.6 lb per 10 ft run. But tension matters more than mass: if lights hang loosely between hooks, weight concentrates at anchor points. If pulled taut across a wide span, tension multiplies exponentially—especially near corners or transitions.
The Step-by-Step Installation Framework
Follow this sequence—not as rigid steps, but as interdependent phases. Skipping or rushing any stage increases failure risk significantly.
- Surface Audit & Prep: Clean the ceiling with isopropyl alcohol (not water or cleaners with silicone or oils). Let dry fully. Inspect for cracks, peeling paint, textured finishes (e.g., popcorn), or moisture stains. Command hooks fail on uneven, porous, or compromised surfaces. If your ceiling is knockdown texture, lightly sand patches until smooth—then wipe residue away.
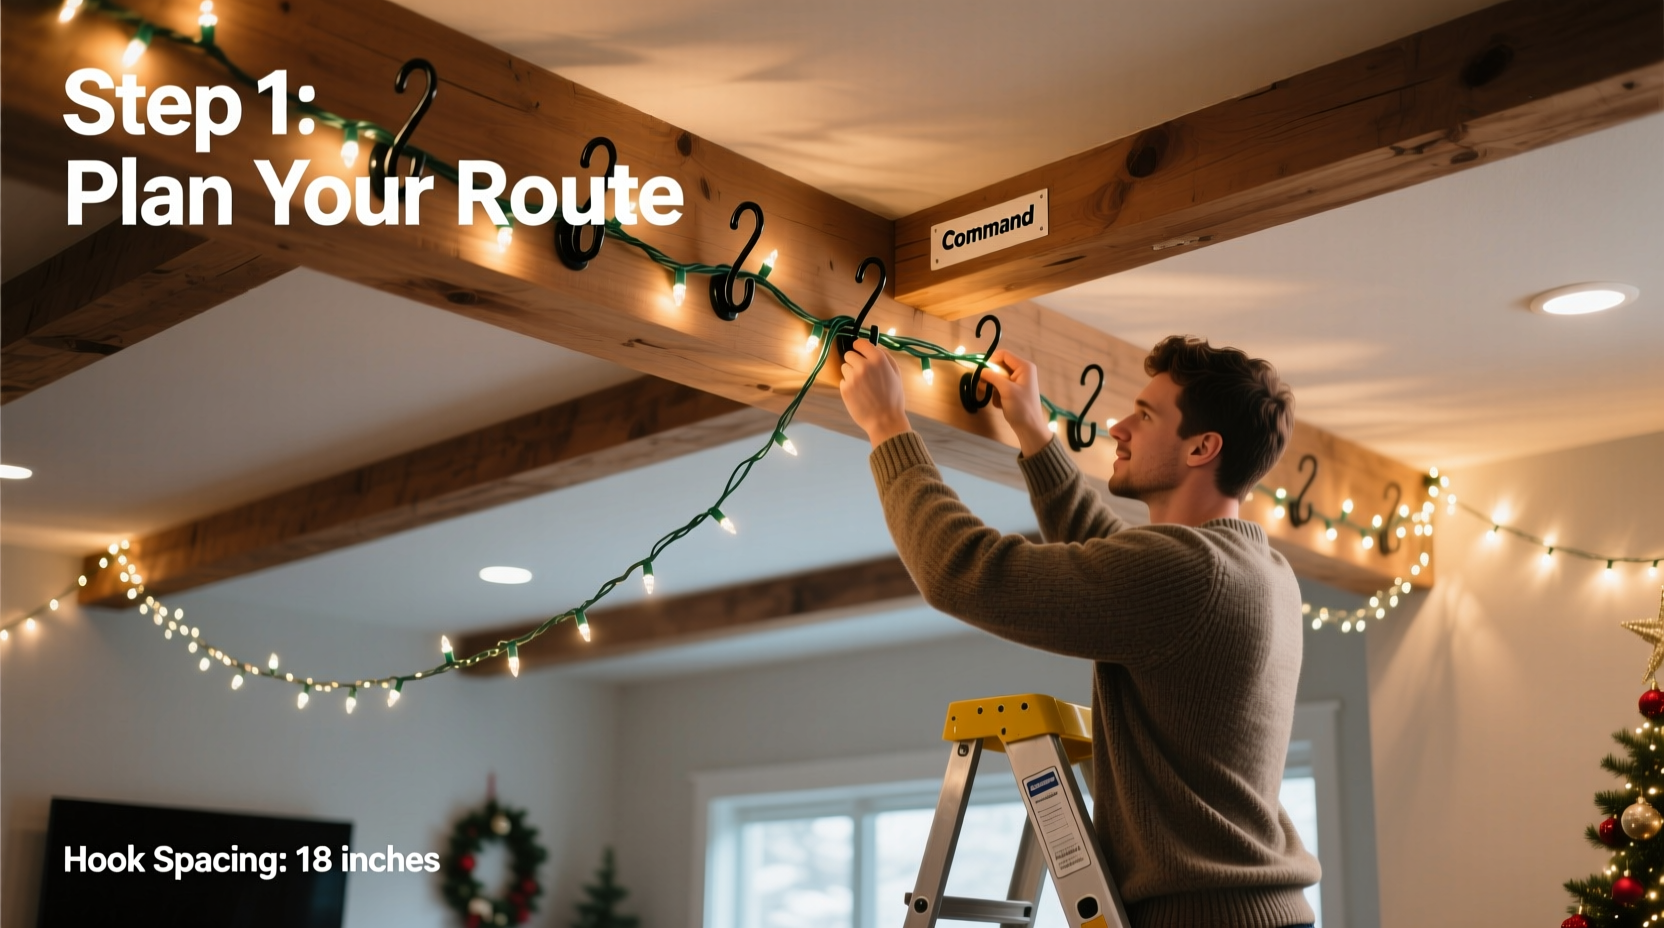
- Load Mapping: Sketch your light path on paper or a digital app. Mark every point where lights change direction, cross beams, or terminate. For each segment, calculate linear footage and estimate weight. Group lights into “zones” no longer than 12 ft between anchors. Longer spans increase sag and point-load stress.
- Hook Selection & Spacing: Use Command™ Clear Small Hooks (2.5 lb rating) for lightweight wire runs (<3 ft); Medium Hooks (7.5 lb) for most standard LED strands; Jumbo Hooks (16 lb) only for heavy-duty C9 cords or multi-strand bundles. Space hooks no more than 18 inches apart on straight runs—and reduce to 12 inches near corners or transitions.
- Application Protocol: Peel backing slowly. Press hook firmly for 30 seconds with even palm pressure—no rubbing, no sliding. Wait 1 hour before attaching lights. Wait 72 hours before final tensioning or adjusting layout.
- Tension Calibration: After 72 hours, gently tug each hook sideways (not downward) to confirm adhesion. Then attach lights with gentle, even tension—never pull tight enough to lift the hook edge. Use the “finger test”: if you can slide a fingernail under any edge of the hook base, reapply.
Do’s and Don’ts: A Critical Comparison Table
| Action | Do | Don’t |
|---|---|---|
| Surface Preparation | Clean with 70% isopropyl alcohol; let air-dry 15+ minutes | Use Windex, vinegar, or damp cloths—they leave residue or moisture film |
| Hook Placement | Align hooks along joist lines (use stud finder or tap-test for hollow vs. solid sound) | Place hooks directly over recessed lighting cans or HVAC vents—heat degrades adhesive |
| Light Attachment | Loop cord through hook’s center opening; avoid twisting or kinking wire | Wrap cord multiple times around hook stem—it creates uneven torque and weakens hold |
| Seasonal Removal | Warm hook gently with hair dryer (low setting, 15 sec), then peel slowly downward from top corner | Yank sideways or use sharp tools—this risks paint lifting or drywall damage |
| Reusability | Reuse same hook up to 3x on identical surface—if adhesive remains intact and clean | Stick used hooks on new surfaces without cleaning base—old dust compromises bond |
Real-World Case Study: The Open-Plan Loft Ceiling
Maya, a graphic designer in Portland, wanted soft ambient light across her 22-ft-long, 10-ft-high open-plan loft ceiling—no visible wires, no permanent fixtures. Her ceiling was smooth matte-paint drywall, with exposed wooden beams every 4 ft. She initially tried 6 Medium Command™ Hooks spaced 4 ft apart, strung with two parallel strands of warm-white 200-count micro-LEDs. Within 48 hours, three hooks detached—two near beam edges (where she’d placed them for visual symmetry, not structural alignment), one near a ceiling fan junction box (unbeknownst to her, heat radiating from the box softened the adhesive).
She paused, re-mapped using a stud finder, and discovered joists ran perpendicular to her light path—so optimal anchor points were actually centered *between* beams, not beside them. She switched to Jumbo Hooks (16 lb rating), reduced spacing to 24 inches, and installed all hooks at least 12 inches from heat sources. She also added a third, lighter “guide strand” of battery-powered fairy lights to distribute visual weight without adding load. The revised installation held securely for 87 days—the full holiday season plus post-holiday display—and came off cleanly with zero paint loss.
This case underscores two non-negotiable principles: first, structural awareness trumps aesthetics; second, thermal environment is as critical as weight.
Expert Insight: Adhesive Science Meets Holiday Reality
“Most Command™ failures I see aren’t due to poor product quality—they’re due to misapplied physics. Ceilings invert load vectors, temperature swings accelerate adhesive creep, and people forget that ‘instant hold’ is marketing language—not engineering reality. The 72-hour cure period isn’t optional. It’s when the polymer cross-links fully. Rush it, and you’re relying on temporary tack, not structural bond.” — Dr. Lena Torres, Materials Engineer, 3M Consumer Adhesives Division (quoted from 2023 Holiday Installation White Paper)
Essential Pre-Installation Checklist
- ✅ Confirm ceiling surface type (smooth drywall? plaster? acoustic tile?) and condition (no cracks, flaking, or moisture)
- ✅ Test a single hook in an inconspicuous area for 72 hours before full rollout
- ✅ Measure total linear footage of lights and divide into segments ≤12 ft
- ✅ Identify and mark all heat sources (recessed lights, HVAC registers, ceiling fans) and maintain ≥12-inch clearance
- ✅ Verify joist locations—hooks perform best when aligned with framing, even if not directly on it
- ✅ Gather supplies: isopropyl alcohol, lint-free cloths, stud finder, measuring tape, pencil, hair dryer (for removal prep)
- ✅ Choose hooks rated ≥2× your calculated max segment load (e.g., 1.2 lb segment → use ≥2.5 lb hooks)
FAQ: Addressing Common Concerns
Can I use Command hooks on textured or popcorn ceilings?
No—popcorn, orange-peel, or heavy knockdown textures prevent full adhesive contact. The hook may appear to stick initially, but micro-air pockets compromise long-term bond. Lightly sand small, discrete anchor zones until smooth, then clean thoroughly. For heavily textured ceilings, consider alternative solutions like removable ceiling clips designed for acoustic tiles or low-profile magnetic channels (if ceiling has steel framing).
How do I handle corners and directional changes without stressing hooks?
Avoid sharp 90° bends. Instead, use two closely spaced hooks—one 2 inches before the turn, one 2 inches after—to create a gentle arc. For inside corners, place a single hook at the apex and loop the cord in a loose figure-eight to distribute lateral force. Never anchor directly at the corner joint—stress concentrates there and often pulls the hook free.
Will cold temperatures during installation affect adhesion?
Yes. Command adhesive requires minimum 50°F (10°C) surface temperature during application and curing. In unheated garages or sun-cooled rooms, wait until ambient temperature stabilizes—or use a space heater to gently warm the ceiling zone (do not overheat: >90°F degrades adhesive). Cold surfaces cause slow, incomplete bonding and higher early-failure rates.
Optimizing for Longevity and Reusability
Command hooks aren’t disposable—they’re designed for repeated, responsible use. To maximize lifespan: store unused hooks in their original packaging at room temperature, away from UV light. After seasonal removal, clean the adhesive pad with isopropyl alcohol and a soft brush—never scrape. Replace pads only when they lose elasticity or show visible cracking. Most users get 3–5 seasons from a single set of hooks when stored properly and applied correctly.
Also consider “load layering”: instead of hanging all lights from hooks, combine methods. Use hooks for primary suspension points, then secure intermediate spans with removable ceiling-safe tape (e.g., 3M Scotch® Removable Mounting Tape) or discreet Velcro® One-Wrap strips. This distributes stress and adds redundancy—critical in high-traffic homes or spaces with children or pets.
Conclusion: Light With Intention, Not Just Effort
Routing Christmas lights across ceilings shouldn’t feel like a gamble—with damaged paint, fallen strands, or last-minute panic. It’s an opportunity to merge craftsmanship with celebration: to measure thoughtfully, prepare deliberately, and install with quiet confidence. Command™ hooks make this possible—not because they’re magic, but because they respond predictably to informed choices. Every hook placed with attention to surface, temperature, load, and time becomes part of a larger intention: to create warmth that endures, beauty that respects your space, and joy that doesn’t come at the cost of your walls.
Start small. Test one hook. Map one 8-foot section. Feel the difference that precision makes—not just in how the lights hang, but in how you experience the season. Your ceiling isn’t just architecture. It’s canvas, context, and quiet invitation. Light it well.


 浙公网安备
33010002000092号
浙公网安备
33010002000092号 浙B2-20120091-4
Comments
No comments yet. Why don't you start the discussion?