
After the holidays, bins fill with remnants of festive decor—tinsel garlands draped over boxes, tangled strands forgotten in corners. Most people discard them without a second thought. But what if those shimmering threads could become something more? Leftover tinsel, often dismissed as too flashy or outdated, holds surprising potential when used intentionally in art and craft projects. One of the most elegant applications is embedding it into resin coasters. When handled with care, tinsel transforms from kitschy clutter into a source of refined, understated sparkle.
Resin crafting has grown in popularity for good reason: it allows for endless customization, durability, and a glass-like finish that elevates even simple materials. Tinsel, with its reflective surface and delicate structure, becomes an unexpected asset when suspended in clear epoxy. The key lies not in overwhelming the piece with glitter, but in using tinsel as a nuanced textural element—adding depth, light play, and a whisper of nostalgia without dominating the design.
This guide explores how to repurpose leftover tinsel into sophisticated resin coasters. From preparation and placement to curing and finishing, every step is designed to help you achieve polished results that feel intentional rather than accidental. Whether you're a seasoned resin artist or a curious beginner, this method opens a sustainable path to beautiful, conversation-starting home accessories.
Why Tinsel Works in Resin (When Used Thoughtfully)
Tinsel’s reputation suffers from decades of overuse during the holiday season. Strands piled on trees, draped across mantels, and wound around banisters often create visual noise. But outside that context, especially within a controlled medium like epoxy resin, tinsel reveals a different character. Its metallic film reflects light dynamically, shifting with viewing angle and ambient lighting. Unlike glitter, which tends to scatter uniformly, tinsel has dimension—individual slivers catch and redirect light in elongated bursts.
In resin, tinsel doesn’t float freely; it’s locked in place, allowing for deliberate composition. When broken into small segments and distributed sparsely, it mimics natural phenomena—flecks of mica in stone, frost on a windowpane, or sunlight glinting off water. This subtle effect adds interest without sacrificing elegance.
“Texture is what separates craft from art. A single strand of tinsel can suggest movement, history, or memory—if it’s given space to breathe.” — Lena Torres, Mixed Media Artist
The contrast between the organic fluidity of resin and the engineered precision of tinsel creates visual tension. That contrast, managed well, becomes the coaster’s strength. It’s not about hiding the fact that you used old decorations—it’s about redefining their meaning through transformation.
Step-by-Step Guide to Creating Tinsel-Infused Resin Coasters
Making resin coasters with tinsel requires planning, patience, and attention to detail. Follow these steps to ensure clarity, safety, and aesthetic success.
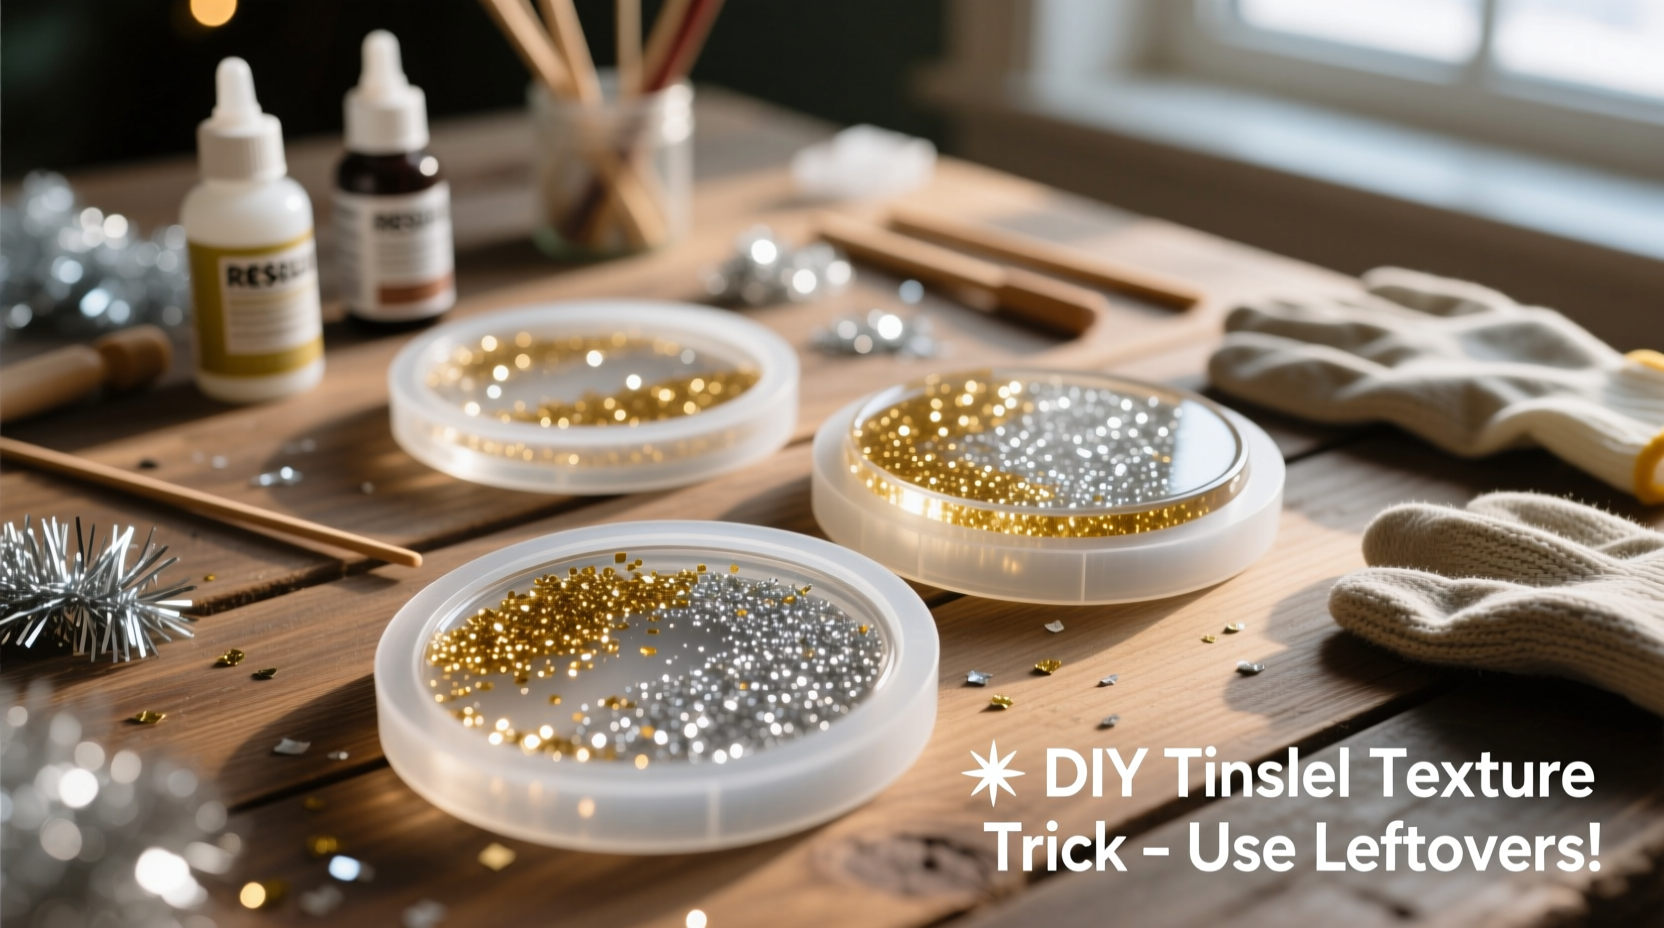
- Gather and prepare materials: Collect silicone coaster molds (typically 3.5–4 inches in diameter), two-part epoxy resin, disposable gloves, mixing cups, stir sticks, a heat gun or torch, and your cleaned tinsel.
- Clean the tinsel: Gently wipe each strand with a dry microfiber cloth to remove dust. If heavily soiled, lightly dab with a barely damp cloth and let dry completely before use. Oils or residue can interfere with resin adhesion.
- Cut tinsel into fine pieces: Use sharp scissors to snip strands into fragments between 0.25” and 0.75”. Avoid long sections—they tend to clump and rise to the surface during curing.
- Prepare your workspace: Cover surfaces with wax paper or silicone mats. Ensure ventilation and work in a dust-free environment. Resin picks up lint and particles easily.
- Mix the resin: Follow manufacturer instructions precisely. For most tabletop resins, mix Part A (resin) and Part B (hardener) at a 1:1 ratio by volume. Stir slowly for 3–5 minutes, scraping the sides and bottom of the cup to eliminate streaks.
- Pour a base layer: Fill each mold halfway with resin. Let sit for 10–15 minutes to allow bubbles to rise. This foundational layer prevents tinsel from touching the mold surface directly, reducing distortion.
- Arrange tinsel: Using tweezers or a toothpick, place small clusters of tinsel fragments onto the cured base layer. Space them unevenly—some areas denser, others sparse—for a natural look. Do not overcrowd.
- Pour the top layer: After the base has set (usually tacky but not wet, after 2–4 hours), mix a fresh batch of resin and pour over the tinsel to fill the mold. Work slowly to avoid dislodging the pieces.
- Remove bubbles: Pass a heat gun set to low over the surface or use a butane torch briefly to pop any trapped air. Hold the tool 6–8 inches away and move quickly to avoid discoloration.
- Cure undisturbed: Cover molds with a cardboard box or container to prevent dust settling. Allow 24–72 hours for full cure, depending on humidity and resin type.
- Demold and finish: Gently flex the silicone mold to release the coaster. Sand any minor imperfections with 600–1000 grit sandpaper, then buff with a soft cloth for shine.
Design Strategies for Subtle, Not Sparkly Overload
The goal isn’t to make a disco ball but to create depth and intrigue. Success depends on restraint and intentionality.
- Limits matter: Use no more than 5–8 small tinsel pieces per coaster. More than that risks visual clutter.
- Vary orientation: Align some strands vertically, others horizontally or diagonally. This mimics randomness found in nature.
- Color coordination: Match tinsel tone to your resin hue. Silver works in clear or cool-toned resin; gold complements amber or blush tints.
- Layer with other elements: Combine tinsel sparingly with dried botanicals, crushed mother-of-pearl, or fine mesh for added complexity without chaos.
- Consider negative space: Leave open areas where light can pass through unobstructed, enhancing the contrast when tinsel catches the glow.
| Do | Don't |
|---|---|
| Use pre-cut tinsel from garlands instead of loose confetti-style strands | Drop entire garlands into the mold |
| Break strands into varied lengths for organic distribution | Cut all pieces uniform and evenly spaced |
| Embed tinsel in the middle third of the resin pour | Let tinsel float on the surface |
| Test layout on paper before placing in resin | Guess placement while pouring |
| Use matte sealant on back if desired for non-slip grip | Apply sealant over the front surface and dull the shine |
A Real Example: Transforming Nostalgia into Functional Art
Sarah Kim, a hobbyist crafter from Portland, Oregon, inherited a box of vintage tinsel from her grandmother’s Christmas collection. The silver strands were thin, slightly oxidized, and carried a faint scent of pine from decades past. Rather than store them indefinitely, she decided to incorporate them into a new series of coasters for her coffee table.
She began by sorting the tinsel by thickness, selecting only the finer, more pliable strands. Each was cut into irregular segments and arranged in a radial pattern around the center of six circular molds—evoking ripples in water. She poured a clear epoxy base, waited three hours, then positioned the tinsel with tweezers before sealing with a final layer.
After curing, the result surprised her: under daylight, the coasters appeared almost translucent, with flecks of silver catching the eye only when tilted. In lamplight, they shimmered softly, casting tiny reflections on nearby walls. Friends assumed they were store-bought designer pieces. Sarah now sells them locally under the name “Memory Rings,” each labeled with a note: *Made from reclaimed holiday light.*
Her experience underscores a broader truth—emotional materials gain new life when repurposed with purpose. The tinsel wasn’t just reused; it was reinterpreted.
Essential Checklist Before You Begin
- ☐ Acquire silicone coaster molds (reusable, flexible)
- ☐ Choose high-clarity, bubble-resistant epoxy resin
- ☐ Clean and dry all tinsel thoroughly
- ☐ Cut tinsel into short, varied-length pieces
- ☐ Set up a clean, level, ventilated workspace
- ☐ Gather tools: gloves, stir sticks, measuring cups, torch/heat gun
- ☐ Test resin mix on a small scale if using for the first time
- ☐ Plan tinsel layout on paper or digitally before pouring
Frequently Asked Questions
Can I use any type of tinsel?
Most plastic or PVC-based tinsel works well, provided it’s clean and free of coatings that might react with resin. Avoid foil-wrapped paper tinsel, as it may degrade or discolor. Vintage cellulose nitrate tinsel (common before the 1970s) is flammable and should not be used.
Will the tinsel sink or float during curing?
Tinsel is lightweight and tends to float, especially in a single pour. To control placement, use a two-stage method: pour a base layer, let it gel, then position the tinsel before adding the top coat. This keeps it centered and prevents migration.
How do I prevent bubbles around the tinsel?
Bubbles form when air gets trapped beneath or between strands. To minimize this, dip each piece briefly in resin before placing it, or gently press it down with a toothpick after positioning. A quick pass with a heat gun post-pour will eliminate most surface bubbles.
Final Tips for Longevity and Presentation
Once demolded, your coasters are functional art—but they still benefit from mindful handling. While epoxy resin is heat- and water-resistant, prolonged exposure to direct sunlight can cause yellowing over time, especially in cheaper formulations. Store them away from windows when not in use, or consider UV-stable resin for future batches.
To enhance usability, affix felt pads to the bottom with strong adhesive. This protects furniture and reduces sliding. Alternatively, sand one side lightly and apply a food-safe rubber coating for grip.
If gifting, package them in recycled kraft boxes with tissue paper. Include a small card explaining the origin of the tinsel—many recipients appreciate the story behind handmade items. Some artists even invite buyers to send in their own tinsel for custom commissions, turning personal history into shared art.
Conclusion: Turn Leftovers Into Legacy Pieces
Using leftover tinsel in resin coasters isn’t just about recycling—it’s about reimagining. What once decorated a tree for a few weeks can now grace a living room for years, catching light and questions alike. The process teaches patience, precision, and the value of seeing potential where others see waste.
Every strand carries a memory. By embedding them in resin, you preserve not just material, but sentiment—reframed through creativity. These coasters don’t shout; they whisper. And sometimes, the quietest pieces make the strongest impression.


 浙公网安备
33010002000092号
浙公网安备
33010002000092号 浙B2-20120091-4
Comments
No comments yet. Why don't you start the discussion?