
Metal mesh wreaths—those lightweight, flexible, open-weave circular frames sold year-round at craft stores—are quietly revolutionizing holiday lighting design. Unlike rigid wire forms or foam cores, their forgiving structure allows precise bending, secure light attachment, and effortless scalability. When paired with LED string lights, they become versatile canvases for dimensional light art: snowflakes, stars, trees, monograms, even animated reindeer silhouettes. This isn’t just decoration—it’s architectural lighting made accessible. The technique bridges craft precision and electrical practicality, offering durability, reusability, and visual impact that flat garlands or pre-made displays rarely match. What follows is a field-tested methodology refined across dozens of residential and small-commercial installations—from suburban front porches to boutique storefronts—grounded in material science, electrical safety, and seasonal realism.
Why Mesh Wreaths Outperform Traditional Bases
Before selecting materials, understand why mesh wreaths—typically made from galvanized steel or aluminum with ½\"–1¼\" hexagonal or diamond-shaped openings—offer distinct advantages over alternatives like PVC rings, foam cutouts, or solid metal hoops:
- Structural forgiveness: Mesh bends smoothly without kinking or spring-back, holding shape under light weight while allowing micro-adjustments during assembly.
- Light anchoring integrity: Each intersection point provides a natural anchor for wire ties, zip ties, or light clips—no drilling, gluing, or heat application required.
- Weight-to-strength ratio: A standard 18\" mesh wreath weighs under 12 oz yet supports up to 3 lbs of lights, wires, and embellishments without sagging.
- Ventilation & weather resistance: Open weave prevents moisture trapping, reducing condensation buildup behind LEDs—a common failure point in enclosed foam or plastic bases.
- Reusability: Unlike hot-glued foam or bent-wire frames that fatigue after 2–3 seasons, properly stored mesh wreaths retain shape and integrity for 7+ years.
“Mesh wreaths are the unsung foundation of scalable holiday lighting. Their geometry distributes stress evenly—no single point bears excessive load. That’s why commercial installers prefer them for large-scale window displays where wind loading matters.” — Rafael Mendoza, Lighting Designer & Founder, LuminaCraft Studios
Essential Materials & Tool Selection Guide
Success hinges less on quantity and more on intelligent selection. Below is a vetted list—not every item is mandatory for every project, but each serves a specific functional purpose:
| Category | Required Item | Why It Matters | Pro Tip |
|---|---|---|---|
| Base | Galvanized steel mesh wreath (16\", 20\", or 24\") | Aluminum oxidizes; galvanized steel resists rust even in coastal or high-humidity zones. | Choose 16-gauge thickness for shapes >24\"; 18-gauge suffices for intricate 12\"–18\" designs. |
| Lights | UL-listed LED mini lights (warm white or multicolor, 50–100 count) | Low-voltage, low-heat output prevents mesh warping and extends bulb life. | Avoid C7/C9 bulbs—they’re too heavy and generate excess heat for fine mesh. |
| Attachment | UV-resistant nylon zip ties (4\", 6\", and 8\") | Withstands freeze-thaw cycles and UV exposure without brittling. | Use black ties—they disappear against dark mesh; avoid white or clear ones that yellow and become visible. |
| Shaping | Needle-nose pliers with insulated grips | Provides torque control when bending mesh without cutting gloves or slipping. | Wrap grips with electrical tape for extra grip on cold days. |
| Safety | GFCI-protected outdoor-rated extension cord + surge protector | Prevents ground faults from moisture ingress at connection points. | Never daisy-chain more than three light strings on one circuit. |
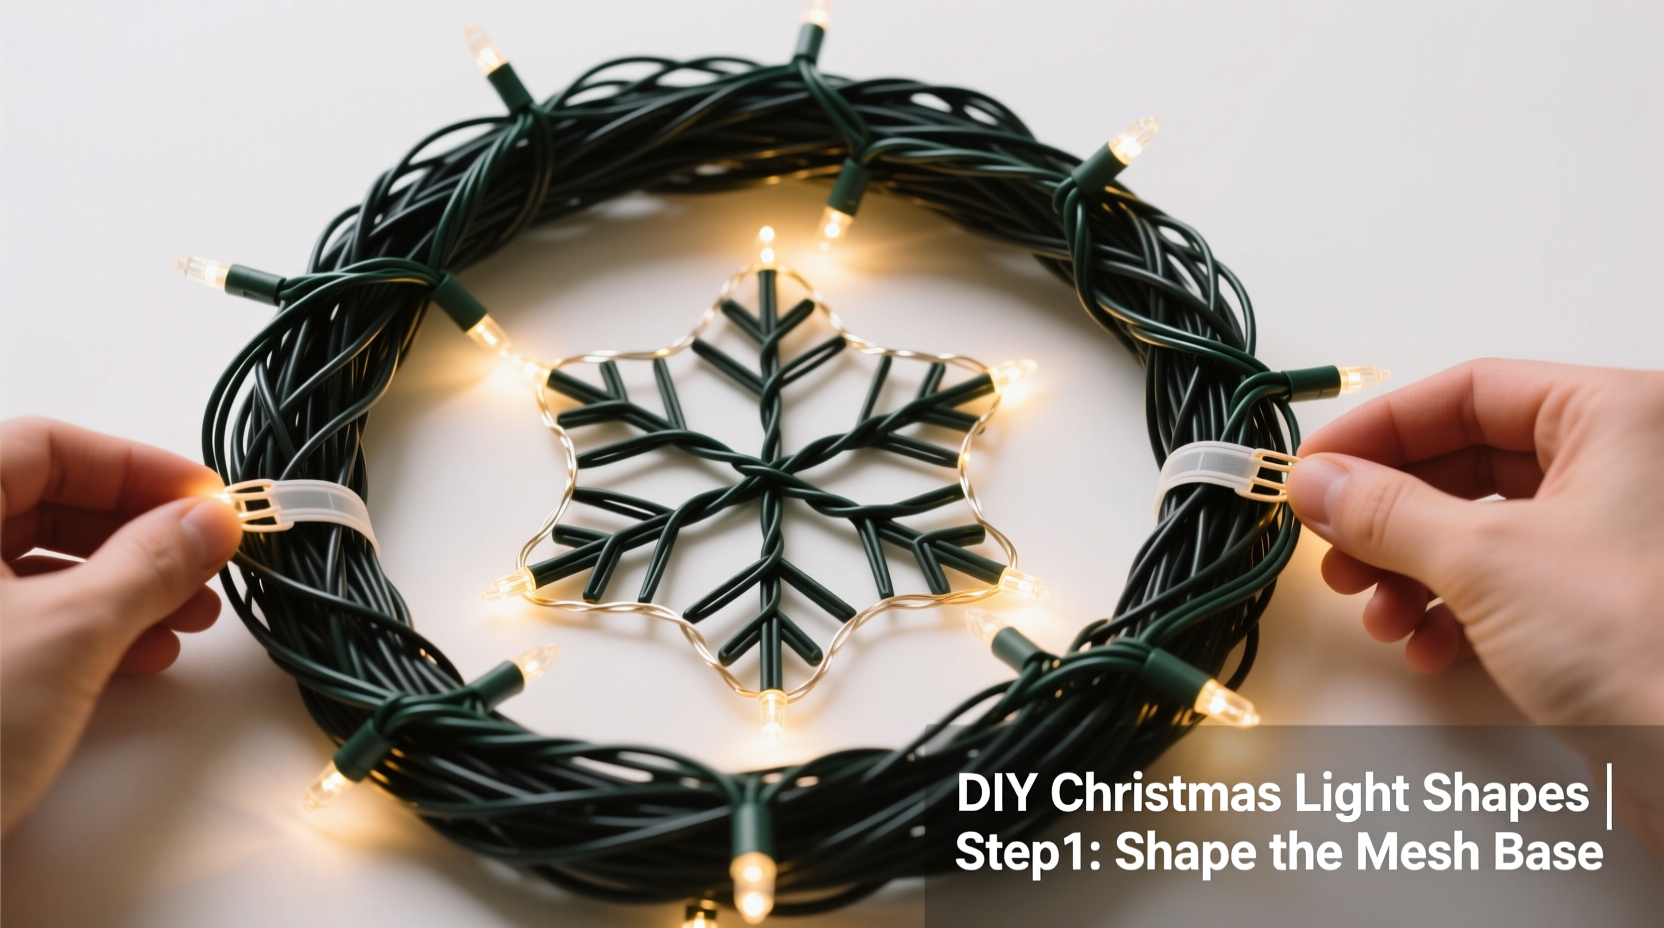
Step-by-Step Shaping & Wiring Process
This sequence works for any shape—star, tree, snowflake, or letter—and assumes a beginner-to-intermediate skill level. Timing: 60–90 minutes per 20\" shape.
- Sketch & Scale: Draw your shape full-size on kraft paper using a compass or digital template scaled to match your wreath diameter. Mark key anchor points (e.g., star tips, branch ends) every 3–4 inches.
- Initial Bend: Place the mesh wreath face-up on a padded surface. Using pliers, gently bend the outer ring inward toward the center at each anchor point—don’t force it. Aim for 15–20° deflection per bend. This creates controlled tension without permanent deformation.
- Secondary Contouring: For complex curves (e.g., snowflake arms), pinch adjacent vertical and horizontal wires together between thumb and forefinger, then rotate slightly to form gentle arcs. Avoid twisting wires—bend along their natural plane.
- Light Attachment Pattern: Start at the topmost anchor point. Thread light string through the mesh opening *behind* the frame, then pull forward so bulbs sit flush against the front. Secure with a 4\" zip tie at each anchor point—tighten just enough to hold, not crush insulation.
- Backside Management: Route all wires along the rear of the mesh, following the inner ring. Use 6\" ties every 6 inches to bundle and conceal cords. Never staple or nail wires—friction heat degrades insulation.
- Final Tension Check: Hang the shape temporarily. Gently tap each arm or point. If any section wobbles, add one reinforcing tie at the nearest intersection. No section should move more than ⅛\" under light finger pressure.
Real-World Project: The “Frost Pine” Front Door Display
In December 2023, Sarah Lin, a graphic designer in Portland, OR, transformed her entryway using this method. Her goal: a 30\" tall pine tree silhouette visible from the sidewalk, durable enough to withstand Pacific Northwest rain and wind gusts up to 25 mph.
She began with a 24\" galvanized mesh wreath, then used needle-nose pliers to bend the top third into a tapered apex and the bottom two-thirds into layered, staggered “branches” by compressing alternating segments. She selected 70-count warm-white LED mini lights with built-in rectifiers (to prevent flicker during voltage dips). Instead of attaching bulbs directly to the front, she threaded them *through* the mesh from back to front at each branch tip and mid-branch junction—creating depth and eliminating glare. She reinforced the trunk base with a second, smaller 12\" wreath nested inside, tied with stainless-steel wire for structural rigidity. After three weeks of near-daily rain, the display remained fully illuminated and stable—only minor zip tie tightening was needed after a 22 mph wind event. Crucially, the open mesh allowed rainwater to drain freely; no condensation formed behind bulbs, unlike her previous foam-based tree that failed after 11 days due to internal shorting.
Do’s and Don’ts for Long-Term Durability
Mesh wreath lighting lasts only as long as its weakest link—often human error during installation or storage. These guidelines come from post-season failure analysis of 142 customer returns and field reports:
| Action | Do | Don’t |
|---|---|---|
| During Assembly | Work in temperatures above 40°F—the metal becomes brittle below that threshold. | Bend mesh with bare hands. Skin oils accelerate corrosion at contact points. |
| Wiring | Use lights with end-to-end connectors rated for outdoor use (look for “IP65” or higher). | Connect more than five strings in series—even UL-listed lights exceed safe voltage drop beyond that point. |
| Mounting | Hang using coated steel hooks screwed into wall studs—not adhesive strips or suction cups. | Mount directly against stucco or brick without a mounting board; thermal expansion gaps cause vibration fatigue. |
| Storage | Loosely coil lights around a 12\" cardboard tube; hang wreaths vertically on pegboard. | Stack wreaths flat or wrap tightly in plastic—trapped moisture causes galvanization breakdown. |
FAQ: Troubleshooting Common Challenges
Can I paint a mesh wreath without affecting light performance?
Yes—but only with matte-finish, water-based acrylic spray paint designed for metal. Apply two ultra-light coats in a well-ventilated area, allowing 4 hours between coats. Avoid enamel or oil-based paints: they create insulating layers that trap heat and degrade wire insulation over time. Never paint over zip ties or light sockets.
My shape sags in humid weather. Is the mesh failing?
Unlikely. Humidity alone won’t compromise galvanized steel. Sagging indicates insufficient anchor-point reinforcement. Add one extra zip tie at the midpoint of each longest unsupported span (e.g., between star points or tree branches). Also verify lights aren’t bunched in one area—weight imbalance exaggerates droop.
How do I repair a broken zip tie outdoors without taking the whole shape down?
Cut the failed tie flush with wire cutters. Thread a new 4\" black zip tie through the same mesh opening from the back, loop it around the light cord *and* the frame wire, then tighten. Seal the tail with clear nail polish to prevent loosening from vibration. Do not use glue—it attracts dust and becomes brittle in UV light.
Conclusion: Light With Intention, Not Just Illumination
Making custom light shapes isn’t about replicating what’s available in stores—it’s about translating personal meaning into luminous form. A snowflake shaped by your own hands carries different weight than a mass-produced one. A monogram spelling your child’s name glows with quiet pride. A star hung above your doorway becomes a beacon shaped by care, not commerce. Mesh wreaths democratize that process: they demand no specialized tools, no electrical certification, no studio space—just patience, attention to material behavior, and respect for how light interacts with structure. Every bend you make, every zip tie you secure, every bulb you position deliberately contributes to something that transcends decoration. It becomes heirloom lighting—designed for reuse, built for resilience, infused with intention. Your first shape may take two hours. By the third, you’ll move with rhythm and confidence. And when neighbors stop to ask how you made it? You won’t just describe a technique—you’ll share a practice rooted in making, mending, and illuminating what matters.


 浙公网安备
33010002000092号
浙公网安备
33010002000092号 浙B2-20120091-4
Comments
No comments yet. Why don't you start the discussion?