
Wrapping a tree in ribbon is one of the most elegant ways to elevate outdoor decor for holidays, weddings, or seasonal events. When done well, it transforms an ordinary tree into a statement piece—graceful, intentional, and visually balanced. But too often, amateur attempts result in tangled ribbons, excessive overlap, or wasted yards of material. The difference between haphazard wrapping and professional-grade presentation lies not in luck, but in planning, precision, and technique.
Professional decorators don’t rely on guesswork. They use systematic approaches that ensure even coverage, minimal waste, and a polished finish. Whether you're dressing a single backyard evergreen for Christmas or preparing multiple trees for a botanical garden display, mastering this skill saves money, time, and frustration. This guide reveals the exact methods used by seasoned decorators to wrap trees flawlessly—without overbuying or under-delivering on impact.
Choose the Right Ribbon for the Job
The foundation of a successful tree wrap begins long before you touch the trunk: it starts with selecting the appropriate ribbon. Not all ribbons are created equal when it comes to outdoor wrapping. Width, durability, flexibility, and texture all influence both appearance and efficiency.
Wide satin or grosgrain ribbons (2–4 inches) offer maximum visual impact and cover more surface area per loop, reducing the total length needed. Narrower ribbons (under 1 inch) may look delicate but require many more wraps to achieve full coverage, increasing material usage significantly. For large trees, wide ribbon is almost always more economical despite its higher per-yard cost.
Outdoor conditions demand weather-resistant materials. Polyester-based ribbons withstand moisture and UV exposure better than cotton or paper-based options. Avoid ribbons with wired edges unless you plan to shape bows or accents—they add stiffness that makes smooth wrapping difficult and can snag on bark.
Measure Smart: Calculate Exactly How Much Ribbon You Need
One of the biggest sources of waste is overestimating required ribbon length. Many people buy extra “just in case,” only to end up with half-used spools. A precise calculation prevents this.
To determine how much ribbon you need, follow these steps:
- Measure the tree’s height from base to where you want the wrapping to end (typically just below major branching).
- Determine vertical spacing between ribbon loops. For bold impact, space loops 6–8 inches apart. For finer detail, use 3–4 inches.
- Calculate number of wraps: Divide total height by spacing. Round up to nearest whole number.
- Measure circumference at midpoint of the trunk. Use a flexible tape measure snug against the bark.
- Multiply circumference by number of wraps. Add 10% for overlap and securing ends.
For example: A 10-foot-tall tree wrapped every 6 inches requires 20 loops (120 ÷ 6 = 20). If the average circumference is 24 inches (2 feet), total ribbon needed is 20 × 2 = 40 feet, plus 4 feet for safety margin—44 feet total.
| Tree Height | Wrap Spacing | # of Loops | Avg. Circumference | Total Ribbon Needed |
|---|---|---|---|---|
| 6 ft | 6 in | 12 | 18 in (1.5 ft) | 19.8 ft (~7 yds) |
| 10 ft | 8 in | 15 | 24 in (2 ft) | 33 ft (~11 yds) |
| 15 ft | 4 in | 45 | 30 in (2.5 ft) | 123.75 ft (~41.25 yds) |
This method eliminates guesswork and ensures you purchase only what’s necessary. Buy in bulk if wrapping multiple trees, but always calculate each individually—trees vary more than expected.
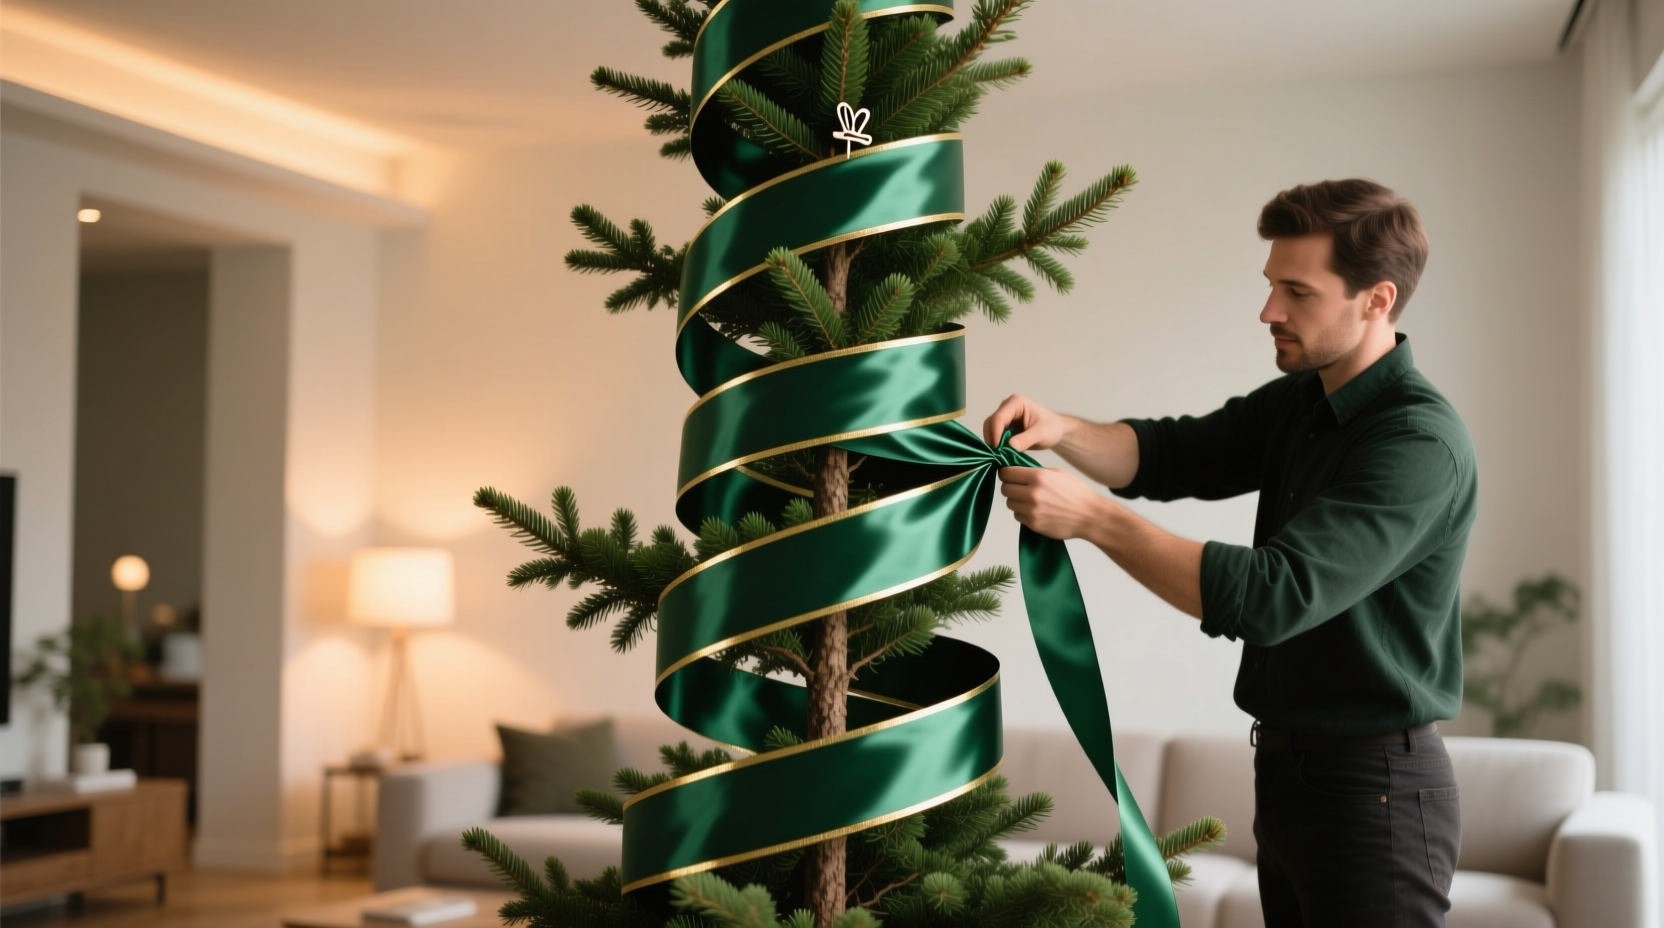
Step-by-Step Guide: Wrapping Technique Used by Pros
Even the best materials fail without proper application. Here's the step-by-step process professionals use to achieve clean, even, waste-free ribbon wraps.
- Prepare the tree: Remove loose debris, broken branches, or moss that could interfere with adhesion or create bumps under the ribbon.
- Start at the bottom: Begin wrapping approximately 2 inches above ground level. This avoids soil contact and allows room for anchoring.
- Secure the tail end: Use a small, discreet staple or floral pin to fix the ribbon’s starting end to the trunk. Cover it with the first full loop—this hides the fastener and prevents unraveling.
- Wrap upward at consistent tension: Pull the ribbon taut but not stretched. Maintain even pressure throughout. Over-tightening can distort the ribbon or damage delicate bark.
- Overlap slightly (10–20%): Each new loop should gently ride over the lower edge of the previous one. This creates continuity and conceals gaps caused by irregular bark.
- Keep alignment straight: Sight along the trunk from a distance every few wraps to ensure the ribbon isn’t drifting diagonally. Adjust immediately if slanting occurs.
- Finish cleanly at the top: End just below the lowest branch. Fold the final inch under and secure with another staple or hidden knot. Never leave a frayed edge exposed.
- Blend seams naturally: If using multiple ribbon segments (due to spool length), join them mid-trunk behind the tree, not at eye level. Use hot glue or clear tape beneath the ribbon to bond ends seamlessly.
The key is consistency—not speed. Rushing leads to uneven spacing, twisted sections, or excess slack that demands trimming later. Work slowly, maintain posture, and rotate around the tree rather than stretching across it.
Real Example: Holiday Display for a Historic Estate
In 2022, landscape designer Mara Lin was commissioned to decorate six mature cedar trees along the entrance drive of a heritage manor for their annual winter gala. Budget constraints limited ribbon expenditure to $300, ruling out wasteful trial-and-error methods.
Lin measured each tree individually. Heights ranged from 11 to 16 feet, circumferences from 22 to 36 inches. She selected a 3-inch-wide metallic polyester ribbon in deep forest green—durable, reflective, and suitable for repeated seasonal use.
Using the calculation method described earlier, she determined total ribbon needs: approximately 38 yards per tree on average. Instead of buying pre-cut rolls, she ordered custom 40-yard spools—no extra, no shortage.
Her team wrapped each tree starting at dawn when temperatures were cool and wind low. They anchored starts with rust-proof staples and overlapped loops by 15%. By midday, all six trees were completed with zero ribbon discarded. Guests praised the uniform elegance, and the estate director noted a 30% reduction in decor costs compared to prior years.
“Precision beats excess every time,” Lin said afterward. “We didn’t have leftover ribbon, but we also didn’t run short. That’s the mark of true professionalism.”
“Efficiency in decoration isn’t about cutting corners—it’s about eliminating waste through foresight and discipline.” — Mara Lin, Award-Winning Landscape Designer
Avoid These Common Mistakes
Even experienced decorators occasionally fall into traps that lead to wasted material or poor results. Being aware of these pitfalls helps you sidestep them entirely.
- Starting too high or too low: Beginning above root flare leaves a bare stump visible; starting below grade risks moisture damage.
- Wrapping diagonally: Often happens when the decorator walks around the tree instead of stepping back to check alignment. Results in a barber-pole effect that looks accidental.
- Using tape visibly: Duct or packing tape shows easily and degrades in sunlight. Use hidden fasteners instead.
- Ignoring bark texture: Rough-barked trees like oaks need wider ribbons or greater overlap to prevent gaps. Smooth-barked birches allow tighter spacing.
- Leaving tails unsecured: Wind quickly unravels loose ends. Always anchor both start and finish points.
Another frequent error is attempting to wrap too tall a section. Focus on the most visible portion—typically the lower 8 to 10 feet. Higher areas are rarely seen and consume disproportionate ribbon.
Checklist: Pro Ribbon Wrapping in 10 Steps
Use this checklist before, during, and after wrapping to ensure flawless execution:
- ☐ Measure tree height and circumference accurately
- ☐ Choose weather-appropriate, wide-format ribbon
- ☐ Calculate total ribbon length with 10% buffer
- ☐ Clear debris from trunk surface
- ☐ Mark start and stop points with chalk or tape
- ☐ Anchor starting end securely and invisibly
- ☐ Wrap upward with consistent tension and slight overlap
- ☐ Check alignment every 3–4 wraps
- ☐ Secure final end neatly; trim excess flush
- ☐ Inspect overall appearance from multiple angles
Frequently Asked Questions
Can I reuse ribbon from last year?
Yes, if stored properly. Inspect for fading, brittleness, or mildew. Clean gently with a damp cloth if dusty. Reusing high-quality ribbon is both economical and sustainable—many pros keep their best pieces for 3–5 seasons.
What if my tree tapers dramatically?
Tapered trunks require careful tension control. On rapidly narrowing sections, reduce overlap slightly to prevent bunching. Alternatively, switch to spiral wrapping (diagonal at 45°) which accommodates taper more naturally—but use only if the design permits.
Is there a way to wrap without damaging the tree?
Absolutely. Use non-invasive fasteners like biodegradable twist ties or reusable silicone clips instead of staples. Avoid girdling—never wrap so tightly that it restricts growth. Remove decorations within 4–6 weeks to prevent bark abrasion.
Final Thoughts: Elevate Your Craft with Intention
Wrapping a tree in ribbon isn’t merely decorative—it’s an act of intention. Every loop communicates care, balance, and respect for both material and environment. When approached with strategy, the results transcend mere aesthetics: they reflect professionalism, sustainability, and mastery.
You don’t need expensive tools or rare materials to achieve pro-level results. What matters is preparation, attention to detail, and a commitment to efficiency. By measuring precisely, choosing wisely, and executing deliberately, you eliminate waste while maximizing beauty.


 浙公网安备
33010002000092号
浙公网安备
33010002000092号 浙B2-20120091-4
Comments
No comments yet. Why don't you start the discussion?