
Wrapping columns or pillars with Christmas lights can transform the exterior of a home, porch, or commercial building into a festive focal point during the holiday season. When done correctly, the effect is polished, balanced, and visually striking. But achieving that even, secure wrap—without sagging wires, uneven spacing, or tangled strands—requires more than just draping lights haphazardly. It demands planning, the right materials, and a consistent technique.
Whether you're decorating a front porch column, a stone pillar on a patio, or an indoor structural support in a grand hall, this guide delivers actionable methods used by professional decorators to achieve flawless results every time.
Selecting the Right Lights and Materials
The foundation of a successful light wrap begins before you climb the ladder. Choosing appropriate lights and accessories ensures durability, safety, and aesthetic consistency.
LED string lights are the top choice for outdoor and indoor pillar wrapping. They consume less energy, generate minimal heat, last longer (often up to 50,000 hours), and are available in a wide range of colors and bulb styles. For pillars, opt for strings with spaced-out bulbs—typically 6 to 12 inches apart—depending on the diameter of the column and your desired density.
Light sets should be rated for outdoor use if exposed to weather. Look for terms like “UL-listed,” “weather-resistant,” or “suitable for wet locations.” Avoid indoor-only strings unless the pillar is fully protected from moisture.
In addition to lights, gather these essential tools:
- Measuring tape
- Ladder (stable and tall enough for safe reach)
- Zip ties or insulated wire clips (never use metal staples)
- Extension cords (outdoor-rated, grounded)
- Work gloves and safety glasses
- Chalk line or string (for marking start/end points)
Measure and Plan Your Wrap Pattern
Even spacing starts with accurate measurement. Measure the height and circumference of the pillar. Multiply the height by 3.14 (π) to calculate the diagonal length needed for one full spiral wrap. However, for vertical coverage, focus on total linear feet required.
Determine your wrapping style:
- Spiral Wrap: Most common. Creates a ribbon-like effect winding upward.
- Vertical Strand: Lights run straight up and down, secured at intervals. Ideal for wide or square pillars.
- Chevron or Crisscross: Decorative pattern using multiple angles. Best for large architectural features.
For spiral wrapping, decide on spacing between loops. A standard interval is 4 to 6 inches vertically. Closer spacing creates denser illumination; wider gaps save lights but may appear sparse.
To calculate how many light strings you’ll need:
Total vertical coverage = Height of pillar ÷ Desired spacing between loops Total length needed = Total loops × Circumference of pillar
Add 10–15% extra for overlap, connections, and errors. Always test lights before installation.
| Pillar Type | Height | Circumference | Loop Spacing | Estimated Lights Needed |
|---|---|---|---|---|
| Rounded Porch Column | 8 ft | 3 ft | 6 in | 48 ft (e.g., four 12-ft strands) |
| Square Patio Pillar | 10 ft | 4 ft | 4 in | 120 ft (e.g., ten 12-ft strands) |
| Indoor Marble Support | 12 ft | 5 ft | 6 in | 120 ft (e.g., ten 12-ft strands) |
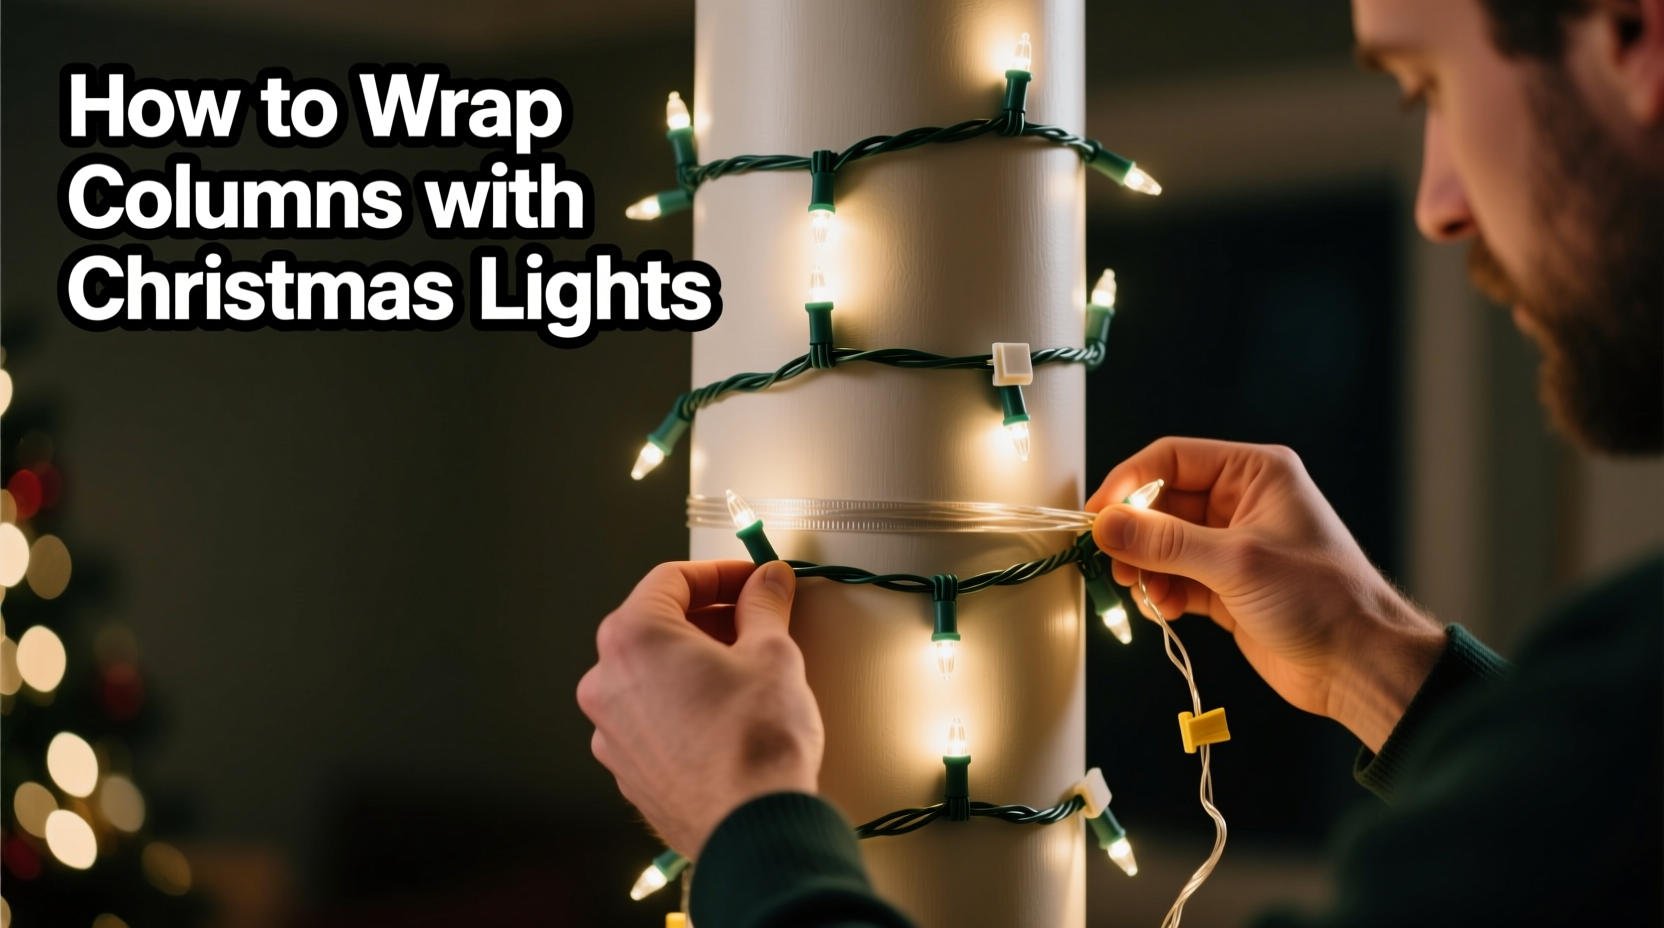
Step-by-Step Installation Guide
Follow this methodical process to ensure a uniform, durable wrap that stays in place all season long.
- Prepare the Area: Clear the base of the pillar. Ensure the surface is dry and free of debris. If working outdoors, check the weather forecast—avoid windy or rainy days.
- Mark the Starting Point: Use chalk or removable tape to mark where the first bulb will sit. Align it with adjacent features (e.g., door frame, step edge) for visual harmony.
- Secure the First End: Plug in the lights and confirm they work. Attach the male end (plug) near the base using a zip tie or plastic clip. Do not bury the plug; keep it accessible for testing and removal.
- Begin Wrapping: For spiral wraps, move upward at a consistent angle. Hold the string taut but not stretched. After each full loop, pause to check vertical alignment. Use a plumb line or laser level if precision is critical.
- Anchor Every Few Loops: Every 2–3 loops, fasten the strand with a zip tie or insulated clip. Gently cinch until snug—over-tightening can damage wires or mar surfaces. Trim excess zip tie tails.
- Handle Corners Carefully: On square or rectangular pillars, guide lights around edges smoothly. Avoid sharp bends that could crack insulation or disconnect sockets.
- Connect Additional Strands: Never daisy-chain more than three or four sets unless manufacturer-approved. Use a power strip with surge protection mounted nearby instead. Conceal cords along downspouts or under trim when possible.
- Final Inspection: Step back and view from multiple angles. Check for loose sections, kinks, or inconsistent spacing. Test the entire circuit overnight to catch intermittent failures.
Avoid Common Mistakes
Even experienced decorators make missteps. These pitfalls compromise both appearance and safety.
- Using staples or nails: Metal fasteners pierce insulation, creating short-circuit risks and water entry points. Always use plastic clips or UV-resistant zip ties.
- Overloading circuits: Plugging too many strands into one outlet causes overheating. Calculate total wattage and distribute load across outlets.
- Ignoring expansion and contraction: Temperature changes cause materials to shift. Allow slight slack in attachments to prevent strain on wires.
- Skipping grounding: Outdoor setups must use grounded (three-prong) extension cords and GFCI-protected outlets to reduce shock hazards.
- Starting at the top: Gravity works against you. Always begin at the base so upper sections don’t pull down on lower ones.
“Most call-backs we get for light repairs come from improper anchoring. Zip ties placed every 18 inches with moderate tension prevent 90% of issues.” — Marcus Reed, Professional Holiday Lighting Installer, Northlight Designs
Real-World Example: The Historic Veranda Project
A homeowner in Charleston, SC, wanted to illuminate eight 10-foot Doric columns on a historic veranda without damaging original woodwork. Using traditional stapling was off the table due to preservation rules.
The solution? Spiral-wrapped LED strings (warm white, 6-inch spacing) secured with clear, UV-stabilized nylon zip ties. Each tie was fastened every two loops and positioned in shadowed grooves of the fluted columns to remain nearly invisible. Power was distributed via low-profile, painted junction boxes mounted discreetly beneath the railing.
The result: a glowing, elegant facade that enhanced the home’s character without compromising its integrity. The system stayed intact through winter storms and was easily removed in January with no residue or damage.
Checklist: Secure and Even Light Wrapping
Use this checklist before, during, and after installation:
- ☐ Measure pillar height and circumference accurately
- ☐ Choose outdoor-rated, energy-efficient LED strings
- ☐ Test all lights before mounting
- ☐ Mark starting point and maintain consistent spacing
- ☐ Begin wrapping at the base, moving upward
- ☐ Secure strands every 2–3 loops with plastic fasteners
- ☐ Avoid sharp bends, kinks, or over-tensioning
- ☐ Use GFCI outlets and proper extension cords
- ☐ Inspect final layout from multiple viewing distances
- ☐ Schedule periodic checks during the season
Frequently Asked Questions
Can I wrap painted or delicate surfaces without causing damage?
Yes. Use soft zip ties or adhesive-backed plastic clips designed for holiday lights. Avoid abrasive fasteners and always remove ties carefully in spring. For sensitive finishes, consider removable hook-and-loop straps made for outdoor decor.
How do I prevent lights from sagging over time?
Sagging usually results from inadequate anchoring or thermal expansion. Secure lights more frequently (every 12–18 inches vertically), especially on tall pillars. Use flexible connectors and avoid stretching the string during installation. Periodic mid-season tightening helps maintain tension.
Is it safe to leave wrapped lights on overnight?
Modern LED strings are generally safe for continuous use, especially when properly installed and not overloaded. However, use timers to limit operation to 6–10 hours per night (e.g., dusk to bedtime). This reduces wear, saves energy, and minimizes fire risk. Always inspect for frayed wires or hot spots before extended use.
Final Tips for Long-Term Success
When taking down your display in January, unroll lights carefully from top to bottom. Wrap them around a piece of cardboard or a reel to prevent tangling. Store in labeled, ventilated containers away from extreme temperatures.
Take photos of your setup for next year. Note what worked—spacing, number of strands, power layout—so you can replicate success without guesswork.
Consider investing in permanent low-voltage systems for recurring installations. While the upfront cost is higher, permanent mounts and recessed wiring eliminate annual labor and improve reliability.
Conclusion: Shine Bright, Wrap Right
Wrapping columns or pillars with Christmas lights doesn’t have to be a frustrating chore. With careful planning, the right tools, and disciplined technique, you can achieve a display that looks professionally installed and withstands the elements. Even spacing and secure fastening aren’t just about aesthetics—they’re essential for safety and longevity.
This holiday season, take pride in transforming ordinary structures into luminous landmarks. Your attention to detail won’t go unnoticed. Neighbors will admire the symmetry, guests will feel welcomed by the warm glow, and you’ll enjoy peace of mind knowing your work is both beautiful and built to last.


 浙公网安备
33010002000092号
浙公网安备
33010002000092号 浙B2-20120091-4
Comments
No comments yet. Why don't you start the discussion?