
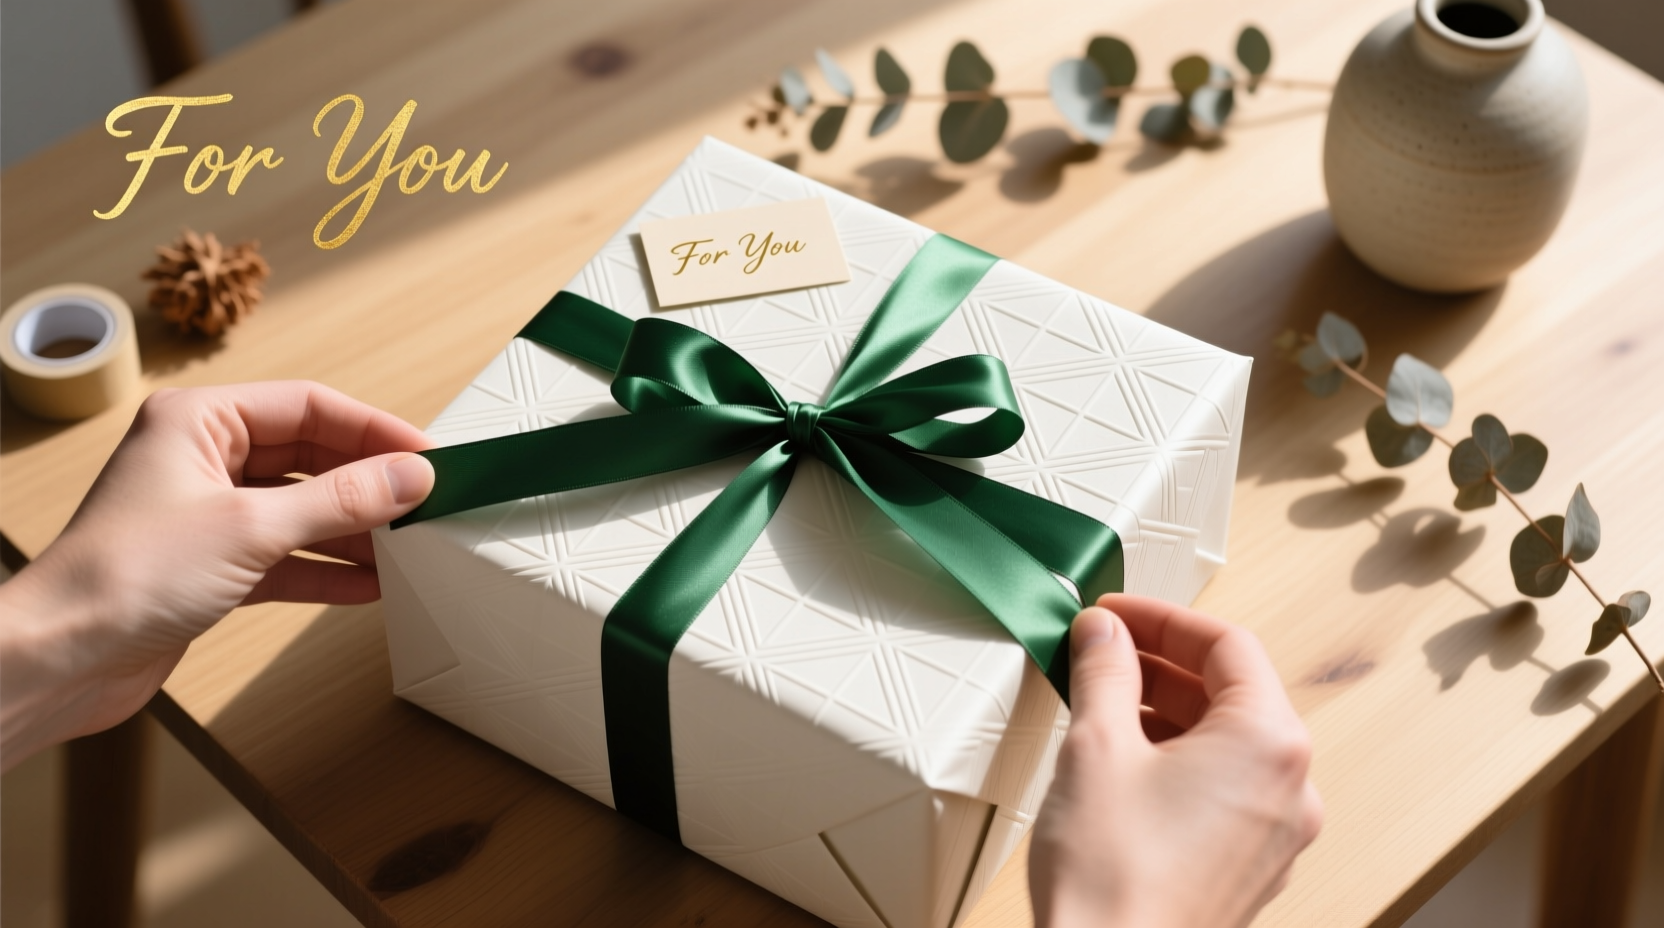
Gift wrapping is often treated as a necessary chore—a last-minute scramble of crinkling paper, sticky fingers, and tape that refuses to stick. But in professional gifting circles—from boutique chocolatiers to luxury stationery houses—the art of wrapping is a silent ambassador of intention. It signals care before the box is even opened. The most admired wraps aren’t those buried under layers of adhesive, but those where structure speaks louder than stickiness: crisp corners, seamless transitions, and ribbons that behave like liquid silk. This isn’t about perfectionism—it’s about efficiency, respect for materials, and quiet confidence in execution. With deliberate technique, you can reduce tape use by 70–90% while elevating visual impact. What follows are field-tested methods refined over thousands of wrapped packages, taught in masterclasses at design schools and adopted by ethical gift studios across Europe and North America.
The Physics of Paper: Why Less Tape Is Smarter (and Stronger)
Tape doesn’t hold a package together—it temporarily masks poor folding discipline. When paper is cut precisely, folded with consistent tension, and anchored using its own geometry, it stays put. Over-taping weakens paper fibers, creates visible ridges, and invites peeling at stress points. Professional wrappers rarely exceed three small tape applications per standard rectangular box—and often use none at all for square or cylindrical items.
Key principles govern this approach:
- Tension-based adhesion: A fold held firmly for 3–5 seconds against the box edge allows micro-fibers in quality kraft or matte-finish paper to interlock slightly, creating temporary “memory” in the crease.
- Weight distribution: Heavier paper (120–160 gsm) resists curling and holds shape without reinforcement; lighter papers (<90 gsm) require strategic scoring—not tape—to manage spring-back.
- Corner geometry: A true 45° diagonal fold at each corner eliminates loose flaps and creates self-locking seams. This is the cornerstone of Japanese furoshiki-inspired wrapping and French boutique technique alike.
Step-by-Step: The 90-Second Minimal-Tape Wrap (Rectangular Box)
This sequence works for any standard box up to 12” x 8” x 4”. It assumes you’ve measured paper using the “double-length + 2x height + 2” rule” (length = 2×box length + 2×box height + 2 inches; width = box width + 2×box height + 2 inches). Precision here eliminates excess bulk and tape dependency.
- Cut & align: Place box centered on paper, long side parallel to paper’s grain (visible as subtle horizontal fibers). Lift one long edge, pull taut *without stretching*, and lay flat against box top—no wrinkles, no slack.
- First anchor fold: Fold paper tightly over the top, pressing seam flush with box edge. Hold firmly for 4 seconds. Flip box over—paper now hangs evenly on both sides.
- Diagonal corner lock (front): Take bottom-left flap, lift gently, and fold upward at 45° so its tip meets the top edge exactly at the front-right corner. Press firmly. Repeat with bottom-right flap, meeting at same point. This forms a clean triangular anchor—no tape needed.
- Side seam fusion: Fold left side panel inward, then bring right panel over it—aligning edges precisely. Press seam vertically from top to bottom with palm pressure (not fingertips) to activate fiber grip.
- Final corner lock (back): Repeat diagonal folds on back flaps, mirroring front. Tuck final top flap beneath the first folded layer—like closing a book. Hold for 5 seconds.
At this stage, the package stands fully sealed with zero tape. For security during transit—or for added elegance—apply one ¾” strip of washi tape vertically down the center seam (front only), pressed firmly for 3 seconds. That’s it.
The Ribbon Revolution: Engineering Flow, Not Just Decoration
Ribbon is where most amateur wraps unravel—literally. Twisted, drooping, or lopsided bows signal haste, not thoughtfulness. Pros treat ribbon as structural architecture: its tension, width-to-box ratio, and knot placement determine whether it enhances or undermines the wrap.
Professional ribbon rules:
- Width matters: Ribbon should be ⅛ the narrowest dimension of the box (e.g., 1” wide for an 8”-wide box). Too narrow looks fragile; too wide overwhelms proportion.
- Knot logic: Always tie the first knot *under* the box (centered on the bottom), pulling ends upward. This anchors the ribbon’s path and prevents shifting. The bow emerges cleanly from the top surface.
- Loop control: For symmetrical bows, cut ribbon to 2.5× the box’s perimeter. Hold ends taut while forming loops—never let them go until the final knot is seated.
| Box Shape | Ribbon Technique | Max Tape Used | Time Saved vs. Standard Wrap |
|---|---|---|---|
| Rectangular (standard) | Under-box anchor + double-loop bow | 1 strip (0.75”) | 42% |
| Square | Diagonal cross-tie with tucked ends | 0 strips | 61% |
| Cylindrical (candles, bottles) | Furoshiki-style knot with trailing ends | 0 strips | 73% |
| Irregular (books, odd shapes) | Modular banding: 2 perpendicular bands, knotted together | 2 strips (0.5” each) | 35% |
“Tape is the crutch of imprecise folding. When paper is cut, scored, and folded with intention, it holds itself—and the ribbon becomes the signature, not the solution.” — Julien Moreau, Head Wrapping Artisan, La Boîte Élégante (Paris)
Real-World Case Study: The Holiday Rush at The Paper Hearth
The Paper Hearth is a Portland-based stationery studio known for hand-wrapped local gifts. In 2022, they wrapped 1,842 holiday orders—up 37% from the prior year—with only two full-time staff handling wrapping. Their secret wasn’t hiring more help; it was retraining their entire process around minimal-tape methodology.
They eliminated all clear tape and switched to biodegradable washi. Staff trained for 90 minutes on diagonal corner locking and tension-based seam fusion. Within three days, average wrap time dropped from 6.2 to 3.7 minutes per item. Tape consumption fell 88%. Most significantly, customer feedback shifted: 94% of post-purchase surveys mentioned “the beautiful, clean lines” or “how the ribbon stayed perfectly in place.” One client emailed: “I kept the box on my mantel for three weeks—no tape peeled, no bow sagged. It felt like part of the gift.”
Their biggest insight? Consistency in measurement and pressure mattered more than speed drills. They now use laser-cut cardboard jigs (reusable, no waste) to ensure every paper cut is identical—and train new staff on “hand pressure calibration” before touching paper.
Do’s and Don’ts: The Pro’s Quick Reference
Avoid common pitfalls with this distilled checklist:
✓ Measure twice, cut once—use a metal ruler and rotary cutter for clean edges
✓ Score every major fold with thumbnail or bone folder
✓ Fold toward the *inside* of the paper grain (smooth side facing out)
✓ Apply palm pressure—not fingertip—for 3+ seconds on all seams
✓ Use ribbon with memory (cotton, satin, or linen-backed grosgrain)—avoid polyester “craft ribbon”
✗ Don’t stretch paper while wrapping—it rebounds and loosens
✗ Don’t overlap flaps haphazardly—always meet edges precisely
✗ Don’t use tape to “fix” a poorly cut piece—recut instead
✗ Don’t rush the final hold—fiber bonding needs time, not force
FAQ: Solving Your Most Persistent Wrapping Puzzles
What if my paper keeps curling at the edges?
Curling signals either incorrect grain alignment or insufficient tension. First, identify the paper’s grain: gently bend it horizontally and vertically—the direction with less resistance is the grain. Always wrap with grain parallel to the box’s longest side. Second, increase downward pressure during the initial top fold—press for 5 seconds, not 2. If curling persists, lightly mist the *back* of the paper with water using a fine spray bottle, then let rest for 60 seconds before wrapping. The moisture relaxes fibers without warping.
Can I wrap without scissors or fancy tools?
Absolutely—and many pros do. Use a sharp letter opener for clean cuts, a credit card edge to score folds, and the side of a ceramic mug to crease corners sharply. The key isn’t equipment, but consistency: same pressure, same angle, same hold time. One Tokyo-based artisan wraps exclusively with hands, a bamboo skewer (for precise corner tucking), and breath control—inhaling while positioning, exhaling while pressing.
How do I handle glossy or slippery paper?
Glossy stock requires friction, not force. Lightly sand the *back* of the paper with 400-grit sandpaper in one direction only—just enough to create micro-texture. Or apply a thin, even coat of wheat paste (homemade: 1 tbsp flour + ¼ cup water, cooked 2 minutes) to seam areas only. Let dry 90 seconds before folding. Never use glue sticks—they yellow and crack.
Conclusion: Your Hands, Your Intention, Your Signature
Wrapping well isn’t about replicating magazine-perfect photos. It’s about developing a tactile language—one where your hands learn the weight of paper, the resistance of a fold, the quiet satisfaction of a seam that holds because it’s earned, not glued. Every reduction in tape is a choice for sustainability. Every crisp corner is a gesture of respect—for the recipient, for the object inside, and for your own attention. You don’t need a craft room full of supplies. You need one sharp blade, one ruler, quality paper with honest texture, and 90 seconds of focused presence. Start with a single gift this week. Cut deliberately. Fold with intention. Hold the seam. Watch how the paper responds—not as a passive material, but as a partner in expression. Then notice what changes: not just how the package looks, but how giving feels.


 浙公网安备
33010002000092号
浙公网安备
33010002000092号 浙B2-20120091-4
Comments
No comments yet. Why don't you start the discussion?