
The dream of having floor-to-ceiling, custom-built-in bookshelves often comes with a daunting price tag. But what if you could achieve that same high-end look without remodeling your walls or draining your savings? Enter the IKEA BILLY bookcase — a humble, affordable staple that’s become the foundation of thousands of DIY transformations. With a few strategic upgrades, this basic unit can blend seamlessly into your space, mimicking the appearance of permanent, architecturally integrated shelving.
Built-ins add character, maximize storage, and elevate a room’s aesthetic. The good news is you don’t need carpentry mastery or a contractor to get the look. By combining clever modifications, thoughtful finishing techniques, and a bit of creativity, you can turn your BILLY bookcase into something that appears custom-designed for your home.
Why the BILLY Bookcase Works So Well
The BILLY bookcase has earned its reputation as one of IKEA’s most versatile products. At under $60 for a standard unit, it offers an ideal balance of affordability, size, and structural simplicity. Its modular design allows for stacking, combining, and anchoring multiple units together — a key advantage when replicating built-in cabinetry.
Measuring approximately 30 inches tall and 79 inches high (depending on model), the BILLY reaches close to ceiling height in many homes, making it easy to minimize the gap at the top with trim or molding. Its neutral particleboard construction accepts paint well, and the adjustable shelves provide flexibility in organizing books, decor, or display items.
“With the right finishing touches, a BILLY hack can be indistinguishable from $5,000 worth of custom millwork.” — Jordan Lee, Interior Designer & DIY Specialist
Step-by-Step Guide: Transforming Your BILLY into Built-Ins
Turning a basic bookcase into a seamless built-in requires planning, precision, and patience. Follow this detailed process to ensure professional results.
- Assess your space. Measure ceiling height, wall width, and baseboard depth. Decide whether you’ll install one tall unit or combine multiple BILLYs side by side or stacked vertically.
- Choose your configuration. For wider walls, pair two or more BILLY bookcases horizontally. Use filler strips between units to eliminate visible gaps.
- Remove doors and hardware. Strip down the bookcase to its core frame. This gives you a blank canvas for painting and trim work.
- Anchor to the wall securely. Use included IKEA anti-tip brackets and extend them to wall studs. If building floor-to-ceiling units, anchor both top and bottom for stability.
- Add crown molding and baseboard. Match your room’s existing trim profile using pine boards cut to fit. Secure with finish nails and wood glue.
- Fill seams and sand smooth. Use wood filler where trim meets the bookcase. Sand thoroughly before priming and painting.
- Prime and paint. Apply a high-adhesion primer first, then 2–3 coats of semi-gloss or eggshell paint in a color matching your walls or trim. <8> Install lighting (optional). Add LED strip lights inside upper shelves for a luxurious glow that enhances the built-in illusion.
Essential Materials List
To complete a full BILLY built-in transformation, gather these supplies before beginning:
- IKEA BILLY bookcase(s) – choose white or birch depending on desired finish
- Crown molding, base cap, and casing trim – match existing room profiles
- Pine boards (1x2, 1x3, or 1x4) for face frames and fillers
- Wood glue, finish nails, and brad nailer
- Spackle or wood filler
- Sanding blocks (120 & 220 grit)
- High-bonding primer (e.g., Zinsser BIN or Bullseye 1-2-3)
- Paint (semi-gloss recommended for durability and clean lines)
- Paintbrushes and foam rollers
- Level, stud finder, drill, and clamps
- Optional: LED puck or strip lighting
Design Variations to Match Your Style
Not all built-ins are created equal — and neither should your BILLY hack be. Customize the final look to suit your interior style.
Modern Minimalist
Opt for flat-panel trim or no trim at all. Paint the entire unit in a matte black or warm gray. Remove visible shelf pins and use floating shelf brackets inside for a sleek, streamlined effect.
Traditional Library
Add dentil crown molding and fluted pilasters on the sides. Stain the exterior with a walnut or espresso gel stain for a rich, classic feel. Include glass cabinet doors on lower sections for elegance.
Scandinavian Simplicity
Keep the birch finish and enhance it with light oak veneer edge banding. Pair with white walls and natural fiber baskets on open shelves for texture and warmth.
Industrial Loft
Combine the BILLY with black steel pipe brackets for exposed supports. Use dark gray paint and add Edison bulb string lights across the top for urban charm.
Do’s and Don’ts: Common Mistakes to Avoid
| Do’s | Don’ts |
|---|---|
| Use wood filler and sand between coats for smooth transitions | Skimp on primer — particleboard absorbs paint unevenly without it |
| Match existing trim profiles exactly for visual continuity | Leave raw edges exposed — always cover with iron-on edge banding or trim |
| Secure every unit to wall studs, especially in earthquake-prone areas | Ignore safety — never skip anti-tip hardware, especially with kids or pets |
| Paint the back panel if using open-back configurations | Use low-quality paint that chips or yellows over time |
| Test paint colors on a small section before committing | Forget about lighting — shadows can break the illusion of permanence |
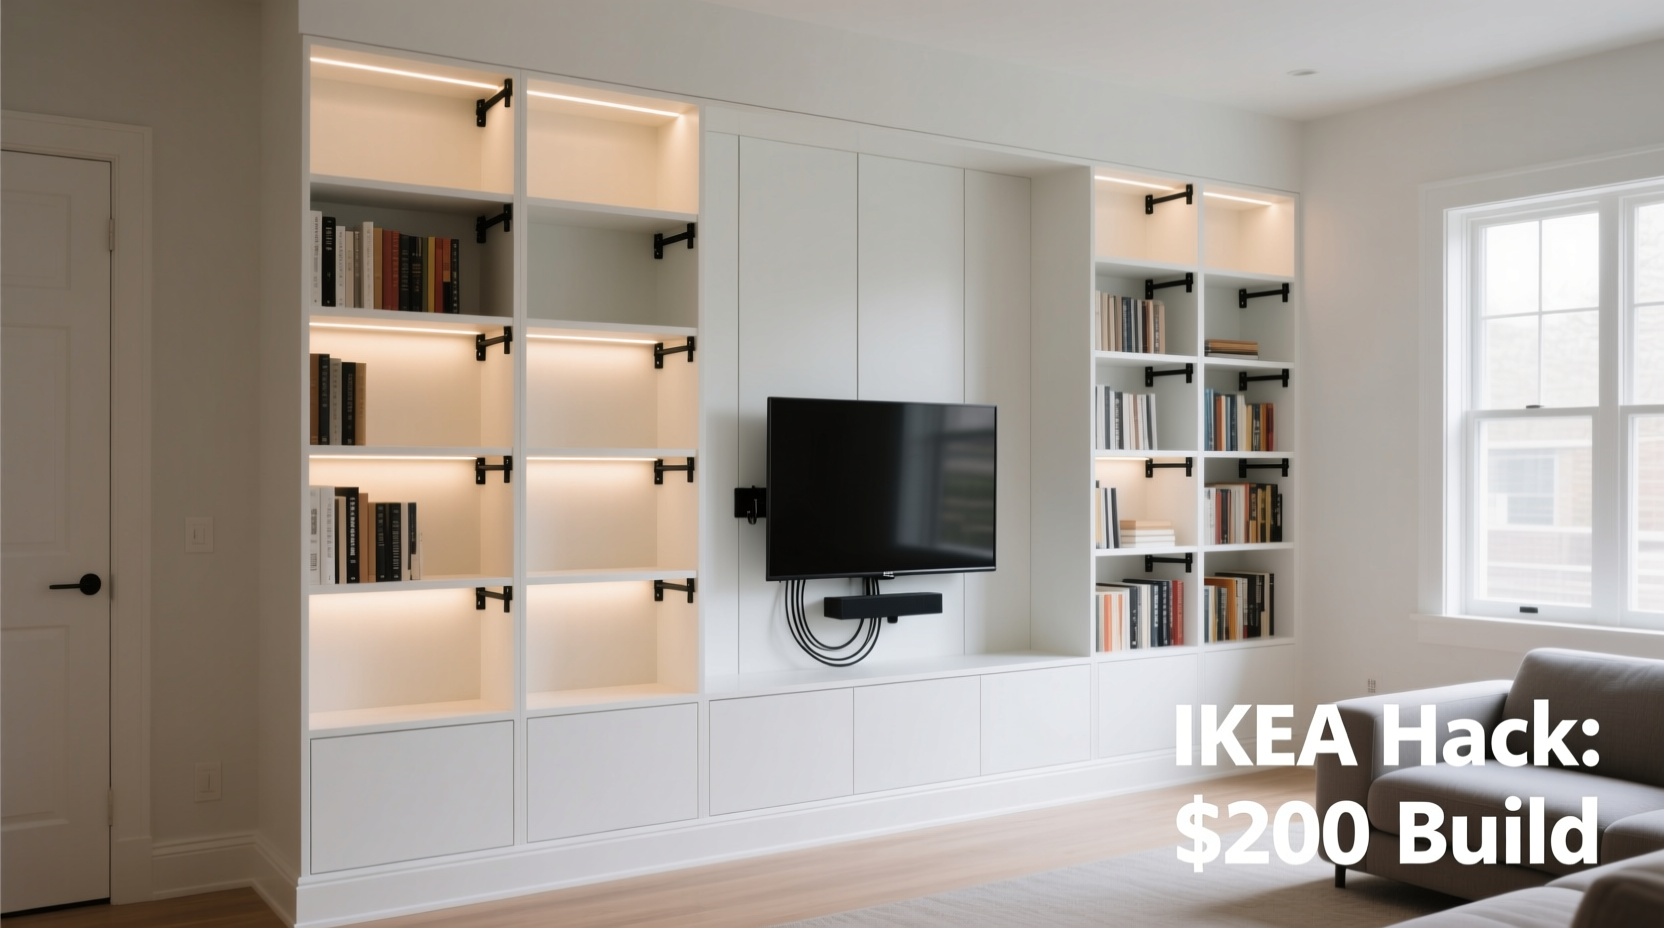
Real Example: A Living Room Transformation
In a 1970s ranch-style home in Portland, Oregon, homeowner Maya R. wanted to upgrade her cluttered living room but couldn’t afford custom cabinetry. She purchased three white BILLY bookcases and arranged them side by side beneath a large window. After removing the doors and backing, she added 1x3 pine face frames around each unit, creating a unified front.
She extended the crown molding from the adjacent dining room onto the top of the unit, filling gaps with caulk and paint. Using leftover Benjamin Moore “Chantilly Lace” paint from her trim, she repainted the entire assembly to match. Inside, she installed motion-sensor LED strips on the top shelf, casting a soft glow at night.
The result? A cohesive, built-in media and book storage unit that guests consistently mistake for original architecture. Total cost: $280. Time invested: two weekends. Professional value estimate: $3,200.
“The biggest compliment I got was when my brother asked, ‘Did you renovate?’ That’s when I knew the hack worked.” — Maya R., DIY Enthusiast
Advanced Hacks for Maximum Realism
For those seeking even greater authenticity, consider these pro-level enhancements:
- Create a false wall extension. Build a lightweight drywall or MDF panel beside the bookcase to eliminate side gaps and simulate a recessed installation.
- Add internal lighting. Use battery-powered LED tape lights with remote controls for ambiance without rewiring.
- Incorporate closed cabinetry. Replace the top section with framed plywood boxes and shaker-style doors for contrast.
- Integrate seating. Build a cushioned bench below the lowest unit for a reading nook effect.
- Use wallpaper or paneling on the back. Instead of the default fiberboard, apply peel-and-stick wood planks or grasscloth for depth.
Frequently Asked Questions
Can I make a BILLY bookcase look like real wood?
Absolutely. While the BILLY is made of particleboard, you can achieve a realistic wood appearance using wood veneer sheets or liquid wood finishes. Apply iron-on veneer to the front edges and faces, then seal with polyurethane. Alternatively, use a wood-grain contact paper designed for furniture — modern versions are nearly indistinguishable from real timber.
How do I prevent the shelves from sagging over time?
The BILLY’s adjustable shelves can bow under heavy loads. Reinforce them by attaching a thin hardwood strip (like poplar or oak) along the back edge using wood glue and brad nails. You can also replace the inner shelves entirely with pre-cut plywood panels sanded and painted to match.
Is it safe to stack BILLY bookcases vertically?
Yes, but only if properly secured. IKEA sells a stacking kit (item 603.850.64) that includes metal rails and connectors. Anchor both the bottom and top units to wall studs, and never place heavy items on upper sections unless structurally reinforced.
Checklist: Your BILLY Built-In Project Planner
Stay organized with this step-by-step checklist before, during, and after your project:
- ✅ Measure wall dimensions and ceiling height
- ✅ Purchase BILLY bookcase(s) and verify condition
- ✅ Buy matching trim, molding, and filler boards
- ✅ Gather tools: nail gun, saw, level, drill, clamps
- ✅ Remove doors, backing, and hardware
- ✅ Assemble and align units on-site
- ✅ Anchor all units securely to wall studs
- ✅ Install face frames and trim pieces
- ✅ Fill seams, sand, and prime entire surface
- ✅ Apply 2–3 coats of paint with light sanding between layers
- ✅ Add lighting or decorative elements (optional)
- ✅ Style shelves with books, plants, and personal items
Conclusion: Elevate Your Space Without the Price Tag
The beauty of the BILLY bookcase hack lies not just in its affordability, but in its transformative power. What begins as a mass-produced shelf becomes a tailored architectural feature — one that reflects your taste, solves storage challenges, and adds lasting value to your home. These upgrades prove that luxury doesn’t require a luxury budget; it demands vision, effort, and attention to detail.
Whether you’re a first-time DIYer or a seasoned renovator, this project offers immediate impact with manageable risk. Start small with a single unit, refine your technique, and scale up as confidence grows. The result won’t just impress guests — it will inspire pride every time you walk into the room.


 浙公网安备
33010002000092号
浙公网安备
33010002000092号 浙B2-20120091-4
Comments
No comments yet. Why don't you start the discussion?