
In tight urban living spaces, every square foot counts. For city dwellers in compact apartments, maximizing space isn’t just a luxury—it’s a necessity. While renovation or relocation might seem like the only solutions, there’s a smarter, more affordable approach: rethinking how you use vertical space with strategic shelving. IKEA, known for its modular, budget-friendly furniture, offers an array of shelves that, when hacked creatively, can transform cramped interiors into airy, functional environments. These aren't just storage solutions—they're spatial illusions that open up rooms, reduce clutter, and enhance light flow.
The key lies not in what you buy, but how you use it. With smart placement, thoughtful modifications, and a bit of DIY ingenuity, standard IKEA shelves can become architectural features that redefine your apartment’s proportions. From floating illusions to multi-functional units, these hacks leverage design psychology, ergonomics, and minimalist principles to make small spaces feel significantly larger.
Elevate Storage with Vertical Thinking
Most people instinctively store items at eye level or below, clustering furniture along walls and crowding floor space. But in a small apartment, horizontal spread is the enemy of openness. The solution? Go vertical. By drawing the eye upward, vertical shelving creates a sense of height and volume, tricking the brain into perceiving more space.
Models like the KALLAX, BILLY, and LACK series are ideal starting points. When mounted high on walls or stacked vertically, they minimize floor obstruction while offering abundant storage. For example, placing a KALLAX unit upright in a corner and filling the cubbies with lightweight decorative boxes or plants draws attention upward, elongating the room visually.
To amplify this effect, align multiple shelves in a staggered column rather than a single blocky unit. This breaks up mass and adds rhythm to the wall, preventing the heavy, boxed-in feeling common in small rooms.
Transform Cubes into Room Dividers
One of the most effective ways to expand perceived space is by defining zones without building walls. In studio apartments or open-plan layouts, a well-placed room divider can separate sleeping, working, and living areas—making each zone feel intentional and distinct, even within a confined footprint.
The KALLAX shelf is particularly suited for this hack. Positioned horizontally behind a sofa or bed, it acts as a low-profile partition. Fill one side with books and decor visible from the living area; keep the bedroom-facing side minimal or fitted with fabric bins for privacy. For added light permeability, leave several cubbies empty or insert translucent acrylic panels.
For a floating effect, mount the unit slightly above the floor (using adjustable legs or brackets) to allow light and sightlines underneath. This subtle lift enhances airiness and prevents the divider from feeling like a barrier.
“Using modular shelving as a semi-transparent divider can increase spatial clarity by 30% in micro-apartments.” — Lena Tran, Urban Interior Designer & Small Space Specialist
How to Build a Light-Passing Divider
- Select a KALLAX 4x2 or 5x2 unit depending on ceiling height and width needs.
- Paint or stain the frame in a neutral tone matching your walls to reduce visual weight.
- Insert frosted acrylic sheets or rice paper panels into alternate cubbies.
- Add soft lighting inside select compartments using LED strips.
- Anchor securely to wall studs if placing in a high-traffic area.
Create Floating Illusions with Wall-Mounted Shelves
Nothing opens up a room like unbroken floor space. Wall-mounted shelves eliminate leg clutter and provide storage without sacrificing square footage. IKEA’s FLAT-PACK series, such as the EKBY JÄRVI or LACK wall shelves, are perfect for this purpose.
To maximize the illusion of space:
- Install shelves at varying heights across an entire wall, avoiding symmetry to create dynamic movement.
- Use narrow-depth shelves (under 10 inches) to prevent the wall from feeling crowded.
- Style with lightweight objects—framed photos, small plants, or ceramic accents—that don’t project far into the room.
A popular hack involves combining EKBY PLATSA brackets with custom-cut wood planks for a built-in look. Stain the wood to match existing flooring or trim, then paint the brackets in a matte black or white to blend with the wall. The result mimics high-end cabinetry at a fraction of the cost.
Double Functionality: Shelves That Work Overtime
In tiny apartments, every piece of furniture should serve more than one purpose. Shelving units can double as desks, benches, headboards, or even mini closets when reimagined.
Consider the KALLAX 2x4 placed horizontally at the end of a bed. With two cubbies fitted with cushion tops and lower sections used for folded blankets or shoes, it becomes a hybrid bench-and-storage unit. Add a slim desk board across the top cubbies during the day, and it transforms into a compact workspace.
Another idea: Mount a BILLY bookcase sideways above a closet door (where space is often wasted). Fit shallow baskets or labeled bins for accessories, scarves, or toiletries. This “hidden” zone remains accessible yet invisible from the main room, preserving clean sightlines.
| Hack | IKEA Product | Secondary Use | Spatial Benefit |
|---|---|---|---|
| Headboard with storage | KALLAX 2x2 | Nightstand + display | Eliminates need for bedside tables |
| Under-stair shelving | LACK wall shelf | Display or pantry | Uses dead space efficiently |
| Floating desk | EKBY JÄRVI + plank | Workspace | Clears floor for movement |
| Closet-top extension | BILLY bookcase | Extra storage | Draws eye upward |
Case Study: A 400-Sq-Ft Studio Transformed
Maria, a graphic designer living in a 400-square-foot Brooklyn studio, struggled with constant clutter and a lack of defined zones. Her bed dominated the room, her desk was crammed into a corner, and storage spilled onto the floor.
Her solution? Two KALLAX units—one mounted vertically near the entrance as a coat and bag station, the other laid horizontally behind the bed as a room divider and nightshelf combo. She painted both units matte white to recede into the background and installed LED strips inside cubbies facing the living area for ambient lighting.
She also added a floating EKBY shelf above the kitchen counter for spices and cookbooks, freeing up cabinet space. The total cost: under $300. After the overhaul, Maria reported feeling “less claustrophobic” and noted that guests consistently commented on how “spacious” her apartment felt.
The transformation wasn’t due to added square footage—but to intelligent redirection of focus and function.
Light, Color, and Reflection Hacks
Shelving doesn’t just store items—it interacts with light and color to shape perception. Strategic styling can amplify brightness and depth.
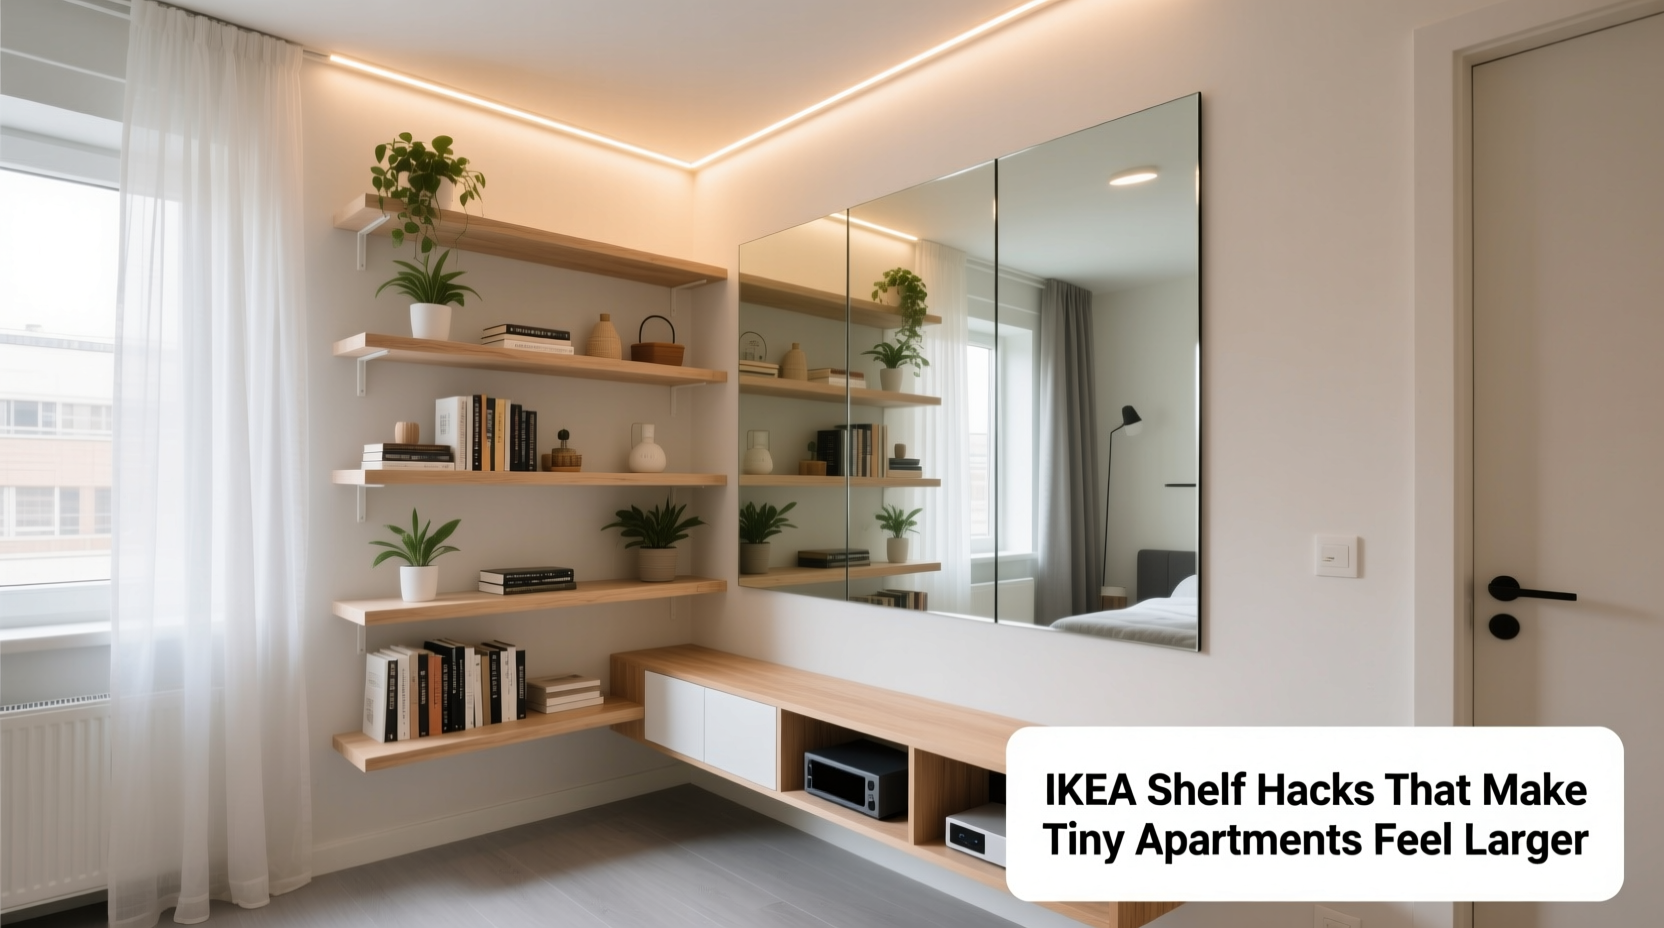
Paint the back panels of deep shelves in glossy white or mirror-finish contact paper. When paired with LED strip lighting inside the cubbies, this creates a reflective glow that pushes the wall backward visually. Place a small mirror inside one cubby to bounce natural light from windows deeper into the room.
Color coordination matters. Use monochromatic bins and containers in shades of white, gray, or beige to minimize visual noise. Avoid bold patterns or bright colors on frequently viewed shelves, as they attract too much attention and fragment the space.
Step-by-Step: Building a Space-Expanding Shelf Wall
Follow this sequence to create a cohesive, space-enhancing shelving wall in under a weekend:
- Assess your wall space: Identify a large, uninterrupted wall—preferably opposite a window or entry point.
- Choose your system: Select KALLAX or BILLY units based on height and load needs.
- Plan the layout: Sketch a staggered arrangement with taller units on ends and shorter ones in the middle.
- Mount securely: Use wall anchors and stud finders to ensure stability, especially for loaded shelves.
- Style strategically: Place heavier items at the bottom, decorative or reflective pieces toward the top.
- Add lighting: Install adhesive LED strips inside upper cubbies to illuminate the wall at night.
- Edit ruthlessly: Remove any item that doesn’t serve function or beauty. Clutter negates spatial gains.
Common Mistakes to Avoid
Even well-intentioned hacks can backfire if not executed carefully. Watch out for these pitfalls:
- Overloading shelves: Packed cubbies feel chaotic. Stick to 60–70% capacity for a clean look.
- Ignoring scale: Oversized units overwhelm small rooms. Measure twice, install once.
- Blocking natural light: Never place tall shelves directly in front of windows.
- Skipping anchoring: Unsecured shelves pose safety risks and look temporary.
- Mixing too many styles: Stick to one color family and material type (e.g., all wood-tone or all white).
FAQ
Can I combine different IKEA shelf models in one setup?
Yes, but only if they share similar depths and proportions. For example, BILLY and KALLAX can be mixed if painted uniformly, but avoid pairing deep cabinets with slim wall shelves unless intentionally creating contrast.
Are these hacks landlord-friendly?
Most are reversible. Use removable adhesive hooks, tension rods inside cubbies, or freestanding configurations. For drilling, choose less visible areas and offer to patch holes upon move-out.
How do I prevent shelves from looking institutional?
Break up rigid lines with organic elements—plants, woven baskets, framed art, or soft lighting. Rotate decor seasonally to keep the space feeling dynamic, not static.
Checklist: Your IKEA Shelf Hack Action Plan
- ☐ Measure your room’s key walls and ceiling height
- ☐ Identify zones needing separation or storage
- ☐ Choose 1–2 IKEA shelf models that fit your dimensions
- ☐ Decide on mounting vs. freestanding setup
- ☐ Purchase paint or finish to match your décor
- ☐ Buy LED strips or backlighting options
- ☐ Gather organizational bins in neutral tones
- ☐ Install with proper wall support
- ☐ Style with intention—function first, beauty second
- ☐ Reassess monthly and edit clutter promptly
Conclusion
Living small doesn’t mean compromising on comfort or style. With thoughtful IKEA shelf hacks, even the tiniest apartment can feel expansive, organized, and uniquely yours. The secret isn’t magic—it’s mindfulness. By leveraging vertical space, embracing multipurpose design, and manipulating light and perception, you turn limitations into opportunities.
Start with one wall. One shelf. One change. You’ll be surprised how quickly the space begins to breathe. And when you do, share your transformation—someone else in a shoebox apartment might just find the inspiration they need.


 浙公网安备
33010002000092号
浙公网安备
33010002000092号 浙B2-20120091-4
Comments
No comments yet. Why don't you start the discussion?