
There’s nothing more frustrating than capturing what you think is the perfect moment, only to zoom in and find a soft, blurry mess. Despite the iPhone's advanced camera system, fuzzy photos remain a common issue for users across models—from the iPhone 15 down to older generations. The good news: most causes of blur are preventable. Understanding the root causes and applying precise techniques can transform your mobile photography from disappointing to stunning.
Blur isn’t always about hardware limitations. More often, it stems from user behavior, environmental conditions, or overlooked settings. By addressing these factors systematically, you can consistently produce sharp, detailed images straight out of the camera—without relying on post-processing filters or third-party apps.
Understanding the Types of Camera Blur
Before fixing blur, it helps to identify what kind you're dealing with. Not all blurriness is created equal. There are three primary types:
- Motion blur: Caused by movement during exposure—either from shaky hands or a moving subject.
- Out-of-focus blur: Happens when the camera fails to lock focus on the right part of the scene.
- Optical/lens blur: Results from physical obstructions like smudges, dust, or protective cases blocking the lens.
Each type requires a different solution. For example, cleaning the lens won’t help if the problem is motion blur from low-light handholding. Diagnosing the correct cause is the first step toward sharper photos.
How Lighting Affects Image Sharpness
Lighting plays a crucial role in image clarity. iPhones use fast shutter speeds in bright conditions, freezing motion and producing crisp results. In low light, however, the camera slows down the shutter to gather more light, increasing the risk of motion blur—even with slight hand tremors.
The iPhone’s Night mode automatically activates in dim environments, using longer exposures and computational photography to brighten scenes. While effective, this process demands stability. Any movement during the multi-second exposure will result in blur.
To combat this:
- Avoid shooting in dark rooms without supplemental lighting.
- Use nearby lamps or natural ambient light to brighten scenes.
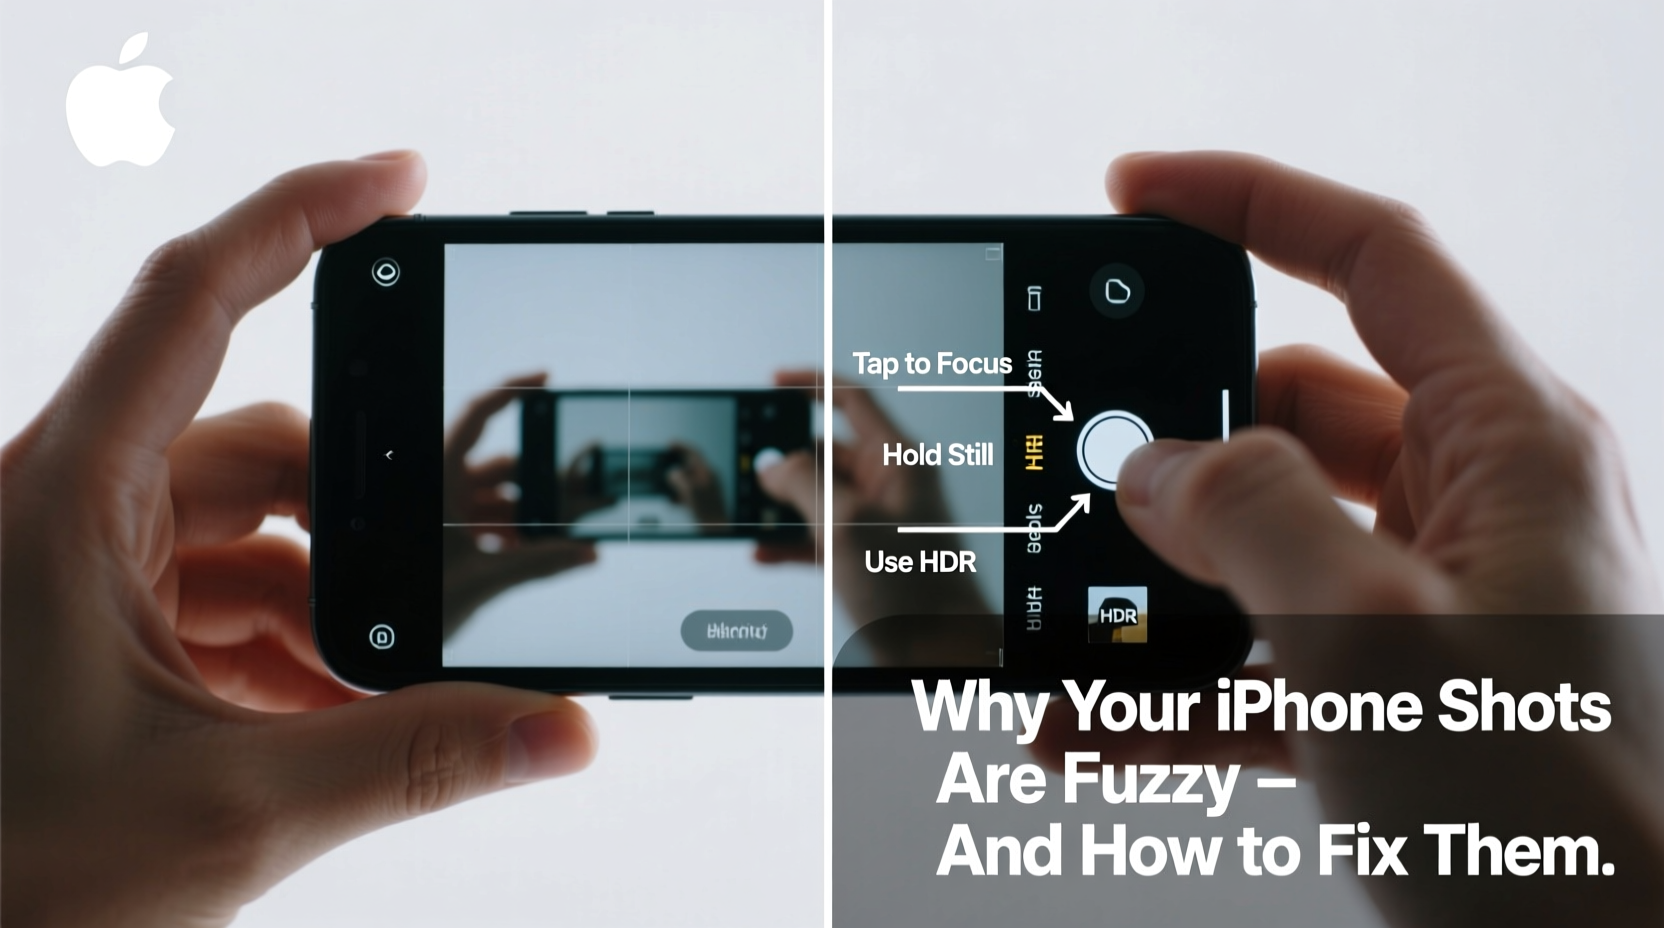
- Enable HDR (High Dynamic Range) in moderate lighting to balance shadows and highlights while maintaining detail.
“Most blurry iPhone photos stem from poor lighting choices, not faulty hardware.” — Jordan Lee, Mobile Photography Instructor at TechLens Academy
Mastering Focus and Exposure Control
One of the most underused features on the iPhone is manual focus and exposure adjustment. By default, the camera auto-selects where to focus and how bright the image should be. But it doesn’t always get it right—especially with backlit subjects or busy backgrounds.
To take control:
- Open the Camera app.
- Tap directly on your subject on the screen to set focus.
- After tapping, slide your finger up or down to adjust brightness (exposure).
This technique ensures the camera prioritizes your intended subject and avoids overexposing skies or underexposing faces. For moving subjects, use AE/AF Lock by pressing and holding until “AE/AF Lock” appears. This prevents the camera from refocusing mid-shot.
Real Example: Portrait Mode Failure
Sarah took a portrait of her daughter in the park using Portrait mode. The background was softly blurred as expected—but the child’s face was slightly out of focus. After reviewing the shot, she realized she hadn’t tapped the screen to set focus on her daughter’s eyes. Instead, the camera focused on a tree branch behind her.
By simply tapping the face before capturing the next shot, Sarah achieved perfect facial sharpness. The difference was immediate and dramatic—proving that even small interactions make a big impact.
Eliminating Motion Blur with Stability Techniques
Even the steadiest hands introduce micro-movements during long exposures. At shutter speeds slower than 1/60th of a second, handheld shake becomes visible in final images. This is especially true when zooming or shooting in low light.
Here’s how to stabilize your shots:
- Lean against a wall or pole to reduce body sway.
- Hold your breath gently just before pressing the shutter to minimize chest movement.
- Use a mini tripod or grip-style stabilizer for consistent support.
- Press the volume button or use a Bluetooth remote instead of tapping the on-screen shutter to avoid jarring the phone.
If you frequently shoot in dim environments, consider investing in a compact phone tripod. Many foldable models fit in pockets and attach magnetically or via standard screw mounts.
Keeping Your Lens Clean and Unobstructed
A dirty lens is one of the simplest—and most overlooked—reasons for blurry photos. Fingerprints, dust, pocket lint, and greasy smudges scatter light and degrade image quality, particularly around high-contrast edges.
Many users also unknowingly block part of the lens array with bulky cases. Some third-party cases extend too far over the rear camera bump, creating vignetting or softening corners.
To maintain optical clarity:
- Inspect the lens regularly under bright light for smudges.
- Clean gently with a microfiber cloth (the kind used for glasses).
- Avoid paper towels or clothing, which can scratch coatings.
- Remove the case occasionally to clean both the lens and the case opening.
- Ensure your case doesn’t cover any part of the lens module.
| Issue | Symptom | Solution |
|---|---|---|
| Fingerprint on lens | Overall haze, reduced contrast | Clean with microfiber cloth |
| Case blocking lens | Dark corners, soft edges | Adjust or replace case |
| Dust inside lens housing | Small spots or blur in fixed areas | Use air blower; avoid liquids |
| Scratched lens coating | Glare, flares, permanent blur | Limited fix; consider professional repair |
Using Zoom Correctly to Avoid Digital Softness
Optical zoom produces sharp results because it uses multiple physical lenses. On newer iPhones (Pro models), you’ll find true optical zoom at 2x, 3x, and up to 5x depending on the model. However, beyond those limits, the camera switches to digital zoom—which crops and enlarges the image.
Digital zoom degrades quality significantly. The resulting photos appear pixelated and lack fine detail. To preserve sharpness:
- Stick to optical zoom levels whenever possible.
- Avoid pinching to zoom beyond the optical limit unless absolutely necessary.
- Instead of zooming, move closer to your subject.
- If cropping is needed, shoot at full resolution and crop later during editing.
You can tell when you’re using digital zoom by watching the zoom slider in the Camera app. Once it turns red or displays a magnification above the optical range (e.g., >3x), you’re sacrificing quality.
Step-by-Step Guide to Sharper iPhone Photos
Follow this routine before every important shot to maximize clarity:
- Inspect the lens: Wipe clean with a dry microfiber cloth.
- Check your case: Ensure no part covers the lens ring.
- Assess lighting: Move toward natural light or add illumination if needed.
- Set focus manually: Tap your subject on-screen.
- Adjust exposure: Slide up/down after tapping to brighten or darken.
- Stabilize your stance: Lean against a surface or brace elbows.
- Use volume button: Press to capture without touching the screen.
- Review immediately: Zoom in post-shot to verify sharpness.
Repeating this checklist builds muscle memory and drastically reduces avoidable blur.
Common Software and Setting Mistakes
Some blur issues originate not from technique but from misconfigured settings. Here are frequent culprits:
- Auto Macro mode (iPhone 13 Pro and later): Can cause unintended focus shifts when close to subjects. Disable it in Settings > Camera > Macro Control if you want manual control.
- Filters or Live Photo enabled: These can slow shutter response or reduce resolution. Turn off Live Photo when maximum clarity is needed.
- Low storage space: When storage is nearly full, the iPhone may compress images or fail to process HEIF files correctly, leading to artifacts.
Additionally, ensure your iOS is up to date. Apple regularly releases camera performance improvements through software updates, especially for low-light processing and autofocus speed.
FAQ: Common Questions About iPhone Camera Blur
Why are my iPhone photos blurry even in good light?
Even in bright conditions, blur can occur due to incorrect focus, lens obstruction, or accidental movement. Check that you’ve tapped to focus on the subject and that your lens is clean. Also, verify that your case isn’t covering any part of the camera module.
Does closing unused camera apps improve photo quality?
While running multiple camera apps simultaneously doesn’t directly cause blur, it can slow down system performance and interfere with image processing. Restart your phone periodically and close background apps to maintain optimal responsiveness.
Can I fix blurry photos after taking them?
Slight softness can sometimes be improved using the Sharpen or Structure tools in the Photos app or third-party editors like Snapseed. However, severely blurred images—especially those affected by motion or defocus—cannot be fully restored. Prevention is always better than correction.
Expert Insight: What Professionals Do Differently
Professional mobile photographers don’t rely on luck. They treat the iPhone like any serious camera—preparing carefully and minimizing variables.
“The secret isn’t gear—it’s discipline. Clean lens, steady hands, proper light, and deliberate focus. Nail those four, and your iPhone will outperform most point-and-shoots.” — Marcus Tran, Award-Winning Mobile Photographer
Tran emphasizes that mastering fundamentals beats buying accessories. He shoots 90% of his work handheld but follows a strict pre-shot checklist similar to the one outlined above.
Final Checklist: Sharpen Your iPhone Photography Today
Apply these actions immediately to start capturing crisper images:
- ✅ Clean your lens daily with a microfiber cloth.
- ✅ Verify your case isn’t obstructing the camera.
- ✅ Tap to focus before every critical shot.
- ✅ Shoot in well-lit environments whenever possible.
- ✅ Use volume buttons or a remote to trigger the shutter.
- ✅ Avoid digital zoom; move closer instead.
- ✅ Update iOS to access the latest camera optimizations.
- ✅ Review photos right after capture to catch blur early.
Conclusion: Take Control of Your iPhone’s Camera Potential
Blurry iPhone photos aren’t inevitable. With attention to lighting, focus, stability, and maintenance, you can consistently produce sharp, gallery-worthy images. The technology in your pocket is capable of remarkable quality—it just needs the right conditions and technique to shine.
Start applying these strategies today. Whether you're documenting family moments, creating social media content, or exploring mobile photography as an art form, clarity transforms how your images are perceived. Don’t accept fuzzy results as normal. Adjust your habits, refine your approach, and watch your photo quality rise dramatically.


 浙公网安备
33010002000092号
浙公网安备
33010002000092号 浙B2-20120091-4
Comments
No comments yet. Why don't you start the discussion?