
Smartphones have transformed photography into an everyday art form, and the iPhone stands out with its powerful camera system. Yet even the most advanced devices can produce blurry images—frustrating moments when a special memory is captured poorly due to focus issues, motion, or environmental factors. Understanding why your iPhone photos turn out blurry is the first step toward fixing it. From hardware limitations to user habits, multiple factors contribute to soft or unfocused shots. The good news? Most causes are fixable with simple adjustments and best practices.
Why Your iPhone Photos Turn Out Blurry
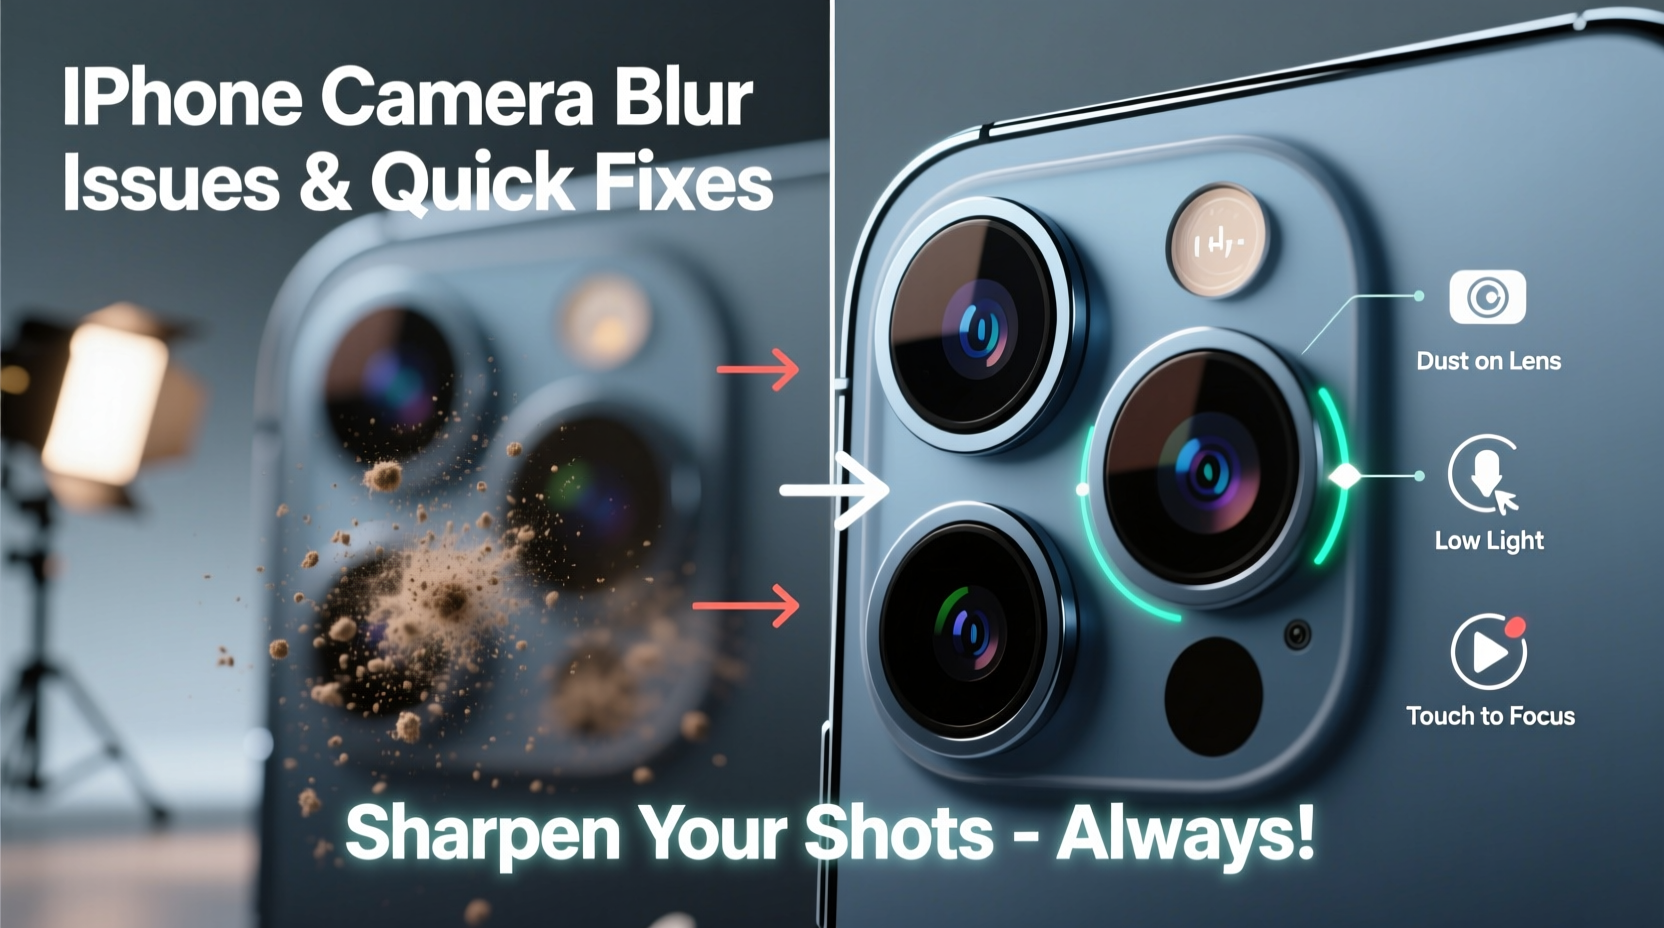
Blur in iPhone photography doesn’t always stem from a single cause. It’s often the result of overlapping factors related to lighting, movement, lens condition, software behavior, or user technique. Identifying the root issue is essential before applying solutions.
One of the most common culprits is camera shake. Even slight hand movements during exposure—especially in low light—can lead to motion blur. The iPhone compensates by increasing exposure time, but without stabilization, this leads to ghosting or smearing in the image.
Another frequent issue is poor autofocus performance. While iPhones use advanced contrast- and phase-detection systems, they can struggle in low-contrast scenes (like blank walls or foggy skies) or when shooting through glass. If the camera locks focus on the wrong plane, the intended subject appears soft.
Lens contamination is surprisingly common. Fingerprints, dust, or smudges on the rear or front lenses scatter light and reduce clarity, especially in backlit conditions. Many users overlook this simple fix, assuming the problem lies deeper in software or hardware.
In addition, digital zoom and HDR processing can degrade image quality. Digital zoom crops the sensor data, reducing resolution and amplifying noise. Meanwhile, HDR (High Dynamic Range) combines multiple exposures, which requires holding the phone steady. Any movement between frames results in misalignment and blurring.
Common Causes and Their Quick Fixes
Not all blur is created equal. Some issues arise from user error, others from environmental constraints or technical settings. Below are the most prevalent causes and immediate steps to correct them.
1. Camera Shake Due to Hand Movement
Handheld shots in dim lighting often result in blur because the iPhone slows down the shutter speed to gather more light. This increases sensitivity to movement.
- Solution: Hold your iPhone with both hands, elbows tucked in, and press the shutter gently—or use the volume buttons or AirDrop-connected Apple Watch to trigger capture without touching the screen.
- For critical shots, lean against a wall or rest the phone on a stable surface.
2. Dirty or Smudged Lenses
A fingerprint on the lens acts like a diffuser, scattering light and softening details. This is especially noticeable in bright sunlight or at night with artificial lights.
- Solution: Clean both front and rear lenses regularly with a dry microfiber cloth. Avoid paper towels or clothing, which may scratch the coating.
3. Autofocus Misfires
If the camera focuses on the background instead of your subject, the main point of interest will be blurred.
- Solution: Tap the screen on your subject before capturing. A yellow box confirms focus lock. For moving subjects, enable “AE/AF Lock” by long-pressing the screen.
4. Low Light Without Proper Support
In dark environments, the iPhone uses Night mode, which takes longer exposures. Any movement ruins the shot.
- Solution: Allow Night mode to complete its countdown (up to 3 seconds). Keep the phone perfectly still. Consider using a mini tripod or resting it on a flat surface.
5. Overuse of Digital Zoom
Zooming beyond 2x on most iPhones uses digital cropping rather than optical zoom, degrading image quality.
- Solution: Get physically closer to your subject. Use the 0.5x (ultra-wide) or 2x (telephoto) optical options when available.
“Sharpness starts before you press the shutter. Stability, lighting, and focus precision define image clarity far more than megapixels.” — Daniel Reyes, Mobile Photography Instructor at SF Media Academy
Step-by-Step Guide to Sharper iPhone Photos
Follow this systematic approach every time you take a photo to minimize blur and maximize detail.
- Clean the lens: Wipe both front and rear cameras with a lint-free cloth.
- Assess lighting: Shoot in ample light when possible. Avoid backlighting unless using Portrait mode.
- Stabilize your grip: Hold the phone with two hands, arms close to your body.
- Tap to focus: Touch the screen where you want sharpness—usually your subject’s eyes in portraits.
- Wait for focus lock: Watch for the brief flash or square pulse indicating focus confirmation.
- Use volume buttons: Press either volume key to take the photo without jostling the phone.
- Review immediately: Zoom in post-capture to check sharpness. Retake if needed.
Do’s and Don’ts for Clear iPhone Photography
| Do | Don't |
|---|---|
| Use natural light whenever possible | Shoot directly into strong sunlight without adjusting exposure |
| Tap the screen to set focus and exposure | Assume the camera auto-focuses correctly every time |
| Keep lenses clean with a microfiber cloth | Use pocket lint, shirts, or tissues to wipe the lens |
| Use a tripod or stable surface in low light | Move the phone during Night mode exposure |
| Get closer instead of digitally zooming | Blow up distant subjects expecting HD clarity |
| Enable Grid in Camera Settings for better composition | Ignore rule-of-thirds and center everything |
Troubleshooting Persistent Blur: When Fixes Don’t Work
If you’ve followed best practices and still experience consistent blur, consider deeper causes.
Hardware Damage: Dropping your iPhone can misalign internal lenses or damage the OIS (Optical Image Stabilization) module. Symptoms include constant wobbling in the viewfinder, visible distortion, or uneven focus across the frame.
To test, place the phone on a flat surface and open the camera app. Point it at a detailed scene (like text on a book). Slowly pan side to side. If the image jumps erratically or lags, OIS may be compromised.
Software Glitches: Occasionally, iOS bugs affect camera performance. Updating to the latest version often resolves these. To troubleshoot:
- Restart your iPhone.
- Update iOS via Settings > General > Software Update.
- Reset camera settings: Go to Settings > Camera > Preserve Settings and toggle off all options, then restart.
Third-party App Conflicts: Some apps modify camera behavior or run background processes that interfere with native functionality. Try switching to the built-in Camera app exclusively for testing.
Faulty Sensor or Lens Module: If blur persists across all lenses and lighting conditions, professional repair may be necessary. Visit an Apple Store or authorized service provider for diagnostics.
Mini Case Study: Fixing Blurry Photos After a Beach Trip
Sophie, an amateur photographer, noticed her iPhone 14 Pro was producing consistently soft images after a weekend at the coast. Despite perfect lighting and careful framing, beach portraits lacked crispness.
She reviewed her process: she’d been holding the phone with sandy hands and storing it in a beach bag near damp towels. Upon inspection, she found salt residue and moisture film on both rear lenses. After cleaning them thoroughly with a microfiber cloth and distilled water, image clarity improved instantly.
Additionally, she realized she had been using digital zoom to capture distant seagulls, which further reduced quality. By switching to the 2x telephoto lens and avoiding zoom, her wildlife shots became dramatically sharper.
This experience taught her that environmental factors and small habits significantly impact photo quality—even on premium devices.
Essential Checklist for Crisp iPhone Photos
Before every important shoot, run through this checklist to ensure optimal image clarity:
- ✅ Clean front and rear lenses with a microfiber cloth
- ✅ Disable digital zoom; use optical zoom or move closer
- ✅ Tap screen to manually set focus on subject
- ✅ Hold phone steadily with two hands or use support
- ✅ Enable Grid (Settings > Camera > Grid) for better composition
- ✅ Ensure sufficient lighting—avoid dark scenes without Night mode
- ✅ Let Night mode complete its exposure cycle without interruption
- ✅ Avoid extreme temperature changes that cause lens fogging
- ✅ Keep iOS updated to the latest stable version
- ✅ Test all lenses periodically for alignment and clarity
Frequently Asked Questions
Why are my iPhone photos blurry even in good light?
Even in bright conditions, blur can occur due to lens smudges, incorrect focus, or unintentional movement. Make sure you tap to focus on your subject and hold the phone steady. Also, check for dirt on the lens, which can soften images regardless of lighting.
Does using a case affect iPhone camera quality?
Poorly designed cases with raised edges around the lens can trap dust or rub against the lens coating, causing scratches over time. Thick cases may also block one of the multiple lenses on newer models. Choose slim, precision-cut cases that leave the camera module fully exposed and protected from direct contact.
Can I fix a scratched iPhone camera lens?
Minor scratches may not affect image quality significantly, as they’re often outside the active sensor area. Deep scratches that scatter light can degrade sharpness and increase flares. Apple does not offer standalone lens replacements—you’ll need a full rear camera module replacement through Apple or an authorized provider.
Maintaining Long-Term Camera Performance
Preserving your iPhone’s camera capabilities goes beyond taking better photos today—it’s about protecting the hardware for months and years of reliable use.
Regular maintenance includes weekly lens inspections and cleanings, especially if you carry your phone in pockets or bags. Avoid placing it face-down on rough surfaces. When traveling, consider a lens cap accessory or a protective pouch.
Also, manage storage effectively. A full phone can slow down image processing, delaying saves and affecting burst mode or HDR performance. Keep at least 10–15% free space for smooth operation.
Finally, calibrate your habits. Practice mindful photography: pause, compose, stabilize, and focus before capturing. These small disciplines compound into consistently sharp results.
Conclusion: Take Control of Your iPhone’s Photo Quality
Blurry iPhone photos don’t have to be inevitable. With awareness of common pitfalls and disciplined shooting techniques, you can consistently capture sharp, vibrant images worthy of printing or sharing. The camera hardware is capable—the real difference lies in how you use it.
Start today by cleaning your lenses, mastering manual focus, and stabilizing your shots. Apply the checklist before your next outing, and notice the improvement. Great mobile photography isn’t about having the latest model—it’s about understanding and optimizing what you already have.


 浙公网安备
33010002000092号
浙公网安备
33010002000092号 浙B2-20120091-4
Comments
No comments yet. Why don't you start the discussion?