
Smartphone photography has evolved dramatically, but even with advanced hardware, most users never unlock their phone’s full photographic potential. The difference between a good photo and a great one often comes down to how well you understand and use your camera settings. Whether you're on an iPhone or an Android device, default configurations are designed for simplicity—not quality. By adjusting a few key settings, you can significantly improve exposure, focus, dynamic range, and color accuracy. This guide breaks down the most impactful camera settings on both platforms, explains why they matter, and shows you exactly how to configure them.
1. Master Exposure Control: Don’t Let Auto Decide Everything
Exposure determines how bright or dark your image appears. While automatic exposure works in many situations, it often misjudges scenes with high contrast—like a backlit subject or a snowy landscape—and either overexposes highlights or underexposes shadows.
On both iPhone and Android, you can manually adjust exposure after tapping to focus:
- iPhone: Tap to set focus on your subject, then swipe up or down on the small sun icon that appears to increase or decrease brightness.
- Android (Samsung, Google Pixel, etc.): Tap to focus, then use the exposure slider (usually a sun icon) that appears on-screen to fine-tune brightness.
This real-time adjustment gives you precise control. For example, when photographing someone against a bright window, tap their face first, then reduce exposure slightly to avoid turning them into a silhouette.
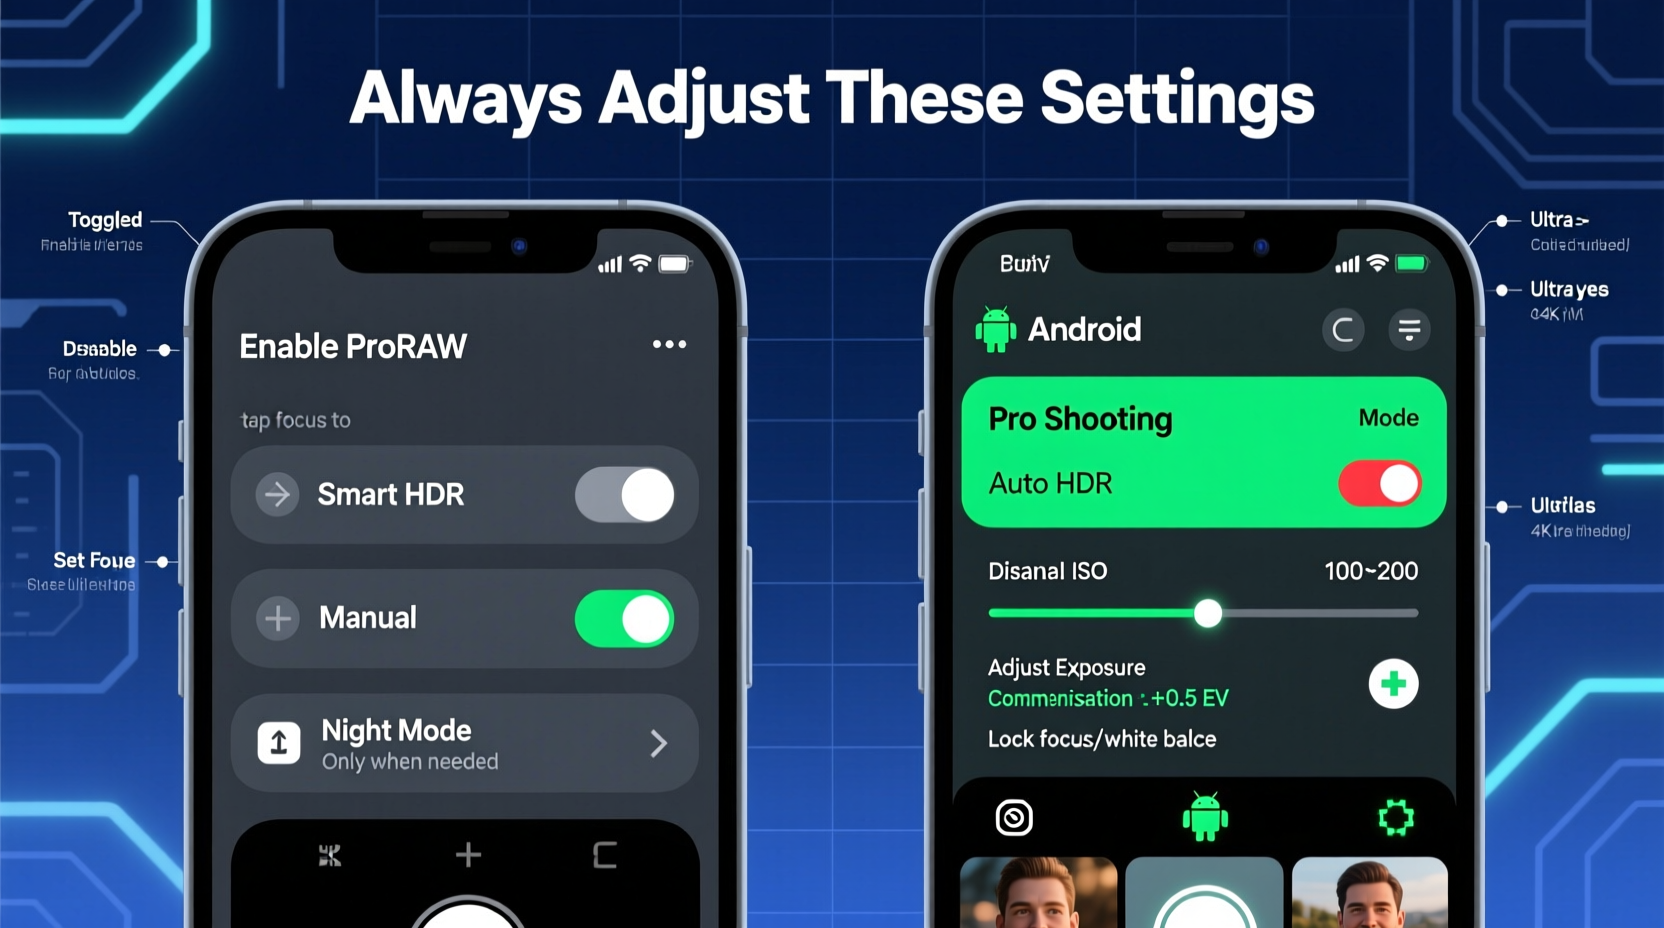
2. Enable Pro Mode (Android) or Use Third-Party Apps (iPhone)
One of the biggest differences between iPhone and Android is access to manual controls. Most Android phones come with a \"Pro\" or \"Manual\" mode in the native camera app, allowing direct control over ISO, shutter speed, white balance, and focus.
iPhones lack this in the stock app, but third-party apps like Halide, ProCamera, or Moment fill the gap. These apps offer full manual control and support RAW capture, giving photographers far more flexibility in post-processing.
“Manual mode isn’t just for pros—it’s for anyone who wants consistent results across different lighting conditions.” — Daniel Kim, Mobile Photography Instructor at SF Photo Labs
Here’s what each setting does:
| Setting | Function | Best Use Case |
|---|---|---|
| ISO | Sensor sensitivity to light | Low ISO (100–200) for daylight; higher only when necessary |
| Shutter Speed | How long the sensor is exposed | Fast (1/500+) for motion; slow (1/4s+) for night shots |
| White Balance | Color temperature correction | Adjust to match lighting (e.g., 5500K for daylight) |
| Focus | Manual focus point selection | Macro shots or when autofocus struggles |
For Android users, explore your phone’s Pro mode regularly. On Pixels, Galaxy devices, and OnePlus models, it’s usually accessible by swiping to “Pro” or “Manual” in the camera mode selector. iPhone users should download a pro app and spend time learning its interface—it pays off in image quality.
3. Choose the Right Aspect Ratio and Resolution
Most people never change their camera’s aspect ratio, sticking with the default 4:3. But choosing the right format can save time in editing and preserve more detail.
The default 4:3 captures the full sensor area, maximizing resolution and dynamic range. However, if you primarily share photos on Instagram (which favors 9:16 or 1:1), shooting in 4:3 means cropping later and losing pixels.
Both platforms allow changing aspect ratios:
- iPhone: Go to Settings > Camera > Preserve Settings > toggle on “Camera Mode.” Then, in the Camera app, swipe to select “Square,” “Portrait,” or “Video” modes, which use different ratios.
- Android: Open the camera, tap the settings gear, and look for “Aspect Ratio” or “Photo Size.” Options vary by brand but commonly include 4:3, 16:9, and 1:1.
If your phone supports multiple resolutions (e.g., 12MP vs. 50MP), consider when to use each:
- High resolution (50MP+): Best for landscapes or prints where detail matters. File sizes are large.
- Standard resolution (12MP): Ideal for social media and everyday use. Smaller files, faster processing.
Many Android phones use pixel binning (combining four pixels into one) to produce cleaner 12MP images in low light. iPhones typically default to 12MP but use Smart HDR to enhance detail.
4. Optimize HDR and Dynamic Range Settings
High Dynamic Range (HDR) helps balance bright skies and dark shadows in a single shot. Both iPhone and Android use computational HDR, but they handle it differently.
iPhone: Smart HDR is always on by default in newer models. It automatically blends multiple exposures. You can enable “Auto HDR” in Settings > Camera, but it’s largely automatic. For more control, shoot in ProRAW (if supported) and adjust HDR in editing.
Android: Most brands have their own version—Samsung calls it “HDR,” Google uses “HDR+,” and OnePlus has “Auto-HDR.” These usually activate automatically, but you can disable or force-enable them in settings.
HDR isn’t always ideal. It can create unnatural-looking skies or halos around objects if overprocessed. Turn it off when:
- Shooting fast-moving subjects (HDR takes multiple frames).
- You want a dramatic, high-contrast look.
- Lighting is already balanced (e.g., overcast days).
“When HDR is forced in flat light, it can make images look flat and lifeless. Know when to let contrast breathe.” — Lena Torres, Editorial Photographer
A practical approach: leave HDR on auto for daily use, but switch to manual mode when shooting architecture or landscapes where you want full control over tone mapping.
5. Fine-Tune Focus and Autofocus Behavior
Autofocus systems on modern smartphones are impressive, but they still benefit from user input. Tapping to focus is basic—but understanding how focus works unlocks sharper images.
On both platforms, tap anywhere on the screen to set focus. A yellow box or circle confirms the point. But many users don’t realize that focus and exposure are linked. If you recompose after tapping, the exposure may shift unless locked.
For moving subjects, use continuous autofocus:
- iPhone: In video mode, swipe left or right on the focus ring during recording to enable continuous tracking. For photos, tap and hold until “AE/AF Lock” appears, then pan slightly to follow motion.
- Android: In Pro mode, select “Continuous Autofocus” (often labeled AF-C). Some Samsung and Pixel models also offer subject tracking in standard mode.
Mini Case Study: Capturing a Sunset Portrait
Maya was taking a portrait of her friend at sunset using her iPhone 15. The sky was brilliant orange, but her friend’s face was too dark. She tapped on her friend’s face to focus, then swiped down on the exposure slider to brighten the subject without blowing out the sky. She held her phone steady for two seconds to ensure focus lock, then took the shot. Later, she edited the photo in Lightroom, recovering slight highlights. The result was a balanced, emotionally rich image that preserved both the warmth of the moment and facial detail.
Had she not adjusted exposure manually, the phone would have averaged the scene, resulting in a washed-out sky and a dark foreground. Her simple tweak made all the difference.
Essential Camera Settings Checklist
Use this checklist before shooting important moments:
- ✅ Clean the lens with a microfiber cloth
- ✅ Tap to focus on your main subject
- ✅ Adjust exposure manually using the brightness slider
- ✅ Enable HDR only if lighting is high-contrast
- ✅ Use 4:3 aspect ratio for maximum quality
- ✅ For Android: Set ISO to 100–200 in daylight; increase only as needed
- ✅ For iPhone: Install a pro camera app if manual control is needed
- ✅ Lock AE/AF when recomposing or shooting motion
- ✅ Consider using grid lines (enable in settings) for better composition
- ✅ Shoot in RAW (if available) for greater editing flexibility
Frequently Asked Questions
Should I always shoot in HDR?
No. HDR is best used in high-contrast scenes like backlit portraits or landscapes with bright skies and dark foregrounds. In evenly lit conditions, HDR can oversaturate colors and reduce contrast. Use it selectively.
Why do my Android photos look over-sharpened?
Many Android manufacturers apply aggressive sharpening and saturation in-camera to make images pop on social media. To reduce this, shoot in Pro mode with neutral profiles or use RAW format. Brands like Google Pixel apply less processing than Samsung or Xiaomi by default.
Can I change the default camera resolution on iPhone?
Not directly in the stock app. iPhones use 12MP as standard, combining data from multiple lenses via computational photography. However, you can shoot in ProRAW (on Pro models) for higher bit-depth and editing headroom. Third-party apps may offer alternative resolutions.
Final Thoughts: Take Control, Not Just Photos
The convenience of smartphone cameras shouldn’t mean surrendering creative control. Both iPhone and Android offer powerful tools—if you know where to look. From manual exposure tweaks to leveraging Pro modes and optimizing HDR, small adjustments yield professional-level improvements. The goal isn’t to complicate photography, but to make intentional choices that reflect your vision.
Great photos aren’t taken—they’re crafted. Whether you’re using an iPhone 15 Pro Max or a Google Pixel 8, the settings you adjust today will define the quality of your memories tomorrow.


 浙公网安备
33010002000092号
浙公网安备
33010002000092号 浙B2-20120091-4
Comments
No comments yet. Why don't you start the discussion?