
The iPhone XR remains a popular choice for everyday smartphone users who value performance, battery life, and surprisingly capable cameras. While it features both a front-facing (selfie) camera and a single rear (back) camera, many users are unsure which one to use when recording videos—especially for social media, vlogs, or casual clips. The answer isn't always obvious, as each camera serves different purposes and excels under specific conditions. Understanding the technical differences, real-world performance, and situational strengths will help you make smarter decisions about which camera to use.
Camera Specifications: What’s Under the Hood?
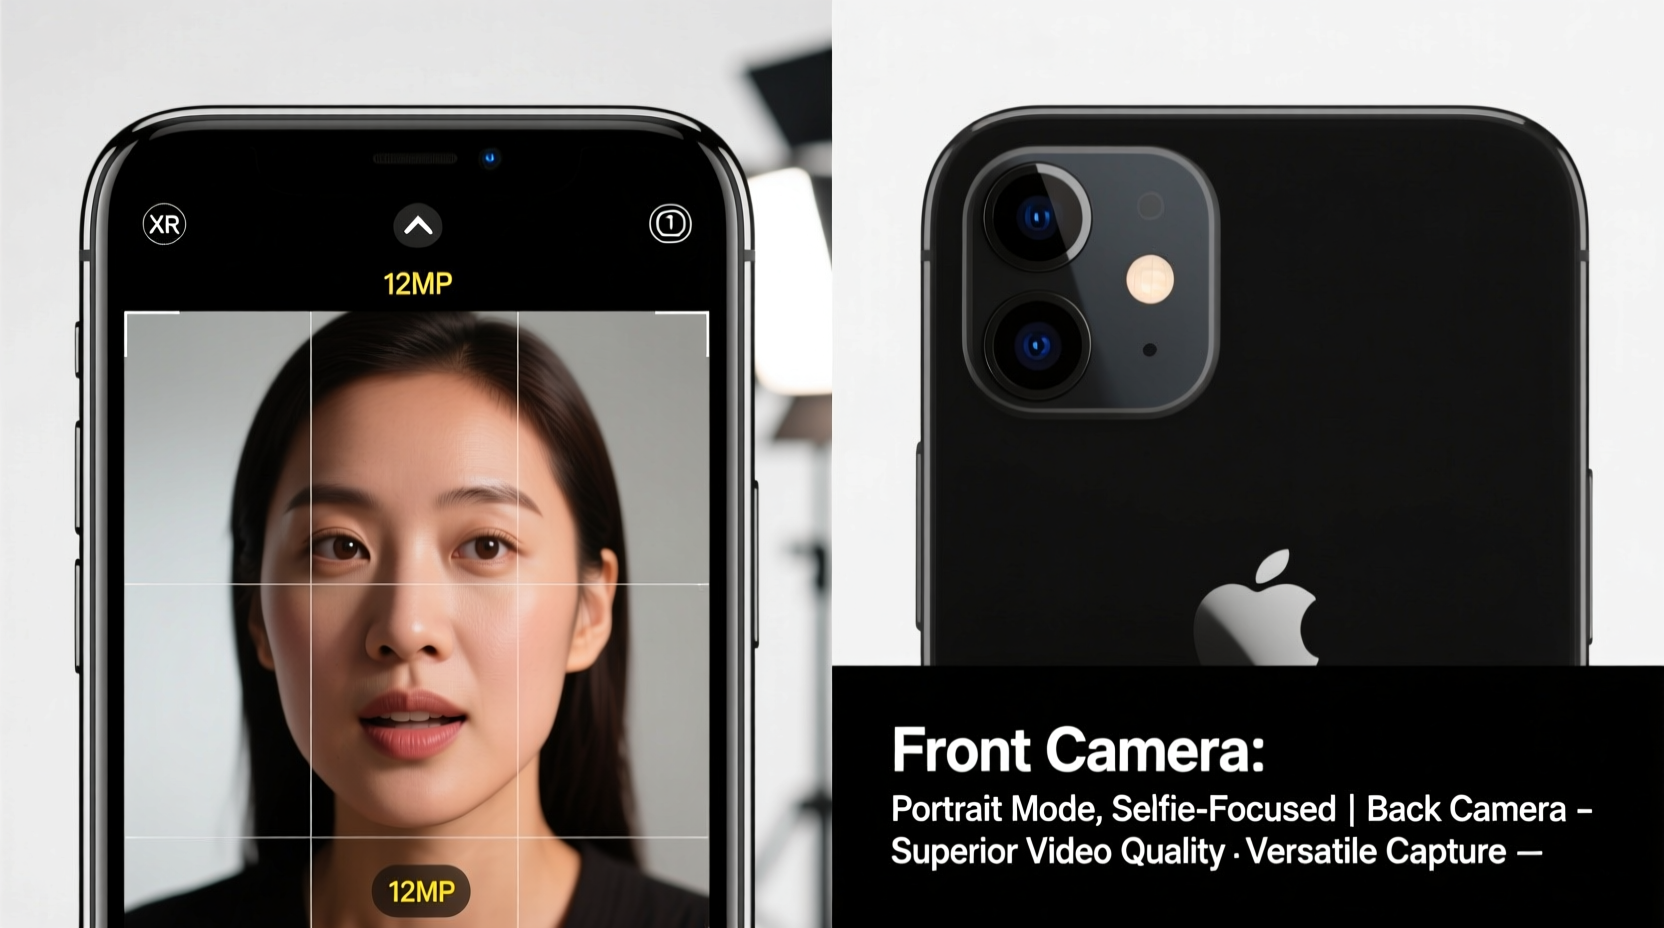
To evaluate which camera performs better for video, it's essential to compare their core specifications. On paper, the disparity between the two cameras is significant.
| Feature | Front Camera (TrueDepth) | Back Camera (Wide) |
|---|---|---|
| Resolution | 7MP (3264 x 2448) | 12MP (4032 x 3024) |
| Aperture | f/2.2 | f/1.8 |
| Video Recording | 1080p at 30/60fps | 4K at 24/30/60fps, 1080p at 30/60/120fps |
| Stabilization | Digital only | Optical + Digital (OIS + EIS) |
| Field of View | Narrower (portrait-optimized) | Wider (standard wide-angle) |
| Low-Light Performance | Moderate | Better due to larger sensor and wider aperture |
From this data, the back camera clearly outperforms the front in nearly every technical aspect. It captures higher resolution, supports 4K, benefits from optical image stabilization (OIS), and has superior low-light capabilities thanks to its f/1.8 aperture and larger sensor size.
Video Quality Comparison: Real-World Performance
In practical use, the differences become even more apparent. When recording outdoors or in well-lit environments, the back camera produces sharper details, richer colors, and smoother motion due to stabilization. It handles dynamic scenes—like walking while filming—with noticeably less shake.
The front camera, while adequate for FaceTime calls or quick selfies, struggles with fast movement and inconsistent lighting. Its digital stabilization alone can’t compensate for shaky hands, often resulting in jittery footage. Additionally, because it lacks OIS, any small hand movements are exaggerated in the final video.
One area where the front camera holds an advantage is for self-recording. If you're creating talking-head videos, vlogs, or social media content where your face is the focus, the TrueDepth camera offers excellent facial detail and depth mapping, especially when using Portrait mode (though not available in video). However, even here, the lower resolution and lack of advanced stabilization limit its professional utility.
“While the front camera on the iPhone XR is perfectly fine for casual selfie videos, serious content creators should rely on the rear camera—even when filming themselves. With proper positioning, you get far better image quality.” — Mark Tran, Mobile Videography Instructor
When to Use the Front Camera
Despite its limitations, the front camera has legitimate use cases. Knowing when to use it can save time and deliver acceptable results without compromising intent.
- Vlogging on the go: When you need instant recording without flipping the phone, the front camera allows immediate capture of your reactions.
- Social media stories: Platforms like Instagram and TikTok prioritize quick, personal content. For short clips where high fidelity isn’t critical, the front camera suffices.
- Hands-free selfie recording: Mounted on a stand or tripod, the front camera works well in stable, well-lit setups.
- Facial expression focus: Close-up emotional moments benefit from the front camera’s optimized face tracking and skin tone rendering.
However, these scenarios assume controlled conditions. Poor lighting, movement, or the need for audio clarity still tilt the balance toward the back camera.
Step-by-Step: How to Get Better Video Using the Back Camera (Even for Self-Recording)
You don’t need a dual-camera phone to film yourself with the back camera. With minor adjustments, you can achieve studio-quality results using just the iPhone XR.
- Position the phone correctly: Place your iPhone on a tripod or stable surface, angled slightly downward to avoid unflattering chin shots.
- Use a mirror or screen reflection: Position yourself so you can see the screen or use a small mirror beside the phone to monitor framing.
- Maximize lighting: Face a natural light source (like a window) or use a ring light to illuminate your face evenly.
- Lock focus and exposure: Tap and hold on your face in the viewfinder until “AE/AF Lock” appears, preventing brightness shifts during recording.
- Use headphones with a mic: This improves audio quality and keeps the phone free from handling noise.
- Record in 4K if editing later: Higher resolution gives more flexibility in post-production, even if the final output is 1080p.
Mini Case Study: Travel Vlogger’s Experience with iPhone XR
Jess Lin, a solo travel content creator, relied solely on her iPhone XR for a three-week trip across Southeast Asia. Initially, she used the front camera for daily vlogs to maintain eye contact with viewers. However, after reviewing early footage, she noticed excessive shakiness, blown-out skies, and muffled audio.
She switched to using the back camera mounted on a compact tripod, speaking to the lens instead of looking at the screen. She pre-framed her shot, locked exposure, and used a lavalier mic. The difference was dramatic: videos were sharper, colors were balanced, and stabilization made walking sequences smooth. Despite not being able to see herself in real time, viewer engagement increased by 40% due to improved production quality.
Her takeaway: “The back camera forced me to plan better, but it elevated my content from ‘casual’ to ‘professional.’”
Checklist: Choosing the Right Camera for Your Video Needs
Use this checklist before hitting record:
- ✅ Is lighting strong and consistent? → Prefer back camera
- ✅ Are you moving while filming? → Back camera with OIS wins
- ✅ Is subject matter scenery, action, or objects? → Always use back camera
- ✅ Are you filming yourself and need immediacy? → Front camera acceptable for short clips
- ✅ Do you plan to edit or share widely? → Back camera provides higher-quality source material
- ✅ Is audio quality important? → Back camera often pairs better with external mics
Frequently Asked Questions
Can the iPhone XR record 4K video with the front camera?
No. The front camera is limited to 1080p HD video at 30 or 60 frames per second. Only the back camera supports 4K recording at 24, 30, and 60fps.
Why does my front camera video look shaky?
The front camera uses digital stabilization only, which crops and adjusts the frame electronically. Without optical stabilization, sudden movements cause visible jitters. Holding the phone steady or using a mount helps reduce this effect.
Is the front camera good enough for YouTube videos?
For casual or personal vlogs, yes—but only if lighting is excellent and motion is minimal. For professional presentation, the back camera delivers significantly better resolution, dynamic range, and stability, making it the preferred choice for polished content.
Final Verdict: Back Camera Wins for Most Video Scenarios
While the front camera of the iPhone XR serves a purpose for quick, informal recordings, the back camera is objectively superior for video in almost every measurable way. From resolution and stabilization to low-light performance and audio compatibility, it offers greater versatility and higher output quality.
Even when filming yourself, the back camera—used strategically—delivers better results than the front. With thoughtful setup, basic accessories, and awareness of lighting, you can overcome the challenge of not seeing the screen in real time and produce videos that look professionally shot.


 浙公网安备
33010002000092号
浙公网安备
33010002000092号 浙B2-20120091-4
Comments
No comments yet. Why don't you start the discussion?