
A ceiling-mounted floating Christmas tree—suspended mid-air with no visible support, appearing to hover like a celestial ornament—is no longer science fiction. It’s a growing trend in modern holiday design, especially among architects, interior stylists, and homeowners seeking bold, minimalist, or gallery-inspired seasonal statements. But unlike traditional floor-standing trees, this installation sits at the intersection of festive creativity and structural responsibility. The short answer is yes—it’s possible. The critical follow-up is: *only if engineered correctly, anchored to load-bearing structure, and verified for safety*. This article walks through the real-world feasibility, material and hardware requirements, step-by-step installation protocol, common pitfalls, and expert-backed safeguards—so you don’t trade wonder for worry.
Why “Floating” Is Misleading—and Why That Matters
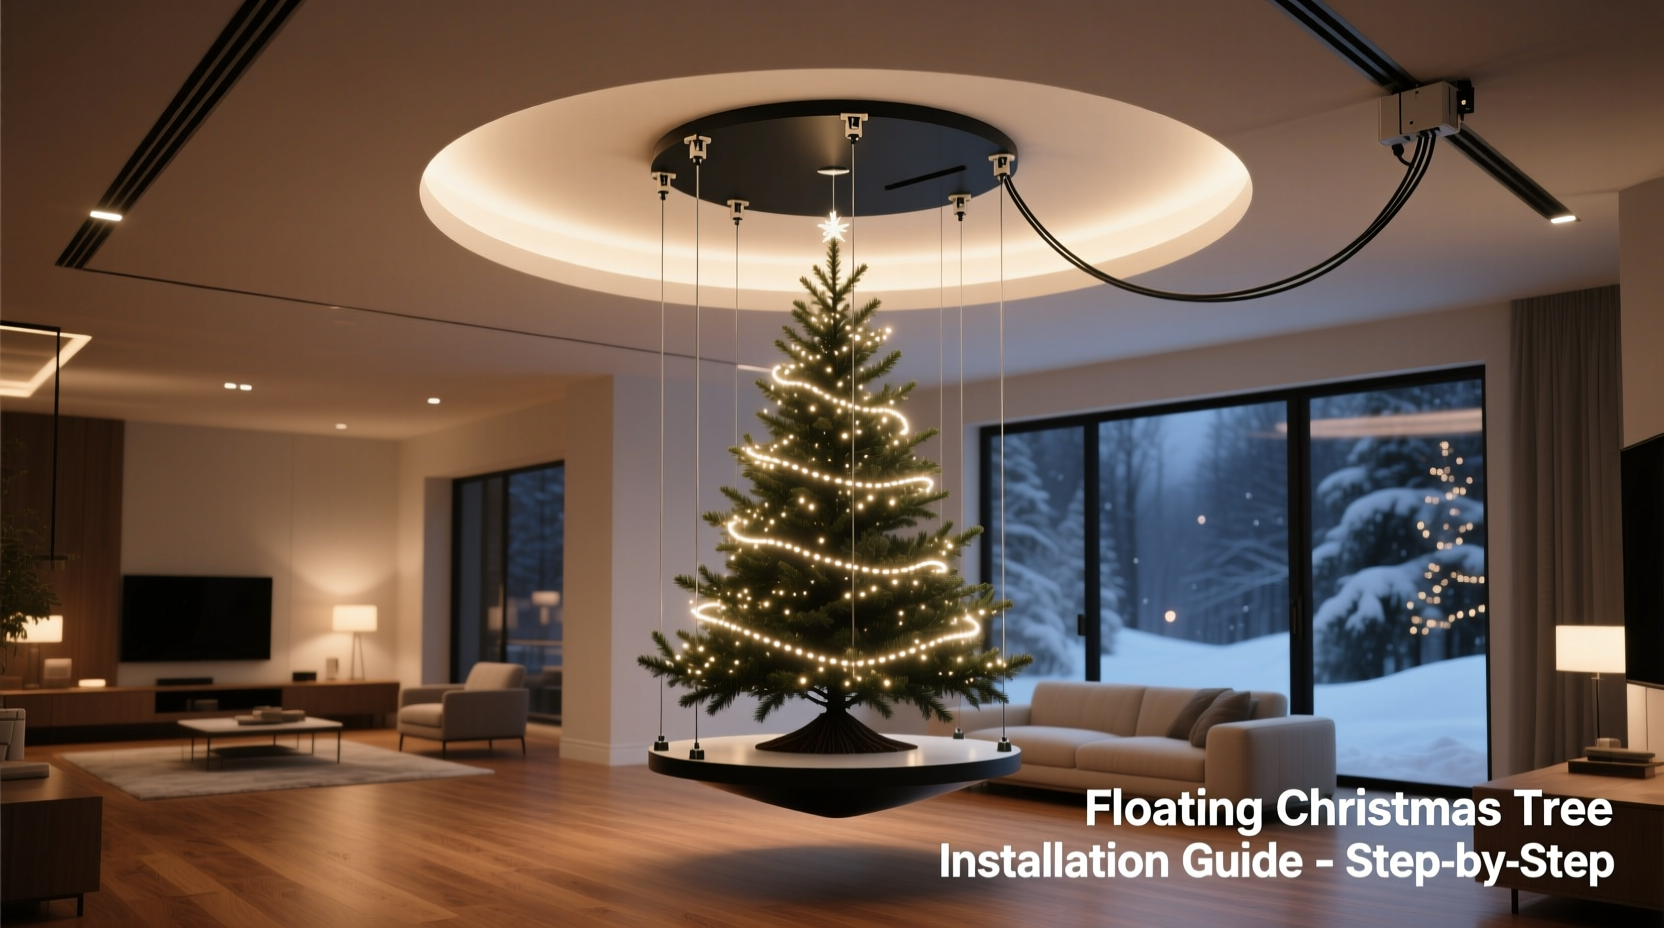
The term “floating” suggests weightlessness, but physics doesn’t negotiate with tradition. What appears to be a floating tree is actually a precisely counterbalanced, rigidly suspended system—typically using aircraft-grade stainless steel cable, concealed rigging points, and often a custom internal frame. There is no magic; there is only calibrated tension, distributed load, and unyielding adherence to building codes.
Most residential ceilings are not designed to carry concentrated vertical loads beyond light fixtures (usually 15–30 lbs). A 4- to 6-foot artificial tree—including ornaments, lights, and internal support—can easily weigh 25 to 55 lbs. Add dynamic forces—like accidental bumps, air currents from HVAC vents, or even vibration from footsteps on an upper floor—and the effective load may spike by 30–50%. That’s why visual deception must never override structural truth.
Feasibility Assessment: 5 Non-Negotiable Conditions
Before purchasing hardware or selecting a tree, confirm all five of these conditions. If any one fails, the project should be paused or redesigned.
- Joist Access & Orientation: You must identify ceiling joists (typically 2×6 or 2×8 lumber spaced 16\" or 24\" apart) using a stud finder with deep-scan capability—or better, verify with an inspection hatch or attic access. Joists must run perpendicular to your intended suspension axis for optimal load distribution.
- Minimum Joist Depth & Species: Standard southern pine or Douglas fir joists at 2×6 or larger are acceptable for trees up to 5 ft. For taller trees (5.5–7 ft), 2×8 or laminated veneer lumber (LVL) joists are strongly advised. Avoid spanning across multiple joists without engineered bridging.
- Tree Weight Limit: Total assembled weight—including stand frame (if used), branch arms, lights, ornaments, and internal rigging—must stay under 60% of the rated static load capacity of the anchoring point. For a typical 2×6 SPF joist, that’s ~75 lbs max per anchor. Conservative target: ≤45 lbs total.
- Ceiling Height & Clearance: Minimum 9-foot ceiling height recommended. You need at least 18 inches of vertical clearance between the top of the tree and the ceiling surface to accommodate rigging hardware, adjustment space, and safety margin. Lower ceilings increase lateral sway risk and reduce visual impact.
- Electrical Integration Plan: All lighting must be hardwired via UL-listed low-voltage (12–24V DC) systems or use battery-operated LED strings with integrated timers. No standard 120V extension cords dangling from the ceiling—this violates NEC Article 400.8(1) and creates fire and trip hazards.
Hardware & Materials: What Actually Works (and What Doesn’t)
Off-the-shelf “floating shelf” kits or picture-hanging wire will fail. This application requires industrial-grade components rated for *static suspension*, not shear or pull-out force. Below is a comparison of proven solutions versus high-risk alternatives.
| Component | Recommended Specification | Why It’s Required | Avoid |
|---|---|---|---|
| Anchors | 1/4\" or 5/16\" lag screws with minimum 3\" thread engagement into solid joist; washer + locknut included | Provides >300 lbs pull-out resistance when properly torqued (per ASTM D1761) | Drywall toggles, plastic anchors, self-tapping screws |
| Cable | 7×19 stainless steel aircraft cable, 1/16\" or 3/32\" diameter, with swaged thimbles and Crosby-style cable clamps | Corrosion-resistant, non-stretch, and certified for overhead lifting (ASME B30.9 compliant) | Nylon cord, fishing line, braided polyester rope, zip ties |
| Tree Frame | Custom aluminum or powder-coated steel chassis with integrated top-mount plate and balanced lower counterweight mount | Prevents torque-induced rotation; enables fine-tuning of center-of-gravity | Wood dowels, PVC pipe, unbraced wire frames |
| Lighting | UL 2108–listed 12V LED stringers with IP65 rating; powered via Class 2 transformer mounted in accessible junction box | Eliminates shock/fire risk; supports continuous operation; dimmable and flicker-free | Standard mini-lights, C7/C9 bulbs, plug-in transformers near ceiling |
| Control | Wi-Fi–enabled smart relay (e.g., Shelly Pro 2) wired to transformer input, controllable via app or voice | Enables scheduling, remote off/on, and energy monitoring without physical access | Smart plugs daisy-chained above ceiling, manual switches hidden in attic |
Step-by-Step Installation Protocol (with Safety Checks)
This sequence assumes you’ve passed the feasibility assessment and have access to an attic or ceiling cavity. If not, hire a licensed contractor for joist verification and anchoring.
- Map & Mark Joists: Use a magnetic stud finder and confirm with a 1/8\" drill probe. Mark centerlines every 16\". Measure twice, drill once.
- Design Suspension Geometry: Sketch a triangle: two anchor points (A and B) on adjacent joists, 24–36\" apart horizontally; third point (C) at tree apex. Ideal apex angle = 90°–110°. Narrower angles increase horizontal force on anchors.
- Install Primary Anchors: Pre-drill pilot holes 1/16\" smaller than lag screw shank. Drive anchors fully using a torque wrench set to manufacturer spec (e.g., 75 in-lbs for 1/4\" lag into SPF). Tighten locknuts firmly.
- Assemble Tree Chassis: Mount tree onto its custom frame. Attach top mounting plate to apex. Secure lower counterweight (e.g., 3–5 lb steel disc encased in felt) directly beneath center of mass—verified using a plumb line and bubble level.
- Rig & Tension Cables: Thread cables through thimbles, loop around anchors, and secure with three Crosby clamps per termination (per ASME B30.9: clamp saddles must face live end). Tighten clamps alternately, then apply final tension using a turnbuckle or ratchet strap—measuring sag with a laser level. Max allowable deflection: 1/4 inch at midpoint.
- Verify Balance & Stability: Gently displace tree 2 inches laterally and release. It should return to center within 2 seconds with minimal oscillation. If it rotates or swings >3 seconds, reposition counterweight or adjust cable lengths.
- Final Electrical Integration: Route low-voltage wiring through discrete knockouts or grommeted holes. Terminate transformer inside an accessible, ventilated junction box mounted to a joist—not hanging freely. Label all circuits clearly.
“The illusion of floating relies entirely on invisible precision. One misaligned anchor or undersized cable introduces cumulative stress that accelerates fatigue—especially during thermal cycling in heated homes. This isn’t decoration; it’s temporary architecture.” — Rafael Mendoza, P.E., Structural Consultant for Retail & Residential Installations
Real-World Case Study: The Brooklyn Loft Installation
In December 2023, designer Lena Cho installed a 5.5-foot frosted silver tree in a converted Williamsburg loft with exposed Douglas fir joists and 11-foot ceilings. Her client wanted “zero-floor footprint, maximum drama.” She began with a structural review: joists were 2×10, spaced 16\", with 3.5\" depth available above drywall. Using a digital load calculator, she determined dual 5/16\" lag anchors could safely hold 128 lbs static load—well above her tree’s 41.2-lb total (verified on calibrated scale).
She built a triangular aluminum frame with integrated LED channels and mounted a 4.5-lb tungsten counterweight 14\" below the tree’s geometric center. Cables were tensioned to 85 lbs each using a handheld dynamometer. Final testing included simulated HVAC gusts (using a 200 CFM fan at 3 ft distance) and timed swing decay measurement: 1.8 seconds. The tree remained perfectly still during a 72-hour observation period—including overnight temperature drops from 72°F to 64°F. It stayed installed through New Year’s Day with zero maintenance.
Key takeaway: Success hinged not on novelty, but on methodical verification at every stage—from joist density to thermal expansion tolerance.
Frequently Asked Questions
Can I hang a real Christmas tree from the ceiling?
No—real trees dehydrate rapidly, shedding needles and losing mass unpredictably. Their water reservoir adds unstable weight shifts, and sap can corrode metal rigging. More critically, dry foliage is highly flammable. All ceiling-mounted trees must be high-quality artificial models with flame-retardant (NFPA 701–certified) branch materials and non-combustible frames.
Do I need a permit for a ceiling-mounted tree?
Permit requirements vary by municipality, but most jurisdictions exempt decorative installations under 50 lbs and under 12V power—provided no structural modification occurs. However, if your installation involves cutting joists, adding blocking, or running new electrical circuits (even low-voltage), a permit and inspection are legally required. When in doubt, contact your local building department with engineering sketches before starting.
How long can a ceiling-mounted tree safely remain installed?
Maximum recommended duration is 60 days. Prolonged suspension—even with perfect balance—induces micro-creep in cable strands and gradual compression in wood fibers. After 60 days, inspect all anchors for movement, cables for fraying or kinking, and counterweights for slippage. Retension cables and reverify balance before rehanging next season. Document all inspections in a simple logbook.
Conclusion: Wonder Demands Responsibility
A ceiling-mounted floating Christmas tree is more than a decoration—it’s a quiet declaration of intentionality. It says you value both beauty and integrity, spectacle and substance. But that elegance comes with obligation: to understand load paths, respect material limits, and prioritize safety over speed. It means measuring twice, consulting experts when uncertain, and walking away from shortcuts that look convincing in photos but compromise real-world stability. When executed with discipline, this installation delivers something rare in modern living: a moment of serene, gravity-defying joy—anchored not in illusion, but in expertise, care, and quiet confidence.
Don’t rush the suspension. Don’t guess the joists. Don’t ignore the counterweight. Your home deserves wonder that lasts—and that begins with doing it right.


 浙公网安备
33010002000092号
浙公网安备
33010002000092号 浙B2-20120091-4
Comments
No comments yet. Why don't you start the discussion?