
Nothing disrupts a morning routine like pressing the brew button on your Keurig only to be met with silence, slow drips, or incomplete dispensing. While Keurig machines are known for their convenience, they’re not immune to mechanical hiccups. The good news? Most brewing failures stem from simple, fixable causes. With a few targeted steps, you can often restore full function without calling a technician or replacing the unit.
This guide walks through the most common reasons a Keurig stops brewing properly—and how to resolve them quickly. Whether your machine isn’t brewing at all, only dispensing partial cups, or making strange noises, these practical solutions address root causes, not just symptoms.
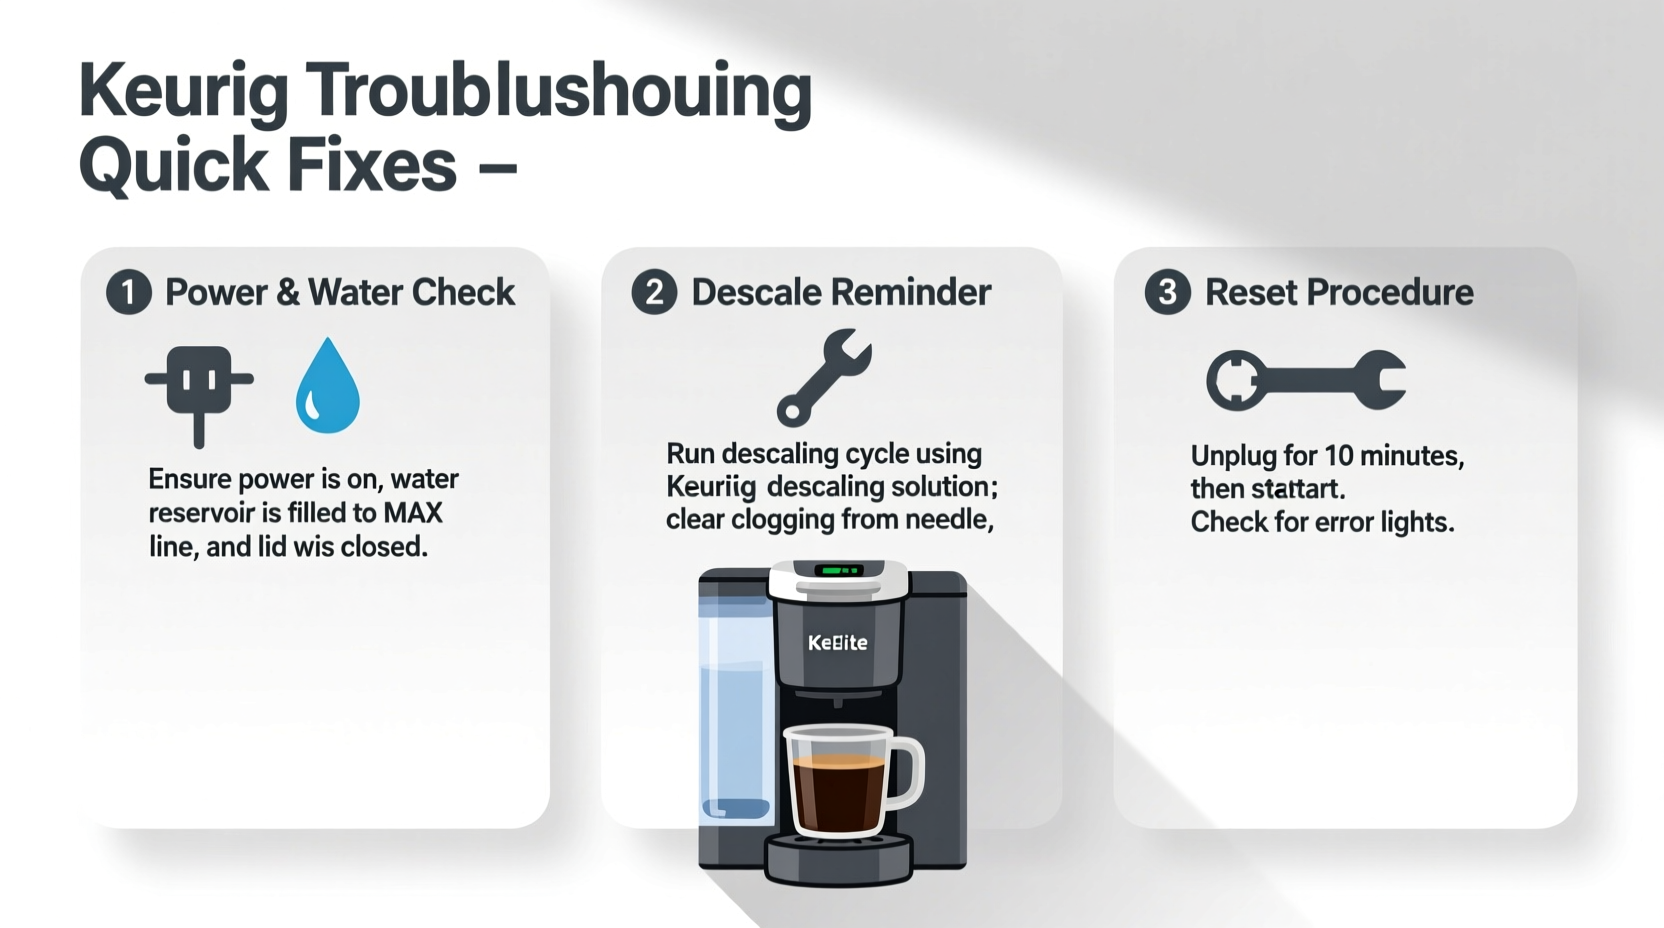
Why Your Keurig Might Not Be Brewing Properly
Brewing problems typically fall into three categories: water flow issues, pod mechanism faults, or internal blockages. Before assuming hardware failure, consider everyday factors like mineral buildup, improper pod placement, or airlocks in the system. Many users overlook basic maintenance until performance degrades significantly.
According to appliance repair expert Carlos Mendez, “Over 70% of Keurig service calls could have been avoided with regular descaling and proper cleaning.” Mineral deposits from hard water are the number one culprit behind reduced water pressure and inconsistent brewing.
“Over 70% of Keurig service calls could have been avoided with regular descaling and proper cleaning.” — Carlos Mendez, Appliance Repair Technician
Step-by-Step Troubleshooting Guide
Follow this logical sequence to diagnose and fix brewing issues efficiently. Start with the simplest checks before moving to deeper interventions.
- Check Water Reservoir Level and Placement: Ensure the reservoir is filled above the minimum line and securely seated. A misaligned tank interrupts the sensor that signals the pump to activate.
- Inspect Pod Holder and Needle Alignment: Open the lid and verify that the K-Cup holder is free of coffee grounds or debris. Misalignment can prevent puncturing.
- Listen for Pump Activation: When you press brew, you should hear a low hum. No sound suggests an electrical or pump issue.
- Test Brew Without a Pod: Run a cycle with no K-Cup inserted. If water flows, the issue may be with pod seating or needle clogs.
- Perform a Reset: Unplug the machine for 5 minutes to reset internal circuitry. This resolves temporary software glitches in digital models.
Common Fixes for Specific Brewing Problems
Different symptoms point to different underlying issues. Use this reference table to match your problem with the right solution.
| Issue | Possible Cause | Solution |
|---|---|---|
| No water dispensed | Clogged exit needle, airlock, empty reservoir | Clean needles, burp system, refill water |
| Slow drip or partial cup | Mineral buildup, low water pressure | Descaling recommended |
| Machine makes grinding noise | Foreign object in pod chamber, stuck plunger | Disassemble and inspect pod holder |
| Leaking during brew | Cracked pod, overfilled reusable filter, damaged gasket | Replace pod, clean filter, check seals |
| Water runs through too fast | Pod not sealed, puncture error | Reinsert pod, clean entrance needle |
Cleaning the Exit and Entrance Needles
The sharp needles that pierce K-Cups can become blocked by coffee grounds or mineral deposits. To clean:
- Unplug the machine and open the pod lid.
- Use a paperclip or small brush to gently clear both the top (entrance) and bottom (exit) needles.
- Flush with warm water or run a vinegar solution through after cleaning.
Be careful not to bend the needles—this can lead to permanent misalignment.
Descale Your Keurig: The Most Overlooked Fix
Scale buildup from calcium and magnesium in tap water restricts water flow and reduces heating efficiency. Even if your machine appears to work, scale can cause long-term damage. Keurig recommends descaling every 3–6 months, depending on usage and water hardness.
To descale:
- Empty the water reservoir and fill it with Keurig Descaling Solution or a 50/50 mix of white vinegar and water.
- Place a large mug on the drip tray and run a brew cycle (without a K-Cup) until the \"Add Water\" light appears.
- Let the machine sit for 30 minutes to allow the solution to dissolve deposits.
- Discard remaining liquid and rinse the reservoir thoroughly.
- Refill with fresh water and run 3–5 cleansing brews to flush out residue.
Troubleshooting Checklist
Keep this checklist handy when your Keurig acts up. Go through each item systematically to identify and resolve the issue.
- ✅ Is the power cord securely plugged in?
- ✅ Is the water reservoir filled and properly seated?
- ✅ Is there a K-Cup correctly placed and sealed?
- ✅ Are the entrance and exit needles clean and unobstructed?
- ✅ Has the machine been descaled recently?
- ✅ Have you tried resetting the machine by unplugging for 5 minutes?
- ✅ Is the drip tray overflow sensor blocked?
- ✅ Are you using a compatible or non-counterfeit pod?
Many users report success simply by ensuring the drip tray isn’t overflowing. Some models automatically disable brewing when the tray is full to prevent spills.
Real Example: How Sarah Fixed Her Keurig in 20 Minutes
Sarah, a remote worker from Portland, noticed her Keurig K-Classic wasn’t brewing past half a cup. She had already replaced the water and tried different pods. Frustrated, she was about to order a new machine when she remembered reading about needle clogs.
She unplugged the unit, opened the pod chamber, and inspected the bottom needle. Using a straightened paperclip, she removed a small chunk of compressed coffee grounds blocking the tip. After running two water-only cycles, the machine brewed a full cup normally. “I saved $100 and learned to clean the needles monthly,” she said.
Frequently Asked Questions
Why does my Keurig make noise but no water comes out?
This usually indicates an airlock in the water line. Try removing the reservoir, holding the brew button for 5 seconds to release pressure, then refilling and reseating the tank. Running a few water-only cycles can also dislodge trapped air.
Can I use CLR instead of vinegar to descale my Keurig?
Yes, but with caution. CLR (Calcium, Lime & Rust remover) is more aggressive than vinegar and must be diluted according to instructions. Rinse thoroughly afterward with multiple water cycles to avoid chemical residue in your next brew.
Why won’t my Keurig recognize the cup size I selected?
Digital models sometimes glitch due to software errors. Unplug the machine for 5 minutes, then restart. If the issue persists, check for firmware updates (available on select newer models via Keurig’s app).
Final Tips for Long-Term Keurig Performance
Maintaining consistent brewing performance isn’t complicated—but it does require routine attention. Treat your Keurig like any precision appliance: regular care prevents costly repairs and extends lifespan. Wipe down the exterior weekly, clean the pod holder monthly, and descale on schedule.
Avoid using third-party pods excessively—they vary in seal quality and can leave behind residue that affects brewing consistency. Stick to reputable brands or clean reusable filters immediately after each use.
“The key to a reliable Keurig is consistency. Five minutes of maintenance a month saves hours of frustration later.” — Lisa Tran, Home Appliance Consultant
Take Action Today
Your Keurig doesn’t need to be replaced just because it’s underperforming. Most brewing issues are solvable with basic troubleshooting and a little patience. Pick one fix from this guide—whether it’s descaling, needle cleaning, or a system reset—and apply it now. Chances are, you’ll have your morning brew back in minutes.


 浙公网安备
33010002000092号
浙公网安备
33010002000092号 浙B2-20120091-4
Comments
No comments yet. Why don't you start the discussion?