
Corsets have evolved from historical undergarments into modern fashion statements, body-shaping tools, and even therapeutic wear. Yet, no matter the purpose, a corset only performs well when it's properly laced. Too loose, and it won’t shape or support; too tight, and it can cause discomfort or injury. Achieving that ideal balance requires technique, patience, and understanding. This guide breaks down the entire process—from choosing the right lacing method to adjusting for comfort—so you can wear your corset confidently and safely.
Understanding Corset Lacing Basics
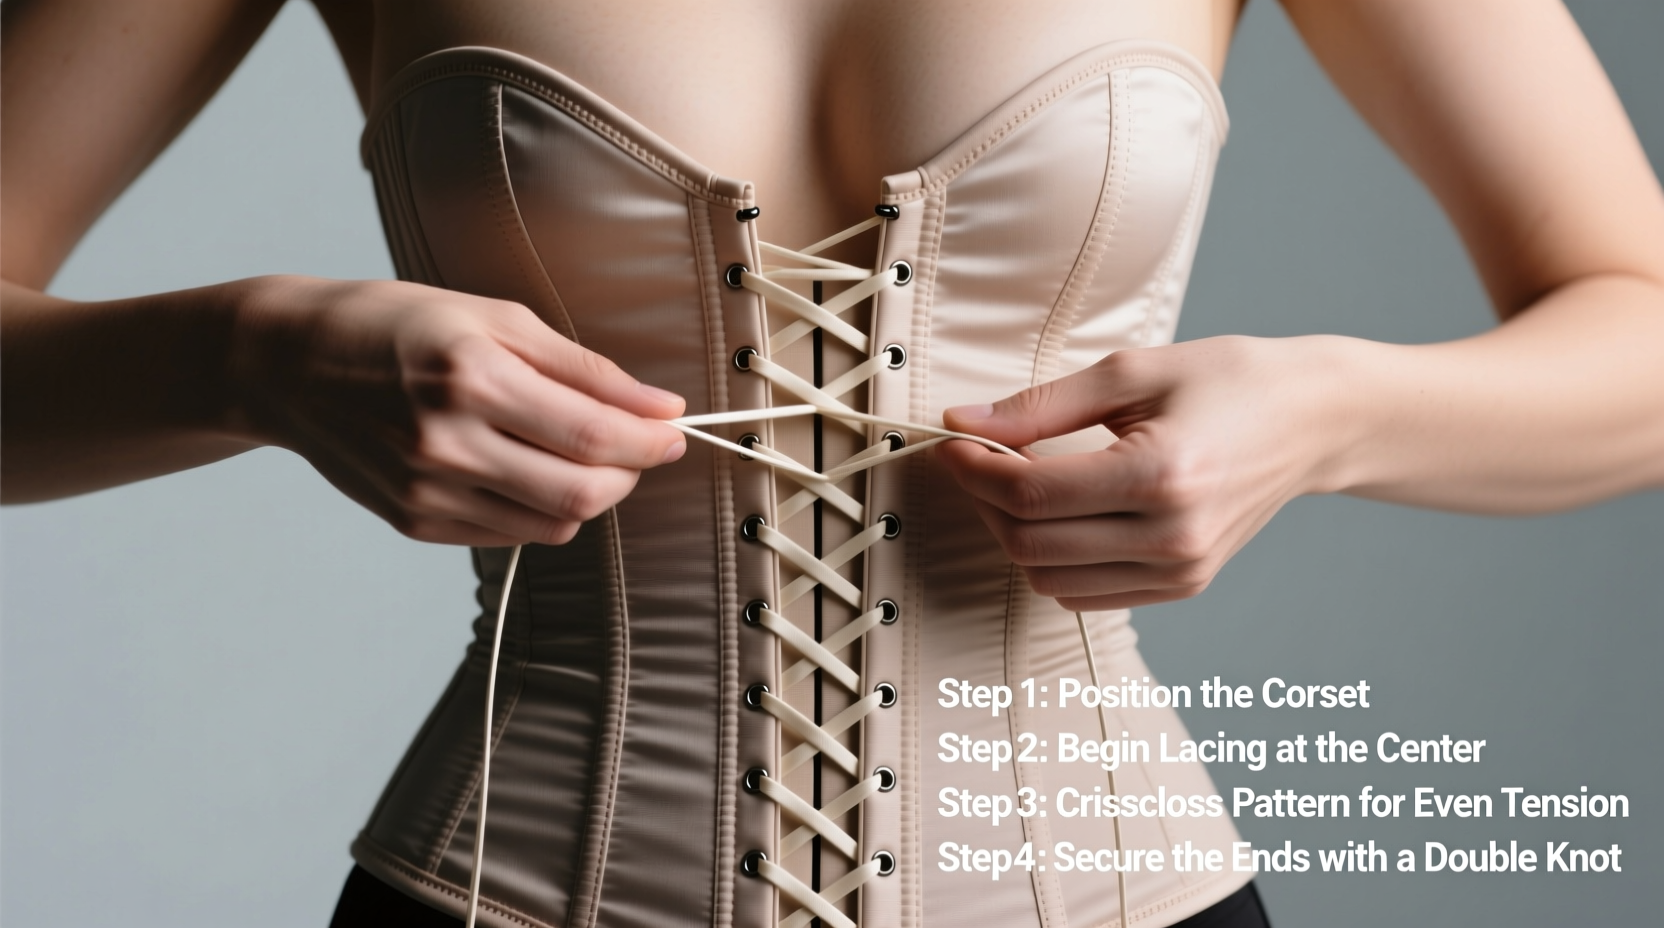
Before tightening the first lace, it’s essential to understand how corset lacing works. The back of most corsets features two sets of grommets through which a single lace is threaded in a crisscross pattern. This creates tension across the torso, allowing the corset to compress and reshape the waist while supporting the spine and posture.
The goal isn’t maximum tightness but optimal fit: snug enough to provide structure and shaping, yet flexible enough to allow natural breathing and movement. Proper lacing distributes pressure evenly, prevents gapping at the back, and protects the fabric and bones from strain.
“Many people damage their corsets—or hurt themselves—by rushing the lacing process. Take your time. A well-laced corset should feel supportive, not suffocating.” — Lydia Chen, Historical Costuming Conservator & Corset Fit Specialist
Step-by-Step Guide to Perfect Corset Lacing
Follow this detailed sequence to lace your corset correctly, whether you're dressing independently or receiving help from another person.
- Prepare the corset: Lay it flat with the busk (front closure) facing up. Ensure the laces are fully loosened and the back panels are open.
- Start with the bottom: Insert one end of the lace through the bottom-left grommet from the outside in. Pull about 6–8 inches through so you have enough length to work with.
- Cross diagonally upward: Thread the lace diagonally across to the right side, going into the next higher grommet from the inside out.
- Continue the crisscross pattern: Repeat this diagonal crossing until all grommets are laced. Keep tension light during this phase—don’t pull tightly yet.
- Leave equal ends: Once both sides are connected, ensure the lace ends are roughly equal in length for balanced pulling.
- Begin tightening from the top and bottom: Standing or sitting upright, gently pull on both lace ends. Start by drawing in the top and bottom sections first, then gradually work toward the middle. This ensures even compression and prevents puckering.
- Close the gap progressively: Use small, controlled tugs rather than one strong pull. Aim for a 2–3 inch gap at the back if you’re new to waist training; experienced wearers may close it further depending on flexibility and corset type.
- Secure with a modesty panel (optional): If there’s visible skin between the back edges, insert a modesty panel to protect your skin and prevent chafing.
- Tie off the laces: Cross the two ends over each other and tie a simple bow or double knot at the base of the lacing. Avoid tying too high, where it might dig into the lower back.
Choosing the Right Lace and Technique
Not all laces are created equal. The material, thickness, and length affect how smoothly your corset closes and how long the lacing lasts.
| Lace Type | Best For | Avoid If |
|---|---|---|
| Cotton Flat Braid | Daily wear, beginners | You need extra strength for tightlacing |
| Polyester Round Cord | Heavy-duty use, tightlacing | Skin sensitivity (can be abrasive) |
| Satin Ribbon | Cosplay, decorative purposes | Support or prolonged wear |
| Waxed Cord | Reduced slippage, structured fits | Allergic to wax or prefer soft texture |
For most users, a 5–6 yard cotton flat braid lace between ¼” and ⅜” wide offers the best combination of durability, grip, and comfort.
Common Lacing Mistakes and How to Avoid Them
- Rushing the process: Yanking the laces tight immediately can warp the boning or tear grommets. Always tighten gradually.
- Starting in the middle: Pulling from the center first causes buckling. Always begin at the top and bottom.
- Uneven tension: One side tighter than the other leads to twisting. Check alignment frequently.
- Over-tightening too soon: New corsets require seasoning. Wear them loosely for the first few wears to break them in.
- Ignoring discomfort signals: Sharp pain, numbness, or difficulty breathing mean you’ve gone too far. Loosen immediately.
Real-World Example: Sarah’s First Corset Experience
Sarah, a 28-year-old designer attending her first historical renaissance fair, purchased a custom-fit underbust corset for authenticity and posture support. Excited but nervous, she laced it tightly in front of the mirror, pulling aggressively from the middle. Within minutes, she felt sharp pain under her ribs and noticed red marks forming on her back.
After consulting a costuming expert, she learned she had misaligned the lacing and applied uneven pressure. She re-laced using the top-and-bottom method, started with a 3-inch gap, and wore it for just an hour the first day. Over two weeks, she gradually increased wear time and reduced the gap. By the event, she wore it comfortably for eight hours—pain-free and confident.
This case highlights why patience and proper technique outweigh immediate results.
Essential Checklist for Flawless Corset Lacing
- Choose the correct lace length and material
- Lay the corset flat and thread from the bottom up
- Maintain even, light tension during initial lacing
- Tighten progressively: top → bottom → center
- Ensure back edges are parallel and gap is symmetrical
- Secure laces with a stable knot or bow
- Move, breathe, and adjust as needed
- Incorporate a modesty panel if required
Frequently Asked Questions
How tight should my corset be?
Your corset should feel snug but not painful. You should be able to take full breaths, speak normally, and move without restriction. A good rule: if you can’t slide two fingers between the corset and your body, it’s too tight.
Can I lace my corset by myself?
Yes, self-lacing is entirely possible with practice. Use a wall mirror or smartphone camera to monitor alignment. Some find it easier to sit while lacing to maintain control and reduce strain.
Why does my lacing gap widen over time?
Some gapping is normal, especially in new corsets. As you wear and season the garment, it molds to your body. Persistent large gaps may indicate poor sizing or incorrect lacing technique.
Final Thoughts: Confidence Begins With Comfort
Mastering corset lacing isn’t just about aesthetics—it’s about empowerment through knowledge. When you understand how to fit your corset properly, you unlock its full potential: improved posture, enhanced silhouette, and personal expression—all without compromising health or comfort.
Whether you’re wearing a corset for fashion, function, or fitness, the difference lies in the details. Apply these techniques consistently, listen to your body, and refine your approach over time. A perfectly laced corset doesn’t just look good—it feels right.


 浙公网安备
33010002000092号
浙公网安备
33010002000092号 浙B2-20120091-4
Comments
No comments yet. Why don't you start the discussion?