
Quiche is one of those rare dishes that bridges breakfast, brunch, lunch, and dinner with effortless elegance. At its best, a quiche delivers a buttery, flaky crust cradling a creamy, savory custard enriched with cheese, vegetables, or meat. Yet many home cooks struggle with soggy bottoms, cracked fillings, or tough pastry. The secret lies not in complexity, but in precision and understanding the science behind each layer. This guide breaks down every stage—from dough preparation to baking temperature—with actionable techniques that ensure consistent success.
The Foundation: Crafting a Flaky Pie Crust
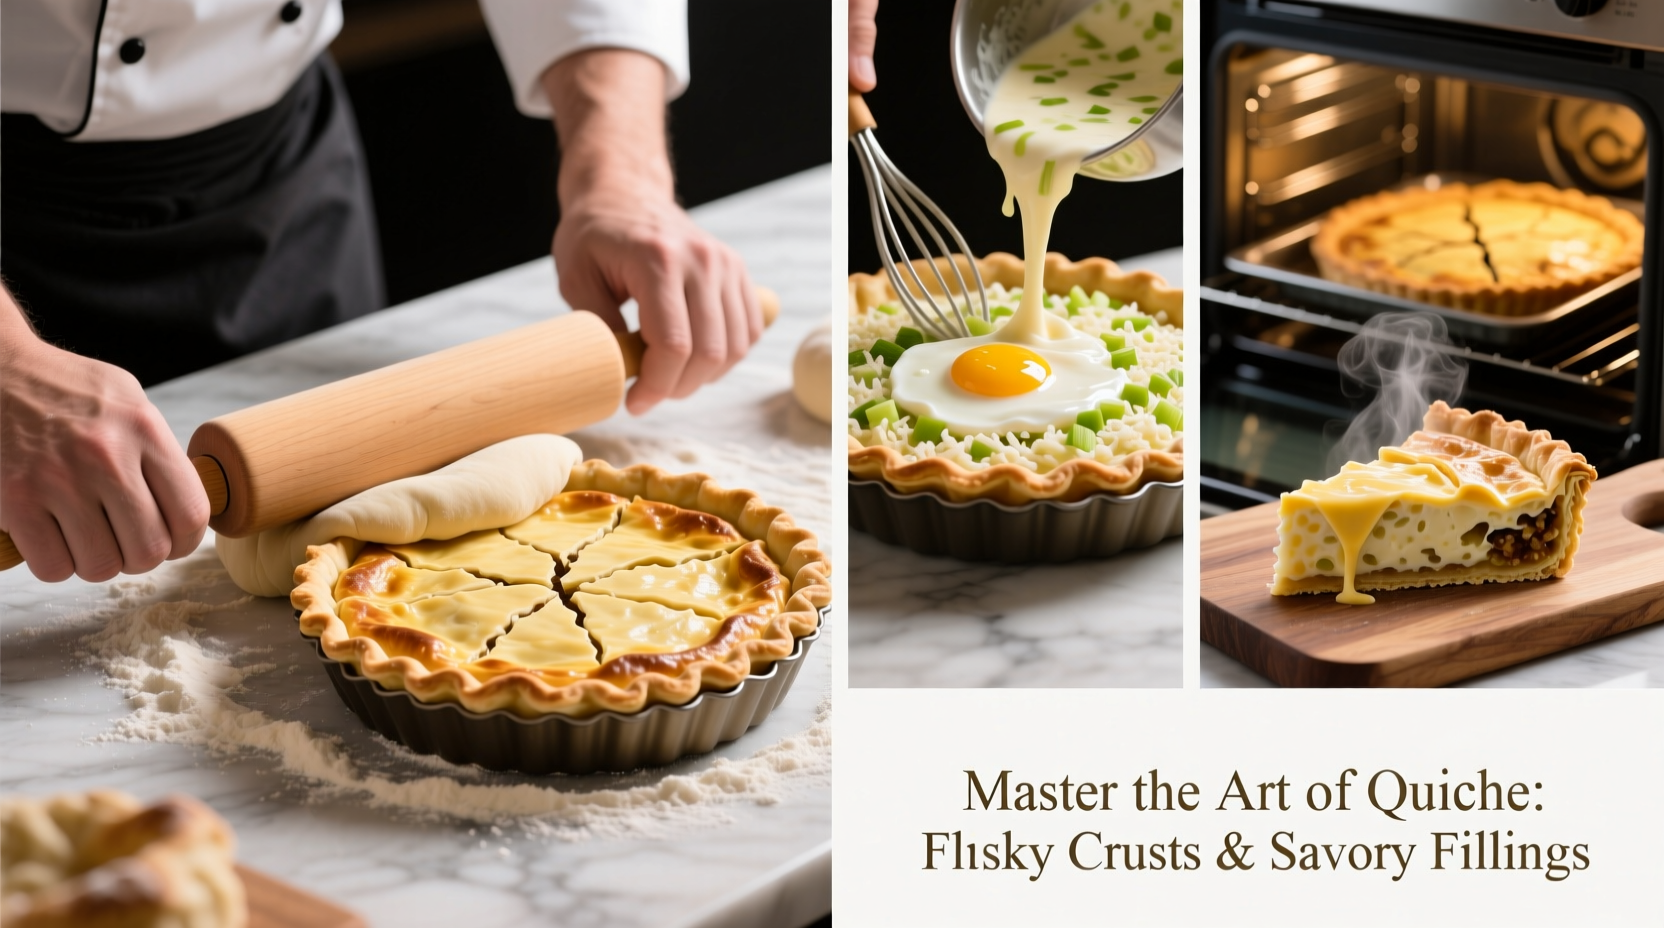
A great quiche begins with its foundation: the crust. A well-made pastry should be crisp on the outside, tender within, and sturdy enough to hold the custard without becoming soggy. The key is minimizing gluten development while maximizing flavor and texture through fat distribution.
Use a 3:2:1 ratio as your base: three parts flour, two parts cold butter, one part ice water. This classic formula ensures richness and tenderness. Always use butter chilled from the refrigerator—not frozen, not softened. Cut it into small cubes and work it into the flour using a pastry cutter or fingertips until the mixture resembles coarse breadcrumbs with pea-sized butter pieces remaining.
Once the dough comes together, form it into a disk, wrap in plastic, and chill for at least one hour. This rest relaxes the gluten and re-chills the butter, both critical for flakiness. When rolling, keep the surface lightly floured and rotate the dough frequently to prevent sticking and ensure even thickness.
Blind Baking: Preventing a Soggy Bottom
One of the most common quiche failures is a wet, undercooked crust. The solution? Blind baking—pre-baking the crust before adding the filling.
- Preheat oven to 375°F (190°C).
- Roll out the dough and fit it into a 9-inch tart or pie pan. Trim and crimp edges.
- Prick the bottom all over with a fork to prevent air pockets.
- Line the crust with parchment paper or foil and fill with pie weights or dried beans.
- Bake for 15 minutes. Remove weights and bake another 10–12 minutes until golden.
For extra protection against moisture, brush the warm baked crust with a thin layer of beaten egg white and return to the oven for 1 minute. This creates a natural moisture barrier.
Building the Custard: The Heart of the Quiche
The filling is a delicate custard made from eggs and dairy. Getting the ratio right is essential: too much dairy and the quiche won’t set; too few eggs and it becomes rubbery.
A standard ratio is 1 large egg to ½ cup of cream or half-and-half. Whole milk can be used, but heavy cream or a mix of milk and cream yields a richer texture. Whisk the eggs first, then gradually whisk in the warmed (not hot) dairy to avoid scrambling the eggs.
Season gently with salt, white pepper, and a pinch of nutmeg—this last ingredient enhances savoriness without being detectable. Over-seasoning can overpower delicate ingredients like leeks or Gruyère.
“Temperature control is everything in custard. Warm dairy blended slowly into room-temperature eggs gives you silkiness, not curds.” — Chef Renée Laurent, Pastry Instructor at Le Cordon Bleu Paris
Choosing and Preparing Fillings
Fillings define the character of your quiche, but they must be pre-cooked or properly drained to avoid excess moisture. Vegetables like spinach, mushrooms, or onions release water during baking, which can ruin the custard’s texture.
Sauté vegetables first and let them cool completely. Wring out greens like spinach in a clean kitchen towel. Meats such as bacon, ham, or cooked sausage should be crisped and blotted of grease. Cheese—preferably firm varieties like Gruyère, cheddar, or feta—should be grated or crumbled just before use.
| Filling | Prep Method | Amount (for 9” quiche) |
|---|---|---|
| Spinach | Sautéed & squeezed dry | ¾ cup |
| Mushrooms | Sliced, sautéed until browned | 1 cup |
| Bacon | Crisp-cooked, chopped | ½ cup |
| Leeks | Sweated in butter until soft | ⅔ cup |
| Gruyère | Grated | ¾ cup |
Classic Quiche Lorraine: A Real Example
Sophie, a home cook in Portland, struggled for years with quiches that either leaked or tasted bland. After attending a local cooking demo, she adjusted her method: she began blind-baking her crust, frying her bacon until crisp, and melting Gruyère into the custard instead of layering it on top. She also started cooling her fillings completely before mixing them in. Her latest quiche received rave reviews at a Sunday brunch—and held its shape perfectly when sliced.
Step-by-Step Assembly and Baking
Now that each component is prepared, follow this timeline for flawless execution:
- Day Before (Optional): Make the dough, chill overnight.
- 1 Hour Before Baking: Roll and blind bake the crust.
- While Crust Bakes: Prepare and cool all fillings.
- After Crust Is Baked: Sprinkle fillings evenly over the base.
- Mix Custard: Whisk eggs, cream, salt, pepper, nutmeg.
- Pour Into Crust: Slowly add custard over fillings—do not overfill (leave ¼ inch headspace).
- Bake at 350°F (175°C): 35–45 minutes, until center jiggles slightly and knife inserted near center comes out clean.
- Cool 10–15 Minutes: Let quiche rest before slicing for cleaner cuts.
Common Pitfalls and How to Avoid Them
- Soggy crust: Skip blind baking or fail to pre-cook wet ingredients.
- Cracked surface: Overbake or use high oven temperature. Custard should jiggle slightly when done.
- Weeping (liquid pooling): Caused by overmixing or sudden temperature changes. Cool gradually.
- Bland flavor: Underseason the custard or use pre-shredded cheese (which contains anti-caking agents and less flavor).
Checklist for Quiche Success
- Chill butter and water for crust
- Rest dough for at least 1 hour
- Blind bake crust fully
- Pre-cook and drain all fillings
- Use fresh, full-fat dairy and eggs
- Whisk custard gently, no bubbles
- Bake at moderate temperature (350°F)
- Cool before slicing
Frequently Asked Questions
Can I make quiche ahead of time?
Yes. Fully baked quiche keeps well refrigerated for up to 3 days. Reheat slices at 325°F for 15–20 minutes. You can also freeze whole quiches for up to 3 months—wrap tightly in foil and thaw overnight before reheating.
Why did my quiche sink after baking?
Some slight settling is normal as custard cools. Significant sinking usually indicates overbeating the eggs, which incorporates too much air. Whisk gently and stop as soon as ingredients are combined.
Can I make a crustless quiche?
Absolutely. Grease the pan well and pour the custard mixture directly in. Cooking time may reduce by 5–10 minutes. Crustless versions are lower-carb and still delicious with hearty fillings like broccoli and cheese.
Final Touches and Serving Suggestions
A perfect quiche needs no adornment, but a sprinkle of fresh herbs—chives, parsley, or tarragon—adds color and brightness. Serve warm or at room temperature with a simple green salad dressed in vinaigrette. For brunch, pair with roasted potatoes and fruit. Leftovers reheat beautifully and taste even better the next day as flavors meld.
Mastering quiche isn’t about perfection on the first try—it’s about understanding the balance between ingredients and technique. Once you’ve nailed the crust and custard, the variations are endless: Mediterranean (sun-dried tomatoes, olives, feta), broccoli cheddar, smoked salmon and dill, or even a spicy jalapeño and pepper jack version.


 浙公网安备
33010002000092号
浙公网安备
33010002000092号 浙B2-20120091-4
Comments
No comments yet. Why don't you start the discussion?