
Poseable 1:12 scale action figures offer a unique blend of artistry and storytelling. At roughly six inches tall, these detailed collectibles are more than static showpieces—they can be staged into compelling scenes that capture emotion, motion, and narrative depth. Yet, achieving natural, engaging poses requires more than simply bending joints. It demands an understanding of anatomy, balance, and visual storytelling. Whether you're displaying a superhero mid-leap, a soldier in tactical stance, or a character in quiet contemplation, mastering the subtle craft of posing elevates your display from ordinary to museum-quality.
Understanding 1:12 Scale and Articulation Limits
The 1:12 scale—meaning one inch equals one foot in real life—produces figures around five to seven inches tall, ideal for intricate detailing and realistic proportions. However, not all figures in this scale share the same articulation. Some have ball-jointed hips and shoulders; others feature swivel wrists or hinge knees. Knowing your figure’s range of motion is the first step toward effective posing.
Overextending joints is a common mistake. Pushing a knee joint beyond its design can cause stress cracks or permanent deformation, especially in older PVC or ABS plastics. Always test movement gently before locking a pose. Figures with higher articulation (18+ points) allow greater flexibility, but even simpler designs can achieve dramatic results with thoughtful positioning.
Anatomy and Weight Distribution for Realism
Realistic posing begins with understanding weight distribution. A standing figure should appear balanced, with weight shifted naturally onto one leg if in a relaxed stance, or evenly distributed if alert or bracing. The spine's alignment affects the entire posture—slight curves at the waist and neck create lifelike tension.
Consider the center of gravity. If a figure leans forward dramatically, its hips must shift backward to compensate. This principle applies even in dynamic action poses. For example, a figure lunging forward should have a rear leg extended to anchor the body, preventing it from appearing top-heavy or floating.
“Good posing isn’t about complexity—it’s about believability. Even a simple two-point stance can feel alive if the weight reads correctly.” — Daniel Reyes, Figure Display Curator at Miniature Legends Gallery
Key Anatomical Guidelines
- Feet: Distribute weight across the balls of the feet for active poses, flat for neutral ones.
- Hips: Tilt slightly when one leg bears more weight to mimic natural pelvic tilt.
- Shoulders: Avoid perfect symmetry; slight unevenness adds realism.
- Head: Angle downward when looking at hands or objects, up when gazing into the distance.
Creating Dynamic Action Poses
Action poses inject energy into a display. The goal is to suggest motion without sacrificing stability. Start by identifying the core action: running, punching, crouching, or jumping. Then break it down into key frames—like animation stills.
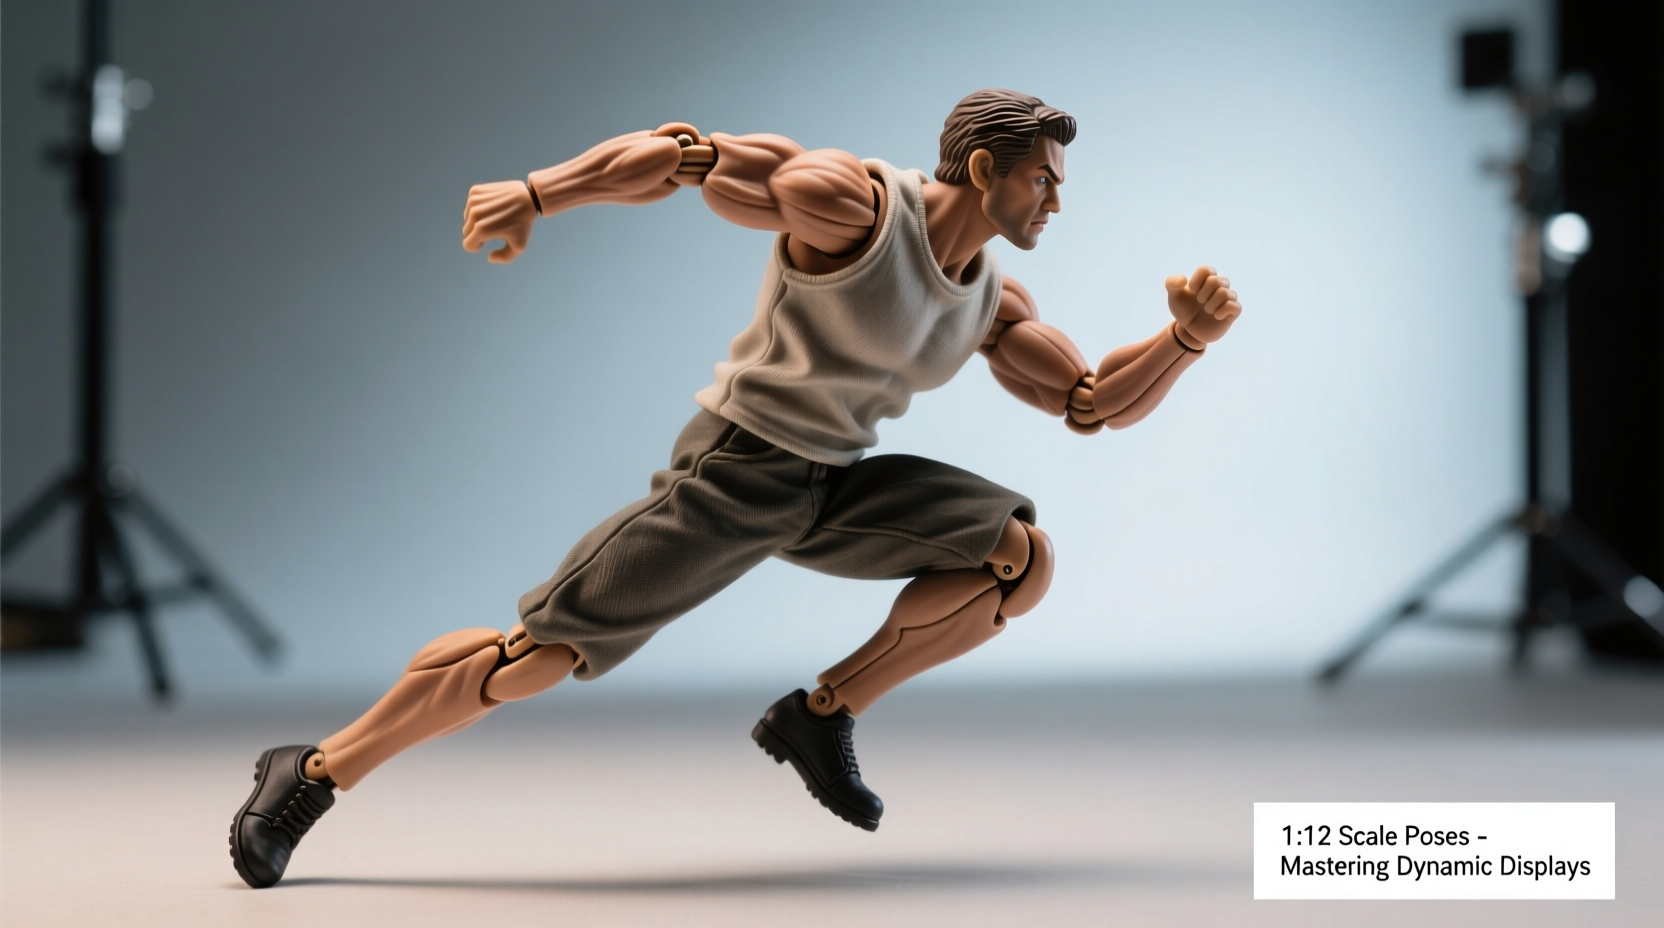
For a running pose, one leg extends forward, heel off the ground; the opposite arm swings forward, elbow bent. The torso twists slightly, and hair or cape elements (if present) flow backward. To enhance the illusion of speed, angle the figure diagonally on the base and use subtle hand gestures—fingers slightly spread, as if cutting through air.
| Pose Type | Joint Focus | Stability Tip |
|---|---|---|
| Running | Knees, ankles, shoulders | Use a clear rod support behind the back if leaning far forward |
| Fighting | Wrists, elbows, hips | Anchor front foot; keep back heel raised |
| Crouching | Hips, knees, spine | Bend knees deeply; lower center of gravity |
| Jumping | Ankles, hips, arms | Lift toes; extend arms upward for lift effect |
Storytelling Through Pose and Context
A pose should tell a story. Is the character cautious, triumphant, exhausted? Subtle cues convey emotion. A figure with slumped shoulders, head down, and hands in pockets suggests introspection. One with clenched fists, arched back, and wide stance radiates defiance.
Incorporate accessories to enhance narrative. A figure holding a tiny weapon should have fingers wrapped naturally around the grip—not stiffly pressed against it. If placing a figure beside a miniature chair or vehicle, adjust limb angles to suggest interaction, such as one hand resting on the seat.
Mini Case Study: The Urban Patrol Scene
Jessica, a collector in Portland, wanted to showcase her detective figure in a noir-inspired street scene. Instead of a standard upright pose, she angled the figure slightly forward, left foot ahead, right hand in coat pocket, and hat tilted low. She used a thin brass rod painted black to support the back, allowing a 30-degree forward lean. Steam effects from a hidden humidifier added atmosphere. The result was a compelling moment of tension—a detective pausing mid-patrol, scanning shadows. Visitors consistently remarked on the figure’s “lived-in” presence.
Step-by-Step Guide to Perfecting a Pose
- Define the intent: Decide whether the pose is action, emotion, or dialogue-driven.
- Sketch or visualize: Mentally picture the figure in space—what limbs move, where weight falls.
- Test mobility: Gently articulate each joint to understand limits.
- Build from the ground up: Start with feet placement, then hips, spine, arms, and head.
- Add micro-gestures: Slight wrist turns, finger curls, or head tilts increase realism.
- Check balance: Ensure the figure won’t topple; use discreet supports if needed.
- Refine under light: View from multiple angles under display lighting to catch unnatural lines.
Common Posing Mistakes and How to Avoid Them
- Rigid symmetry: Matching arm and leg positions exactly makes figures look robotic. Break symmetry subtly.
- Over-articulation: Bending every joint excessively creates unnatural, contorted appearances.
- Ignoring fabric flow: Cloaks, coats, and capes should drape logically based on movement direction.
- Flat foot syndrome: Feet flat on the ground in running or jumping poses kill the illusion of motion.
“The best poses make you forget you’re looking at plastic. They make you believe in the character.” — Lena Torres, Award-Winning Diorama Artist
Essential Posing Checklist
- Is the weight distributed realistically?
- Are joints within safe bending limits?
- Does the pose match the character’s emotion or action?
- Can I see the story just by looking at it?
- Is the figure stable without visible support?
- Have I checked the pose from all viewing angles?
FAQ
How do I prevent my figure’s joints from becoming loose over time?
Avoid frequent re-posing. Once a figure is set, minimize adjustments. For looser joints, consider using tiny rubber O-rings inside hip or shoulder sockets to add tension. Never force joints into unnatural positions.
Can I pose vintage figures safely?
Vintage 1:12 figures often have brittle plastics and limited articulation. Handle with care—avoid twisting or pulling. Use external supports rather than stressing old joints. If a limb resists movement, don’t force it.
What materials work best for invisible supports?
Clear acrylic rods, thin brass wire, or 3D-printed brackets painted to match the base. Attach securely to a custom display plinth so the figure appears self-supporting.
Mastery Through Practice and Patience
Posing 1:12 scale action figures is equal parts technical skill and artistic instinct. There’s no single correct way to position a figure—but there are principles that guide authenticity. By respecting anatomical logic, embracing narrative intention, and refining technique through repetition, you transform static collectibles into living moments frozen in time.
Begin with simple stances, analyze real human photos for reference, and gradually experiment with bolder compositions. Over time, your eye will develop for what looks natural, balanced, and emotionally resonant.


 浙公网安备
33010002000092号
浙公网安备
33010002000092号 浙B2-20120091-4
Comments
No comments yet. Why don't you start the discussion?