
Selecting the perfect designer dress is more than choosing the right color or silhouette—it begins long before that, with one critical step: precise self-measurement. Whether shopping online, ordering custom pieces, or preparing for alterations, inaccurate measurements lead to disappointment, wasted time, and costly returns. Designer brands often follow strict sizing standards that differ from ready-to-wear labels, making it essential to know your exact dimensions. This guide equips you with professional techniques, tools, and insights to measure yourself correctly and confidently.
The Importance of Accurate Sizing in High Fashion
In high-end fashion, precision defines fit. Unlike mass-market clothing designed with standardized sizes and stretch allowances, designer dresses are often cut to exact proportions. A deviation of even half an inch can alter how a garment drapes, flows, or accentuates your figure. Couture-level craftsmanship demands equally meticulous preparation from the wearer.
Consider this: luxury fabrics like silk crepe, satin, and structured lace offer minimal give. If your bust measurement is off by 1\", the bodice may gap or bind. An incorrect waistline could shift the entire balance of the dress. Designers such as Carolina Herrera, Oscar de la Renta, and Elie Saab rely on clients providing accurate data—especially when offering made-to-order options.
“Fit is the foundation of elegance. A perfectly tailored dress transforms presence.” — Antoine Moreau, Parisian Atelier Tailor
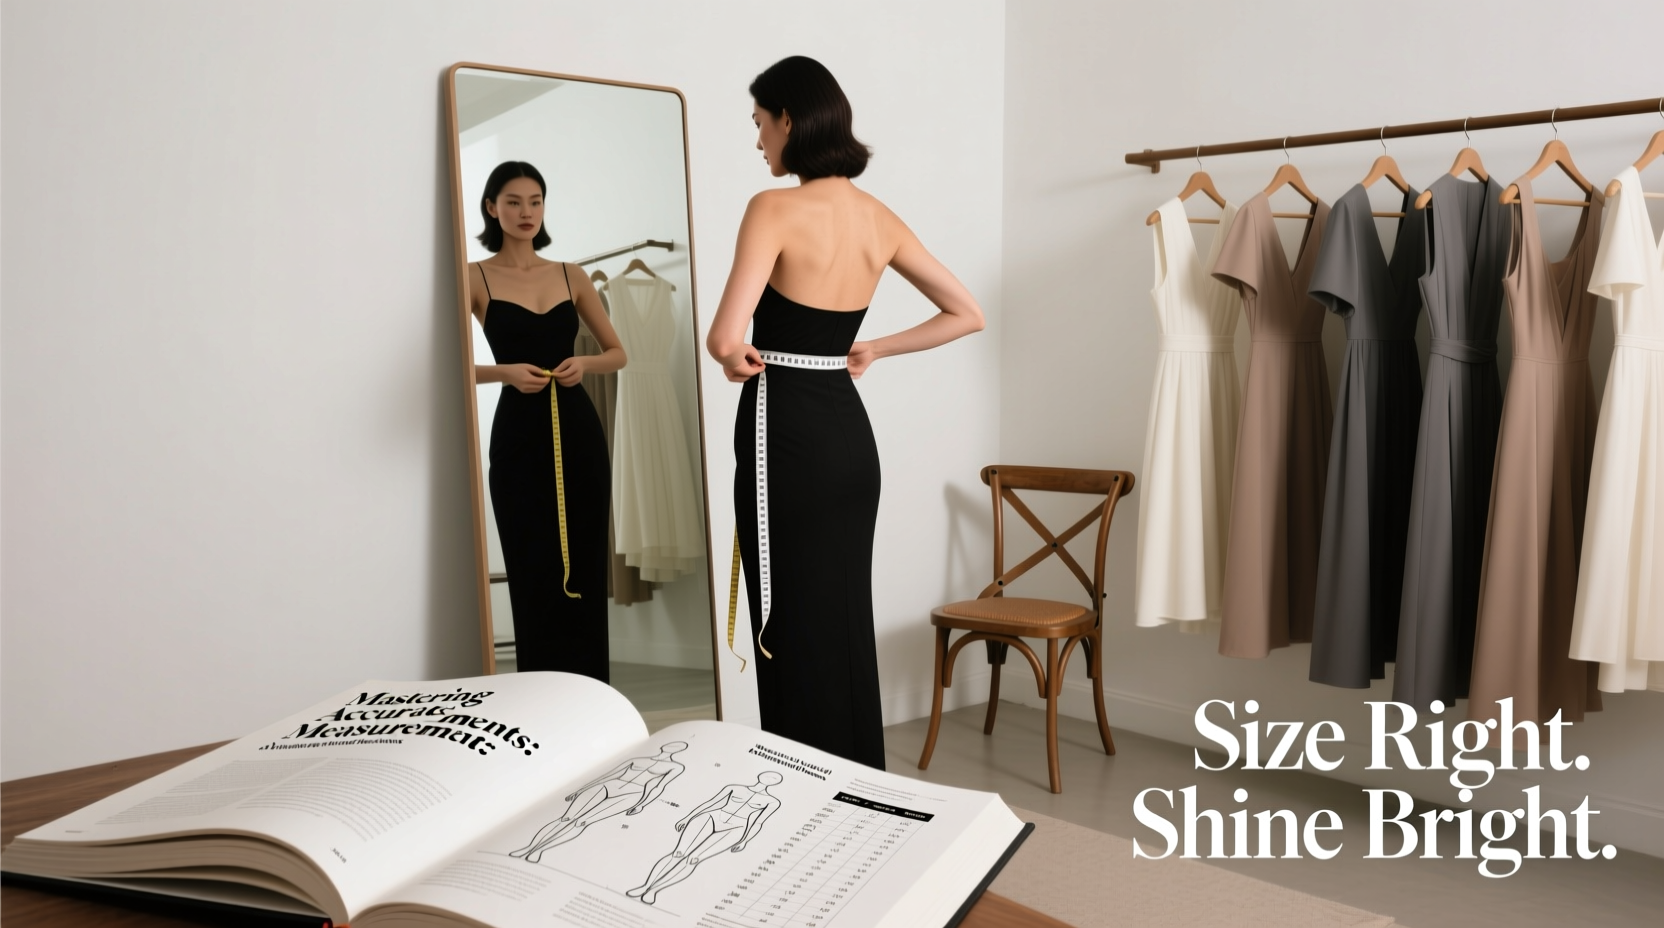
Essential Tools for Reliable Measurements
Before taking any measurements, gather the correct tools. Using makeshift alternatives—like a string and ruler—leads to inaccuracies. Invest in these three essentials:
- Flexible measuring tape: Preferably 60 inches long, non-stretch, with clear metric and imperial markings.
- Mirror: Full-length if possible, so you can check tape placement.
- Fitted undergarments: Wear the type you plan to wear with the dress (e.g., strapless bra, shapewear).
Step-by-Step Guide to Measuring Key Body Areas
Follow this sequence to ensure consistency and accuracy. Measure against bare skin or thin undergarments, standing straight with feet together and arms relaxed. Breathe normally—do not suck in your stomach.
- Bust: Wrap the tape around the fullest part of your chest, keeping it parallel to the floor. The tape should pass over the nipple line and under the shoulder blades without digging in.
- Underbust: Measure just beneath the bust, where a band of a fitted dress or corset would sit. Useful for lingerie-style gowns or basques.
- Natural Waist: Find the narrowest point between your ribs and hips—usually about an inch above the navel. This is not where your pants sit unless they are high-waisted.
- Hips: Measure around the fullest part of your hips and buttocks, typically 7–9 inches below the waist. Keep the tape level front and back.
- Upper Hip (for sheath or mermaid styles): Measure 4–5 inches below the natural waist. Many designers use this for lower hip shaping.
- Shoulder to Waist (front and back): From the top of the shoulder (where a strap would rest) down to the natural waist. Note differences if your posture causes a longer back drop.
- Armhole Depth: From the top outer edge of the shoulder vertically down to where the arm meets the torso. Critical for sleeveless designs.
- Neck Circumference: Around the base of the neck, where a high neckline would fall.
- Height and Inseam (optional but helpful): Especially important for floor-length gowns. Measure from crown to heel and inside leg from crotch to floor.
Common Measurement Mistakes and How to Avoid Them
Even experienced shoppers make errors that compromise fit. Awareness prevents repeated issues.
| Mistake | Consequence | Solution |
|---|---|---|
| Tightening the tape too much | Measurements run small; dress feels restrictive | Tape should glide smoothly over skin—snug but not compressive |
| Measuring over bulky clothing | Readings inflated by up to 2\" | Wear form-fitting undergarments only |
| Using outdated measurements | Fit reflects past body shape, not current | Re-measure every 3–6 months or after weight change |
| Ignoring posture | Front/back length discrepancies | Stand naturally, avoid arching or slouching |
Real Example: Sarah’s Bridal Gown Experience
Sarah ordered a sample-size designer wedding gown online based on her “usual size 8” assumption. When it arrived, the bodice gaped at the back and the waist sat two inches too high. After consulting a bridal fitter, she discovered her actual measurements were between a US 6 and 8, with a longer torso than average. She remeasured using the method outlined here, shared the numbers with the designer’s concierge team, and received a made-to-order version that fit flawlessly. Her takeaway? “Assumptions cost me three weeks of stress. Precision saved my wedding day look.”
Designer Size Charts vs. Your Numbers: Making the Match
No universal standard exists across luxury labels. One brand’s size 6 may equal another’s 4. Always refer to the specific brand’s size chart—not generic conversions. Use this checklist when comparing:
- Download the official size guide from the brand’s website.
- Check whether measurements are body-based or garment-based.
- Note if the brand runs small (common in Italian fashion) or large.
- Contact customer service if ranges overlap or lack detail.
- Ask for a fit consultation if ordering from haute couture houses.
“At Dior, we build garments around millimeter-accurate client dossiers. We expect—and appreciate—clients who provide reliable inputs.” — Clémentine Lefèvre, Client Relations Director, Dior Atelier
Checklist: Pre-Measurement Preparation
Before you begin measuring, complete these steps to ensure optimal accuracy:
- Choose a quiet space with good lighting and a full-length mirror.
- Wear appropriate undergarments (e.g., seamless bra, no padding).
- Have a pen, paper, and digital device ready to record numbers.
- If possible, ask a friend to assist—especially for back measurements.
- Check your measuring tape for fraying or stretching.
- Stand on a hard, flat surface (not carpet).
- Avoid measuring right after eating or exercising when bloating may occur.
Frequently Asked Questions
Can I measure myself accurately alone?
Yes—with practice. Use a mirror to verify tape alignment. For tricky areas like back waist or shoulder seams, consider marking temporary reference points with chalk or washi tape.
What if my measurements fall between two sizes?
Most designers recommend sizing up, especially in structured silhouettes. However, consult the brand’s fit notes: some suggest going down due to fabric stretch or built-in ease.
How do I account for alterations?
Professional tailors can adjust most garments by 1–1.5 inches at key seams. But major changes (like reducing bust by 2+ inches) risk disrupting design lines. Aim to select a size requiring minimal modification.
Final Thoughts: Confidence Through Precision
Mastering self-measurement isn’t just about numbers—it’s about empowerment. Knowing your true dimensions allows you to navigate the world of designer fashion with clarity and confidence. You’ll reduce return rates, save money on alterations, and enjoy wearing clothes that truly flatter your form. Whether you’re investing in a red-carpet moment or building a timeless wardrobe, accurate sizing is the silent foundation of style.


 浙公网安备
33010002000092号
浙公网安备
33010002000092号 浙B2-20120091-4
Comments
No comments yet. Why don't you start the discussion?