
Proper inflation is critical for performance, safety, and longevity—whether you're dealing with car tires, bicycle wheels, air mattresses, or sports balls. While air pumps are common household tools, many people underestimate their importance or use them incorrectly. Mastering the use of an air pump isn’t just about connecting a nozzle and pressing a button; it involves understanding pressure requirements, choosing the right equipment, and applying consistent technique. This guide breaks down the process into actionable steps, helping you achieve reliable results across a variety of applications.
Understanding Air Pump Types and Their Uses
Air pumps come in various forms, each suited to specific tasks. Choosing the right one ensures efficiency, accuracy, and equipment longevity.
- Manual Hand Pumps: Ideal for low-volume inflation like bicycle tires or small inflatables. They require physical effort but are portable and don’t rely on power.
- Bicycle Floor Pumps: Tall, stable pumps with gauges that provide high-pressure output, perfect for road and mountain bike tires.
- Electric (12V) Car Air Pumps: Plug into a vehicle’s cigarette lighter socket. Best for quick tire top-offs during travel.
- AC-Powered Home Inflators: High-capacity units that plug into wall outlets, suitable for large inflatables, car tires, and even pool toys.
- Portable Lithium-Powered Inflators: Compact, battery-operated devices with digital displays. Increasingly popular for emergency car tire use and outdoor gear.
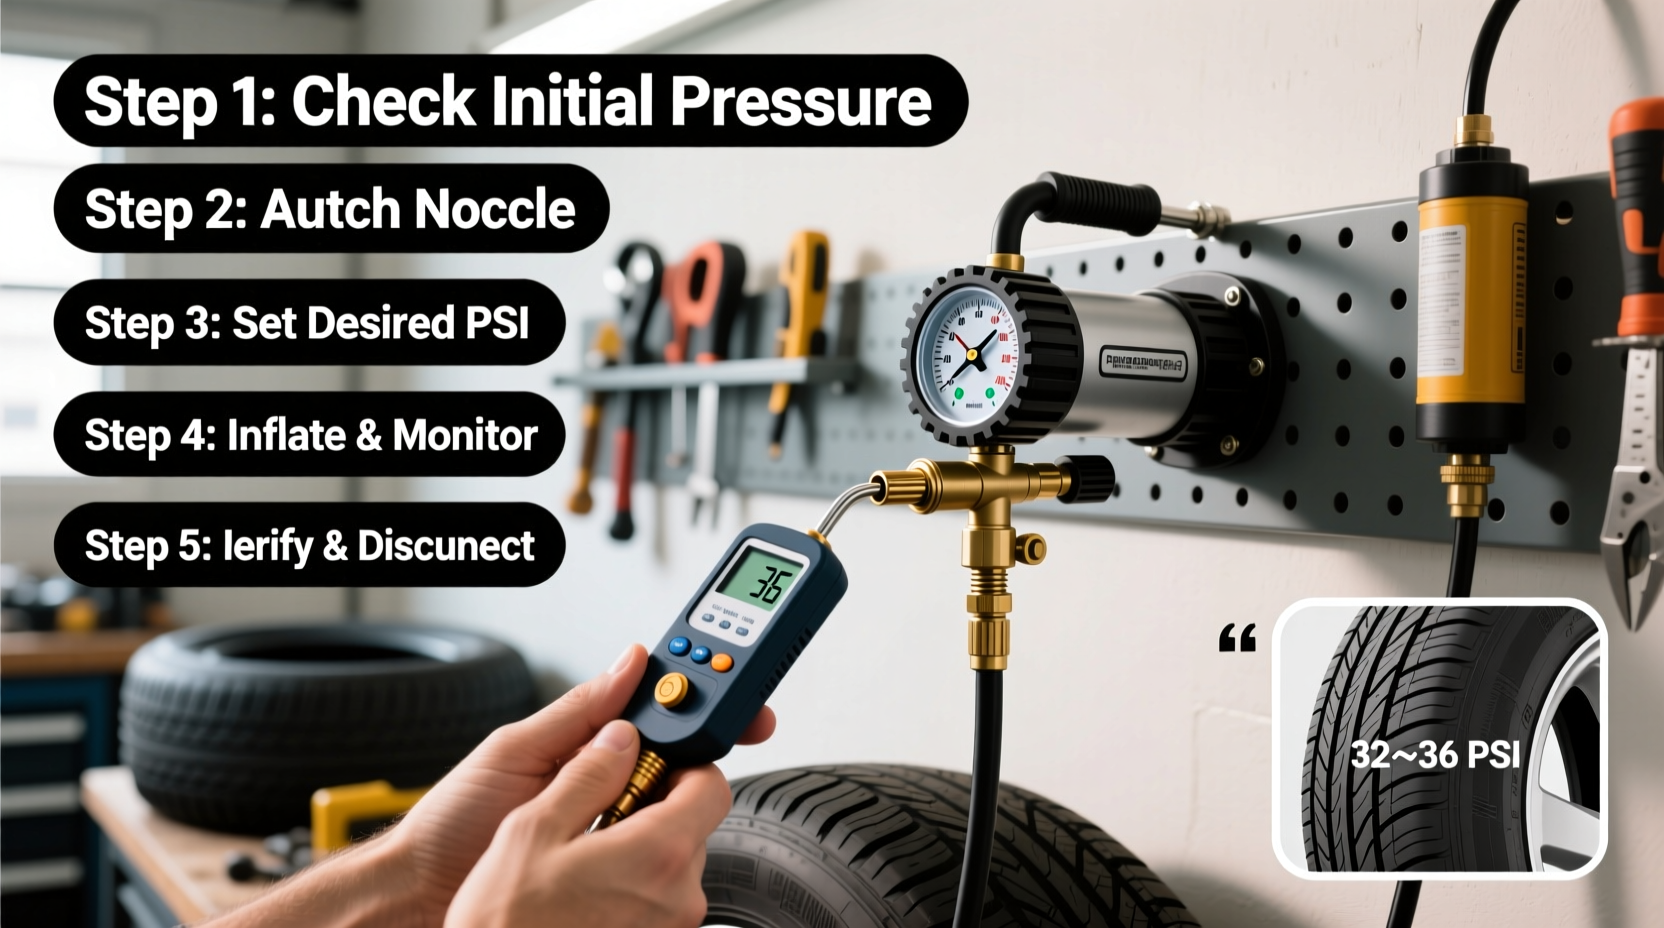
Step-by-Step Guide to Inflating Vehicle Tires
Tire pressure directly affects fuel efficiency, handling, and safety. Underinflated tires increase rolling resistance and wear, while overinflation reduces traction and comfort.
- Check Recommended PSI: Locate the manufacturer’s recommended pressure on the driver’s side door jamb or in the owner’s manual. Do not rely on the number printed on the tire sidewall—that’s the maximum, not the ideal.
- Inspect the Tire: Look for visible damage, embedded debris, or slow leaks before inflating.
- Remove Valve Cap: Unscrew the small cap from the tire’s valve stem.
- Attach the Pump: Press the pump nozzle firmly onto the valve. You may hear a brief hiss—this is normal if air escapes momentarily.
- Inflate Gradually: Activate the pump and inflate in short bursts. Check pressure frequently using the built-in gauge.
- Stop at Target PSI: Once the correct pressure is reached, release the nozzle and immediately replace the valve cap to prevent dirt and moisture ingress.
- Repeat for All Tires: Don’t forget the spare if applicable.
“Maintaining proper tire pressure can improve fuel economy by up to 3% and significantly reduce the risk of blowouts.” — National Highway Traffic Safety Administration (NHTSA)
Expanding Beyond Tires: Inflating Sports Equipment and Inflatables
The same principles apply to other inflatable items, though precision and nozzle types vary.
| Item | Typical PSI Range | Recommended Pump Type | Special Considerations |
|---|---|---|---|
| Car Tire | 32–35 PSI | AC or 12V Electric | Check when cold; pressure rises when hot |
| Bicycle Tire (Road) | 80–130 PSI | Floor Pump with Gauge | Use Presta valve adapter if needed |
| Soccer Ball | 8.5–15.6 PSI | Hand Pump with Needle | Insert needle straight to avoid bladder damage |
| Air Mattress | 1.5–3 PSI | Electric or Battery-Powered | Do not overinflate; allow slight give |
| Pool Float | 0.5–2 PSI | Manual or Mini Electric | Overinflation in sun can cause bursting |
Mini Case Study: The Weekend Camper’s Mistake
Mark planned a weekend camping trip and packed his family’s air mattress, confident it would last the night. He used a high-powered electric pump to inflate it quickly, not realizing he was pushing it beyond its recommended capacity. By midnight, the mattress had developed a bulge and began deflating rapidly. The next morning, he discovered a seam split caused by overpressure. After replacing the mattress, Mark invested in a pump with an adjustable PSI limiter and now checks manufacturer guidelines before every use. His new routine has prevented further issues and extended the life of his gear.
Essential Tips for Efficient and Safe Inflation
To get the most out of your air pump and protect your equipment, follow these best practices:
- Always let tires cool before checking or adjusting pressure. Heat expands air, giving false readings.
- Keep your pump clean and store it in a dry place. Moisture can corrode internal components.
- Use nozzle adapters correctly. For example, Presta valves (common on bikes) require loosening the tip before attaching the pump.
- Never leave an electric pump running unattended. Overheating can damage the motor.
- For inflatables, inflate outdoors or in a well-ventilated area. Some materials expand unpredictably under pressure.
Checklist: Pre-Inflation Safety and Setup
- Verify the recommended PSI for the item being inflated.
- Inspect the pump for damage or hose cracks.
- Ensure the power source (outlet, car socket, or battery) is functional.
- Clean the valve stem or opening to remove dirt.
- Select the correct nozzle or adapter.
- Test the pump’s gauge accuracy periodically with a standalone pressure meter.
Frequently Asked Questions
Can I use a bike pump to inflate a car tire?
Technically yes, but it’s highly impractical. Car tires require much higher air volume and typically 32–35 PSI, while most hand pumps struggle past 100 PSI but lack the airflow. A floor pump might get you close, but it will take significant time and effort. Use an electric pump for vehicles.
Why does my tire lose pressure slowly over time?
All tires lose about 1–2 PSI per month due to natural permeability of rubber. Temperature changes also affect pressure—tires lose about 1 PSI for every 10°F drop. Regular monthly checks help maintain optimal levels.
How do I know when an inflatable is fully inflated?
Refer to the manufacturer’s specifications. If no PSI is given, the surface should feel firm but slightly yielding. Overinflated inflatables appear stretched, shiny, or taut and may make creaking sounds.
Conclusion: Take Control of Your Inflation Needs
Mastering air pumps empowers you to maintain safety, extend equipment life, and avoid inconvenient failures. Whether you’re preparing for a long drive, setting up camp, or getting ready for a game, accurate inflation makes a measurable difference. By selecting the right pump, understanding pressure requirements, and following a disciplined process, you ensure reliability across all your inflatables. Don’t wait for a flat tire or burst mattress to act—build these habits now and keep your gear in peak condition.


 浙公网安备
33010002000092号
浙公网安备
33010002000092号 浙B2-20120091-4
Comments
No comments yet. Why don't you start the discussion?